The Central Processing Unit (CPU) is the brain of your computer, responsible for executing instructions and performing calculations. Upgrading your CPU can significantly boost your system’s performance, enabling smoother multitasking, faster application loading, and improved gaming experiences. While the prospect of handling such a critical component might seem daunting, with the right preparation and a step-by-step approach, installing a new CPU is a manageable and rewarding upgrade. This guide will walk you through the entire process, from understanding compatibility to the final boot-up, ensuring you can confidently tackle this technical task.
The main topics of this website, encompassing Tech, Brand, and Money, highlight the interconnectedness of our digital lives. In the realm of Tech, understanding hardware like the CPU is fundamental. This knowledge can then translate into practical applications, potentially enhancing productivity and even opening avenues for new business ventures (Money). Furthermore, mastering such technical skills can contribute to building a personal brand as someone knowledgeable and capable.
Before You Begin: Essential Preparations for a Successful CPU Installation
Embarking on a CPU installation requires meticulous planning and preparation. Rushing into the process without understanding the prerequisites can lead to compatibility issues, damage to components, or a failed installation. This section focuses on the critical steps you need to take before you even open your computer case.
1. Ensuring CPU and Motherboard Compatibility: The Cornerstone of Your Upgrade
The most crucial step before purchasing a new CPU is to ensure it’s compatible with your existing motherboard. CPUs and motherboards are designed to work together through specific socket types and chipsets. Trying to install an incompatible CPU is like trying to fit a square peg into a round hole – it simply won’t work and can cause irreparable damage.
Understanding Socket Types
The CPU socket on your motherboard is the physical interface where the CPU is installed. Different CPU manufacturers (Intel and AMD) and generations of processors use different socket designs. Common Intel sockets include LGA 1700, LGA 1200, and LGA 1151, while AMD has popular sockets like AM5 and AM4. You can usually find the socket type printed directly on the motherboard itself, or by checking your motherboard’s manual or the manufacturer’s website.
Checking Chipset Compatibility
Beyond the physical socket, the motherboard’s chipset also plays a vital role in CPU compatibility. The chipset is a set of integrated circuits that manages data flow between the CPU, memory, and peripherals. Even if a CPU physically fits into the socket, it might not be supported by the motherboard’s chipset. Motherboard manufacturers release lists of supported CPUs for each of their models. This is often referred to as the “CPU support list” or “QVL (Qualified Vendor List).” This is the definitive resource to consult.
BIOS/UEFI Updates
Sometimes, a motherboard may have the correct socket and chipset for a newer CPU, but it requires a BIOS (Basic Input/Output System) or UEFI (Unified Extensible Firmware Interface) update to recognize and utilize the new processor. If you’re upgrading to a CPU released after your motherboard’s initial production, it’s highly recommended to check for the latest BIOS update. You can usually download the update from your motherboard manufacturer’s support website. Important Note: If your current CPU is not compatible with the older BIOS version that is installed on your motherboard, you will need to install the new CPU first before updating the BIOS. However, if your current CPU is compatible with the newer BIOS, it’s generally safer to update the BIOS before removing the old CPU and installing the new one. This ensures the motherboard can correctly identify and boot with the new CPU.
2. Gathering Your Tools and Supplies: Be Prepared for the Task Ahead
Having the right tools readily available will make the installation process smoother and safer. Avoid scrambling for tools mid-task, which can increase the risk of errors or damage.
Essential Tools:
- Phillips Head Screwdriver: A magnetic-tipped Phillips head screwdriver is essential for removing and reattaching various screws within your computer case.
- Anti-Static Wrist Strap: This is a non-negotiable item for protecting your sensitive electronic components from electrostatic discharge (ESD). ESD can fry your CPU, motherboard, and other parts without you even feeling it.
- Isopropyl Alcohol (90% or Higher): For cleaning off old thermal paste from the heatsink and the CPU surface.
- Lint-Free Cloths or Coffee Filters: For applying and wiping away isopropyl alcohol.
- Thermal Paste: A small tube of high-quality thermal paste is necessary for transferring heat efficiently from the CPU to the cooler. Most CPU coolers come with pre-applied thermal paste, but having extra is good for future replacements or if the pre-applied paste is compromised.
- Optional: Small Container or Tray: To keep track of screws and small parts.
- Optional: Flashlight: To illuminate dark corners inside your computer case.
Gathering Documentation:
- Motherboard Manual: This is your most valuable resource. It will detail screw locations, component identification, and often provides specific instructions for CPU installation.
- CPU Cooler Installation Guide: If you’re installing a new CPU cooler, ensure you have its specific instructions.
The Installation Process: Step-by-Step Guide to Replacing Your CPU
This section details the actual physical steps involved in removing your old CPU and installing the new one. Remember to always work in a well-lit area and ground yourself frequently.
1. Powering Down and Disconnecting: Safety First
Before you even think about opening your computer, ensure it’s completely shut down.
- Shut Down Your Computer: Go to your operating system’s shutdown menu and initiate a full shutdown.
- Unplug the Power Cable: Disconnect the power cord from the back of your computer.
- Flip the Power Supply Switch (Optional but Recommended): If your power supply unit (PSU) has a physical switch on the back, flip it to the “off” position.
- Ground Yourself: Attach your anti-static wrist strap to a bare metal part of your computer case. If you don’t have one, touch a grounded metal object (like a metal desk leg) before touching any internal components.
2. Opening the Computer Case and Accessing the Motherboard
The process of opening your computer case varies slightly depending on the model, but generally involves removing side panels.
- Locate and Remove Case Screws: Most PC cases have screws on the back panel that hold the side panel in place. Unscrew these and carefully slide or lift off the side panel to gain access to the interior.
- Identify the CPU and Cooler: Once the case is open, locate the CPU. It’s usually found under a large heatsink and fan assembly, mounted on the motherboard.
3. Removing the Existing CPU Cooler
The CPU cooler is attached to the motherboard and needs to be removed to access the CPU. The method for removal varies based on the cooler type.
- Disconnect Fan Cables: Carefully unplug the fan cable from the motherboard header.
- Release Cooler Mounting Mechanism:
- Clip-on/Lever Systems (Common on Stock Coolers): These usually involve a lever or clips that need to be released. Refer to your motherboard manual for specific locations if unsure.
- Screw-in Systems: Some aftermarket coolers use screws that directly attach to the motherboard. You’ll need to unscrew these in a diagonal or star pattern (e.g., top-left, bottom-right, top-right, bottom-left) to ensure even pressure release.
- Gently Remove the Cooler: Once the mounting mechanism is disengaged, gently twist and lift the cooler straight up. Do not force it. If it seems stuck, a slight twist can help break the seal of the old thermal paste. Crucially, do not touch the bottom of the cooler where the thermal paste is, as you’ll need to clean it off.
4. Removing the Old CPU
With the cooler out of the way, you can now access the CPU itself.
- Locate the CPU Retention Arm/Lever: On the motherboard, around the CPU socket, you’ll find a metal lever.
- Release the Lever: Gently push down on the lever and move it outwards to disengage it from its catch. This will lift the retention arm, which holds the CPU in place.
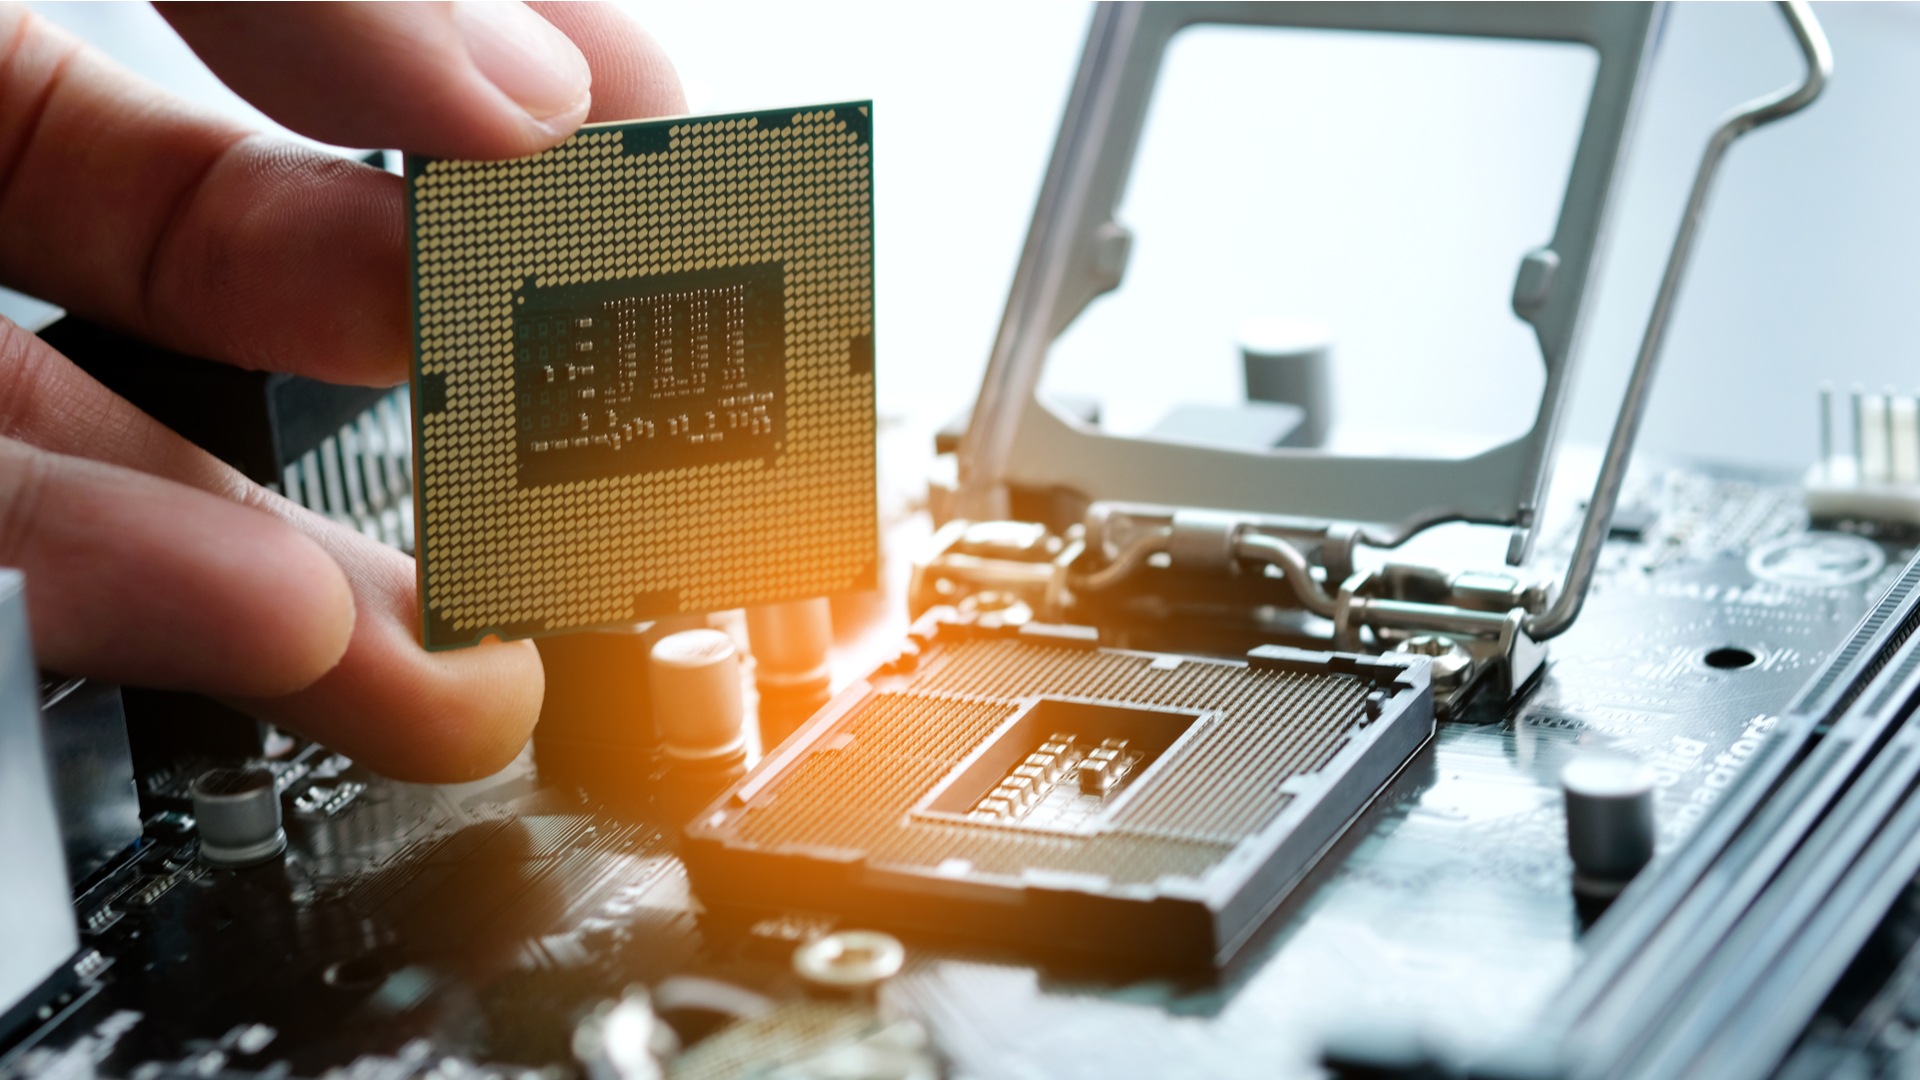
- Carefully Lift Out the CPU: Once the retention arm is lifted, the CPU should be loose. Handle the CPU by its edges only. Do not touch the pins or the contact pads on the underside. Lift it straight up and out of the socket. Place it in an anti-static bag or its original packaging for safekeeping.
5. Preparing the Motherboard and New CPU for Installation
Before installing the new CPU, it’s essential to prepare both the motherboard socket and the CPU itself.
- Clean the CPU Socket (If Necessary): Inspect the CPU socket for any dust or debris. If you see any, you can use a can of compressed air to blow it out. Never use a vacuum cleaner inside your computer, as it can generate static electricity.
- Clean the CPU Cooler Base: If you are reusing your old CPU cooler, you’ll need to remove the old thermal paste from its base. Apply a small amount of isopropyl alcohol to a lint-free cloth and gently wipe away the old paste until the metal surface is clean and shiny.
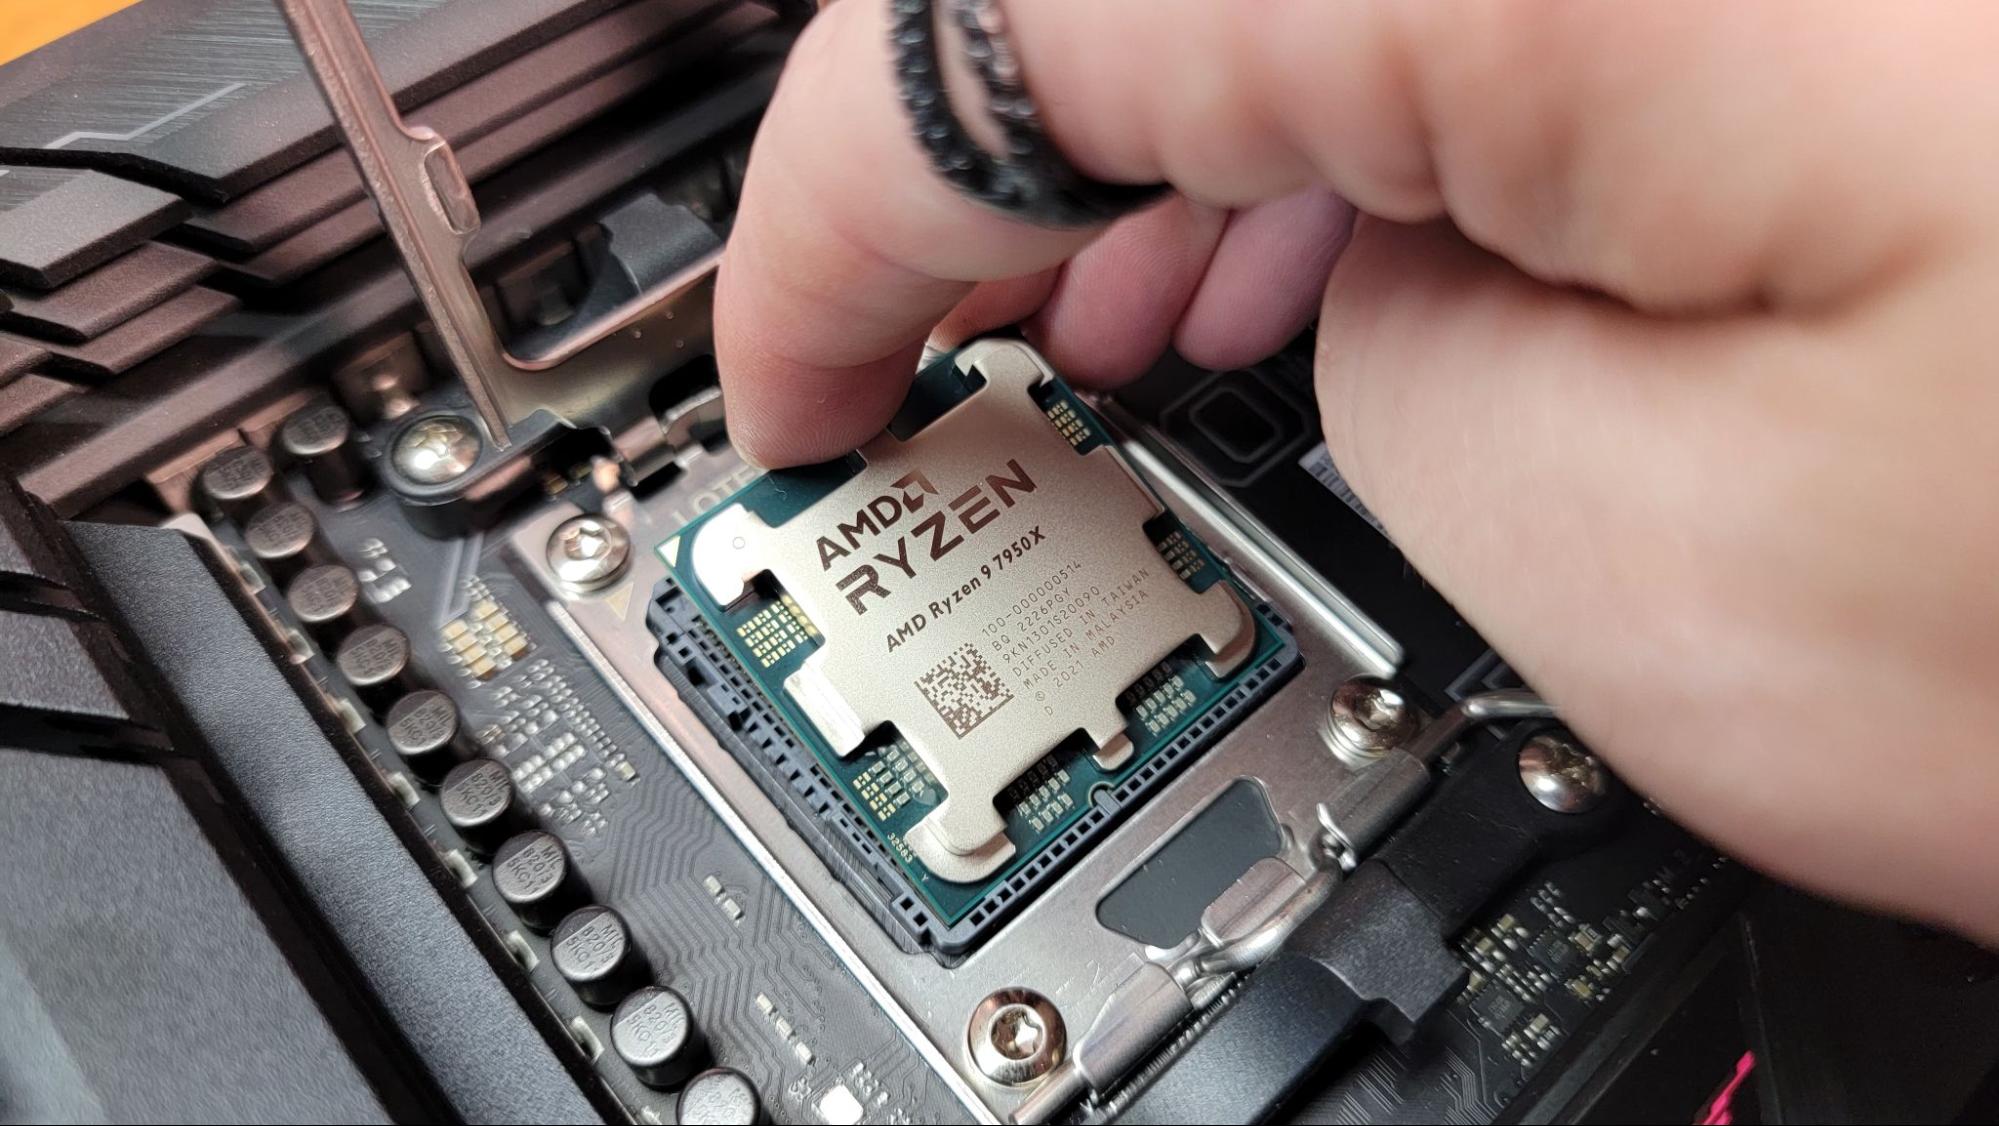
- Prepare the New CPU: Handle the new CPU by its edges. Identify the CPU’s orientation. Most CPUs and sockets have a small triangle or notch that aligns them. This is critical for correct installation. Never force the CPU into the socket.
6. Installing the New CPU
This is the moment of truth. Take your time and be precise.
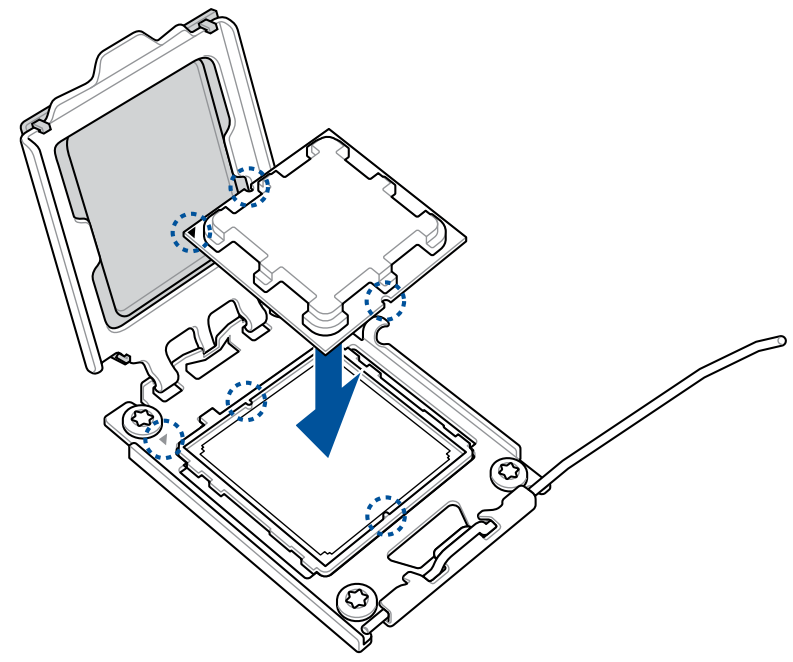
- Align the CPU: Carefully examine your new CPU and the motherboard socket for alignment markers (usually a small triangle or notch on one corner of the CPU and a corresponding mark on the socket).
- Gently Place the CPU: With the alignment markers matched, gently place the CPU into the socket. It should drop in with very little resistance. If it doesn’t sit flush, do not force it. Recheck your alignment.
- Lower the Retention Arm: Once the CPU is seated correctly, lower the retention arm back into its locked position. You may need to apply slight pressure to secure the lever.
7. Applying Thermal Paste and Reinstalling the CPU Cooler
Proper thermal paste application is crucial for efficient heat dissipation.
- Apply Thermal Paste:
- Pea-Sized Dot: The most common and effective method is to place a small, pea-sized dot of thermal paste directly in the center of the CPU’s integrated heat spreader (IHS) – the metallic surface you see.
- Spreading (Optional): Some prefer to gently spread the paste thinly across the CPU’s surface with a small spatula or the edge of a credit card, but the “pea-sized dot” method usually allows the cooler’s pressure to spread it evenly.
- Pre-Applied Paste: If your new cooler has pre-applied thermal paste, ensure the protective film is removed before installation.
- Reinstall the CPU Cooler:
- Align the Cooler: Carefully align the CPU cooler over the CPU, ensuring the mounting brackets or screws line up with the motherboard’s mounting holes.
- Secure the Cooler: Follow the cooler’s installation guide. For screw-in coolers, tighten the screws in a diagonal pattern, gradually increasing tension to ensure even pressure. For clip-on coolers, engage the levers or clips until they are securely fastened.
- Reconnect Fan Cable: Plug the CPU cooler’s fan cable back into the appropriate header on the motherboard.
8. Final Checks and Boot-Up
With the hardware installed, it’s time for the final steps.
- Double-Check Connections: Ensure all cables are securely plugged in.
- Reattach the Side Panel: Securely reattach the computer case side panel.
- Reconnect Peripherals and Power: Plug in your power cable, monitor, keyboard, and mouse.
- Power On Your Computer: Press the power button.
What to Expect During First Boot:
Your computer should power on, and you should see the motherboard’s BIOS/UEFI splash screen. It might take a moment longer than usual as the system detects the new hardware. You may be prompted to enter the BIOS/UEFI settings to confirm the CPU is recognized, or you might be able to proceed directly to your operating system. If you encounter any issues, don’t panic. Power down, re-ground yourself, and carefully retrace the steps, paying close attention to your connections and CPU alignment.
Post-Installation: Ensuring Optimal Performance and Stability
After a successful CPU installation, a few final steps will ensure your system is running optimally and that you’ve maximized the benefits of your upgrade.
1. Verifying the CPU in the Operating System and BIOS/UEFI
It’s important to confirm that your operating system and BIOS/UEFI correctly identify the new CPU.
- BIOS/UEFI Check: Upon booting, enter your BIOS/UEFI setup (usually by pressing DEL, F2, or F12 during startup). Look for system information or CPU details to confirm the correct model and speed are displayed.
- Operating System Check:
- Windows: Right-click on “This PC” or “My Computer” and select “Properties.” The CPU information will be listed there. Alternatively, open Task Manager (Ctrl+Shift+Esc), go to the “Performance” tab, and select “CPU.”
- macOS: Click the Apple menu in the top-left corner and select “About This Mac.”
- Linux: Open a terminal and use commands like
lscpuorcat /proc/cpuinfo.
2. Monitoring Temperatures and Performance
Keeping an eye on your CPU’s temperature and performance after an upgrade is crucial for ensuring stability and longevity.
- Temperature Monitoring Software: Download and install reputable monitoring software like HWMonitor, Core Temp, or Speccy. These tools will display your CPU’s core temperatures in real-time.
- Idle vs. Load Temperatures: Note your CPU temperatures when the system is idle (not running any demanding applications) and when it’s under load (e.g., during gaming or heavy multitasking).
- Ideal Temperature Ranges: Generally, CPUs should operate below 80-85 degrees Celsius under full load. If your temperatures are consistently higher, it could indicate an issue with the CPU cooler installation, thermal paste application, or insufficient case airflow.
3. Updating Drivers and Operating System
While not always strictly necessary for a CPU upgrade alone, it’s good practice to ensure your system is up-to-date.
- Chipset Drivers: Visit your motherboard manufacturer’s website and download the latest chipset drivers for your specific model. These drivers help the motherboard communicate effectively with the CPU and other components.
- Operating System Updates: Ensure your Windows, macOS, or Linux operating system is fully updated. These updates often include performance optimizations and bug fixes that can benefit your new hardware.
Conclusion: Enjoying Your Enhanced Computing Experience
Installing a new CPU is a significant hardware upgrade that can breathe new life into your computer. By carefully following these preparation, installation, and post-installation steps, you can confidently perform this task and enjoy a noticeably faster and more responsive computing experience. Remember, patience, attention to detail, and a commitment to safety are your greatest allies in this process. With your upgraded CPU, you’re now better equipped to tackle demanding software, enjoy smoother gaming, and enhance your overall productivity.
aViewFromTheCave is a participant in the Amazon Services LLC Associates Program, an affiliate advertising program designed to provide a means for sites to earn advertising fees by advertising and linking to Amazon.com. Amazon, the Amazon logo, AmazonSupply, and the AmazonSupply logo are trademarks of Amazon.com, Inc. or its affiliates. As an Amazon Associate we earn affiliate commissions from qualifying purchases.