
In today’s rapidly evolving digital landscape, the ability to isolate and experiment with different operating systems and software environments is becoming increasingly crucial. Whether you’re a tech enthusiast looking to explore new software without affecting your primary system, a developer needing a clean testing ground, or a business aiming for enhanced security and efficiency, virtual machines (VMs) offer a powerful solution. This comprehensive guide will walk you through the process of installing a virtual machine, demystifying the technology and empowering you to harness its full potential.
Understanding the Power of Virtualization
Before we dive into the installation process, it’s essential to grasp what a virtual machine truly is and why it’s such a valuable tool. At its core, virtualization is the creation of a virtual, rather than actual, version of something. In the context of computing, a virtual machine is a software-based emulation of a physical computer. This means you can run an entirely separate operating system – and its applications – on top of your existing operating system, all within a dedicated software environment.
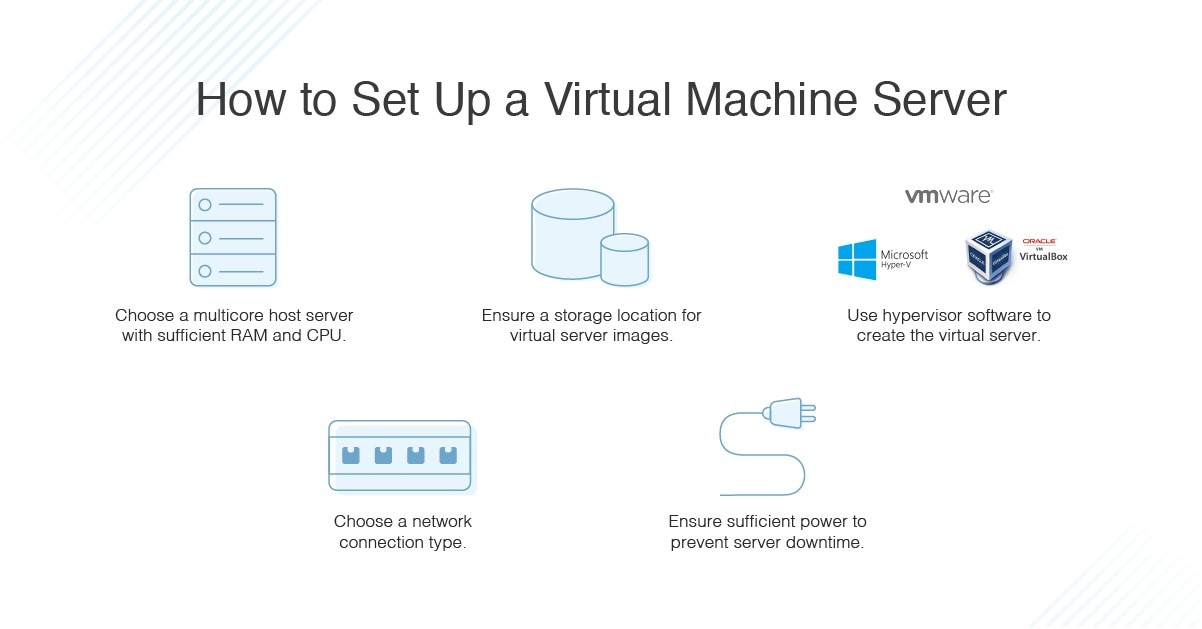
Think of it like having a computer within your computer. This “guest” operating system operates independently, with its own virtual CPU, RAM, storage, and network interface, all of which are allocated from your physical hardware’s resources. The software that makes this possible is called a hypervisor. Hypervisors come in two main types:
- Type 1 (Bare-metal) Hypervisors: These run directly on the host’s hardware, without an underlying operating system. Examples include VMware ESXi and Microsoft Hyper-V. They are typically found in enterprise environments for server virtualization.
- Type 2 (Hosted) Hypervisors: These run as applications on top of an existing operating system, like Windows, macOS, or Linux. This is the type most commonly used by individuals and smaller businesses for desktop virtualization. Popular examples include Oracle VirtualBox and VMware Workstation Player/Pro.
The benefits of using virtual machines are extensive and span across the categories of Tech, Brand, and even Money:
For the Tech Enthusiast: Exploring Without Limits
- Software Testing and Development: Developers can use VMs to test their applications across various operating systems and configurations without needing multiple physical machines. This is invaluable for ensuring compatibility and identifying bugs early on.
- Experimentation with New OSs: Want to try out the latest Linux distribution or a beta version of Windows? A VM provides a safe sandbox to do so without risking your primary operating system’s stability.
- Learning New Technologies: VMs are excellent tools for learning new programming languages, frameworks, or even system administration skills. You can set up complex network configurations or simulate different server environments for practice.
- Running Legacy Software: Some older applications may not be compatible with modern operating systems. A VM can be set up with an older, compatible OS to run these essential programs.
- Digital Security and Privacy: VMs offer a layer of isolation that can protect your host system from malware or risky online activities. You can browse suspicious websites or open untrusted files within a VM, and if it gets infected, you can simply delete the VM and start fresh.
Enhancing Brand and Business Operations: Security and Efficiency
- Application Isolation: Businesses can deploy specific applications in isolated VMs, preventing conflicts between software and ensuring that one application doesn’t negatively impact others.
- Disaster Recovery and Business Continuity: VMs can be easily backed up and restored, making them ideal for disaster recovery plans. If a physical server fails, a VM can often be brought back online quickly on different hardware.
- Streamlined Deployment: Pre-configured VM images can be rapidly deployed across multiple machines, significantly reducing setup time for new employees or development environments.
- Sandboxing for Security: Sensitive operations or the execution of potentially untrusted code can be performed within a VM, minimizing the risk of security breaches affecting the core business infrastructure.
- Remote Work and BYOD Support: VMs can provide employees with a standardized and secure work environment that can be accessed from any device, supporting Bring Your Own Device (BYOD) policies while maintaining corporate security.
Financial Considerations: Cost Savings and Resource Optimization
- Reduced Hardware Costs: By consolidating multiple virtual servers onto fewer physical machines, businesses can significantly reduce their hardware acquisition and maintenance costs.
- Lower Energy Consumption: Fewer physical servers translate to lower electricity bills and reduced cooling requirements in data centers.
- Efficient Resource Utilization: VMs allow for more dynamic allocation of resources. If a particular application needs more RAM or CPU power, those resources can be temporarily reallocated from less-utilized VMs.
- Cost-Effective Testing and Staging: Instead of purchasing multiple physical machines for testing and staging environments, businesses can use VMs, which are essentially software licenses and a portion of existing hardware.
Choosing Your Virtualization Software
The first critical step in installing a virtual machine is selecting the right virtualization software, also known as a Type 2 hypervisor for desktop use. The two most popular and user-friendly options are:
Oracle VirtualBox: The Free and Open-Source Champion
VirtualBox is a free, open-source, and cross-platform virtualization product. It’s a fantastic choice for beginners and seasoned users alike due to its ease of use, extensive feature set, and strong community support.
-
Pros:
- Completely free and open-source.
- Available for Windows, macOS, Linux, and Solaris hosts.
- Supports a wide range of guest operating systems, from older versions of Windows and macOS to various Linux distributions and even some BSD variants.
- Features like “Guest Additions” enhance integration between the host and guest (e.g., shared folders, improved graphics performance, seamless mouse integration).
- Snapshots allow you to save the state of your VM at any point, making it easy to revert to a previous configuration.
-
Cons:
- While powerful, it might not offer the absolute highest levels of performance or the most advanced enterprise-grade features found in some paid alternatives.
VMware Workstation Player/Pro: The Professional Choice
VMware is a long-standing leader in virtualization technology. They offer two main products for desktop virtualization:
-
VMware Workstation Player: A free version for personal, non-commercial use, offering a solid set of features for running VMs.
-
VMware Workstation Pro: A paid, professional version that includes advanced features for developers and IT professionals, such as advanced networking, cloning, and integration with vSphere.
-
Pros:
- Known for excellent performance and stability.
- Broad guest OS support.
- Workstation Pro offers cutting-edge features for advanced users.
- Strong integration with other VMware products.
-
Cons:
- Workstation Player, while free for personal use, is not open-source.
- Workstation Pro can be a significant investment for individual users.
For the purpose of this guide, we will focus on using Oracle VirtualBox due to its accessibility and suitability for a wide audience.
Step-by-Step Installation of a Virtual Machine (Using VirtualBox)
Now that you’ve chosen your virtualization software, let’s get started with the installation process. This guide assumes you’re installing VirtualBox on a Windows host, but the principles are very similar for macOS and Linux.
1. Download and Install VirtualBox
- Visit the Official VirtualBox Website: Go to https://www.virtualbox.org/ and navigate to the “Downloads” section.
- Select Your Host Operating System: Click on the download link for your host operating system (e.g., “Windows hosts”).
- Run the Installer: Once the download is complete, locate the installer file and double-click it.
- Follow the On-Screen Prompts: The installation wizard is straightforward. Accept the default settings for most options unless you have a specific reason to change them. You might be prompted about installing network interfaces or devices; it’s generally safe to allow these.
- Install the VirtualBox Extension Pack (Optional but Recommended): After installing VirtualBox, it’s highly recommended to download and install the VirtualBox Extension Pack from the same downloads page. This pack adds support for USB 2.0 and USB 3.0 devices, disk encryption, and other useful features. To install it, simply open VirtualBox, go to “File” > “Preferences” > “Extensions,” and click the “Add new package” button.

2. Obtain Your Guest Operating System Installation Media
Before you can install an operating system within your virtual machine, you’ll need its installation media. This typically comes in the form of an ISO (.iso) file.
- For Windows: You can download an ISO file of Windows directly from Microsoft’s website. You’ll likely need a valid product key to activate it after installation, though you can usually install it without one initially.
- For Linux: Most Linux distributions (e.g., Ubuntu, Fedora, Debian) offer free ISO downloads from their official websites.
- For macOS: Installing macOS in a VM on non-Apple hardware is generally not supported by Apple and can be complex. However, if you are running macOS on a Mac, you can use VirtualBox to create VMs of other macOS versions or Linux distributions.
Make sure you have the correct ISO file for the operating system you intend to install.
3. Create Your New Virtual Machine
Now, let’s create the virtual machine itself within VirtualBox.
- Launch VirtualBox: Open the Oracle VM VirtualBox application.
- Click “New”: In the main VirtualBox Manager window, click the “New” button.
- Name and Operating System:
- Name: Give your virtual machine a descriptive name (e.g., “Ubuntu Desktop,” “Windows 10 Test”).
- Machine Folder: Choose where you want to store the VM’s files.
- Type: VirtualBox usually detects this automatically based on the name.
- Version: Select the specific version of the operating system you plan to install (e.g., “Ubuntu (64-bit),” “Microsoft Windows 10 (64-bit)”).
- Click “Next.”
- Memory Size (RAM):
- Allocate RAM to your VM. The recommended amount will be shown, but you can adjust it. Crucially, do not allocate more RAM than your host system can spare. For example, if your host has 8GB of RAM, allocating more than 4GB to a single VM might make your host system sluggish.
- Click “Next.”
- Hard Disk:
- Create a virtual hard disk now: This is the most common option.
- Hard disk file type: For general use, VDI (VirtualBox Disk Image) is recommended. If you plan to use your VM with other virtualization software, consider VMDK (Virtual Machine Disk) or VHD (Virtual Hard Disk).
- Storage on physical hard disk:
- Dynamically allocated: The virtual hard disk file will only grow as you add data to it, up to the maximum size you specify. This saves space on your host.
- Fixed size: The virtual hard disk file will be created at its maximum size immediately. This can offer slightly better performance but uses more disk space upfront.
- For most users, “Dynamically allocated” is the best choice.
- File location and size: Specify where to save the virtual hard disk file and its maximum size. Ensure this size is sufficient for your planned operating system and applications.
- Click “Create.”
4. Install the Guest Operating System
Your virtual machine has been created, but it’s like a new computer without an operating system. Now, you need to install one.
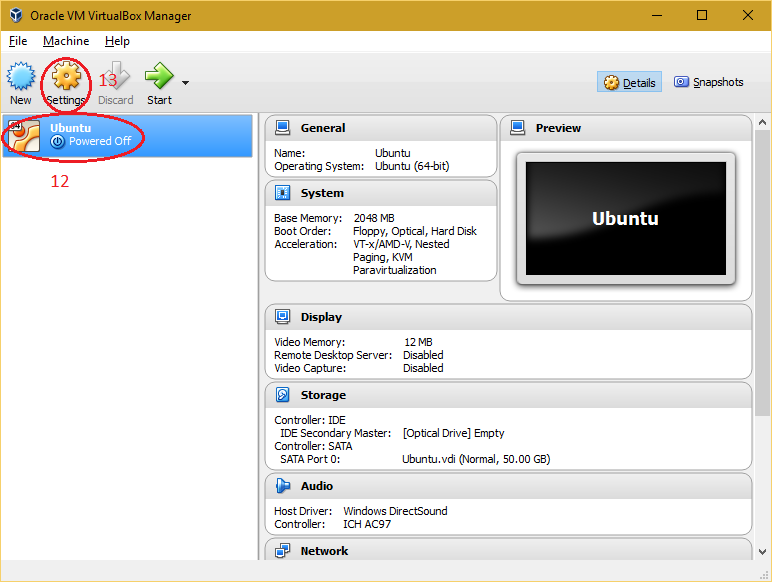
- Select Your VM: In the VirtualBox Manager, click on the VM you just created.
- Click “Start”: Click the “Start” button in the toolbar.
- Select Startup Disk: A window will appear asking you to select a startup disk.
- Click the folder icon and then “Add” to browse to the ISO file of the operating system you downloaded earlier.
- Once selected, click “Choose,” and then click “Start.”
- Follow the OS Installation Process: The virtual machine will now boot from the ISO file, and you will see the familiar installation wizard for your chosen operating system (e.g., Windows or Linux). Follow the on-screen instructions just as you would when installing on a physical computer.
- Partitioning: When prompted to partition the virtual hard disk, you can usually accept the default options or choose to use the entire disk for the OS.
- User Accounts and Settings: Complete the setup by creating user accounts, configuring network settings, and choosing your preferences.
5. Install VirtualBox Guest Additions (Crucial for Performance and Usability)
Once your guest operating system is installed and running within the VM, the next vital step is to install the VirtualBox Guest Additions. These are a set of device drivers and system applications designed to improve the performance of the guest OS and enable seamless interaction between the host and guest.
- With the VM running:
- Go to the VirtualBox menu bar for your VM window.
- Click on “Devices” > “Insert Guest Additions CD image…”.
- Inside the Guest OS:
- A virtual CD-ROM drive will appear in your guest OS.
- For Windows: Open File Explorer in the guest OS, navigate to the CD drive, and run the
VBoxWindowsAdditions.exeinstaller. Follow the prompts. - For Linux: You might need to open a terminal within the guest OS, navigate to the mounted CD-ROM (often in
/media/cdromor similar), and run a script like./VBoxLinuxAdditions.run. You may need root privileges (e.g.,sudo ./VBoxLinuxAdditions.run).
- Restart the VM: After the Guest Additions are installed, you will be prompted to restart the guest operating system.
Why are Guest Additions so important? They enable features like:
- Better Graphics Performance: Higher resolutions, smoother window resizing, and hardware-accelerated 3D graphics.
- Shared Clipboard: Copy and paste text and files between your host and guest OS.
- Drag and Drop: Drag files directly from your host to your guest and vice versa.
- Shared Folders: Seamlessly access files located on your host system from within the guest VM.
- Improved Mouse Integration: The mouse pointer moves smoothly between the host and guest without needing to press a special key.
Advanced Virtual Machine Concepts and Best Practices
Once you have a working virtual machine, you can explore more advanced features and adopt best practices to maximize its utility and security.
Snapshots: Your Virtual Machine’s Time Machine
VirtualBox’s snapshot feature is incredibly powerful for experimentation and recovery. A snapshot captures the complete state of your virtual machine at a specific point in time – including its running state, installed software, and file system.
- Creating Snapshots: Select your VM, go to “Machine” > “Take Snapshot,” and give it a descriptive name.
- Restoring Snapshots: To revert your VM to a previous state, go to “Machine” > “Revert to Snapshot” and choose the desired snapshot.
- Use Cases:
- Before installing new software: Take a snapshot. If the software causes issues, you can quickly revert.
- Before making significant system changes: Create a snapshot to easily undo unintended consequences.
- Testing potentially harmful actions: Perform risky operations within a VM and revert if something goes wrong.
Best Practice: Regularly take snapshots before any significant changes or installations. Don’t keep an excessive number of snapshots, as they can consume disk space. Delete older, no longer needed snapshots.
Networking Modes: Connecting Your VM to the World
VirtualBox offers several networking modes that determine how your VM connects to the network and the internet. Understanding these modes is crucial for various scenarios.
- NAT (Network Address Translation): This is the default and simplest mode. Your VM shares the host’s IP address and accesses the network through it. It’s good for general internet access but can be tricky for hosting services.
- Bridged Adapter: Your VM gets its own IP address on your physical network, appearing as a separate device. This is ideal if you need your VM to be accessible to other devices on your local network or if you’re running servers within the VM.
- Host-Only Adapter: Creates a private network between your host and guest machines. Your VM can communicate with the host and other VMs on the same host-only network but cannot access the external network or the internet. Useful for isolated testing environments.
- Internal Network: Similar to Host-Only but creates a network isolated from the host. VMs on the same internal network can communicate with each other, but not with the host or the outside world.
To configure networking: Select your VM, go to “Settings” > “Network,” and choose the desired adapter and mode.
Security Considerations
While VMs offer a layer of isolation, they are not inherently impenetrable.
- Keep Host and Guest Updated: Ensure both your host operating system and your guest operating system(s) are regularly patched with the latest security updates.
- Be Cautious with Shared Folders and Clipboard: These features, while convenient, can be conduits for malware. Only enable them when necessary and with trusted sources.
- Scan Files from Untrusted Sources: Even within a VM, scan any downloaded files with your antivirus software.
- Isolate Risky Activities: For extremely sensitive or risky activities, consider using a dedicated VM that is never connected to the internet or shared resources.
Conclusion: Unleash the Power of Virtualization
Installing a virtual machine might seem like a technical hurdle, but as you’ve seen, with user-friendly tools like Oracle VirtualBox, it’s an accessible and immensely rewarding process. Whether you’re looking to expand your tech knowledge, test new software without risk, enhance your business’s security, or simply explore the capabilities of different operating systems, virtual machines are an indispensable tool. By following these steps, you’ve taken a significant leap into the world of virtualization, opening up a realm of possibilities for learning, innovation, and efficient digital management. Embrace the power of running a computer within a computer, and unlock a new dimension of your digital experience.
aViewFromTheCave is a participant in the Amazon Services LLC Associates Program, an affiliate advertising program designed to provide a means for sites to earn advertising fees by advertising and linking to Amazon.com. Amazon, the Amazon logo, AmazonSupply, and the AmazonSupply logo are trademarks of Amazon.com, Inc. or its affiliates. As an Amazon Associate we earn affiliate commissions from qualifying purchases.