Chromebooks, with their cloud-centric approach and emphasis on simplicity, have made printing a seamless experience for many users. However, if you’re new to the Chrome OS ecosystem or have recently acquired a new printer, you might find yourself wondering, “How do I get this thing to work with my Chromebook?” Fear not, as installing a printer on a Chromebook is generally a straightforward process, often involving minimal configuration. This comprehensive guide will walk you through the various methods and considerations to ensure you can print your documents, photos, and more without a hitch.
The beauty of Chromebooks lies in their ability to leverage cloud-based technologies. This means that in many cases, your printer will be automatically detected and ready to use. However, there are times when a little manual intervention is required. We’ll explore both scenarios, ensuring you’re equipped to handle any printing challenge.
Understanding Chromebook Printing: Cloud-Ready and Beyond
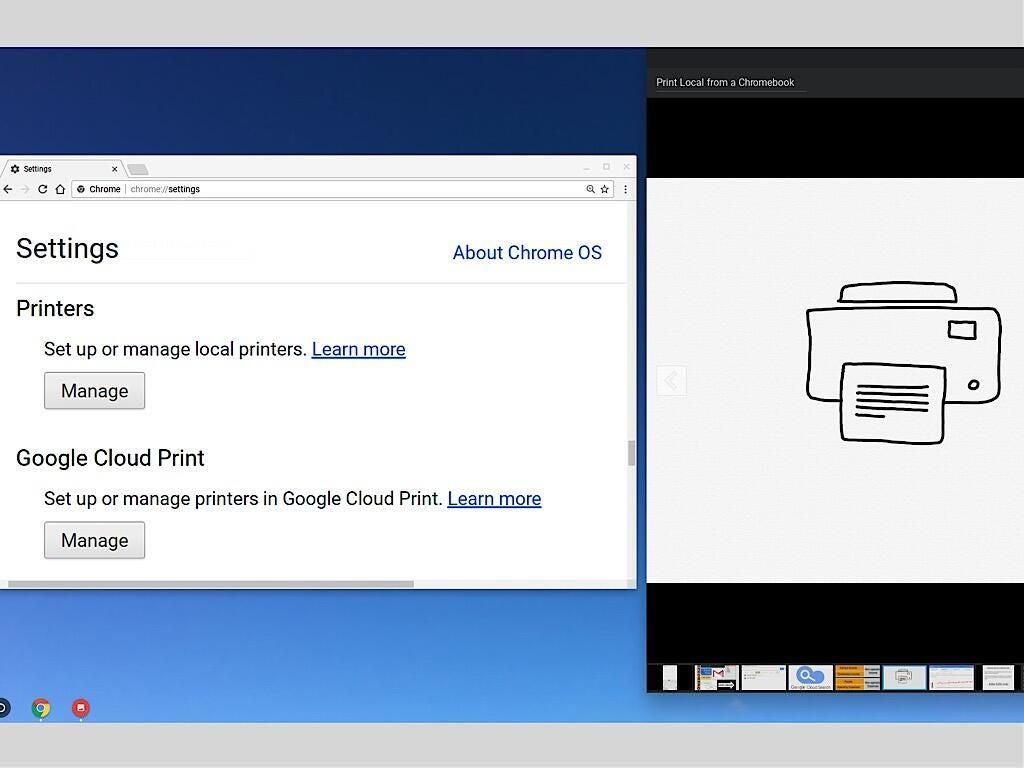
Chromebooks are designed to work seamlessly with cloud printing services. Google Cloud Print, while officially sunsetted, paved the way for a more integrated and effortless printing experience. Today, Chromebooks primarily rely on two main methods for printer connectivity:
- Managed Printers: If you’re on a school or work network, your IT administrator might have already configured printers for you. These are often referred to as “managed printers.” In such environments, the printer is usually readily available without any user intervention. You simply select it from the print dialog.
- Networked Printers (Wi-Fi/Ethernet): Most modern printers connect to your home or office network via Wi-Fi or an Ethernet cable. Chromebooks are excellent at detecting these printers automatically.
- USB Printers: While less common with modern, network-enabled printers, some older models or specific use cases might involve connecting a printer directly to your Chromebook via a USB cable. This method also requires a slightly different approach.
Before diving into the installation steps, it’s important to ensure your printer is set up correctly on your network. This typically involves connecting it to your Wi-Fi router according to the printer manufacturer’s instructions. Once your printer is online and accessible on your network, your Chromebook should be able to find it.
Adding a Network Printer Manually
In most cases, your Chromebook will automatically detect printers connected to your Wi-Fi network. You’ll see them appear in the print dialog when you go to print a document. However, if for some reason your printer isn’t showing up automatically, or if you want to add it manually, you can do so through the Chromebook’s settings.
Steps to Add a Network Printer:
- Open Settings: Click on the time in the bottom-right corner of your screen and then click on the gear icon to open the Settings menu.
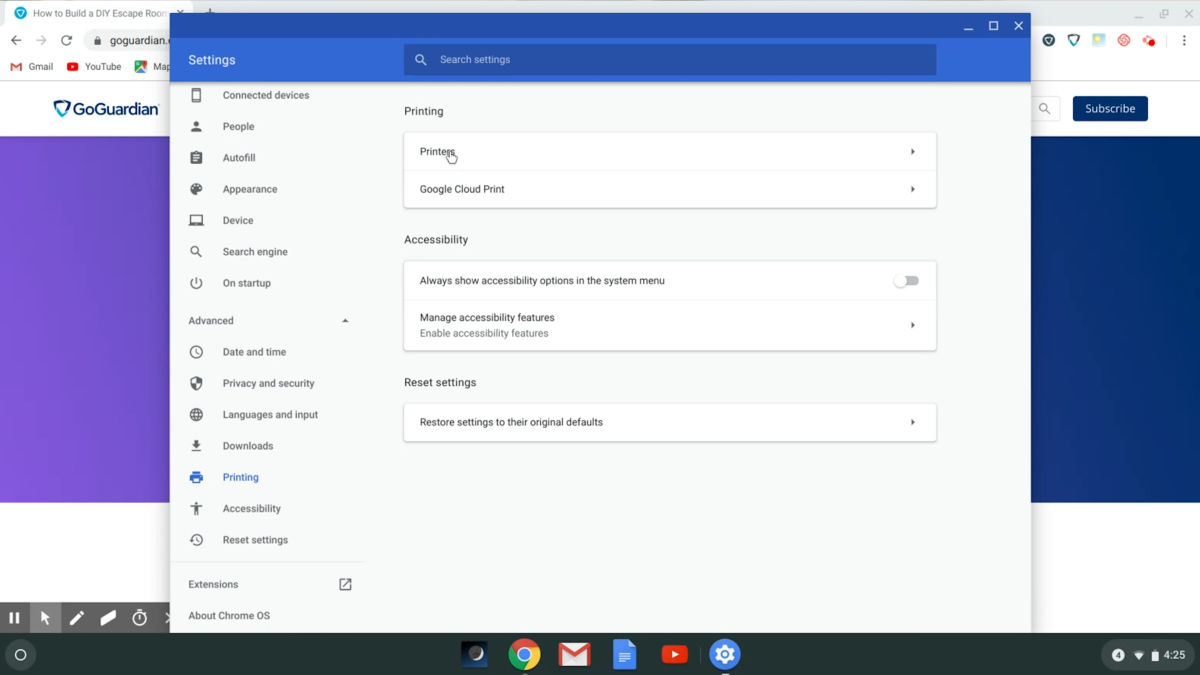
- Navigate to Advanced: In the Settings menu, scroll down and click on “Advanced.”
- Find “Printers”: Under the “Privacy and security” section, you should see an option for “Printers.” Click on it.
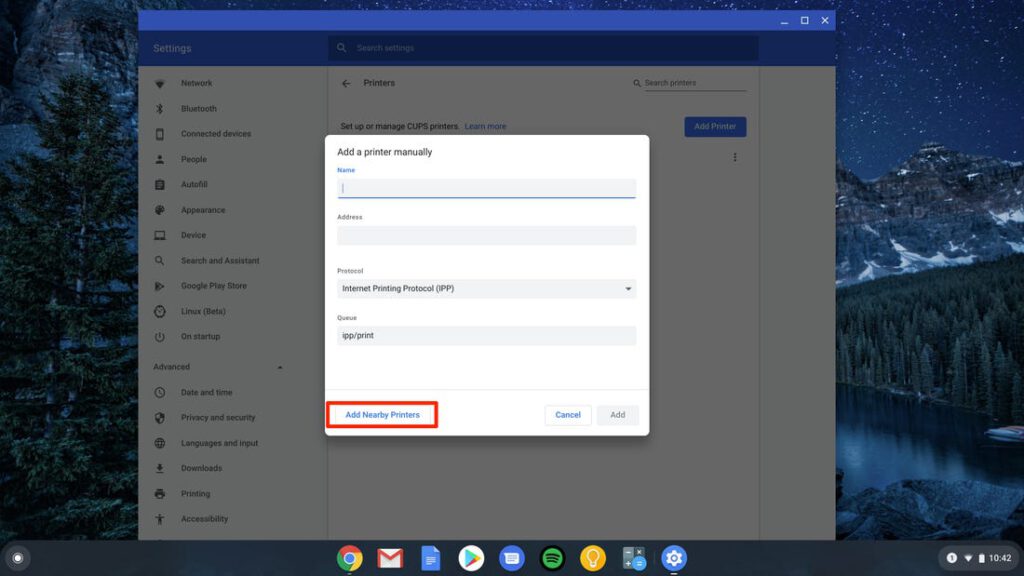
- Add Printer: You’ll see a list of any already added printers. Click on the “Add printer” button.
- Select Your Printer: Your Chromebook will scan for available printers on your network. If your printer is detected, it will appear in the list. Select your printer from the dropdown menu.
- Configure and Add: Chrome OS will attempt to automatically detect the printer’s model and driver. In most instances, it will find the correct one. If it doesn’t, you might need to select the manufacturer and model from the provided lists. Once you’ve selected your printer, click the “Add” button.
Your printer should now be added and ready to use. You can test it by opening a document and selecting “Print” from the file menu or by pressing Ctrl + P.
Connecting a Printer via USB
While Wi-Fi connectivity is the preferred and most common method for Chromebooks, you can also connect a printer directly using a USB cable. This is particularly useful if you have an older printer that doesn’t support network connectivity or if you encounter issues with Wi-Fi setup.
Steps to Connect a USB Printer:
- Connect the Printer: Ensure your printer is powered on and connected to your Chromebook via a USB cable.
- Open Settings: As with adding a network printer, open your Chromebook’s Settings by clicking on the time and then the gear icon.
- Navigate to Advanced: Scroll down to “Advanced” and click on it.
- Find “Printers”: Under “Privacy and security,” click on “Printers.”
- Add Printer: Click the “Add printer” button.
- Manual Connection: When the list of detected printers appears, you should see an option to “Add manually” or a prompt to select a connection type if your USB printer isn’t immediately recognized.
- Select USB Printer: Look for an option that specifically mentions USB printers. You may need to select your printer from a list that enumerates connected USB devices.
- Configure and Add: Similar to network printers, Chrome OS will try to automatically identify the driver. If it fails, you’ll need to manually select the manufacturer and model. Once configured, click “Add.”
Your USB printer should now be recognized and available for printing.
Troubleshooting Common Printing Issues
Even with the streamlined nature of Chromebook printing, you might occasionally encounter hiccups. Here are some common issues and their solutions:
Printer Not Detected
- Check Network Connection: Ensure your printer is properly connected to your Wi-Fi network and that your Chromebook is on the same network. Try restarting your router and printer.
- Restart Chromebook: A simple reboot of your Chromebook can often resolve temporary glitches that prevent device detection.
- Verify Printer Status: Make sure your printer is powered on and has no error messages displayed on its control panel.
- Manual Addition: If automatic detection fails, follow the manual addition steps outlined above.
- Printer Compatibility: While most modern printers are compatible with Chrome OS, very old or obscure models might not be. Check the printer manufacturer’s website for Chrome OS support information.
Print Jobs Stuck in Queue
- Cancel and Retry: Go to your Chromebook’s print queue (usually accessible from the print dialog or within Settings > Printers) and cancel any stuck print jobs. Then, try printing again.
- Restart Printer and Chromebook: This can often clear temporary communication errors.
- Check Printer Memory: Some printers have limited memory, and a very large or complex print job might overwhelm it. Try printing a simpler document.
Incorrect Printing or Garbled Output
- Driver Issues: If your printer isn’t printing correctly, it might be due to an incorrect driver. In the printer settings, you can sometimes edit the printer and try selecting a different driver or allowing Chrome OS to re-detect it.
- Print Settings: Double-check the print settings in the application you are using. Ensure you have selected the correct paper size, orientation, and other relevant options.
- Printer Firmware: Check your printer manufacturer’s website for any available firmware updates for your printer model. Outdated firmware can sometimes cause compatibility issues.
Printing from Specific Apps
Most applications on your Chromebook will have a “Print” option in their file or menu. However, if you’re using Android apps or Linux apps installed on your Chromebook, the printing process might differ slightly.
- Android Apps: Printing from Android apps generally works well if the app supports it. The print dialog will typically leverage the Chrome OS printing system. If an app doesn’t offer a print option, you might need to find a way to “share” the content to a printing-friendly format or app.
- Linux Apps: Printing from Linux applications can be more complex as it relies on the Linux subsystem’s printing capabilities (CUPS – Common Unix Printing System). You might need to install printer drivers within the Linux environment and configure printing through the Linux settings. This is an advanced topic and depends heavily on the specific Linux application and printer.
Advanced Printing Options and Considerations
While basic printing is usually plug-and-play, Chromebooks offer some advanced features and considerations for users with specific needs.
Setting a Default Printer
If you frequently use a particular printer, you can set it as your default. This means that whenever you initiate a print job, this printer will be automatically selected, saving you the step of choosing it each time.
To Set a Default Printer:
- Go to Settings > Advanced > Printers.
- You’ll see your list of added printers.
- Next to the printer you want to set as default, there should be a toggle or option to “Set as default.” Toggle it on.
Printing to a PDF
Sometimes, instead of printing to a physical printer, you might want to save a document as a PDF file. This is incredibly useful for sharing documents electronically, archiving, or preparing them for online submission.
When you open the print dialog, you’ll typically see an option to “Change destination” or “See more…” under the printer selection. Among the available destinations, you should find “Save as PDF.” Selecting this will allow you to save your document as a PDF file to your Chromebook’s Downloads folder or another chosen location.
Printer Management and Security
For users in managed environments (schools, businesses), IT administrators have more control over printer deployment and security policies. This can include restricting access to certain printers or enforcing print quotas.
For home users, ensuring the security of your printer is also important. If your printer is connected to your Wi-Fi network, it’s essentially another device on your network. Ensure your Wi-Fi password is strong and consider regularly checking for firmware updates for your printer to patch any security vulnerabilities.
When to Contact Manufacturer Support
If you’ve exhausted all troubleshooting steps and are still unable to get your printer to work with your Chromebook, it’s a good idea to contact the printer manufacturer’s support. They will have specific knowledge about their hardware and can assist with driver issues or hardware-specific problems that might be beyond the scope of Chromebook troubleshooting.
In conclusion, installing a printer on a Chromebook is designed to be an intuitive process. By understanding the different connection methods and following these troubleshooting tips, you should be able to enjoy hassle-free printing from your Chromebook. Whether you’re printing a school assignment, a work report, or a cherished photograph, your Chromebook is ready to connect you to the world of paper.
aViewFromTheCave is a participant in the Amazon Services LLC Associates Program, an affiliate advertising program designed to provide a means for sites to earn advertising fees by advertising and linking to Amazon.com. Amazon, the Amazon logo, AmazonSupply, and the AmazonSupply logo are trademarks of Amazon.com, Inc. or its affiliates. As an Amazon Associate we earn affiliate commissions from qualifying purchases.