The digital landscape is constantly evolving, and at its heart lies a continuous quest for more efficient, elegant, and powerful development tools. Mantine, a highly popular and feature-rich React components library, has emerged as a front-runner for developers seeking to build modern, beautiful, and accessible web applications with unprecedented speed and ease. Whether you’re a seasoned professional looking to streamline your workflow or a budding developer eager to create stunning user interfaces, understanding how to install and integrate Mantine into your projects is a foundational step. This comprehensive guide will walk you through the entire process, from initial setup to leveraging its core functionalities, ensuring you can harness the full potential of this transformative library.

Mantine is not just another UI library; it’s a complete toolkit designed to empower developers. Its extensive collection of accessible, themeable, and responsive components, coupled with a robust set of hooks and utilities, allows for rapid development of complex applications. This article is tailored to fit within the broader context of technological advancements, focusing on the practical application of a cutting-edge software solution. We’ll delve into the technical intricacies of installation, but also touch upon how such tools contribute to enhanced productivity and, by extension, can impact business efficiency and brand perception through polished user experiences.
Setting Up Your Development Environment
Before you can embark on your Mantine journey, ensuring your development environment is properly configured is paramount. This foundational step involves having Node.js and a package manager like npm or Yarn installed on your system. These are the bedrock upon which most modern web development projects are built.
Essential Prerequisites: Node.js and Package Managers
Node.js is a JavaScript runtime environment that allows you to execute JavaScript code outside of a web browser. It’s essential for managing packages, running build tools, and developing server-side applications. If you don’t have Node.js installed, head over to the official Node.js website (nodejs.org) and download the latest LTS (Long-Term Support) version suitable for your operating system. The installation process is straightforward and typically involves following an on-screen wizard.
Once Node.js is installed, you’ll automatically have npm (Node Package Manager) available. npm is used to install, share, and manage code packages (libraries and dependencies) for your JavaScript projects. Alternatively, you might prefer Yarn, another popular package manager known for its speed and reliability. To install Yarn, you can use npm itself: npm install -g yarn.
Choosing Your Project Setup: Create React App or Vite
When initiating a new React project, you have several excellent choices for setting up your development environment. Two of the most popular and recommended methods for starting a Mantine project are using Create React App (CRA) or Vite. Each offers a slightly different approach to project bootstrapping, and the choice often comes down to personal preference and project requirements.
Using Create React App (CRA)
Create React App is a widely adopted, officially supported toolchain that allows you to create a new single-page React application without requiring any complex configuration. It’s known for its ease of use and comes pre-configured with essential tools like Webpack and Babel.
To create a new React project with CRA, open your terminal or command prompt and navigate to the directory where you want to create your project. Then, run the following command:
npx create-react-app my-mantine-app
Replace my-mantine-app with your desired project name. This command will download and set up a new React project in a folder named my-mantine-app.
Once the project is created, navigate into the project directory:
cd my-mantine-app
Now, you’re ready to install Mantine.
Leveraging Vite for Faster Development
Vite is a modern front-end build tool that significantly improves the developer experience by offering lightning-fast cold server starts and Hot Module Replacement (HMR). It’s rapidly gaining popularity due to its performance advantages.
To create a new React project with Vite, run the following command in your terminal:
npm create vite@latest my-mantine-app --template react
Or, if you prefer Yarn:
yarn create vite my-mantine-app --template react
Again, replace my-mantine-app with your project’s name. Vite will prompt you to select a framework and variant; choose react and react (for JavaScript) or react-ts (for TypeScript).
After the project is created, navigate into the project directory:
cd my-mantine-app
Then, install the project dependencies:
npm install
or
yarn install
With your project structure in place, whether through CRA or Vite, you’re now perfectly positioned to integrate Mantine.
Installing and Integrating Mantine
With your React project set up, the next logical step is to incorporate Mantine into your application. This involves installing the core Mantine packages and its associated styling solution.
Installing Mantine Packages
Mantine provides a set of essential packages that you’ll need for most projects. The primary package is @mantine/core, which contains all the core UI components. Additionally, you’ll want to install @mantine/hooks for a collection of useful React hooks that simplify common logic, and a styling solution. Mantine supports Emotion or Styled Components out of the box, but its default and recommended styling solution is Emotion.
To install these packages using npm, run the following command in your project’s root directory:
npm install @mantine/core @mantine/hooks @emotion/react @emotion/server
If you’re using Yarn, the command is:
yarn add @mantine/core @mantine/hooks @emotion/react @emotion/server
The @emotion/react package is crucial for Mantine’s styling system, enabling dynamic styling and theming. @emotion/server is included for server-side rendering (SSR) capabilities, which can be beneficial for performance and SEO.
Setting Up MantineProvider

The MantineProvider is the central component that wraps your entire application. It provides the context for all Mantine components, allowing them to access theme settings, configuration, and other global styles. To effectively use Mantine, you must wrap your application’s root component with MantineProvider.
Open your project’s main entry file, which is typically src/index.js or src/main.jsx (for Vite projects), and import MantineProvider and your App component. Then, wrap your App component with MantineProvider.
Here’s an example for a typical src/index.js file:
import React from 'react';
import ReactDOM from 'react-dom/client';
import { MantineProvider } from '@mantine/core';
import App from './App';

const root = ReactDOM.createRoot(document.getElementById('root'));
root.render(
  <React.StrictMode>
    <MantineProvider>
      <App />
    </MantineProvider>
  </React.StrictMode>
);
For Vite projects using src/main.jsx, the structure will be very similar:
import React from 'react';
import ReactDOM from 'react-dom/client';
import { MantineProvider } from '@mantine/core';
import App from './App.jsx';

ReactDOM.createRoot(document.getElementById('root')).render(
  <React.StrictMode>
    <MantineProvider>
      <App />
    </MantineProvider>
  </React.StrictMode>
);
By default, MantineProvider applies a sensible set of global styles and enables theming. You can further customize the theme by passing a theme prop to MantineProvider.
Importing and Using Mantine Components
Once MantineProvider is set up, you can import and use any Mantine component in your application. For example, to use the Button component, you would import it from @mantine/core and use it like any other React component.
In your src/App.js or src/App.jsx file, you can do the following:
import { Button, Container, Title } from '@mantine/core';

function App() {
  return (
    <Container>
      <Title order={1}>Welcome to My Mantine App!</Title>
      <Button>Click me!</Button>
    </Container>
  );
}

export default App;
This simple example demonstrates how easily you can integrate and utilize Mantine components. The Container component helps in centering content and managing layout, while Title provides semantic headings. The Button component offers a styled and accessible button ready for interaction.
Customizing Mantine and Advanced Configurations
While Mantine provides a rich set of default styles and components, its true power lies in its extensibility and customizability. You can tailor the library to perfectly match your brand’s identity and project’s specific needs.
Theming Mantine
Mantine’s theming system is one of its most powerful features. You can define a global theme that dictates the look and feel of all your components, including colors, fonts, spacing, and more. This is crucial for maintaining brand consistency across your application and ensures a cohesive user experience.
To customize the theme, you pass a theme object to the MantineProvider. This object follows a specific structure, allowing you to override default values or add new ones.
Here’s an example of how to customize the primary color and font family:
import React from 'react';
import ReactDOM from 'react-dom/client';
import { MantineProvider, createTheme } from '@mantine/core';
import App from './App';

const theme = createTheme({
  colors: {
    brand: [
      '#f0b429', '#e69f00', '#d18c00', '#bb7a00', '#a66700',
      '#915400', '#7d4100', '#692e00', '#551b00', '#410800',
    ],
  },
  primaryColor: 'brand',
  fontFamily: 'Open Sans, sans-serif',
  headings: {
    fontFamily: 'Montserrat, sans-serif',
    sizes: {
      h1: { fontSize: '2.5rem', fontWeight: '700' },
      h2: { fontSize: '2rem', fontWeight: '600' },
    },
  },
});

const root = ReactDOM.createRoot(document.getElementById('root'));
root.render(
  <React.StrictMode>
    <MantineProvider theme={theme}>
      <App />
    </MantineProvider>
  </React.StrictMode>
);
In this example, we’ve defined a custom brand color and set it as the primary color. We’ve also specified different font families for general text and headings, and customized the size and weight of h1 and h2 headings. The createTheme function is a utility provided by Mantine to help structure your theme object correctly.
Integrating with Other Libraries
Mantine is designed to play well with the broader React ecosystem. You can integrate it with routing libraries like React Router, state management solutions like Redux or Zustand, and form handling libraries like Formik or React Hook Form.
For instance, if you’re using React Router for navigation, you would typically wrap your application’s routes within your MantineProvider.
// src/App.js
import React from 'react';
import { BrowserRouter as Router, Routes, Route } from 'react-router-dom';
import { MantineProvider, Button } from '@mantine/core';
import HomePage from './pages/HomePage';
import AboutPage from './pages/AboutPage';

function App() {
  return (
    <MantineProvider>
      <Router>
        <Routes>
          <Route path="/" element={<HomePage />} />
          <Route path="/about" element={<AboutPage />} />
        </Routes>
      </Router>
    </MantineProvider>
  );
}

export default App;
This demonstrates how easily Mantine components can be used within a routed application. The accessibility features and consistent styling of Mantine components will naturally extend to all your application’s pages.
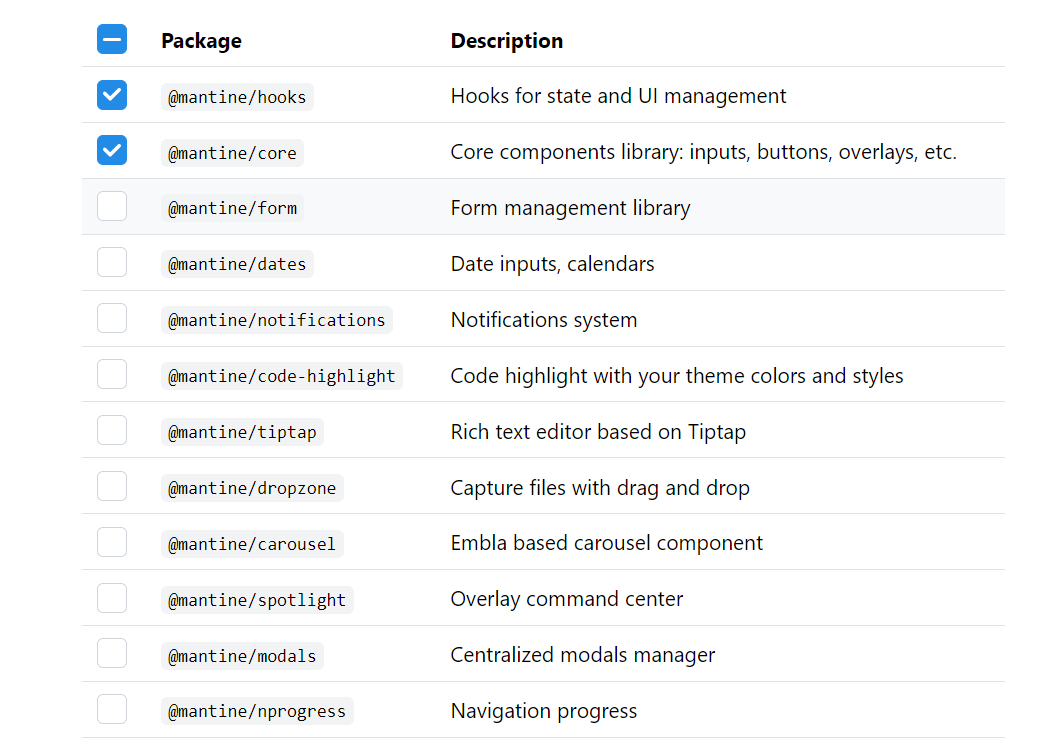
Beyond Core: Exploring Mantine Ecosystem Packages
Mantine’s ecosystem extends beyond the core components and hooks. There are several other official packages that can significantly enhance your development workflow and application capabilities.
@mantine/form: A powerful hook for handling forms with built-in validation, submission, and state management.@mantine/dates: A comprehensive set of date and time input components, including DatePickers and TimePickers.@mantine/notifications: A versatile system for displaying user notifications, toasts, and alerts.@mantine/carousel: An accessible and responsive carousel component for showcasing content.@mantine/tiptap: Integrates Mantine components with the Tiptap rich text editor.
To install any of these additional packages, you would use your package manager. For example, to install the form package:
npm install @mantine/form
or
yarn add @mantine/form
These packages are designed to seamlessly integrate with the core Mantine library, providing a unified and consistent development experience. By leveraging these extensions, you can build more complex and feature-rich applications with greater efficiency.
In conclusion, installing and configuring Mantine is a straightforward yet crucial step in building modern, high-quality React applications. From setting up your development environment to customizing themes and exploring the extensive ecosystem, Mantine provides a robust and enjoyable development experience. By following this guide, you’ll be well-equipped to harness the power of Mantine and accelerate your journey in creating exceptional web interfaces. The continuous evolution of technology, exemplified by tools like Mantine, empowers developers to not only build faster but also to create more sophisticated and user-centric digital products, ultimately influencing brand perception and driving business success.
aViewFromTheCave is a participant in the Amazon Services LLC Associates Program, an affiliate advertising program designed to provide a means for sites to earn advertising fees by advertising and linking to Amazon.com. Amazon, the Amazon logo, AmazonSupply, and the AmazonSupply logo are trademarks of Amazon.com, Inc. or its affiliates. As an Amazon Associate we earn affiliate commissions from qualifying purchases.