The landscape of home entertainment has dramatically shifted, and at the forefront of this revolution sits the Roku streaming platform. Offering a gateway to a vast universe of content – from blockbuster movies and binge-worthy series to live news and niche documentaries – Roku has become an indispensable part of many households. While the core functionality of browsing and streaming is intuitive, a common point of inquiry for new and even experienced Roku users revolves around a fundamental action: how to install apps, or “channels” as Roku refers to them, to expand their entertainment horizons.

This guide will demystify the process of installing apps on your Roku device, whether you’re looking to add popular streaming services like Netflix and Hulu, discover independent content creators, or access utility channels for a more streamlined digital life. We’ll cover everything from the basic steps on the Roku interface to more advanced methods like using the Roku mobile app and even sideloading for specific use cases.
Understanding the Roku Channel Store: Your Gateway to Content
Before diving into the installation process, it’s crucial to understand the Roku Channel Store. This is Roku’s official marketplace where you can find and add thousands of applications, officially termed “channels.” These channels offer access to a wide array of streaming services, video-on-demand platforms, music streaming, and even some games and utility applications.
The Two Main Ways to Add Channels:
There are generally two primary methods for adding channels to your Roku device:
- Through the Roku Device Interface: This is the most common and straightforward method. You’ll navigate directly on your Roku TV or streaming stick using your remote.
- Through the Roku Mobile App or Website: For added convenience, you can manage your Roku channels remotely using the official Roku mobile application or by logging into your Roku account on their website.
We’ll explore both of these in detail, along with some nuances and troubleshooting tips.
Installing Apps (Channels) Directly on Your Roku Device
This is the method most users will employ, and it’s designed for ease of use. You’ll be interacting directly with your Roku’s operating system.
Step-by-Step Installation Through the Roku Interface:
- Power On Your Roku Device: Ensure your Roku device is powered on and connected to your TV.
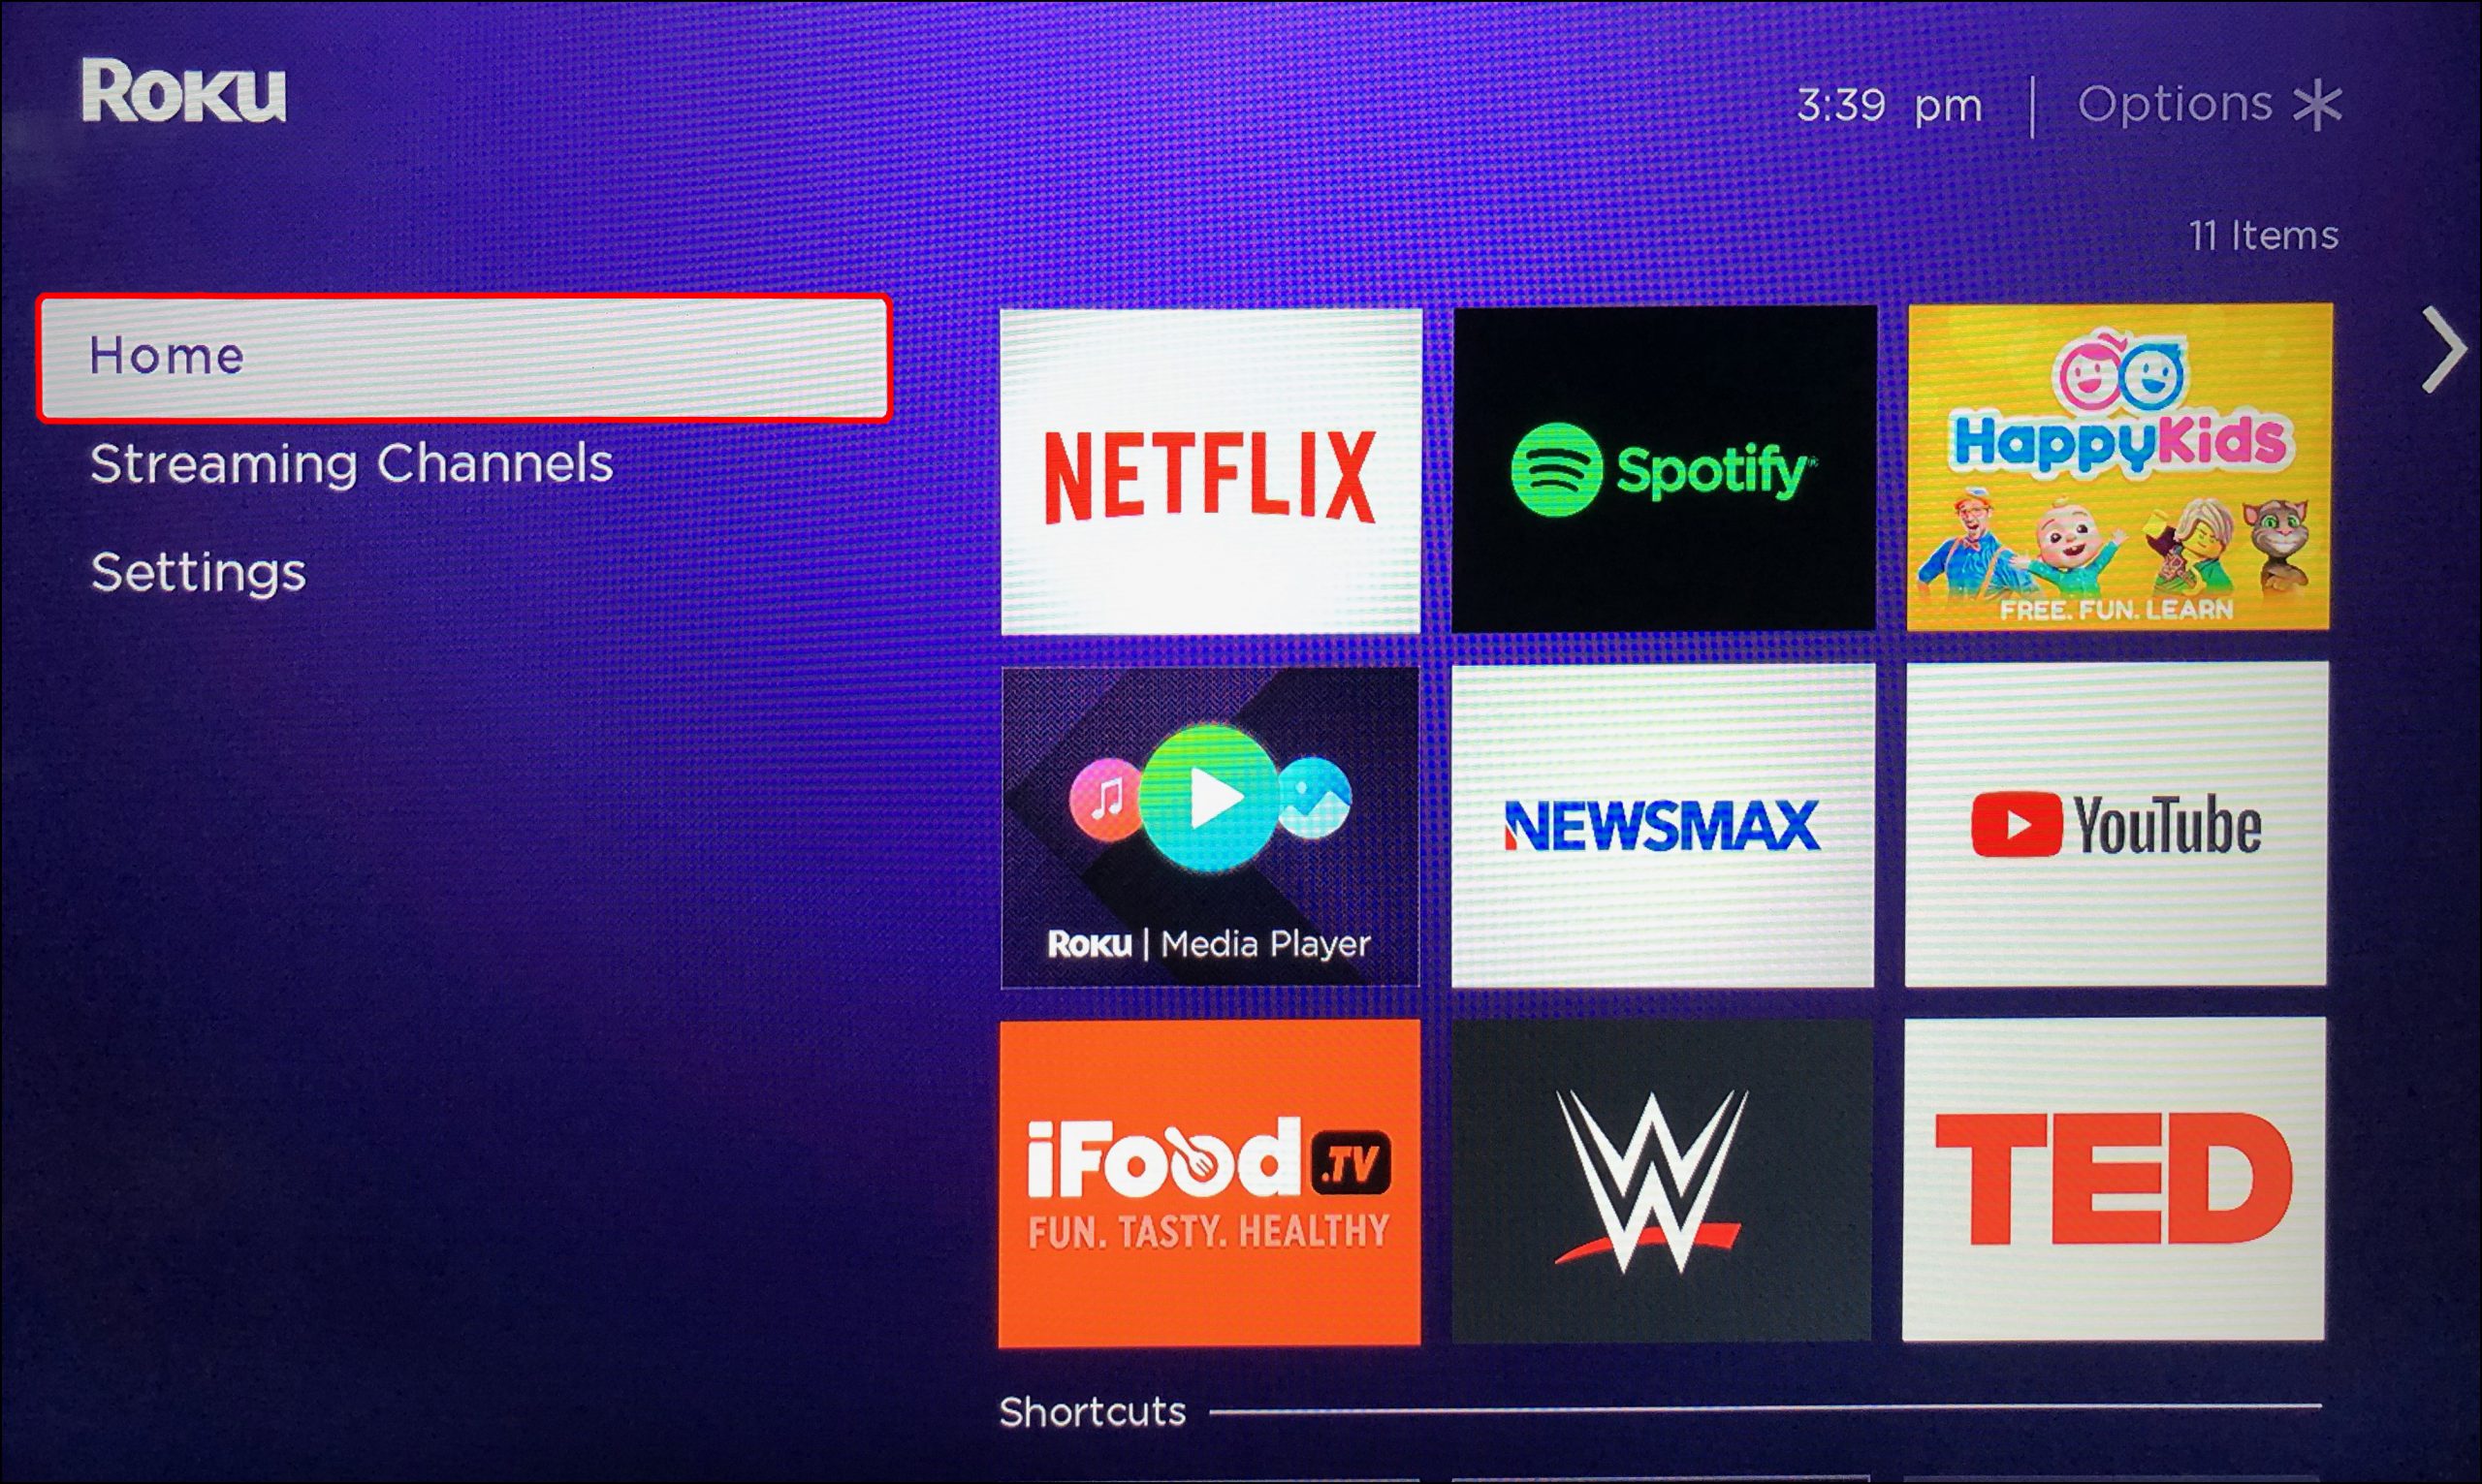
- Navigate to the Home Screen: Once your Roku boots up, you’ll be greeted by the familiar Roku home screen. This is your central hub for accessing all your installed channels and settings.
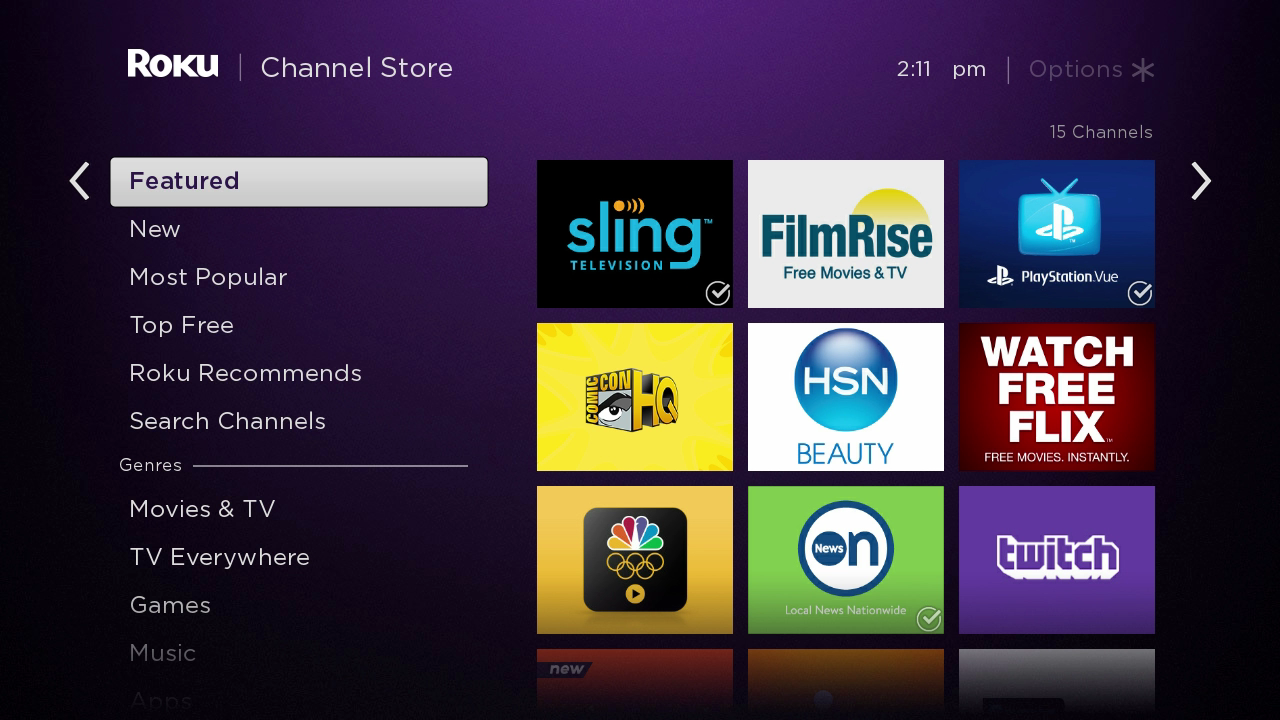
- Select “Streaming Channels”: Using your Roku remote, navigate to the left-hand menu and select “Streaming Channels.” Press the OK button on your remote to enter the Channel Store.
- Browse or Search for Channels:
- Browsing: The Channel Store presents various categories like “Featured,” “New & Noteworthy,” “Movies & TV,” “Music,” “Kids & Family,” and more. You can scroll through these categories to discover new channels.
- Searching: If you know the specific app you’re looking for, select the “Search” option (usually represented by a magnifying glass icon). Type in the name of the app (e.g., “Netflix,” “Disney+,” “Plex”). As you type, Roku will suggest matching channels.
- Select the Channel You Want to Install: Once you find the channel you’re interested in, highlight it and press the OK button on your remote. This will take you to the channel’s details page.
- View Channel Information: On the details page, you’ll see a description of the channel, screenshots, and sometimes user reviews. This is a good place to confirm you’ve found the correct app.
- Add the Channel: Look for the “Add channel” button. Highlight it and press OK.
- Confirmation and PIN Entry (if applicable):
- For free channels, after selecting “Add channel,” Roku will typically confirm the addition, and you can then select “Go to channel” to launch it or “OK” to return to the Channel Store.
- For paid channels or channels requiring a subscription, you might be prompted to proceed to checkout or be directed to the service’s website to complete the subscription before the channel can be fully activated on your Roku.
- Purchase PIN: If you have set up a purchase PIN for your Roku account, you will be prompted to enter it to confirm the addition of any paid channels or in-app purchases. This is a security measure to prevent unauthorized purchases.
- Launch the Channel: Once added, the channel will appear in your list of installed channels on the Roku home screen. You can select it and press OK to launch it.
Finding Your Newly Installed Channel on the Home Screen:
Newly installed channels are usually added to the end of your channel list on the Roku home screen. You can scroll down to find them. If you have a large number of channels, it might take a bit of scrolling.
Reordering Your Channels for Easier Access
For frequently used channels, you’ll likely want to move them closer to the top of your list. Here’s how:
- Highlight the Channel: On the Roku home screen, navigate to and highlight the channel you want to move.
- Press the Asterisk () Button: On your Roku remote, press the asterisk () button. This will bring up an options menu for that specific channel.
- Select “Move Channel”: From the options, choose “Move channel.”
- Use Arrow Keys to Reposition: Use the arrow keys on your remote to move the channel up or down the list.
- Press OK to Confirm: Once the channel is in its desired position, press the OK button to confirm the move.
This simple act of reordering can significantly improve your Roku navigation experience.
Installing Apps (Channels) Remotely via the Roku Mobile App and Website
For those who prefer managing their devices from their smartphone or computer, Roku offers a convenient way to add channels remotely. This is particularly useful if you’re setting up a new Roku device or want to add channels without interrupting your current viewing session.
Using the Roku Mobile App:
The Roku mobile app (available for iOS and Android) acts as a remote control and a management tool for your Roku devices.
- Download and Install the Roku App: If you haven’t already, download the official Roku app from your device’s app store.
- Connect to Your Roku Device: Open the app and follow the on-screen instructions to connect it to your Roku device. This typically involves ensuring both your mobile device and Roku are on the same Wi-Fi network.
- Navigate to the Channel Store: Within the app, you should find an option to access the Roku Channel Store. This will mimic the experience of browsing or searching on the Roku device itself.
- Search or Browse for Channels: Use the search bar or browse through categories to find the desired channel.
- Tap “Add Channel”: Once you’ve found the channel, tap on it to view its details, and then tap the “Add channel” button.
- Confirmation: The app will confirm that the channel has been added to your Roku device. You might need to restart your Roku device or wait a moment for the channel to appear in your list.
Using the Roku Website:
You can also manage your Roku channels directly through the Roku website by logging into your account.
- Go to Roku.com: Open a web browser on your computer and go to www.roku.com.
- Sign In: Log in to your Roku account using your email address and password.
- Navigate to “My Account”: Once logged in, look for “My Account” or a similar option in the navigation menu.
- Access the Channel Store: Within your account settings, you should find a link to the Roku Channel Store.
- Search and Add Channels: Browse or search for channels as you would on the device or app. When you find a channel, click on it to view its details and then click the “Add channel” button.
- Confirmation: The website will confirm the addition. The channel will then be added to your Roku device, usually appearing shortly after.
Advanced Installation Methods: Private Channels and Sideloading
While the official Channel Store covers the vast majority of streaming needs, there are instances where users might want to install channels not listed there. This typically falls into two categories: private channels and sideloading.
Private Channels:
Roku allows developers to create “private channels” that are not publicly listed in the Channel Store. These are often used for testing purposes, for specific communities, or for content that doesn’t meet the public store’s guidelines. To add a private channel, you need a unique “add code” provided by the channel developer.
Steps to Add a Private Channel:
- Obtain the Add Code: Get the specific “add code” for the private channel from its developer or source. This is usually a short string of letters and numbers.
- Go to the Roku Website: Log in to your Roku account on Roku.com.
- Navigate to “Add Channel”: Look for an option like “Add channel with a code” or “Add a private channel.”
- Enter the Add Code: Type in the private channel add code accurately.
- Click “Add Channel”: Follow the prompts to add the channel. It will then appear on your Roku device.
Important Note: Private channels are not vetted by Roku in the same way public channels are. Proceed with caution and only install private channels from trusted sources.
Sideloading (Not Directly Supported by Roku for General Users):
Sideloading, in the context of streaming devices, generally refers to installing applications from sources other than the official app store. For Roku, direct sideloading of third-party applications like you might do on an Android TV box is not officially supported or straightforward for the average user. Roku’s ecosystem is designed to be a curated experience through its Channel Store.
While there might be very niche, developer-focused methods or workarounds that involve more technical expertise (like using developer mode on some older devices or specific network configurations), these are not recommended for general users due to complexity, potential for bricking your device, and security risks. Roku prioritizes security and stability, which is why their app distribution is tightly controlled.
If you’re looking for an app that isn’t in the Roku Channel Store, your best bet is to:
- Check if it’s available as a private channel.
- See if the content provider offers a web-based version you can access through a Roku browser (if available on your model, though this is less common now).
- Consider alternative streaming devices that offer more open app installation.
Troubleshooting Common Installation Issues
Even with a straightforward process, you might encounter hiccups. Here are some common issues and how to resolve them:
Channel Not Found:
- Spelling Errors: Double-check your spelling when searching for a channel.
- Regional Availability: Some channels are only available in specific countries. Ensure your Roku account region matches the channel’s availability.
- Channel Discontinued: The channel might have been removed from the Roku Channel Store by Roku or the developer.
Installation Fails or Gets Stuck:
- Internet Connection: Ensure your Roku device has a stable internet connection. Try restarting your router and modem.
- Roku Device Restart: Sometimes, a simple restart of your Roku device can resolve temporary glitches. Go to Settings > System > System restart.
- Storage Space: While less common, if your Roku device is extremely full of channels and apps, it might affect new installations. Try removing a few unused channels.
- Roku Account Issues: Ensure your Roku account is active and not experiencing any issues.
Paid Channel Prompts for Subscription:
- Subscription Required: Most streaming services require a separate subscription beyond just adding the channel to your Roku. You’ll need to sign up and pay for the service through their website or app to access its content.
- Purchase PIN: If you’re being prompted for a PIN and don’t recall setting one, check your Roku account settings on Roku.com.
Conclusion: Expanding Your Entertainment Universe on Roku
Installing apps on your Roku device is a fundamental step to unlocking its full potential. Whether you’re a seasoned streamer or just getting started, the process is designed to be intuitive and accessible. By mastering the Roku Channel Store, utilizing the convenience of remote installation through the mobile app or website, and understanding the nuances of private channels, you can curate a personalized entertainment experience that perfectly suits your tastes. Remember to always install channels from trusted sources to ensure a safe and enjoyable streaming journey. Happy streaming!
aViewFromTheCave is a participant in the Amazon Services LLC Associates Program, an affiliate advertising program designed to provide a means for sites to earn advertising fees by advertising and linking to Amazon.com. Amazon, the Amazon logo, AmazonSupply, and the AmazonSupply logo are trademarks of Amazon.com, Inc. or its affiliates. As an Amazon Associate we earn affiliate commissions from qualifying purchases.