
In the rapidly evolving world of technology, a Graphics Processing Unit (GPU) stands as the beating heart of any high-performance computer, dictating everything from the fluidity of your games to the speed of your video rendering and even the efficiency of AI-driven tasks. Upgrading your GPU isn’t just about chasing higher frame rates; it’s an investment in your digital future, enhancing your productivity, entertainment, and the overall longevity of your system. This guide will walk you through the entire process of installing a new GPU, from meticulous preparation to post-installation optimization, ensuring a smooth and successful upgrade that aligns with the “Tech” focus of our platform. We’ll also touch upon how this crucial upgrade impacts your “Money” through improved value and potential for income, and even your “Brand” through a more professional and capable setup.
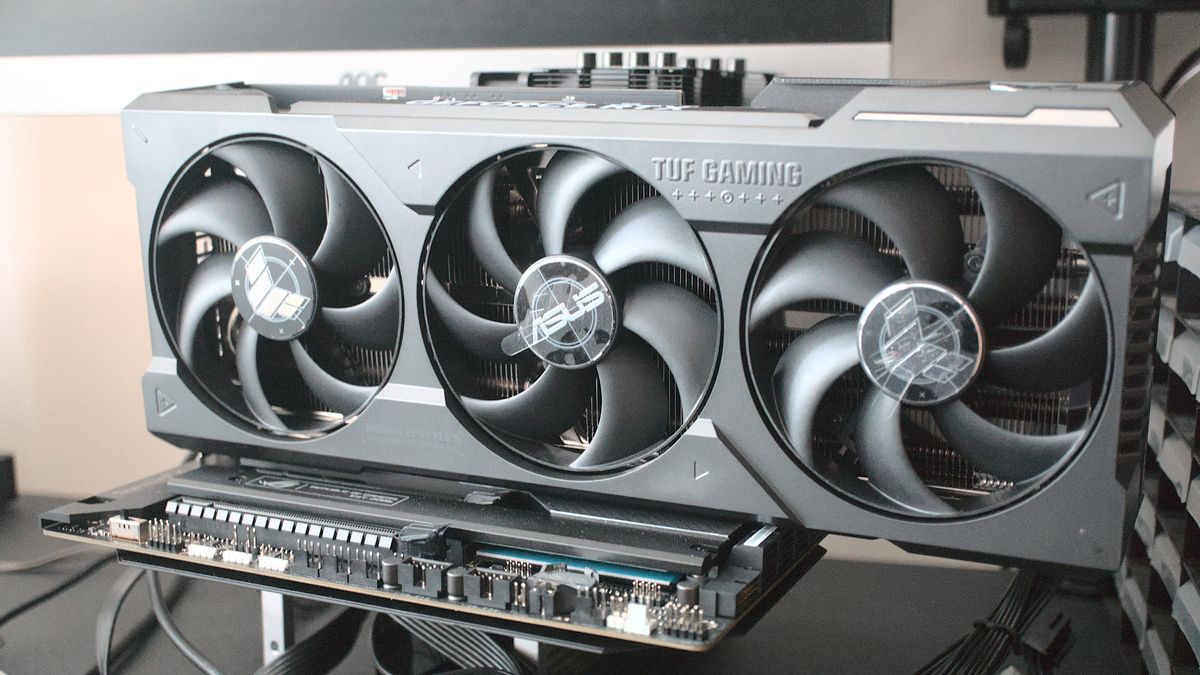
The Essential Pre-Installation Checklist: Preparing for Your GPU Upgrade
Before you even think about opening your PC case, a thorough preparation phase is paramount. Skipping these initial steps can lead to compatibility issues, installation headaches, or even damage to your components. Taking the time to gather the right tools, confirm compatibility, and prepare your system ensures a seamless transition and protects your valuable investment.
Gathering Your Tools and Workspace
A tidy and well-equipped workspace is the foundation of any successful PC build or upgrade. You’ll need a few basic tools and a designated area where you can work comfortably and safely.
- Phillips Head Screwdriver: This is the most crucial tool, used for opening the case, removing old components, and securing new ones.
- Anti-Static Wrist Strap (Recommended): Static electricity is the silent killer of PC components. An anti-static strap safely grounds you, preventing accidental discharges that could fry your new GPU or motherboard. Alternatively, frequently touching a grounded metal object (like your PC’s unpainted metal frame) can help dissipate static.
- Cable Ties or Velcro Straps: For neat cable management post-installation, which improves airflow and aesthetics.
- Flashlight or Headlamp: To illuminate the often-dark recesses of your PC case.
- Compressed Air: Useful for cleaning out dust from your case and PCIe slot before installing the new card.
- Clean, Flat Surface: A well-lit, uncluttered table provides ample space to work with components without losing small screws. Avoid working on carpeted surfaces, which can generate more static electricity.
- Your New GPU and its Accessories: Ensure you have the graphics card itself, any necessary power adapters, and the documentation.
Power Supply Unit (PSU) Compatibility: The Heart of Your System
Your Power Supply Unit (PSU) is the unsung hero that feeds power to all your components. An underpowered PSU can lead to system instability, crashes, or simply prevent your new GPU from performing at its best. This is where the “Money” aspect comes into play; investing in a capable PSU now can save you from costly issues down the line.
- Check Wattage Requirements: Every GPU has a recommended PSU wattage. This information is typically found on the GPU manufacturer’s website or the product box. Compare this to the wattage rating of your current PSU. If your PSU’s wattage is significantly lower, an upgrade is necessary.
- Verify PCIe Power Connectors: Modern, powerful GPUs often require dedicated PCIe power connectors (6-pin, 8-pin, or even 12-pin for newer NVIDIA cards). Check your new GPU’s requirements and ensure your PSU has the correct connectors available. Adapters exist, but direct PSU connections are always preferred for stability and safety.
- Consider PSU Efficiency (80 PLUS Rating): While not strictly about compatibility, a higher 80 PLUS rating (Bronze, Gold, Platinum, Titanium) indicates better energy efficiency, which can lead to lower electricity bills over time – a small but tangible “Money” saving.
Software Preparation: Drivers and Backup
Before you physically remove anything, prepare your operating system. This software-side preparation minimizes potential conflicts and ensures a clean slate for your new hardware.
- Uninstall Old Graphics Drivers: Using a utility like Display Driver Uninstaller (DDU) in Windows Safe Mode is highly recommended. This removes all traces of previous drivers (especially important if switching between NVIDIA and AMD), preventing software conflicts that can cause instability or poor performance.
- Download New Graphics Drivers: Visit the website of your new GPU’s manufacturer (NVIDIA or AMD) and download the latest drivers for your specific card and operating system. Store them on your desktop or a USB drive for easy access after installation.
- Backup Important Data: While a GPU upgrade is relatively low-risk, it’s always good practice to back up critical files before performing any major hardware changes. This safeguards your “Tech” assets and gives you peace of mind.
- Update BIOS/UEFI (Optional but Recommended): Ensure your motherboard’s BIOS/UEFI firmware is up to date. This can improve hardware compatibility and stability, especially with newer GPU architectures.
Safety First: Static Electricity and Disconnecting Power
Safety cannot be overstated. A moment of carelessness can lead to damaged components or even personal injury.
- Disconnect Power Completely: Unplug your PC from the wall outlet. Do not just turn it off; physically remove the power cable.
- Press Power Button (After Unplugging): Pressing the power button a few times after unplugging can discharge any residual electricity stored in the PSU capacitors.
- Ground Yourself: Wear your anti-static wrist strap, connecting it to an unpainted metal part of your PC case or another grounded object. If you don’t have one, regularly touch a grounded metal surface. This protects your investment and ensures component longevity.
The Physical Installation Process: Swapping Your Graphics Card
With preparations complete, it’s time for the hands-on part. This section details the steps to physically install your new GPU, transforming your PC’s capabilities. Remember to take your time and handle components with care.
Opening Your PC Case and Locating the PCIe Slot
Accessing the interior of your PC is the first physical step.
- Remove Side Panel: Most PC cases have a removable side panel, often secured by a few thumbscrews or standard Phillips screws at the back. Carefully slide or swing it open and set it aside in a safe place.
- Identify the PCIe x16 Slot: The GPU plugs into a PCI Express (PCIe) x16 slot on your motherboard. This is typically the longest slot, usually reinforced with metal on modern motherboards, and closest to your CPU socket. If your motherboard has multiple x16 slots, always use the top one as it’s usually wired for the highest bandwidth (e.g., PCIe 4.0 x16), maximizing your GPU’s performance potential.
Removing the Old GPU (If Applicable)
If you’re upgrading an existing system, you’ll need to carefully remove the old graphics card.
- Disconnect Power Cables: If your old GPU required external PCIe power connectors, gently unclip and disconnect them.
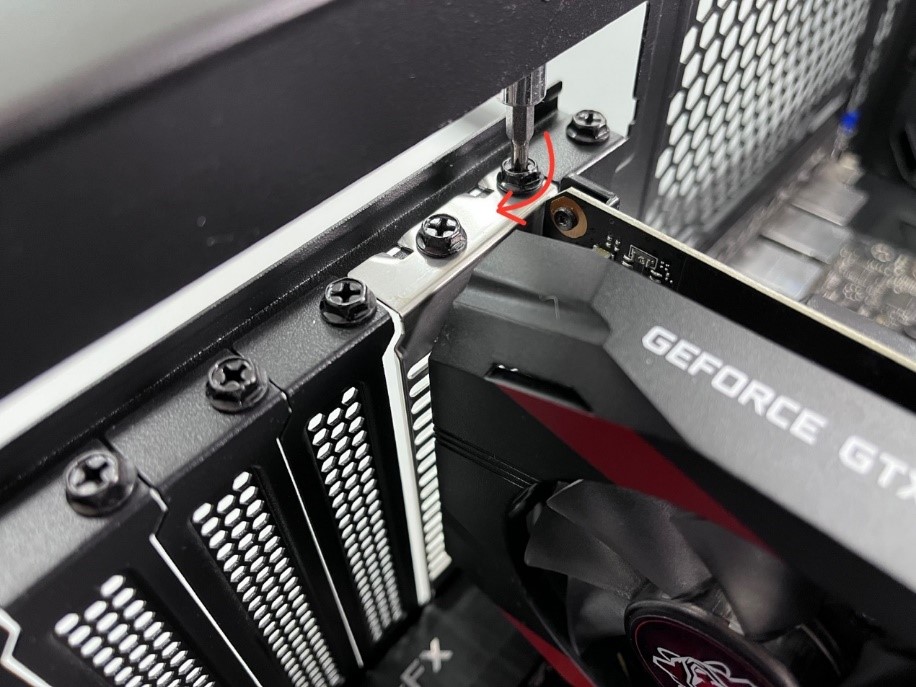
- Unscrew the GPU Bracket: Graphics cards are secured to the PC case at the back I/O panel with one or two screws. Unscrew these.
- Release the PCIe Retention Clip: At the far end of the PCIe slot, there’s a small plastic or metal lever/clip that holds the GPU securely in place. Gently press or push this clip away from the GPU to unlock it. Be careful not to force it, as these can be fragile.
- Gently Remove the Old GPU: With the screws removed and the clip released, carefully pull the old GPU straight out of the PCIe slot. Avoid wiggling it excessively. Place it in an anti-static bag if you plan to keep or resell it (a smart “Money” decision).
Inserting Your New Graphics Card
This is the moment of truth – placing your powerful new component into its rightful place.
- Unbox Your New GPU: Carefully remove your new GPU from its anti-static bag and packaging. Handle it by the edges or the heatsink, avoiding touching the gold contacts on the PCIe connector.
- Align and Insert: Orient the GPU so its PCIe connector aligns perfectly with the motherboard’s PCIe x16 slot. Gently push the GPU straight down into the slot. You should feel it seat firmly, and the PCIe retention clip should click back into place automatically (or you may need to gently push it until it clicks). Do not force the card; if it doesn’t go in, re-check alignment.
- Secure with Screws: Once the GPU is fully seated, secure its bracket(s) to the PC case with the screws you removed earlier. This prevents the card from sagging or shifting.
Securing the GPU and Connecting Power
With the card physically in place, the final physical connections are critical for its operation.
- Connect PCIe Power Cables: Plug in the necessary PCIe power cables from your PSU to your new GPU. These connectors are often 6-pin, 8-pin, or 12-pin. Ensure they are fully seated and clicked into place. Some GPUs require multiple power connectors; ensure all are connected. Incorrectly connected or missing power cables are a common cause of “no display” issues.
- Cable Management (Optional but Recommended): Use cable ties or Velcro straps to tidy up any loose cables, especially the newly connected GPU power cables. Good cable management improves airflow within your case, contributing to better cooling for all components, which extends their lifespan and maintains “Tech” performance.
Post-Installation Procedures: Bringing Your New GPU to Life
The physical installation is just one part of the journey. The next steps involve reconnecting your system, installing the correct software, and verifying that everything is working as it should.

Reassembling Your PC and Initial Boot-Up
Carefully close up your system before powering it on.
- Replace Side Panel: Reattach your PC’s side panel, securing it with the screws.
- Reconnect Peripherals: Plug back in your monitor (ensuring the display cable is connected directly to the new GPU’s ports, not the motherboard’s integrated graphics ports), keyboard, mouse, and other peripherals.
- Reconnect Power Cable: Plug the power cable back into your PC and then into the wall outlet.
- First Boot: Power on your computer. Ideally, you should see your motherboard’s splash screen or the Windows loading screen on your monitor. If you get no display, don’t panic; refer to the troubleshooting section.
Installing and Updating Graphics Drivers
This is arguably the most critical software step. Without the correct drivers, your powerful new GPU will perform no better than a basic display adapter.
- Access Downloaded Drivers: Navigate to where you saved the graphics drivers (on your desktop or USB drive).
- Run the Installer: Double-click the driver installer executable. Follow the on-screen prompts. It’s often recommended to perform a “clean installation” if the option is available, even if you used DDU earlier. This ensures all old driver files are thoroughly overwritten.
- Reboot: After the driver installation is complete, the installer will typically prompt you to restart your computer. Do so. This allows the new drivers to fully integrate with your operating system.
- Verify Driver Installation: Once Windows has rebooted, right-click on your desktop and select “NVIDIA Control Panel” or “AMD Radeon Software.” If these options appear and open correctly, your drivers are likely installed. You can also check Device Manager (search for “Device Manager” in Windows search, then expand “Display adapters”) to confirm your new GPU is recognized without any error symbols.
Verifying Performance and System Stability
Once drivers are installed, it’s time to put your new GPU through its paces.
- Check Display Settings: Ensure your monitor is running at its native resolution and refresh rate (e.g., 1440p at 144Hz). Access these settings via the NVIDIA Control Panel or AMD Radeon Software, or through Windows Display Settings.
- Run Benchmarks or Games: Download and run a popular benchmark tool (e.g., 3DMark, FurMark) or launch one of your favorite games. Monitor your GPU temperatures and performance using tools like MSI Afterburner or the manufacturer’s bundled software. Look for stable frame rates and reasonable temperatures. This confirms your investment is yielding the expected “Tech” benefits.
- Monitor System Stability: Use your computer as you normally would. Play games, edit videos, or perform other intensive tasks. Listen for any unusual fan noises, observe for visual artifacts on screen, or experience unexpected crashes. Any of these could indicate an issue that needs further investigation.
Common Troubleshooting Tips for GPU Installation
Even with careful preparation, issues can arise. Knowing how to diagnose and address common problems can save you a lot of frustration and keep your “Money” investment safe.
“No Display” Issues and Basic Connectivity Checks
This is by far the most common problem after a GPU installation.
- Check Monitor Connection: Ensure your display cable (HDMI, DisplayPort, DVI) is securely plugged into one of the new GPU’s output ports, not the motherboard’s integrated graphics ports.
- Verify GPU Power Cables: Double-check that all required PCIe power cables are firmly connected to the GPU from your PSU. Many GPUs have indicator LEDs that show if power is being received.
- Reseat the GPU: Power down and unplug your PC. Open the case and gently unclip and re-seat the GPU in its PCIe slot, ensuring it clicks into place.
- Check PCIe Slot Retention Clip: Make sure the retention clip at the end of the PCIe slot is fully engaged and holding the card securely.
- Test with Integrated Graphics (if available): If your CPU has integrated graphics, remove the new GPU and connect your monitor to the motherboard’s video output. If you get a display, it indicates the issue is specifically with the GPU or its installation, not the rest of your system.
Driver-Related Problems and Clean Installations
Incorrect or corrupt drivers can cause instability, low performance, or even prevent your OS from booting correctly.
- Re-run DDU: If you’re experiencing driver crashes or poor performance, boot into Windows Safe Mode and use DDU again to completely wipe all graphics drivers. Then, perform a fresh installation of the latest drivers.
- Try Older Drivers: Sometimes, the very latest drivers might have bugs. If issues persist, try installing a slightly older, stable driver version from the manufacturer’s archive.
- Windows Update Issues: Ensure Windows Update hasn’t automatically installed an older, conflicting driver. Disable automatic driver updates if necessary.
Overheating and Fan Issues
High temperatures can severely impact performance and reduce component lifespan.
- Monitor Temperatures: Use software like HWMonitor or the GPU manufacturer’s utility to monitor GPU temperatures during load. Sustained temperatures above 85°C (185°F) are concerning.
- Check Fan Operation: Visually inspect the GPU’s fans to ensure they are spinning correctly when the card is under load. If they aren’t, check power connections.
- Improve Airflow: Ensure your PC case has good airflow. Verify all case fans are working and oriented correctly (intake vs. exhaust). Poor cable management can also restrict airflow.
- Dust Accumulation: Dust acts as an insulator. Use compressed air to clean out any dust from the GPU heatsink and case fans.
The Impact of a GPU Upgrade: Why It Matters for Tech, Brand, and Money
Beyond the technical steps, understanding the broader implications of a GPU upgrade highlights its true value. It’s not merely a component swap; it’s a strategic enhancement for your digital life, reflecting our “Tech,” “Brand,” and “Money” categories.
Enhancing Your Digital Experience (Tech)
A new GPU fundamentally transforms your interaction with technology.
- Gaming Performance: This is the most obvious benefit, delivering higher frame rates, sharper resolutions, and more immersive graphical fidelity in the latest games. For competitive gamers, this can be the edge needed for victory.
- Content Creation: For video editors, graphic designers, 3D artists, and streamers, a powerful GPU dramatically accelerates rendering times, enables real-time previews, and facilitates smoother workflows. This directly contributes to higher productivity and the ability to handle more complex projects.
- AI and Machine Learning: GPUs are increasingly vital for AI acceleration, from running local AI models and stable diffusion to advanced photo editing features. This positions your system at the forefront of emerging technological trends.
- Virtual Reality (VR): A high-end GPU is essential for a fluid and comfortable VR experience, preventing motion sickness and enabling truly immersive virtual worlds.
Future-Proofing and Resale Value (Money/Brand)
A smart GPU upgrade is an investment that yields financial and reputational dividends.
- Extending PC Lifespan: Instead of buying an entirely new PC every few years, a GPU upgrade can significantly extend the usable life of your current system, saving you money in the long run.
- Maintaining Resale Value: A powerful and modern GPU makes your entire PC more attractive on the used market, contributing to a better resale value should you decide to upgrade your entire system in the future. This is a direct “Money” benefit.
- Personal and Professional Brand: For content creators, streamers, or professionals who rely on their PC, a high-performance system powered by a capable GPU enhances their “brand” reputation. It signals professionalism, efficiency, and a commitment to quality in their digital output. A smooth, artifact-free stream or quick render times speak volumes about your setup.
Empowering Creative and Professional Workflows (Tech/Brand)
The symbiotic relationship between powerful hardware and creative output is undeniable.
- Unleashing Creativity: A faster GPU removes bottlenecks, allowing artists and designers to experiment more freely, iterate faster, and tackle more ambitious projects without being limited by their hardware.
- Professional Efficiency: In fields like architecture, engineering, data science, or medical imaging, GPU acceleration is critical for complex simulations, data visualization, and rapid analysis. This translates directly to increased professional efficiency and competitiveness.
- Adopting New Technologies: Many cutting-edge software applications and AI tools are heavily GPU-dependent. An upgraded GPU ensures you can leverage these “Tech” advancements, keeping your skills and capabilities current.
Installing a new GPU might seem daunting at first, but by following these detailed steps, you can confidently transform your PC into a more powerful, efficient, and future-ready machine. This upgrade is not just about raw power; it’s a strategic decision that enhances your digital life, protects your financial investment, and elevates your technological “Brand.” Embrace the upgrade, and unlock the full potential of your computing experience.
aViewFromTheCave is a participant in the Amazon Services LLC Associates Program, an affiliate advertising program designed to provide a means for sites to earn advertising fees by advertising and linking to Amazon.com. Amazon, the Amazon logo, AmazonSupply, and the AmazonSupply logo are trademarks of Amazon.com, Inc. or its affiliates. As an Amazon Associate we earn affiliate commissions from qualifying purchases.