
In the fast-evolving digital landscape, where technology constantly pushes the boundaries of what’s possible, maintaining an efficient and responsive computing experience is paramount. Over time, even the most robust operating systems can become sluggish, plagued by accumulated digital debris, software conflicts, and leftover files from uninstalled applications. If your Windows 10 PC feels like it’s trudging through mud rather than zipping along, exhibiting frequent crashes, inexplicable errors, or just a general sense of sluggishness, a clean installation might be the most effective solution.
Unlike a simple upgrade or reset, a clean install completely wipes your hard drive and reinstalls Windows 10 from scratch. This radical approach clears away all old data, programs, and system configurations, giving you a pristine, “like-new” operating system. This guide will walk you through every step of the process, from meticulous preparation to post-installation optimization, ensuring a smooth transition to a faster, more stable, and more secure digital environment. Embracing this fundamental tech procedure empowers you to reclaim control over your machine and unlock its full potential for productivity and performance.

The Compelling Reasons for a Fresh Start
Deciding to embark on a clean Windows 10 install isn’t a decision to be taken lightly, but the benefits often far outweigh the effort involved. It’s a proactive step towards optimizing your digital workspace, ensuring your machine keeps pace with your demands in an increasingly technology-driven world.
Reclaiming Performance and Speed
The most immediate and noticeable benefit of a clean install is the dramatic improvement in performance. Over months or years of use, Windows accumulates an incredible amount of digital clutter: temporary files, leftover registry entries from countless software installations and uninstallations, browser caches, and redundant system files. This digital detritus acts like a drag chute, slowing down boot times, application launches, and overall system responsiveness. A clean install wipes the slate clean, removing all this accumulated baggage and allowing your hardware to run at its peak efficiency, reminiscent of the day you first unboxed your computer.
Enhanced Stability and Reliability
Software conflicts, corrupted system files, and lingering malware can lead to frequent crashes, freezing, and unpredictable behavior. These issues can be incredibly frustrating, disrupting workflow and leading to data loss. By starting fresh, you eliminate these underlying problems. A clean Windows 10 installation provides a stable foundation, free from the accumulated errors and conflicts that often plague older, heavily used systems, significantly reducing the likelihood of unexpected system failures. This newfound reliability translates directly into enhanced productivity and less downtime.
Bolstered Security and Data Integrity
Even with robust antivirus software, systems can harbor subtle forms of malware or adware that are difficult to fully eradicate from a running system. A clean install ensures that any persistent threats, rootkits, or deeply embedded malicious software are completely wiped away, providing a truly secure foundation for your data and online activities. Starting with a fresh OS and immediately installing all security updates and trusted applications minimizes vulnerabilities from day one, offering peace of mind in an era where digital security is more critical than ever.
Eliminating Bloatware and Unwanted Software
Many new computers come pre-installed with a significant amount of “bloatware” – trial software, manufacturer utilities, and third-party applications that you may never use. These programs consume system resources, run in the background, and contribute to system slowdown. A clean install allows you to bypass all this unwanted software, giving you the power to install only the applications you genuinely need. This minimalist approach not only frees up valuable disk space but also reduces resource consumption, leading to a leaner, faster, and more efficient operating system tailored precisely to your requirements.
A Fresh Slate for Productivity
Beyond the technical benefits, a clean install offers a psychological refresh. It provides an opportunity to reorganize your digital life, rethink your software choices, and set up your system with an optimized workflow from the ground up. This fresh slate can inspire new levels of productivity, allowing you to create a personalized, efficient, and clutter-free digital workspace that truly supports your goals.
Meticulous Preparation: Your Foundation for Success
A successful clean Windows 10 install hinges entirely on thorough preparation. Skipping steps here can lead to lost data, driver headaches, or a frustrating installation process. Think of this phase as laying the groundwork for a solid, high-performing system.
Crucial Data Backup: Don’t Skip This Step!
This is arguably the most critical step. A clean install will erase everything on your primary drive. Assume nothing will survive. You must back up all personal files, documents, photos, videos, music, and any other data you consider valuable.
- What to Back Up:
- Personal Files: Documents, Pictures, Videos, Music folders.
- Desktop Files: Any shortcuts or files saved directly to your desktop.
- Browser Data: Bookmarks, saved passwords, browser extensions (export them if possible).
- Email Data: If you use a desktop email client (like Outlook), ensure you back up your PST/OST files.
- Application-Specific Data: Game saves, specialized software configurations, project files.
- Drivers: While you’ll download new ones, having a backup of existing, working drivers can be a lifesaver, especially for obscure hardware.
- Backup Methods:
- External Hard Drive/USB Drive: The simplest and often fastest method. Copy and paste your essential folders.
- Cloud Storage: Services like OneDrive, Google Drive, Dropbox, or iCloud allow you to sync your files online. Ensure everything is fully synced before proceeding.
- Network Attached Storage (NAS): If you have a home server or NAS, you can back up your files there.
- System Imaging Software: Tools like Macrium Reflect or Acronis True Image can create a complete image of your existing drive, offering a safety net if you need to revert. However, for a clean install, you typically won’t restore this image.
Verify Your Backup: After copying, disconnect your backup medium and try to access a few files to ensure they are intact and readable. A corrupted backup is as good as no backup.
Gathering Essential Resources
Before you wipe your drive, ensure you have access to everything you’ll need after the installation.
- Windows 10 Product Key:
- If your PC came with Windows 10 pre-installed, your license is likely embedded in the motherboard’s firmware (UEFI) and will automatically activate upon reinstall.
- If you purchased a retail key, it should be on a sticker or in your email confirmation.
- You can often retrieve your current key using tools or commands like
wmic path softwarelicensingservice get OA3xOriginalProductKeyin Command Prompt. - If your Windows 10 license is linked to your Microsoft account, it will also reactivate automatically.
- Device Drivers:
- Windows 10 has excellent built-in driver support, but it’s always best practice to download the latest drivers for critical components directly from your computer manufacturer’s website (e.g., Dell, HP, Lenovo, ASUS) or the component manufacturer’s website (e.g., NVIDIA, AMD, Intel). Focus on:
- Chipset Drivers: Crucial for motherboard functionality.
- Network/Wi-Fi Drivers: Essential for getting online immediately.
- Graphics Card Drivers: For optimal display performance and gaming.
- Audio Drivers: For sound functionality.
- Save these drivers to your backup drive or a separate USB drive.
- Windows 10 has excellent built-in driver support, but it’s always best practice to download the latest drivers for critical components directly from your computer manufacturer’s website (e.g., Dell, HP, Lenovo, ASUS) or the component manufacturer’s website (e.g., NVIDIA, AMD, Intel). Focus on:
- List of Essential Software: Make a list of all the programs you regularly use and will need to reinstall (e.g., web browser, office suite, antivirus, photo editor, communication tools). Having this list ready saves time and ensures you don’t forget anything vital.
Creating Bootable Windows 10 Installation Media
You’ll need a way to install Windows 10 onto your wiped drive, typically via a bootable USB flash drive.
-
Minimum Requirements: A USB flash drive with at least 8GB of storage.
-
Downloading the Windows 10 ISO:
- Navigate to the official Microsoft Windows 10 download page.
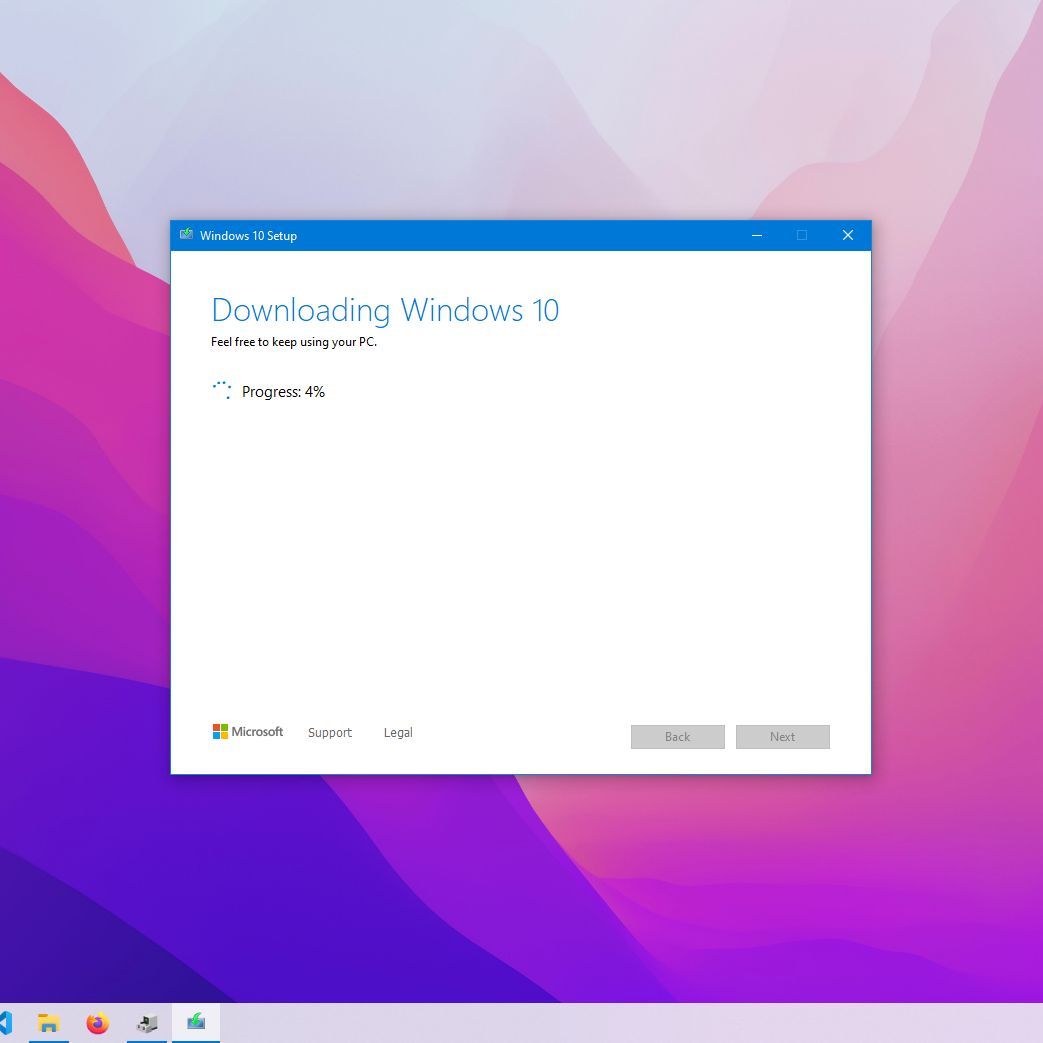
- Microsoft’s site will usually offer you their “Media Creation Tool.”
-
Using the Media Creation Tool (Recommended):
- Download and run the tool.
- Accept the license terms.
- Select “Create installation media (USB flash drive, DVD, or ISO file) for another PC.”
- Choose your language, edition (Windows 10), and architecture (64-bit is most common).
- Select “USB flash drive” and then choose your connected USB drive from the list.
- The tool will download the Windows 10 ISO and create the bootable drive. This process can take some time depending on your internet speed.
-
Alternative (Rufus for ISO): If you prefer to download the ISO separately and then use a third-party tool like Rufus, you can do that. Rufus offers more advanced options for bootable media creation.
The Clean Installation Process: A Step-by-Step Guide
With your backups secured and bootable media ready, you’re now prepared for the main event: installing Windows 10. This process involves navigating the setup wizard and making crucial decisions about disk partitioning.
Initiating the Boot Sequence
- Connect the USB Drive: Insert your bootable Windows 10 USB flash drive into an available USB port on your computer.
- Restart Your PC: Power on or restart your computer.
- Access BIOS/UEFI Settings: As your computer starts, you’ll need to repeatedly press a specific key to enter the BIOS or UEFI firmware settings, or to access a “Boot Menu.” Common keys include
F2,F10,F12, orDel. The exact key varies by manufacturer (check your computer’s manual or on-screen prompts during startup). - Change Boot Order: Once in the BIOS/UEFI settings, navigate to the “Boot” tab or section. You’ll need to change the boot order so that your computer attempts to boot from the USB drive before your internal hard drive. Move your USB drive to the top of the boot priority list.
- Save and Exit: Save your changes and exit the BIOS/UEFI. Your computer should now restart and boot from the USB drive. If successful, you’ll see the Windows setup logo.

Navigating the Windows Setup Wizard
- Initial Setup Screen: The first screen will ask you to select your language, time and currency format, and keyboard or input method. Make your selections and click “Next.”
- Install Now: Click the large “Install now” button.
- Product Key: You’ll be prompted to enter your Windows 10 product key.
- If your system’s license is embedded in the UEFI firmware or linked to your Microsoft account, you can click “I don’t have a product key” and Windows will activate automatically after installation when connected to the internet.
- If you have a physical product key, enter it now.
- License Terms: Read and accept the Microsoft Software License Terms, then click “Next.”
- Choose Installation Type: This is a crucial step for a clean install. Select “Custom: Install Windows only (advanced).” Do NOT choose “Upgrade,” as this will preserve your old files and defeat the purpose of a clean install.
Disk Partitioning and Formatting
This is the most critical part of the clean installation, where you’ll erase your old operating system and data. Proceed with extreme caution.
- Identify Your Drive: You’ll see a list of drives and partitions. It’s vital to correctly identify the drive where you want to install Windows. This is usually your primary SSD or HDD (e.g., “Drive 0”). If you have multiple drives, ensure you’re selecting the correct one to avoid accidentally erasing data from a storage drive.
- Delete Existing Partitions: For a truly clean install, you need to delete all existing partitions on the target drive.
- Select each partition associated with your old Windows installation (e.g., System Reserved, Primary, Recovery partitions on “Drive 0”).
- Click “Delete.” You will receive a warning about data loss. Confirm by clicking “OK.”
- Repeat this for all partitions on your target drive until it shows as “Unallocated Space.” This ensures all remnants of the old OS and any hidden partitions are removed.
- WARNING: Deleting a partition irrevocably erases all data on it. Double-check you are deleting partitions only from the intended drive.
- Create New Partition (Optional, but Recommended):
- Select the “Unallocated Space” on your target drive.
- Click “New” to create a new partition. Windows will typically suggest using the maximum available space, which is usually fine. Click “Apply.” Windows will then create several small system partitions in addition to your main C: drive.
- Select Partition for Installation: Select the largest primary partition (usually named “Drive 0 Partition 4” or similar) that Windows just created for your main OS, and click “Next.”
The Core Installation
Windows will now begin copying files and installing the operating system. This process is largely automated:
- Copying Files: Windows will copy installation files to your drive.
- Installing Features: It will then install features, updates, and perform several restarts.
- Hands-Off Period: Let the computer do its work. It will restart multiple times and may appear to be stuck at certain points, but this is normal. Do not turn off your computer during this phase.
Initial Windows 10 Setup
After the main installation is complete and your computer restarts for the final time, you’ll be guided through the initial Windows 10 setup experience:
- Region and Keyboard: Select your region and keyboard layout.
- Network Connection: Connect to your Wi-Fi or Ethernet network.
- Account Setup:
- You’ll be prompted to sign in with a Microsoft account. This is recommended for features like cloud sync and easier activation.
- If you prefer not to use a Microsoft account, you can usually select “Offline account” or “Domain join instead” (depending on the version) to create a local user account.
- Privacy Settings: Review the privacy settings carefully (Location, Diagnostic data, Tailored experiences, etc.) and adjust them to your preference.
- Cortana Setup: Choose whether to enable Cortana as your digital assistant.
Once these steps are complete, you’ll be greeted by your brand-new Windows 10 desktop!
Post-Installation Essentials: Optimizing Your Fresh System
Getting to the desktop is just the beginning. To truly unlock the potential of your clean install and ensure a secure, high-performing system, there are several crucial steps to take immediately.
Driver Installation and Verification
Even though Windows 10 has excellent built-in driver support, installing the latest manufacturer-specific drivers is critical for optimal performance, stability, and hardware functionality.
- Start with Network Drivers: If Windows didn’t automatically install your Wi-Fi or Ethernet drivers, you won’t be able to get online. Use the drivers you downloaded in the preparation phase. Install them from your USB drive.
- Install Essential Drivers: Proceed to install your chipset, graphics card, audio, and any other critical drivers you downloaded. Always restart your computer when prompted after a driver installation.
- Verify in Device Manager: To check if all your hardware is recognized and has the correct drivers, open Device Manager (Right-click Start button > Device Manager). Look for any devices with yellow exclamation marks, which indicate missing or problematic drivers.
Running Windows Updates
Once your internet connection is established and core drivers are in place, the very next step should be to update Windows.
- Check for Updates: Go to
Settings > Update & Security > Windows Update. Click “Check for updates.” - Install All Available Updates: Windows will download and install all the latest security patches, feature improvements, and additional drivers. This process might involve multiple restarts. It’s crucial to repeat this step until no more updates are found, ensuring your system is fully patched against known vulnerabilities.
Reinstalling Your Essential Software
Refer to the list of essential software you created during preparation.
- Download from Official Sources: Always download your applications from their official websites or trusted app stores. Avoid third-party download sites that might bundle unwanted software.
- Install Gradually: Install your most critical applications first (e.g., your preferred web browser, office suite, security software).
- Customization: Take the opportunity to customize each application’s settings to your liking, establishing an efficient workflow from the start.
Restoring Your Personal Data
Now is the time to bring back your precious files.
- Connect Backup Drive: Connect your external hard drive or access your cloud storage.
- Copy Files Back: Copy your documents, photos, videos, music, and other personal files from your backup location to their appropriate folders on your newly installed Windows 10 system.
- Organize: Use this opportunity to reorganize your files and folders, creating a more streamlined and accessible structure.
Final System Activation (If Not Already)
While many modern Windows 10 installations will automatically activate, it’s good practice to verify.
- Check Activation Status: Go to
Settings > Update & Security > Activation. - Troubleshoot if Needed: If Windows isn’t activated, and you entered your product key, ensure you’re connected to the internet. If it’s linked to your Microsoft account, ensure you’re signed in with that account. Windows has an activation troubleshooter that can often resolve issues.
Conclusion
Performing a clean Windows 10 install is a significant undertaking, but the rewards are substantial. By meticulously preparing, carefully executing the installation, and thoroughly optimizing your new system, you will transform your computing experience. You’ll gain a system that boots faster, runs applications more smoothly, offers greater stability, and provides enhanced security – a true testament to the power of a fresh start.
This process, while requiring a commitment of time and attention to detail, ultimately empowers you with a deeply satisfying sense of control over your technology. You’re not just reinstalling an operating system; you’re rejuvenating your entire digital workspace, setting the stage for increased productivity, fewer frustrations, and a more enjoyable computing journey. Embrace the benefits of a lean, mean, and perfectly tuned machine, ready to tackle whatever the digital world throws your way.
aViewFromTheCave is a participant in the Amazon Services LLC Associates Program, an affiliate advertising program designed to provide a means for sites to earn advertising fees by advertising and linking to Amazon.com. Amazon, the Amazon logo, AmazonSupply, and the AmazonSupply logo are trademarks of Amazon.com, Inc. or its affiliates. As an Amazon Associate we earn affiliate commissions from qualifying purchases.