In the ever-evolving landscape of technology, mastering essential tools can significantly enhance your productivity and unlock new capabilities. For anyone venturing into Python development or utilizing Python-based applications on Windows, understanding and installing pip is a fundamental step. pip, the package installer for Python, is the de facto standard for managing third-party libraries and modules. Whether you’re a seasoned developer looking to set up a new machine, a student embarking on your coding journey, or a professional leveraging Python for data analysis, AI, or web development, this guide will walk you through the process of installing pip on your Windows system, ensuring you’re equipped to harness the vast Python ecosystem.
Understanding Pip and Its Importance in the Python Ecosystem
Before diving into the installation process, it’s crucial to grasp what pip is and why it’s such an indispensable tool. At its core, pip is a command-line utility that simplifies the process of installing, upgrading, and uninstalling Python packages. These packages are pre-written blocks of code, often referred to as libraries or modules, that extend Python’s functionality. Think of them as ready-made tools that you can readily incorporate into your projects without having to build everything from scratch.
The Python Package Index (PyPI), often pronounced “pipi,” is the official repository for third-party Python packages. pip seamlessly connects to PyPI, allowing you to search for, download, and install thousands of libraries covering a vast array of use cases. These range from web frameworks like Django and Flask, to data science libraries like NumPy and Pandas, to machine learning tools like TensorFlow and PyTorch, and much more.
Why is Pip Essential for Windows Users?
For Windows users, installing pip is often the gateway to a more powerful and flexible Python development experience. While Python itself provides a robust foundation, the true strength of the language lies in its extensive and active community, which continuously contributes an incredible number of reusable packages. Without pip, manually managing these dependencies would be a laborious and error-prone task, involving downloading package archives, resolving dependencies yourself, and meticulously placing files in the correct locations.
pip automates all of this. It handles dependency resolution – meaning if a package you want to install requires other packages to function, pip will automatically identify and install those dependencies as well. This significantly streamlines the development workflow, allowing you to focus on building your application rather than wrestling with package management.
The significance of pip extends beyond just installing new libraries. It also facilitates:
- Upgrading Packages: As developers release newer, more stable, or feature-rich versions of their libraries,
pipallows you to easily update your installed packages to the latest versions. - Uninstalling Packages: When a package is no longer needed,
pipcan cleanly remove it from your system, freeing up disk space and preventing potential conflicts with other libraries. - Managing Virtual Environments: While not directly an
pipfunction,pipis intimately tied to Python’s virtual environment tools (likevenvandvirtualenv). Virtual environments create isolated Python installations, allowing you to manage project-specific dependencies without affecting your global Python installation or other projects. This is crucial for avoiding version conflicts and ensuring project reproducibility.
In essence, pip is the key that unlocks the vast potential of the Python ecosystem for Windows users, making it an indispensable tool for anyone serious about Python development or leveraging Python-based applications.
Installing Pip on Windows: Methods and Best Practices
Installing pip on Windows is generally straightforward, especially with modern Python distributions. Historically, there were different methods, but the current recommended approach is significantly more integrated and user-friendly.
The Recommended Method: Installing Python with Pip Included
The most common and recommended way to get pip on your Windows machine is by installing Python itself from the official Python website. The Python installer for Windows now includes pip by default.
Step 1: Download the Latest Python Installer
- Navigate to the official Python downloads page for Windows: https://www.python.org/downloads/windows/
- Look for the latest stable release of Python. You’ll typically see options for “Latest Python 3 Release” or specific version numbers. Download the executable installer for your system architecture (usually “Windows installer (64-bit)” for most modern computers).
Step 2: Run the Python Installer
- Locate the downloaded
.exefile and double-click it to run the installer. - Crucially, on the first screen of the installer, make sure to check the box that says “Add Python X.X to PATH” (where X.X represents the Python version). This step is vital for being able to run
pipandpythoncommands from any command prompt or PowerShell window. If you miss this, you’ll have to add it manually later, which is more complex. - Click “Install Now.” This will perform a default installation, which includes
pipand other essential components. - The installer will proceed, and once it’s finished, you’ll see a “Setup was successful” message. You can then close the installer.
Step 3: Verify the Installation
To confirm that pip has been installed correctly and is accessible:
-
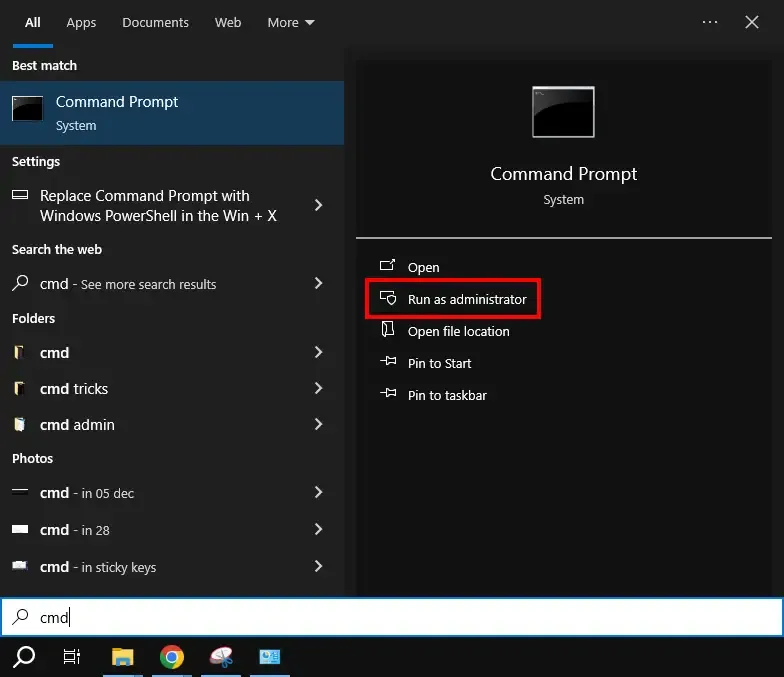
Open the Command Prompt or PowerShell. You can do this by typing
cmdorpowershellin the Windows search bar and pressing Enter. -
In the terminal window, type the following command and press Enter:
pip --versionIf
pipis installed correctly and added to your PATH, you should see output similar to this (the version numbers will vary):pip 23.2.1 from c:usersyourusernameappdatalocalprogramspythonpython311libsite-packagespip (python 3.11)You can also verify the Python installation by typing:
python --versionThis should output the Python version you installed.
Alternative Method (Less Common for New Installations): Using ensurepip
In older Python versions, or in specific scenarios where Python might have been installed without pip, you could use the ensurepip module to install it. However, for most users installing Python from python.org today, this step is unnecessary.
If, for some reason, pip --version gives you an error, you can try running ensurepip:
-
Open Command Prompt or PowerShell.
-
Run the following command:
python -m ensurepip --upgradeThis command tells Python to run the
ensurepipmodule with the instruction to install or upgradepip. After running this, try verifying thepipinstallation again withpip --version.
Updating Pip
Even if pip is installed, it’s good practice to keep it updated to the latest version to benefit from bug fixes, security patches, and new features. You can update pip using pip itself:
-
Open Command Prompt or PowerShell.
-
Run the following command:
python -m pip install --upgrade pipThis command uses Python to run the
pipmodule and instructs it to install the latest version ofpipfrom PyPI.
By following these steps, you should have a fully functional pip installation on your Windows system, ready to manage your Python packages.
Working with Pip: Essential Commands and Tips
Once pip is installed, you’ll want to become familiar with its basic commands to effectively manage your Python packages. This section covers the most frequently used commands and provides some best practices.
Installing Packages
The most common use of pip is to install packages. The basic syntax is:
pip install package_name
For example, to install the popular NumPy library for numerical operations:
pip install numpy

If you want to install a specific version of a package, you can use the == operator:
pip install package_name==1.2.3
To install a version greater than or equal to a specific version:
pip install package_name>=1.2.3
To install a version less than or equal to a specific version:
pip install package_name<=1.2.3
You can also install multiple packages at once:
pip install package1 package2 package3
Listing Installed Packages
To see all the packages currently installed in your Python environment, use the list command:
pip list
This will display a list of package names and their installed versions.
Uninstalling Packages
When you no longer need a package, you can uninstall it using the uninstall command:
pip uninstall package_name
pip will prompt you to confirm the uninstallation. You can bypass the confirmation by adding the -y flag:
pip uninstall -y package_name
Freezing Requirements: Creating a requirements.txt File
For any project, it’s crucial to document its dependencies so that others (or yourself in the future) can easily set up the same environment. pip helps with this through the freeze command, which generates a requirements.txt file.
To create this file in your current project directory:
pip freeze > requirements.txt
This command will list all installed packages and their versions and redirect the output to a file named requirements.txt.
Installing Packages from a requirements.txt File
If you’ve obtained a project that includes a requirements.txt file, you can install all the necessary dependencies with a single command:
pip install -r requirements.txt
This is an incredibly powerful command for setting up development environments quickly and ensuring consistency.
Best Practices for Pip Usage
- Use Virtual Environments: As mentioned earlier, always use virtual environments for your Python projects. This isolates dependencies and prevents conflicts between projects. You can create a virtual environment using Python’s built-in
venvmodule:
bash

python -m venv myenv  # Creates a virtual environment named 'myenv'
Then, activate it:- Windows:
.myenvScriptsactivate - Linux/macOS:
source myenv/bin/activate
Once activated,pip installcommands will only affect the packages within that virtual environment.
- Windows:
- Keep Pip Updated: Regularly run
python -m pip install --upgrade pipto ensure you’re using the latest version. - Check for Security Vulnerabilities: Be aware that not all packages are created equal. For critical applications, consider using tools that scan your dependencies for known security vulnerabilities.
- Use Specific Versions: When creating
requirements.txtfor reproducible builds, it’s generally best to pin to specific versions (package_name==1.2.3) rather than using broad constraints (>=or<) to avoid unexpected breakages.
Mastering these pip commands and best practices will make your Python development experience on Windows significantly smoother and more professional.
Troubleshooting Common Pip Installation and Usage Issues
While installing pip on Windows is typically straightforward, you might occasionally encounter issues. Here are some common problems and their solutions.
“pip” is not recognized as an internal or external command, operable program or batch file.
This is the most frequent error when pip isn’t found. It almost always means that Python and its Scripts directory (where pip.exe resides) are not added to your system’s PATH environment variable.
Solution:
- Re-run the Python Installer: The easiest way is to uninstall Python and reinstall it, making sure to check the “Add Python X.X to PATH” box during the installation process.
- Manually Add to PATH: If you prefer not to reinstall, you can manually add Python to your PATH:
- Find your Python installation directory (e.g.,
C:UsersYourUsernameAppDataLocalProgramsPythonPython311). - Find the
Scriptssubdirectory within your Python installation (e.g.,C:UsersYourUsernameAppDataLocalProgramsPythonPython311Scripts). - Search for “environment variables” in the Windows search bar and select “Edit the system environment variables.”
- In the System Properties window, click the “Environment Variables…” button.
- Under “System variables” (or “User variables” if you only want it for your user), find the
Pathvariable, select it, and click “Edit…”. - Click “New” and paste the full path to your Python installation directory (e.g.,
C:UsersYourUsernameAppDataLocalProgramsPythonPython311). - Click “New” again and paste the full path to your Python
Scriptsdirectory (e.g.,C:UsersYourUsernameAppDataLocalProgramsPythonPython311Scripts). - Click “OK” on all open windows to save the changes.
- Important: Close and reopen any Command Prompt or PowerShell windows for the changes to take effect.
- Find your Python installation directory (e.g.,
SSL Certificate Errors When Installing Packages
Sometimes, pip might fail to install packages due to SSL certificate verification issues. This can happen if your system’s certificates are outdated or if you are behind a restrictive network.
Solution:
- Upgrade Pip and Certificates: A common fix is to ensure
pipand its certificate bundle are up-to-date. Try upgradingpipfirst:
bash

python -m pip install --upgrade pip
- Use
--trusted-host(Use with Caution): As a temporary workaround, you can tellpipto trust a specific host, but this is less secure as it bypasses certificate checks. For example, to trust PyPI:
bash

pip install --trusted-host pypi.org --trusted-host files.pythonhosted.org package_name
Note: This should be a last resort and not used regularly, especially in production environments.
Permission Errors When Installing Packages
You might encounter permission errors if you are trying to install packages globally (into your system’s Python installation) without administrator privileges, or if the Python installation directory itself has restricted permissions.
Solution:
- Use Virtual Environments: This is the most robust solution. Installing packages within a virtual environment creates a user-writable space, avoiding the need for administrator rights for package installations.
- Run as Administrator (If Absolutely Necessary): If you are certain you need to install globally and virtual environments are not an option (though highly discouraged), you can try running your Command Prompt or PowerShell as an administrator. Right-click on the Command Prompt/PowerShell shortcut and select “Run as administrator.”
- Check Folder Permissions: Ensure that the user account you are using has write permissions to the Python installation directory.
Pip is Installed, But Not for the Correct Python Version
If you have multiple Python versions installed on your system, typing pip might invoke the pip associated with a different Python installation than the one you intend to use.
Solution:
- Use
python -m pip: The safest way to ensure you are using the correctpipis to invoke it through the specific Python interpreter you want to use. For example, if you want to install a package for Python 3.11, use:
bash

python3.11 -m pip install package_name
Or, if yourpythoncommand defaults to the version you want:
bash

python -m pip install package_name
This explicitly tells Python to run thepipmodule that belongs to that specific Python interpreter. - Check PATH Order: Ensure that the PATH entry for your desired Python installation’s
Scriptsdirectory appears before any other Python installations in your system’s PATH variable.
By understanding these common issues and their solutions, you can efficiently resolve most problems you might encounter while installing and using pip on Windows, ensuring a smooth and productive development experience.