
In the rapidly evolving landscape of digital technology, maintaining peak performance for your computing hardware is paramount, especially when it comes to graphics processing units (GPUs). NVIDIA drivers, the essential software that facilitates communication between your operating system and your NVIDIA graphics card, are crucial for everything from high-fidelity gaming and professional content creation to smooth everyday computing. Neglecting these updates can lead to a myriad of issues, including performance bottlenecks, software incompatibilities, security vulnerabilities, and even system instability.
This guide delves deep into the necessity of keeping your NVIDIA drivers current, providing a detailed, step-by-step walkthrough of the upgrade process, and offering insights into best practices for ensuring a seamless and optimized experience. Whether you’re a hardcore gamer chasing the highest frame rates, a creative professional demanding flawless rendering, or simply someone who wants their system to run at its best, understanding how to effectively manage your NVIDIA drivers is an invaluable skill. We’ll explore various methods, from the convenience of NVIDIA’s dedicated software to the precision of manual installations, empowering you to take full control of your system’s graphics performance.
Understanding the Importance of Driver Upgrades
Updating your NVIDIA drivers might seem like a minor maintenance task, but its impact on your system’s performance, stability, and security is significant. These updates are far more than simple bug fixes; they are a continuous stream of optimizations and enhancements that keep your hardware running efficiently with the latest software and games.
Enhancing Performance and Stability
One of the primary reasons to upgrade your drivers is to unlock the full potential of your graphics card. NVIDIA frequently releases Game Ready Drivers and Studio Drivers, specifically optimized for new game titles or professional creative applications. These drivers can deliver substantial performance improvements, leading to higher frame rates, reduced latency, and a smoother overall experience. Beyond raw performance, driver updates often address stability issues, fixing glitches, crashes, and freezes that might occur in specific applications or operating system environments. An outdated driver can be a significant bottleneck, preventing your powerful GPU from operating at its intended capacity.
Introducing New Features and Technologies
NVIDIA is constantly innovating, introducing new technologies like DLSS (Deep Learning Super Sampling), Reflex, Ray Tracing advancements, and new features within their control panel. These cutting-edge features often require specific driver versions to function correctly or to be fully optimized. By keeping your drivers updated, you ensure compatibility with these advancements, allowing you to leverage the latest graphical innovations and experience games and applications as their developers intended. From improved image quality to revolutionary rendering techniques, new driver features can transform your computing experience.
Patching Security Vulnerabilities
Like any complex software, graphics drivers can contain security vulnerabilities. NVIDIA regularly identifies and patches these potential weaknesses through driver updates. An outdated driver could expose your system to exploits, making it susceptible to malware or unauthorized access. Regular updates are therefore a critical component of maintaining a secure computing environment, safeguarding your personal data and system integrity from malicious threats. It’s not just about performance; it’s also about peace of mind.
Preparing for a Seamless Driver Update
Before embarking on the driver upgrade process, a few preparatory steps can help ensure a smooth, error-free installation and provide a safety net should anything go awry. These precautions minimize potential downtime and protect your system.
Identifying Your NVIDIA GPU and Current Driver Version
The first crucial step is to know exactly which NVIDIA graphics card model you have. This information is vital for downloading the correct drivers. You can find this by:
- Checking your system’s specifications: If you have a pre-built PC, the manufacturer’s website or documentation might list it.
- Using NVIDIA GeForce Experience: Open the application, go to the “Drivers” tab, and it will typically display your GPU model and the installed driver version.
- Using Windows Device Manager: Right-click the Start button, select “Device Manager,” expand “Display adapters,” and your NVIDIA GPU will be listed.
- Using System Information: Type
msinfo32in the Run dialog (Windows Key + R) and look under “Components > Display.”
Knowing your current driver version allows you to confirm if an update is indeed available and helps with troubleshooting if issues arise after the update.
Creating a System Restore Point
A system restore point acts as a snapshot of your operating system’s configuration at a specific time. If the driver update causes unexpected problems, such as graphical glitches, system instability, or boot issues, you can revert your system to this restore point, effectively undoing the changes. This is a critical safety measure that provides immense peace of mind.
- To create a restore point: Search for “Create a restore point” in the Windows search bar, open the System Properties window, navigate to the “System Protection” tab, select your main drive (usually C:), click “Create,” and give your restore point a descriptive name.
Backing Up Important Data (Optional but Recommended)
While driver updates rarely affect personal files, it’s always good practice to have a recent backup of your most important documents, photos, and projects. This is a general cybersecurity recommendation, not just for driver updates, but it adds an extra layer of security against any unforeseen system failures, however rare they may be. External hard drives or cloud storage services are excellent options for this.
Closing Unnecessary Applications and Disabling Antivirus
Before initiating the driver installation, close all open applications, especially games and graphic-intensive software. This ensures that no programs are actively using the GPU or its drivers during the update process, which could lead to conflicts or an incomplete installation. Temporarily disabling your antivirus software can also prevent it from flagging driver files as suspicious and interfering with the installation process, though this step should be done with caution and re-enabled immediately after the update.
Step-by-Step Guide to Updating Your NVIDIA Drivers
NVIDIA offers several methods for updating your graphics drivers, ranging from automated convenience to manual precision. Each method has its advantages, catering to different user preferences and technical proficiencies.
Method 1: Using NVIDIA GeForce Experience (Recommended for Most Users)
NVIDIA GeForce Experience is a comprehensive companion application for NVIDIA graphics cards, offering game optimization, shadowplay recording, and, crucially, simplified driver management. This is the easiest and most recommended method for the vast majority of users.
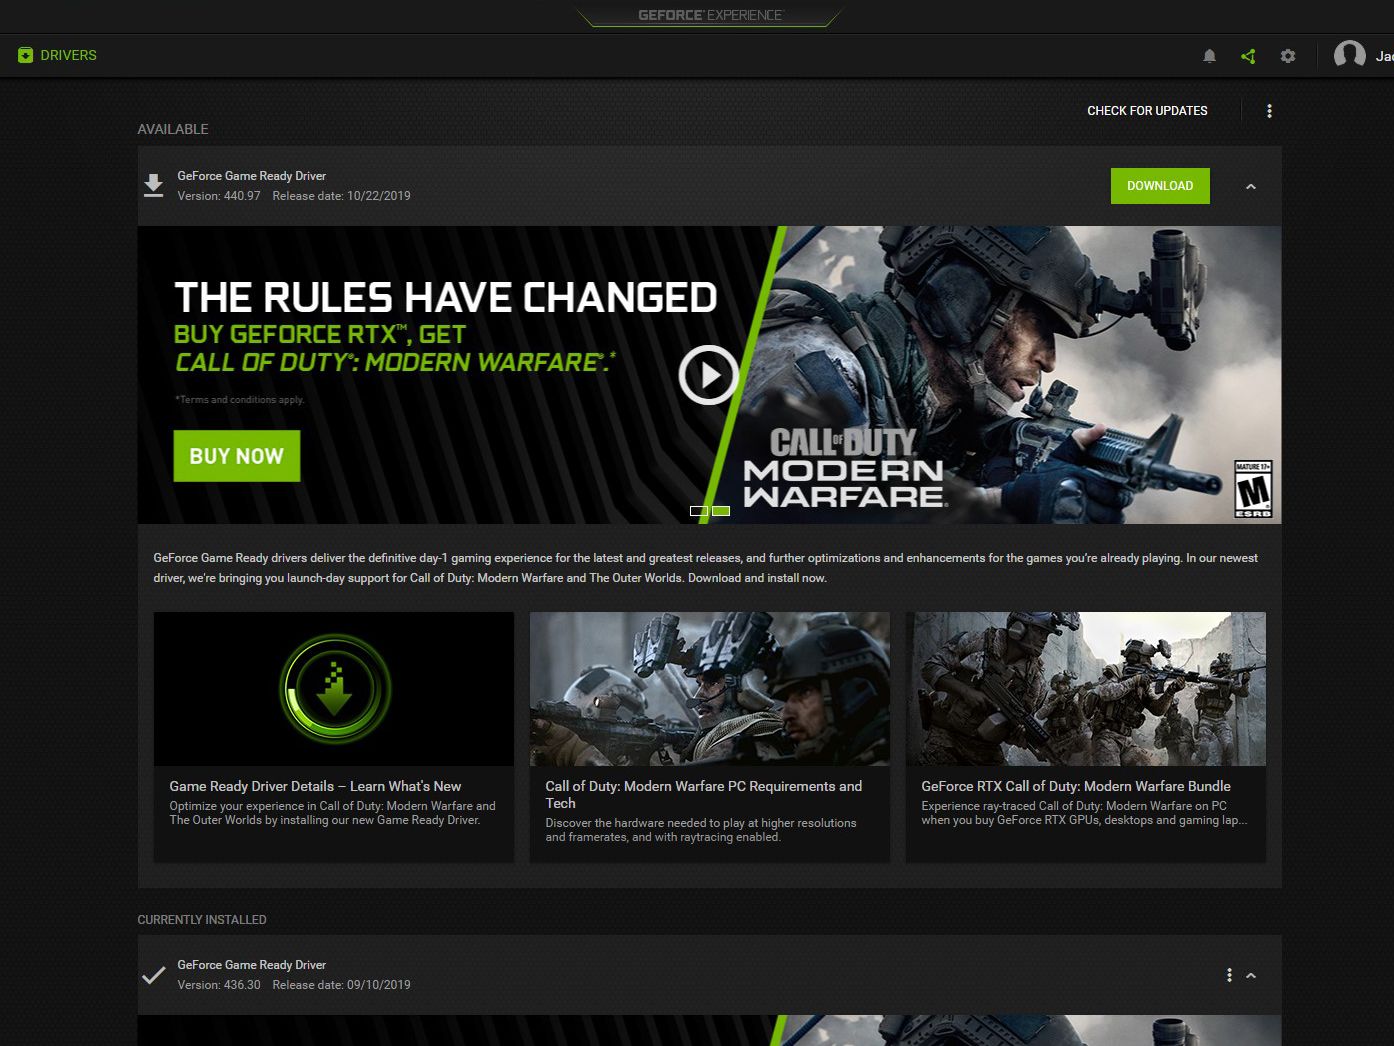
- Launch GeForce Experience: If you don’t have it installed, you can download it from NVIDIA’s official website.
- Navigate to the Drivers Tab: Once open, click on the “Drivers” tab at the top of the window.
- Check for Updates: GeForce Experience will automatically check for available driver updates. If a new version is found, it will display a notification.
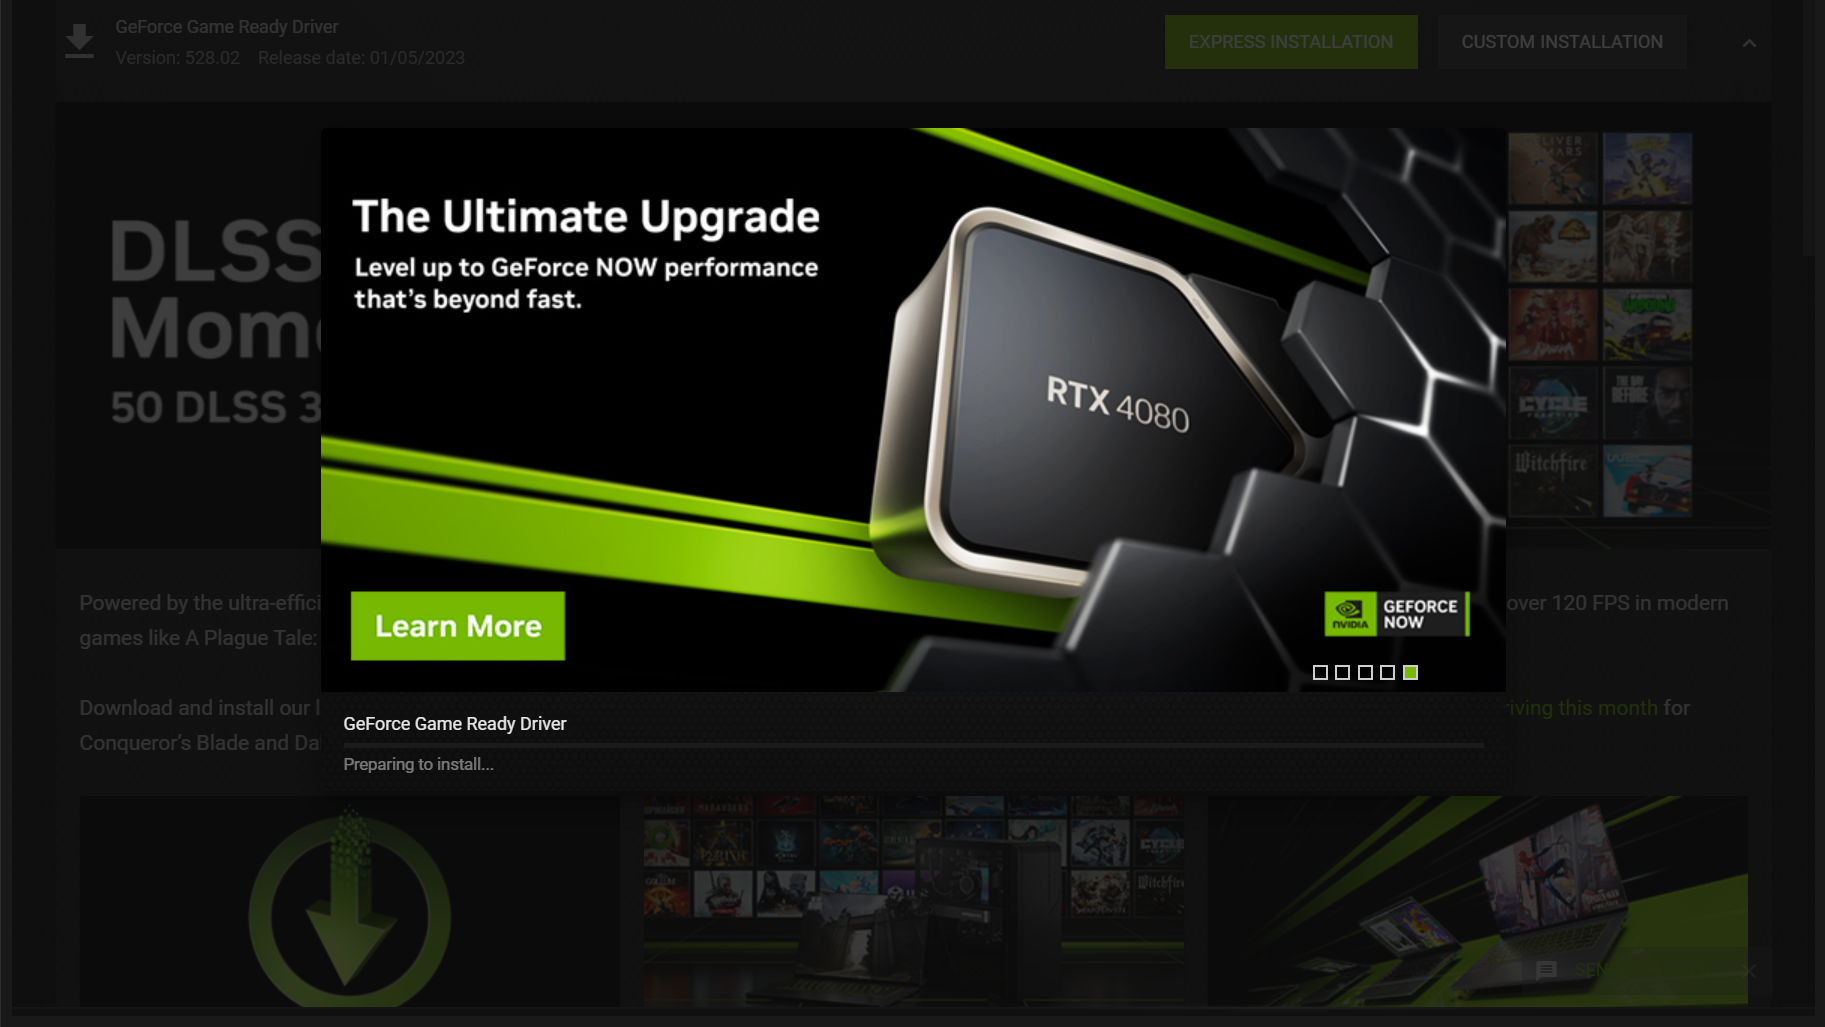
- Download and Install: Click on the “Download” button for the latest driver. Once downloaded, you’ll be presented with two installation options:
- Express Installation: This is the default and recommended option. It automatically installs all necessary components without user input.
- Custom Installation: This allows you to select specific components to install (e.g., only the graphics driver, without GeForce Experience or PhysX). This is also where you can check the “Perform a clean installation” box, which we’ll discuss below.
- Follow On-Screen Prompts: The installer will guide you through the rest of the process. Your screen may flicker or go black momentarily during the installation, which is normal.
- Restart Your PC (If Prompted): Although not always required, a restart ensures all new driver components are fully integrated into the system.
Method 2: Manual Download from NVIDIA’s Official Website
For users who prefer more control, wish to perform a clean installation without GeForce Experience, or troubleshoot specific issues, downloading drivers directly from NVIDIA’s website is the preferred method.
- Visit the NVIDIA Driver Download Page: Open your web browser and go to
www.nvidia.com/drivers. - Select Your Product: Use the dropdown menus to accurately select:
- Product Type: (e.g., GeForce, Quadro, NVS)
- Product Series: (e.g., GeForce RTX 40 Series, GeForce GTX 16 Series)
- Product: (Your specific GPU model, e.g., RTX 4090, GTX 1660 Super)
- Operating System: (e.g., Windows 11, Windows 10 64-bit)
- Download Type: (Game Ready Driver (GRD) for gaming or Studio Driver (SD) for creative professionals).
- Search and Download: Click “Search,” then “Download” for the latest recommended driver.
- Run the Installer: Once the
.exefile is downloaded, double-click it to start the installation process. - Accept License Agreement: Read and accept the NVIDIA Software License Agreement.
- Choose Installation Option:
- Express (Recommended): Similar to GeForce Experience, this is an automated process.
- Custom (Advanced): This option is crucial if you want to perform a clean installation. Select “Custom (Advanced),” click “Next,” then on the next screen, check the “Perform a clean installation” box. This option uninstalls previous driver components before installing the new ones, preventing potential conflicts.
- Complete Installation: Follow the remaining on-screen prompts. Your screen may flicker.
- Restart Your PC: Always restart your computer after a manual driver installation, especially after a clean install.
Method 3: Updating via Windows Device Manager (Least Recommended for Performance)
While Windows Device Manager can update drivers, it is generally the least recommended method for NVIDIA graphics cards, especially for gamers or creative professionals. It often provides only generic or slightly older drivers, lacking the specific optimizations found in NVIDIA’s proprietary packages.
- Open Device Manager: Right-click the Start button and select “Device Manager.”
- Expand Display Adapters: Locate and expand the “Display adapters” section.
- Right-Click NVIDIA GPU: Right-click on your NVIDIA graphics card (e.g., NVIDIA GeForce RTX 4090).
- Select “Update driver”: Choose this option from the context menu.
- Search Automatically: Select “Search automatically for updated driver software.” Windows will attempt to find a driver online or locally.
- Install: If a newer driver is found, Windows will install it. However, as noted, this often isn’t the latest or most optimized NVIDIA-specific driver.
Clean Installation vs. Express Installation: When and Why?
- Express Installation: This is the default and quickest option. It overwrites existing driver files with new ones. It’s usually fine for routine updates and if you haven’t experienced any issues.
- Clean Installation: This option completely removes all previous NVIDIA driver components (including profiles, settings, and registry entries) before installing the new ones. It’s highly recommended in several scenarios:
- Major driver version upgrades: Moving from a significantly older driver version to a new one.
- Troubleshooting issues: If you’re experiencing graphical glitches, crashes, or performance problems, a clean install can often resolve conflicts caused by corrupted or incompatible leftover driver files.
- Upgrading your graphics card: Essential when switching from an AMD GPU to an NVIDIA GPU, or even from one NVIDIA card to another (though less critical in the latter case if staying within the same generation).
- Preventative maintenance: Performing a clean install periodically can help maintain system health.
You can perform a clean installation either through the custom option in the NVIDIA installer (Method 2) or by using a third-party utility like Display Driver Uninstaller (DDU) for an even more thorough removal before running the new driver installer.
Post-Installation Verification and Troubleshooting
After the driver update is complete, it’s essential to verify that the installation was successful and to know how to address any potential issues that might arise.
Verifying Successful Installation
- Check Driver Version:
- NVIDIA Control Panel: Right-click on your desktop, select “NVIDIA Control Panel,” click “Help” in the menu bar, then “System Information.” The driver version will be listed.
- GeForce Experience: Go to the “Drivers” tab, and it should display the newly installed version.
- Device Manager: Right-click your NVIDIA GPU, select “Properties,” then the “Driver” tab.
Ensure the version number matches the one you downloaded.
- Test Graphics Performance: Launch a game or a graphics-intensive application you frequently use. Check for smooth performance, absence of visual artifacts, and overall stability. If you noted FPS benchmarks before the update, compare them now.
Common Troubleshooting Steps
Despite careful preparation, issues can sometimes occur. Here are some common problems and their solutions:
- Black Screen or No Display:
- Wait: Sometimes the screen goes black for longer than expected. Give it a few minutes.
- Force Restart: If it persists, force restart your PC. Windows might revert to a basic display driver.
- Boot into Safe Mode: If you can’t get a display, restart your PC and repeatedly press F8 or Shift+F8 (or refer to your PC’s specific method) to enter Safe Mode. In Safe Mode, you can use DDU to uninstall the problematic driver and then try a fresh installation.
- Graphical Glitches or Artifacts:
- Clean Installation: This is often the solution. Re-run the installer and choose the “Custom (Advanced)” option with “Perform a clean installation” checked.
- Roll Back Driver: In Device Manager, right-click your GPU, go to “Properties,” then the “Driver” tab, and click “Roll Back Driver.” This reverts to the previously installed driver.
- Check GPU Temperature: Ensure your GPU isn’t overheating, which can cause artifacts. Use monitoring software like MSI Afterburner.
- Performance Issues (Worse FPS):
- Roll Back Driver: The new driver might have an unforeseen bug for your specific hardware or software combination. Rolling back to the previous stable version is a quick fix.
- Reinstall with Clean Option: A corrupted installation might be the culprit.
- Check NVIDIA Control Panel Settings: Ensure your preferred settings (e.g., maximum performance power management mode, correct scaling) are still active. Driver updates can sometimes reset these.
- Driver Installation Failure:
- Disable Antivirus Temporarily: Re-attempt installation with your antivirus disabled.
- Run as Administrator: Ensure you’re running the installer as an administrator.
- Check System Requirements: Confirm your GPU and OS are compatible with the driver version.
- Download Again: The downloaded file might be corrupted. Download it again.
Maintaining Optimal Performance: Best Practices
Upgrading drivers is not a one-time event but an ongoing process. Adopting certain best practices can help you maintain an optimally performing and stable system in the long run.
Regular Driver Checks
Establish a routine for checking driver updates. For most users, checking once a month or whenever a major new game or application is released is sufficient. GeForce Experience can automate notifications, making this process effortless. Professional users relying on Studio Drivers might prefer less frequent, more stable updates.
Monitoring System Performance and Temperature
Tools like MSI Afterburner, HWMonitor, or the built-in Windows Task Manager can help you keep an eye on your GPU’s performance, clock speeds, and temperature. Unusual spikes in temperature or drops in performance after an update could indicate an issue. Regular monitoring helps in early detection of potential hardware or software conflicts.
Keeping Your Operating System Updated
Graphics drivers are deeply integrated with the operating system. Ensure your Windows installation is always up-to-date with the latest patches and feature updates. OS updates often include critical bug fixes and improvements that can affect how your drivers interact with the system. An outdated OS can sometimes lead to driver installation failures or performance issues, even with the latest NVIDIA drivers.

Understanding Driver Types (Game Ready vs. Studio)
NVIDIA offers two main types of drivers:
- Game Ready Drivers (GRD): Optimized for the latest games, often released in conjunction with new game titles to provide the best possible day-one performance and stability. Most gamers should use GRDs.
- Studio Drivers (SD): Designed for creative professionals using applications like Adobe Creative Suite, Blender, DaVinci Resolve, etc. These drivers prioritize stability and performance in professional workflows, undergoing extensive testing with these applications. Creative professionals should generally opt for SDs.
Knowing which driver type suits your usage pattern ensures you’re getting the most relevant optimizations for your specific needs.
In conclusion, regularly upgrading your NVIDIA drivers is a fundamental aspect of maintaining a high-performance, stable, and secure computing environment. By following the steps outlined in this guide, understanding the different installation methods, and adopting proactive maintenance practices, you can ensure your NVIDIA graphics card consistently delivers its best, allowing you to fully enjoy the latest games, create stunning content, and leverage cutting-edge graphical technologies without compromise.
aViewFromTheCave is a participant in the Amazon Services LLC Associates Program, an affiliate advertising program designed to provide a means for sites to earn advertising fees by advertising and linking to Amazon.com. Amazon, the Amazon logo, AmazonSupply, and the AmazonSupply logo are trademarks of Amazon.com, Inc. or its affiliates. As an Amazon Associate we earn affiliate commissions from qualifying purchases.