
In the ever-evolving landscape of computing, the graphics processing unit (GPU) stands as a cornerstone of modern system performance, especially for tasks ranging from high-fidelity gaming and professional content creation to complex scientific simulations and artificial intelligence workloads. At the heart of a GPU’s functionality lies its driver – a critical piece of software that acts as the communication bridge between your operating system and the hardware. Without the correct and up-to-date NVIDIA drivers, your powerful graphics card can often perform no better than a basic display adapter, failing to deliver its true potential.
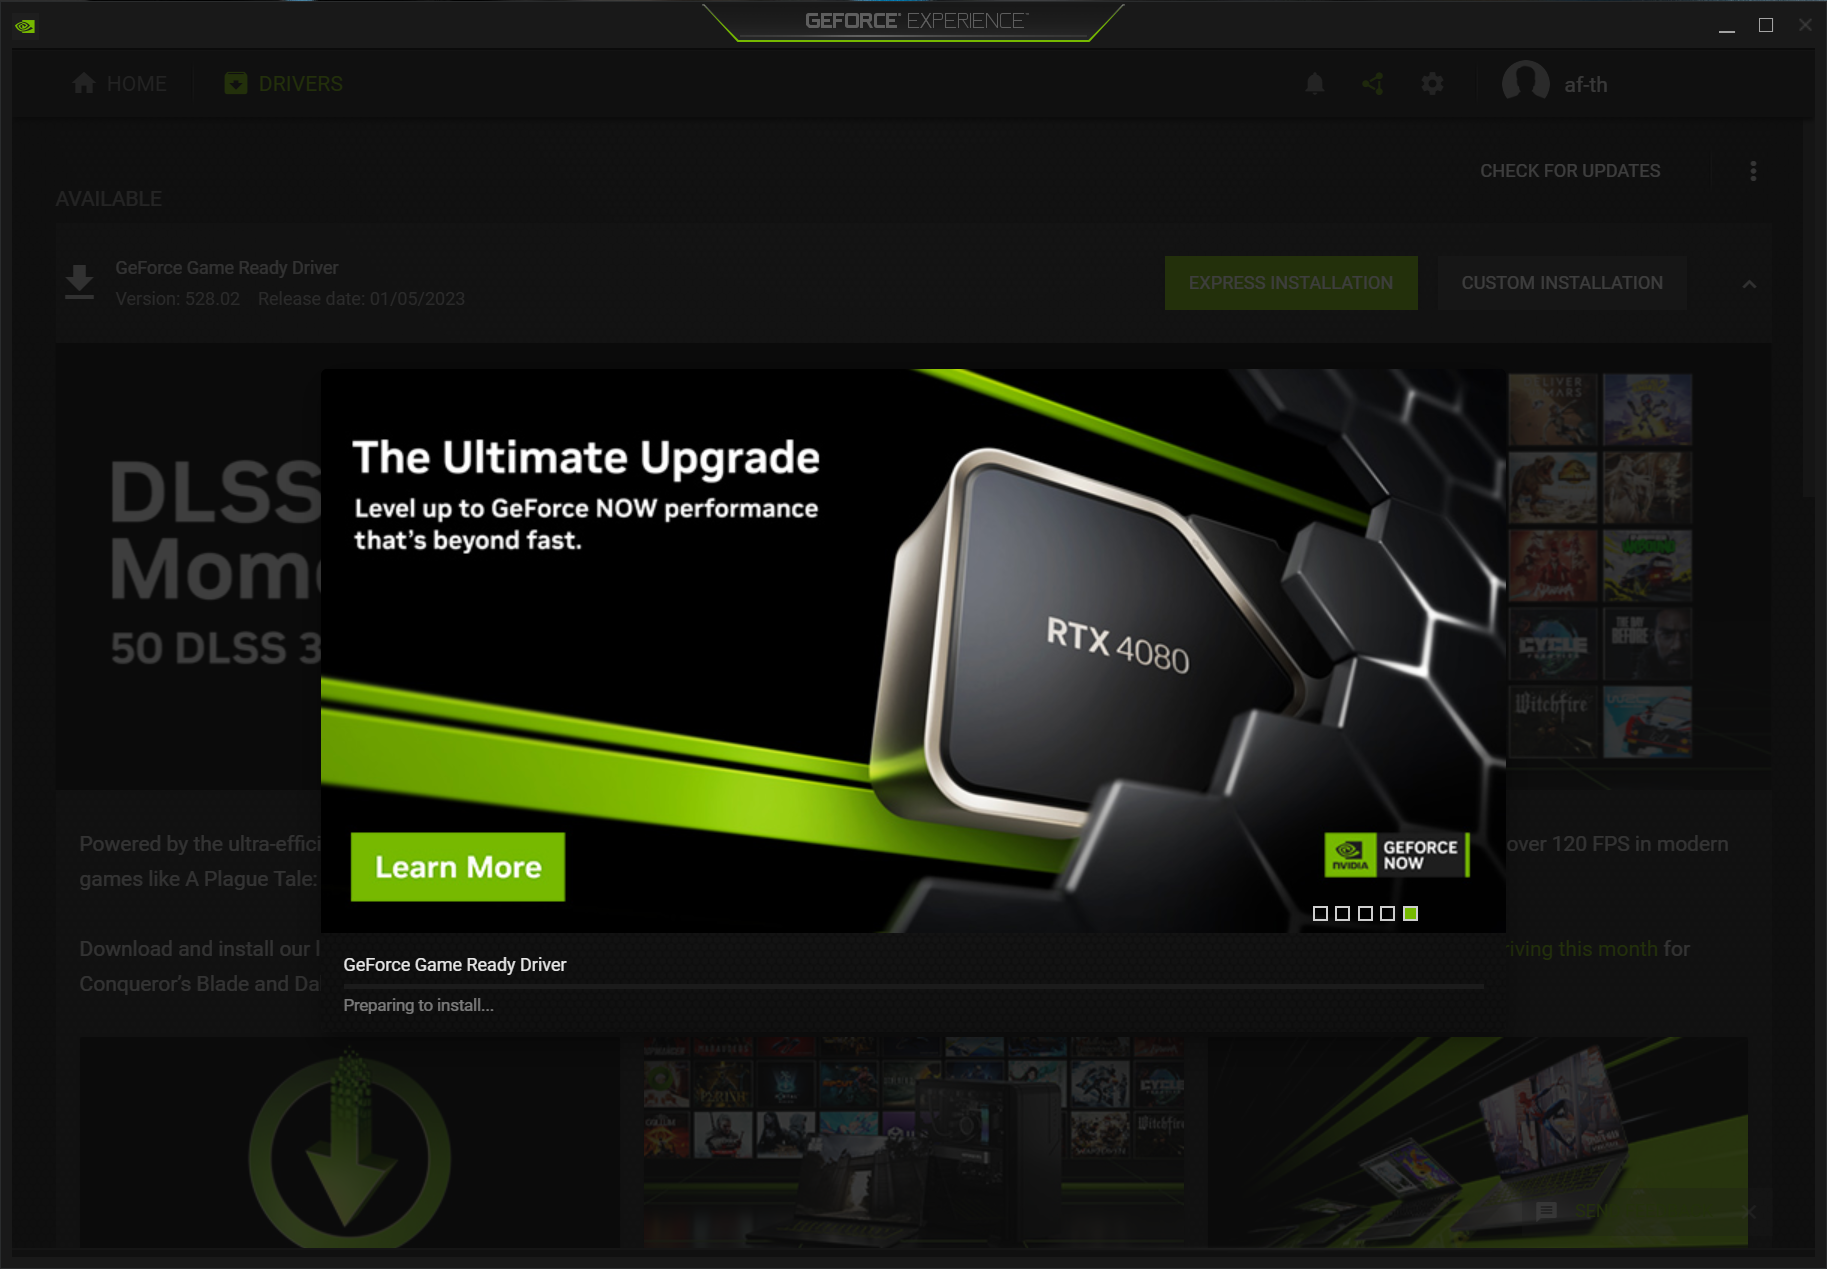
This guide provides an in-depth, professional walkthrough on how to install NVIDIA drivers across various operating systems, focusing primarily on Windows but also touching upon Linux considerations. We’ll explore why these drivers are so vital, the preparatory steps required for a smooth installation, different methods for acquiring and deploying them, and crucial troubleshooting tips to ensure your system operates at peak graphical efficiency. Understanding and mastering the installation process is not just a technical task; it’s an essential skill for anyone looking to optimize their computing experience and harness the full power of their NVIDIA hardware.
Understanding NVIDIA Drivers: The Gateway to Peak Performance
NVIDIA drivers are more than just a piece of software; they are the finely tuned instructions that allow your operating system and applications to interact effectively with your NVIDIA graphics card. They translate high-level commands from software into low-level instructions that the GPU hardware can understand and execute. This intricate interplay is fundamental to unlocking the full capabilities of your graphics card.
Why Driver Updates Matter
The continuous evolution of GPUs, operating systems, and demanding applications necessitates regular driver updates from NVIDIA. These updates are far from trivial; they often bring a host of benefits and critical fixes:
- Performance Enhancements: New driver versions frequently include optimizations for popular games and professional applications, leading to higher frame rates, smoother gameplay, and faster rendering times. NVIDIA often releases “Game Ready” drivers specifically tuned for major new game releases.
- Bug Fixes and Stability Improvements: Drivers can contain bugs that cause crashes, graphical glitches, or other system instabilities. Updates are crucial for patching these issues, ensuring a more stable and reliable computing experience.
- Feature Support: Modern GPUs are constantly introducing new features like Ray Tracing, DLSS (Deep Learning Super Sampling), NVIDIA Reflex, and advanced CUDA capabilities. New drivers are essential to enable and optimize these features, allowing users to take advantage of cutting-edge technology.
- Security Patches: Like any complex software, drivers can have security vulnerabilities. Updates often include patches to mitigate potential security risks, protecting your system from exploits.
- Operating System Compatibility: As operating systems evolve, drivers must be updated to maintain compatibility and ensure seamless integration with the latest OS features and architectural changes.
Neglecting driver updates can lead to suboptimal performance, unexplained crashes, compatibility issues with new software, and even security risks. Therefore, keeping your NVIDIA drivers current is a cornerstone of PC maintenance for any serious user.
Identifying Your NVIDIA Hardware
Before embarking on any driver installation, it’s paramount to know exactly which NVIDIA graphics card you possess. Installing the wrong driver can lead to errors, system instability, or simply a non-functional display. Here’s how to identify your GPU:
- Windows:
- Right-click on the Desktop and select “NVIDIA Control Panel” (if installed). The GPU model is usually displayed at the top or in the “System Information” section.
- Alternatively, right-click on the Start button and select “Device Manager.” Expand “Display adapters.” Your NVIDIA GPU will be listed there (e.g., “NVIDIA GeForce RTX 3080”).
- For a detailed overview, press
Windows Key + R, typedxdiag, and press Enter. Navigate to the “Display” tab to see your GPU model.
- Linux:
- Open a terminal and type
lspci -k | grep -EA3 'VGA|3D|Display'. This command lists PCI devices and will highlight your graphics card. - Alternatively,
nvidia-smi(if drivers are already installed) will show your GPU model and driver version. If no drivers are installed,ubuntu-drivers devices(for Ubuntu/Debian) orlshw -c displaycan help.
- Open a terminal and type
- Physical Inspection: If you built the PC or have access to the hardware, you can often find the model number printed directly on the graphics card itself.
Knowing your specific GPU model (e.g., GeForce RTX 4070, Quadro P5000) is the first and most critical step, as it dictates which driver package you need to download.
Essential Preparations Before Installation
A smooth driver installation often hinges on thorough preparation. Skipping these crucial steps can lead to frustrating issues, from installation failures to system instability. Taking a few moments to prepare can save hours of troubleshooting later.
Backing Up Your System (System Restore Point)
Before making any significant system changes, especially those involving core hardware drivers, creating a system restore point is highly recommended for Windows users. This provides a safety net, allowing you to revert your system to a previous working state if something goes wrong during or after the driver installation.
- How to Create a Restore Point:
- Press
Windows Key + Sto open the search bar, type “create a restore point,” and select the corresponding option. - In the “System Properties” window, ensure “Protection” is “On” for your system drive. If not, select the drive, click “Configure,” and turn on system protection.
- Click the “Create…” button.
- Give the restore point a descriptive name (e.g., “Before NVIDIA Driver Update [Date]”) and click “Create.”
- Wait for the process to complete.
- Press
This simple step can be a lifesaver if a new driver causes unexpected compatibility problems or system crashes.
Uninstalling Previous Driver Versions (Using DDU)
While NVIDIA’s installer often handles previous driver versions automatically, performing a “clean” installation is frequently recommended, especially when encountering issues or upgrading to a significantly newer driver series. Residual files from older drivers can sometimes conflict with new installations, leading to instability or performance problems. For the most thorough uninstallation, the Display Driver Uninstaller (DDU) tool is invaluable.
- What is DDU? DDU is a free, third-party utility designed to remove all traces of display drivers (NVIDIA, AMD, Intel) from your system. It’s particularly effective because it cleans out driver files, folders, and registry entries that standard uninstallers might miss.
- How to Use DDU (Windows):
- Download: Get DDU from a reputable source (e.g., Guru3D).
- Disconnect from Network: To prevent Windows from automatically installing generic drivers, temporarily disconnect your PC from the internet.
- Boot into Safe Mode: This is crucial. Restart your PC and repeatedly press
F8orShift + F8(on older systems) or go throughSettings > Update & Security > Recovery > Advanced startup > Restart now > Troubleshoot > Advanced options > Startup Settings > Restart > Press 4 or F4 for Safe Mode. - Run DDU: Once in Safe Mode, launch DDU. Select “GPU” and then “NVIDIA.”
- Choose “Clean and restart.” DDU will meticulously remove the drivers and then reboot your system.
- After restarting, your system will be running on basic display drivers, preparing it for a fresh NVIDIA driver installation.
While not strictly necessary for every update, using DDU is the gold standard for clean driver installations and can preempt many potential issues.
Gathering System Information (OS Version, Architecture)
Beyond knowing your GPU model, it’s essential to understand your operating system’s specifics:
- Operating System Version: (e.g., Windows 10 64-bit, Ubuntu 22.04 LTS). This dictates the correct driver package.
- System Architecture: Most modern systems are 64-bit. Ensure you download the corresponding 64-bit driver. (You can check this in Windows by going to
Settings > System > Aboutor right-clicking “This PC” and selecting “Properties”).
Having this information ready before you start searching for drivers will streamline the process and prevent downloading incompatible files.
Step-by-Step Installation Methods for Windows Users
Once preparations are complete, you can proceed with the actual driver installation. NVIDIA offers a couple of primary methods for Windows users, each with its own advantages.
Method 1: NVIDIA GeForce Experience (Recommended for Gaming)
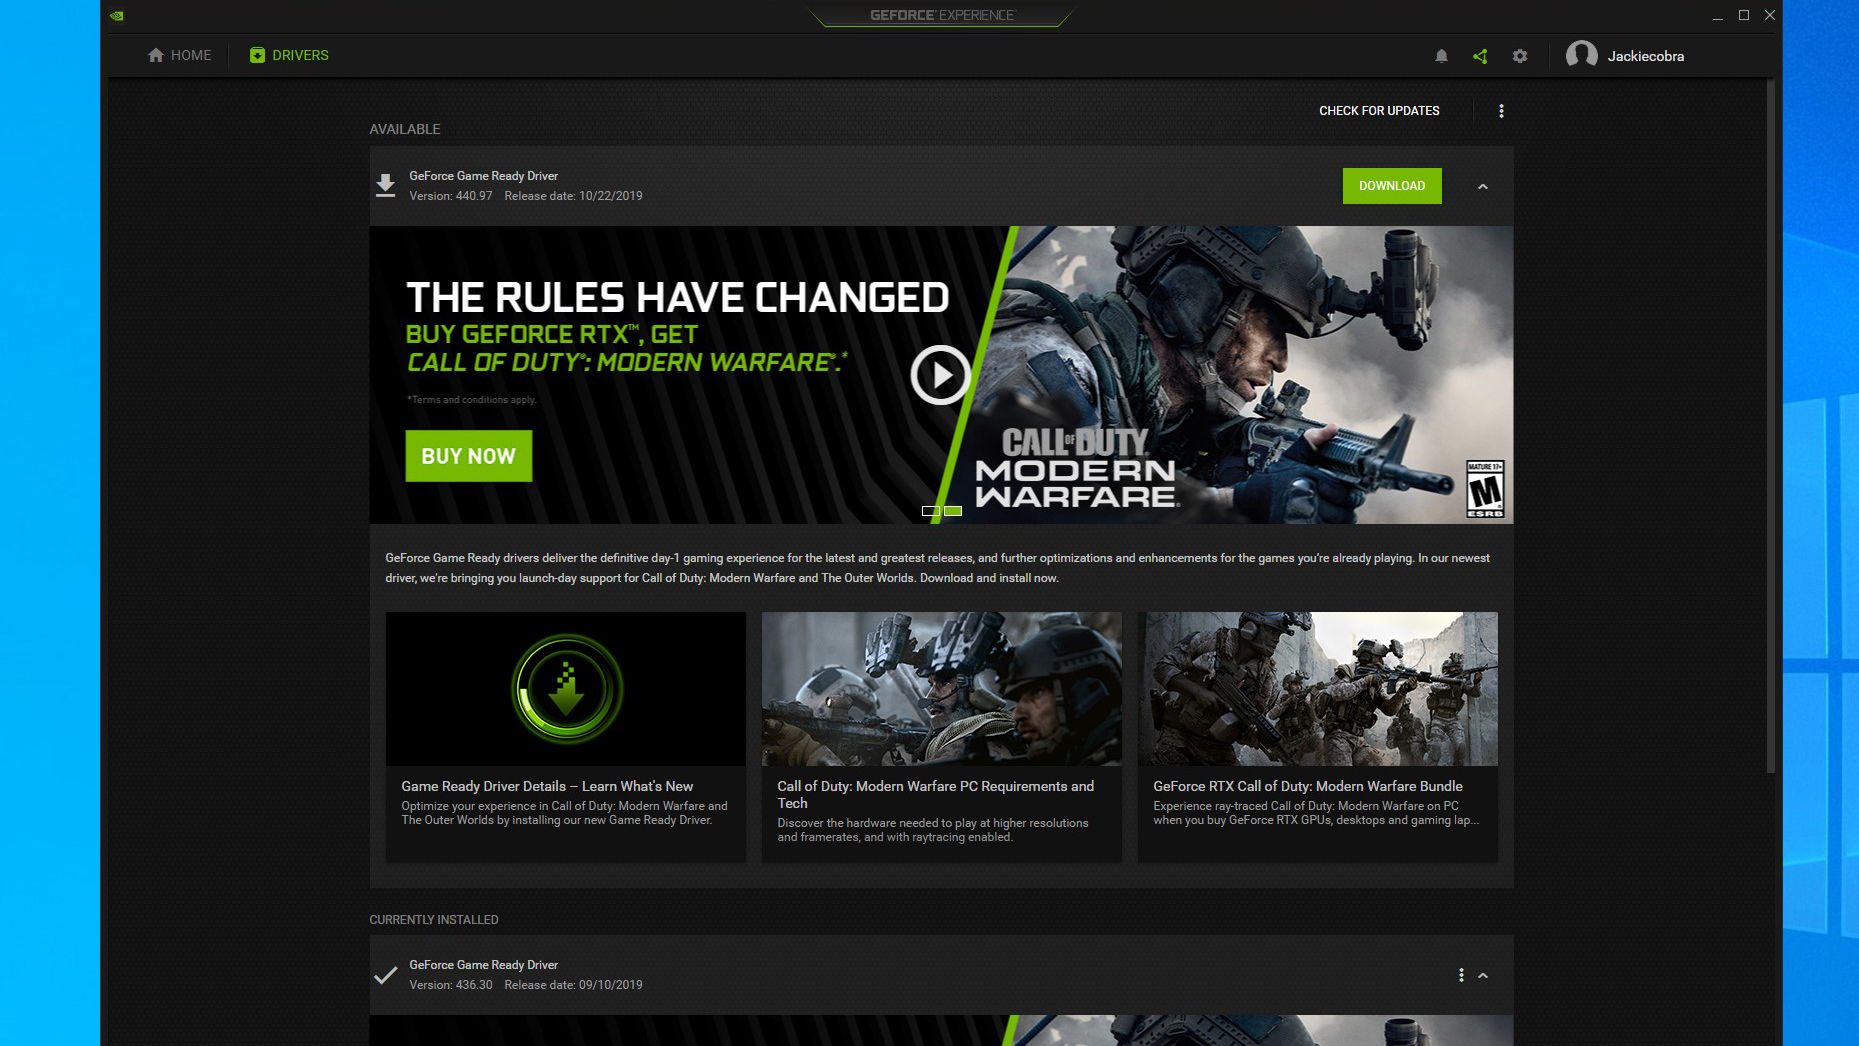
NVIDIA GeForce Experience is a companion application designed to optimize game settings, stream gameplay, and, crucially, keep your drivers up to date. It’s the most convenient method for many users.
- Download and Install GeForce Experience: If you don’t have it, download it from the official NVIDIA website. Install it like any other application.
- Launch GeForce Experience: Open the application. You might need to log in or create an NVIDIA account.
- Navigate to Drivers Tab: Click on the “Drivers” tab at the top of the interface.
- Check for Updates: GeForce Experience will automatically check for the latest “Game Ready Driver” or “Studio Driver” (depending on your preference, which can be set in settings).
- Download Driver: If a new driver is available, click “Download.”
- Choose Installation Type:
- Express Installation: This is the quickest option, installing all components and overwriting existing drivers. Recommended for most users.
- Custom Installation: This allows you to choose specific components (e.g., remove 3D Vision Driver if you don’t use it) and offers the “Perform a clean installation” checkbox. A clean installation is highly recommended here, especially if you skipped DDU.
- Follow On-Screen Prompts: The installer will guide you through the rest of the process, which usually involves a brief screen flicker as the new driver takes effect. Your PC may restart.
Method 2: Manual Download from NVIDIA Website (For Specific Needs)
This method provides more control and is ideal if you prefer not to use GeForce Experience, need a specific older driver version, or are troubleshooting issues.
- Visit NVIDIA Driver Downloads: Go to the official NVIDIA driver download page:
www.nvidia.com/drivers. - Select Your Product: Use the dropdown menus to select your:
- Product Type: (e.g., GeForce, Quadro, NVS)
- Product Series: (e.g., GeForce RTX 40 Series, GeForce GTX 16 Series)
- Product: (Your specific GPU model, e.g., RTX 4070)
- Operating System: (e.g., Windows 10 64-bit, Windows 11 64-bit)
- Download Type: (Game Ready Driver (GRD) for gamers, Studio Driver (SD) for creators, or Production Branch/New Feature Branch for Quadro users).
- Search and Download: Click “Search.” Review the driver details (version, release date, supported products) to ensure it’s the correct one. Click “Download.”
- Run the Installer: Once the
.exefile is downloaded, double-click it to start the installation. - Extraction Path: The installer will ask where to extract the files. The default location is usually fine.
- Accept License Agreement: Read and accept the NVIDIA Software License Agreement.
- Choose Installation Option:
- Express (Recommended): This installs all driver components without requiring much input.
- Custom (Advanced): This is where you can perform a clean installation without DDU. Select “Custom (Advanced),” click “Next,” then tick the “Perform a clean installation” checkbox on the next screen. This will remove previous settings and ensures a fresh start. Deselect any components you don’t need (e.g., NVIDIA GeForce Experience if you don’t want it, though it’s useful for updates).
- Complete Installation: Follow the on-screen prompts. Your screen may flicker, and a restart may be required.
Method 3: Clean Installation via Custom Options
As mentioned in both previous methods, performing a clean installation is often the best practice. When opting for “Custom (Advanced)” during the manual installation or within GeForce Experience, ensure the “Perform a clean installation” checkbox is ticked. This ensures that any leftover files, settings, or registry entries from previous driver versions are removed, preventing potential conflicts and ensuring optimal performance from the newly installed driver. While DDU provides the most thorough cleaning, the custom clean installation option within NVIDIA’s own installer is an excellent alternative for most scenarios.
NVIDIA Driver Installation on Linux Systems
Installing NVIDIA drivers on Linux can be slightly more complex than on Windows due to the diverse nature of Linux distributions and their package management systems. However, with careful steps, it’s quite manageable.
Method 1: Using Your Distribution’s Repository (Recommended for Stability)
This is generally the safest and easiest method, as the drivers are tested and packaged specifically for your distribution.
- Check for Recommended Drivers:
- Ubuntu/Debian-based: Open “Software & Updates” (or “Additional Drivers”). Navigate to the “Additional Drivers” tab. It will scan for available proprietary drivers for your hardware and recommend versions. Select the latest tested proprietary driver and click “Apply Changes.”
- Other Distributions: Consult your distribution’s documentation or use its package manager’s GUI (e.g., YaST on openSUSE, Pamac on Manjaro) to search for “nvidia-driver” or similar packages.
- Install via Terminal (Example for Ubuntu):
bash

sudo apt update

sudo apt install nvidia-driver-535 # Replace 535 with the recommended version

# Or, to let the system pick:

sudo apt install nvidia-driver-535 # Replace 535 with the recommended version

sudo apt install nvidia-driver-535 # Replace 535 with the recommended version

sudo apt install nvidia-driver-535 # Replace 535 with the recommended version

sudo ubuntu-drivers autoinstall
Then, reboot your system:sudo reboot. - DKMS (Dynamic Kernel Module Support): Many repository drivers use DKMS, which automatically rebuilds the NVIDIA kernel modules when your kernel updates, ensuring continuous compatibility.
Method 2: NVIDIA’s Runfile Installer (For Latest Features or Specific Needs)
This method involves downloading the .run file directly from NVIDIA’s website. It offers the absolute latest drivers but requires more manual intervention and can be less robust to kernel updates if DKMS isn’t properly configured or used.
- Download the Driver: Go to
www.nvidia.com/driversand select your GPU and Linux OS. Download the.runfile. - Disable Nouveau Driver: The open-source Nouveau driver conflicts with NVIDIA’s proprietary driver. You must disable it. This often involves blacklisting it.
- Create
/etc/modprobe.d/blacklist-nouveau.confwith:
blacklist nouveau

options nouveau modeset=0
- Update initramfs:
sudo update-initramfs -u.
- Create
- Reboot to Text Console: Boot into a text-only console (TTY) or disable your desktop manager.
- Press
Ctrl + Alt + F1to switch to a TTY. Log in. - Stop your display manager (e.g.,
sudo systemctl stop gdmorsudo systemctl stop lightdm).
- Press
- Run the Installer: Navigate to the directory where you downloaded the
.runfile (e.g.,cd ~/Downloads). Make it executable and run it:
bash

chmod +x NVIDIA-Linux-x86_64-XXX.XX.run # Replace XXX.XX with your version

sudo ./NVIDIA-Linux-x86_64-XXX.XX.run
- Follow Installer Prompts: The installer will guide you. Accept the license, choose to install DKMS (highly recommended for automatic kernel module rebuilding), and confirm the installation.
- Reboot: After successful installation, restart your display manager (
sudo systemctl start gdm) or simply reboot:sudo reboot.
Post-Installation Verification on Linux
After installing, verify the drivers are working:
- Open a terminal and run
nvidia-smi. This command should display your GPU model, driver version, CUDA version, and current GPU usage statistics. - Run
nvidia-settings. This will open the NVIDIA X Server Settings application, allowing you to configure display settings and view GPU information.
If these commands work and show correct information, your NVIDIA drivers are successfully installed.
Troubleshooting Common NVIDIA Driver Issues
Even with careful preparation, issues can sometimes arise during or after driver installation. Here’s how to address some common problems.
Black Screen or Display Problems
A black screen, flickering, or incorrect resolution after installing drivers is a common, albeit alarming, issue.
- During Installation (Windows): If your screen goes black and doesn’t recover within a few minutes during installation, it might be stuck. Force restart your PC. If it boots to a black screen, try booting into Safe Mode and performing a clean uninstall with DDU, then reinstall the driver.
- After Installation (Windows/Linux):
- Windows: Boot into Safe Mode. If the display works there, uninstall the NVIDIA driver using DDU and try reinstalling it. Ensure your monitor is connected to the GPU, not the integrated graphics port on the motherboard.
- Linux: If you get a blank screen or boot loop, it’s often due to Nouveau not being fully disabled or a display manager conflict. Try switching to a TTY (
Ctrl + Alt + F1-F6), uninstalling the driver, re-blacklisting Nouveau, updating initramfs, and reinstalling.
Driver Installation Failure
Errors during the installation process can be frustrating.
- “NVIDIA Installer Failed” (Windows):
- Clean Installation: The most common fix is to perform a truly clean installation using DDU in Safe Mode, then attempt the installation again.
- Antivirus/Firewall: Temporarily disable your antivirus or firewall, as they can sometimes interfere with installer processes.
- Corrupted Download: Redownload the driver file, ensuring it completes without interruption.
- System Requirements: Double-check that your OS and hardware meet the driver’s requirements.
- User Account Control (UAC): Ensure you are running the installer as an administrator.
- Linux: Installation failures are often due to a conflicting kernel module (like Nouveau) still running or prerequisites (like kernel headers) not being met. Ensure Nouveau is fully blacklisted and that you have
build-essentialand your kernel headers installed (e.g.,sudo apt install build-essential linux-headers-$(uname -r)on Debian/Ubuntu).
Performance Issues After Update
Sometimes, a new driver might introduce performance regressions or new bugs for specific games or applications.
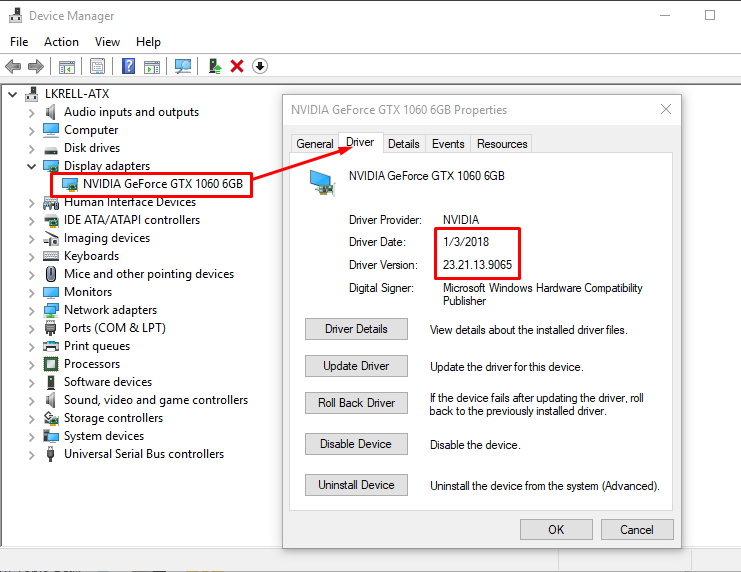
- Rollback Driver (Windows): In Device Manager, right-click your NVIDIA GPU, select “Properties,” go to the “Driver” tab, and click “Roll Back Driver.” This reverts to the previous version.
- Install an Older Version: If rolling back isn’t an option or doesn’t fix it, manually download a known stable older driver version from NVIDIA’s archive and perform a clean installation.
- Monitor Forums/Support: Check NVIDIA’s official forums or game-specific forums. Others might be experiencing the same issue, and a workaround or hotfix might be available.
The Role of Display Driver Uninstaller (DDU)
As highlighted throughout this guide, DDU is an indispensable tool for troubleshooting NVIDIA driver issues on Windows. Its ability to meticulously remove all vestiges of previous driver installations ensures that you’re starting with a truly clean slate, eliminating a major source of conflicts and errors. Whenever facing persistent problems, especially after a failed installation or when upgrading hardware, DDU should be your first line of defense. Always remember to run it in Safe Mode and disconnect from the internet to prevent Windows from automatically installing basic drivers.
Conclusion: Maintaining Optimal Graphics Performance
Installing NVIDIA drivers is a fundamental aspect of PC maintenance, crucial for ensuring your graphics card performs optimally, remains stable, and takes advantage of the latest features and security enhancements. By understanding your hardware, diligently preparing your system, choosing the appropriate installation method, and knowing how to troubleshoot common issues, you empower yourself to unlock the full potential of your NVIDIA GPU.
Regularly checking for and installing driver updates, preferably through GeForce Experience for convenience or via a clean manual installation for control, is a habit every PC enthusiast and professional user should cultivate. While the process might seem intricate at first, following these comprehensive steps will equip you with the knowledge and confidence to manage your NVIDIA drivers effectively, ensuring a superior and uninterrupted computing experience. Remember, your GPU is only as powerful as the driver that controls it.
aViewFromTheCave is a participant in the Amazon Services LLC Associates Program, an affiliate advertising program designed to provide a means for sites to earn advertising fees by advertising and linking to Amazon.com. Amazon, the Amazon logo, AmazonSupply, and the AmazonSupply logo are trademarks of Amazon.com, Inc. or its affiliates. As an Amazon Associate we earn affiliate commissions from qualifying purchases.