Disk management software forms the backbone of digital system maintenance, providing users with indispensable tools for partition management, data recovery, and disk cloning. Among these, DiskGenius stands out as a powerful and versatile solution, trusted by IT professionals and everyday users alike for its robust feature set. However, the true efficacy and safety of using such a critical utility are not solely dependent on its features, but significantly on where it is installed.
Choosing the optimal installation location for DiskGenius is not merely a matter of convenience; it is a crucial decision that can impact system performance, data integrity, and, most critically, the success rate of vital operations like data recovery. In the world of tech, where digital security and data loss are ever-present concerns, understanding these nuances becomes paramount. This guide will delve into the best practices for installing DiskGenius, exploring various scenarios and providing actionable advice to ensure you harness its full potential safely and effectively.
Understanding DiskGenius and the Criticality of Installation Location
Before diving into installation specifics, it’s essential to grasp what DiskGenius offers and why its placement on your system demands careful consideration. Far from being just another application, DiskGenius operates at a fundamental level of your computer’s storage architecture, interacting directly with hard drives, SSDs, and their underlying file systems.
What is DiskGenius? A Brief Overview of Its Capabilities
DiskGenius is an all-in-one disk utility renowned for its comprehensive suite of features. Its primary functionalities include:
- Data Recovery: This is arguably its most critical function, allowing users to recover lost files due to accidental deletion, formatting, partition loss, system crashes, or virus attacks. It supports various file systems like NTFS, FAT32, exFAT, HFS+, and Ext2/3/4.
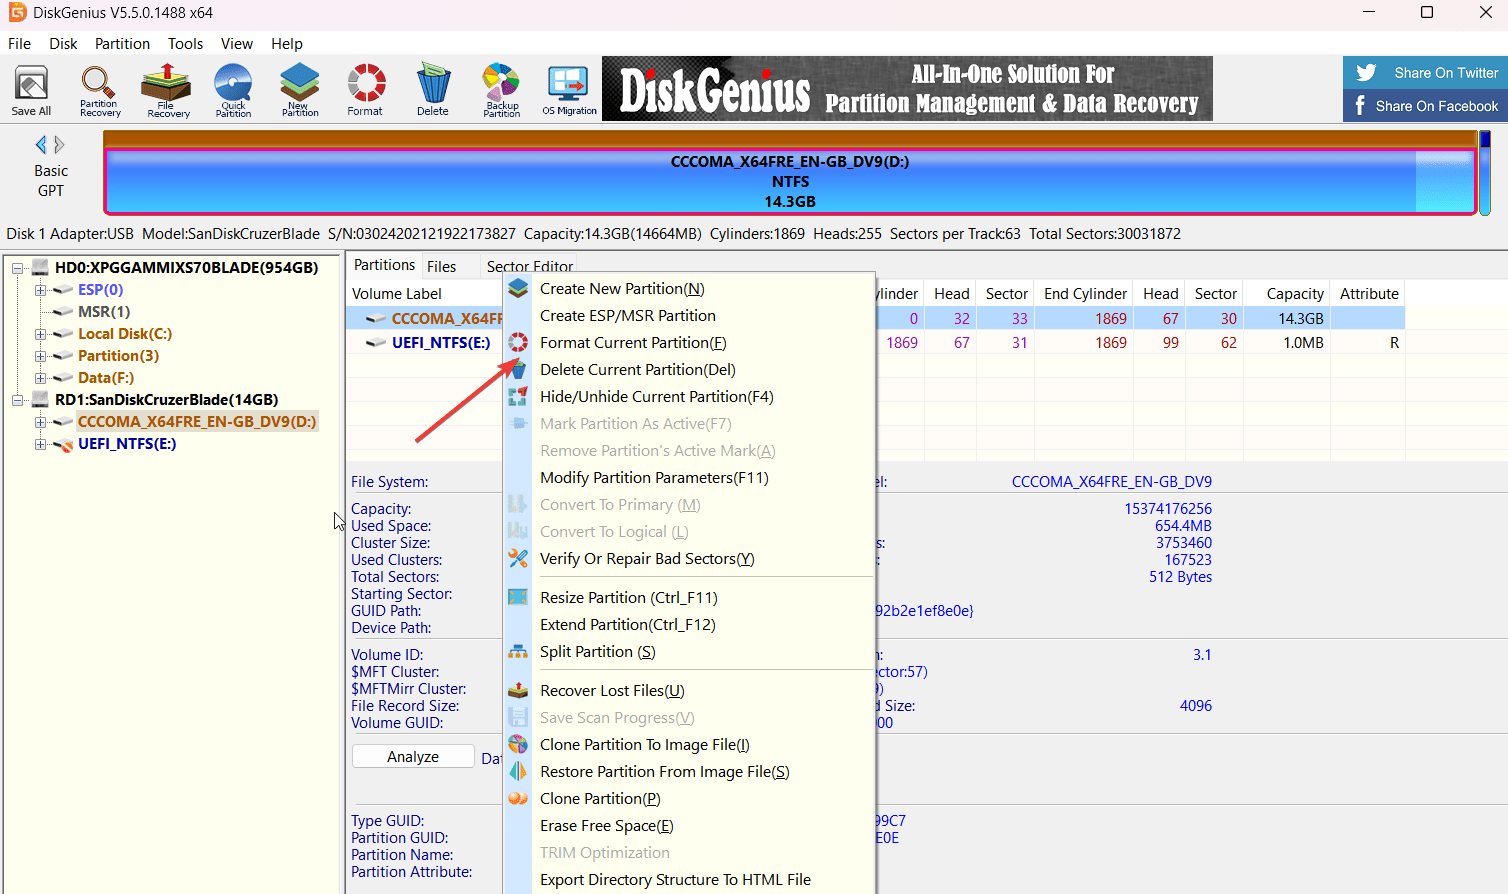
- Partition Management: Users can resize, create, delete, format, hide, and check partitions without data loss. It also supports converting partition table types (MBR to GPT and vice versa) and rebuilding MBR.
- Disk & Partition Backup/Restore: Essential for digital security and disaster recovery planning, DiskGenius enables backing up entire disks or specific partitions to image files and restoring them when needed.
- Disk Cloning & Migration: Facilitates migrating operating systems to new drives (e.g., from HDD to SSD) or cloning entire disks for backup or upgrade purposes.
- Bad Sector Repair: It can detect and attempt to repair bad sectors on hard drives, extending their lifespan and preventing data loss.
- Virtual Disk Support: Allows managing virtual disks created by VMware, VirtualBox, and Microsoft Virtual PC.
The breadth of these capabilities underscores why DiskGenius is an indispensable tool for anyone serious about managing their digital assets and maintaining robust system health.
The Criticality of Installation Location: Why It’s Not Just Another App
Unlike a web browser or a word processor, DiskGenius directly manipulates the low-level structures of your storage devices. This direct interaction makes its installation location a critical factor, primarily for two interconnected reasons:
- Preventing Data Overwriting (Especially for Data Recovery): This is the paramount concern. When you install any software, data is written to the disk. If you install DiskGenius onto the same drive from which you intend to recover lost data, there’s a significant risk that the installation process itself will overwrite the very data blocks you are trying to retrieve. Lost files are often not immediately erased but merely marked as “free space” by the operating system. Writing new data to these sectors makes recovery impossible. Therefore, for successful data recovery, the installation path must be completely isolated from the target drive.
- Maintaining System Stability and Performance: While less dramatic than data overwriting, the installation location can subtly affect system stability and the performance of DiskGenius itself. Installing it on a system-critical partition (like your C: drive, which houses the operating system) means it’s competing for resources and disk I/O with other core system processes. While modern systems are highly optimized, for a tool designed for deep-level disk operations, minimizing potential conflicts is always a good practice. Furthermore, isolating it can prevent unintended interactions or dependencies that might arise from an OS-level installation, particularly in scenarios where the OS itself is compromised.
Given these crucial points, a strategic approach to DiskGenius installation is not just recommended; it’s a necessity for any tech-savvy user.
Best Practices for DiskGenius Installation
Adhering to specific installation practices can significantly enhance the effectiveness of DiskGenius and, more importantly, safeguard your precious data. The core principle revolves around isolation – keeping the DiskGenius installation separate from critical system data and, especially, from any drive you might need to recover.
The Golden Rule: Install on a Separate Drive or Partition
The most fundamental and universally accepted best practice is to install DiskGenius on a physical drive or logical partition different from your primary operating system drive (typically C:) and any drive from which you anticipate needing to perform data recovery.
- For Desktops/Laptops with Multiple Drives: If your computer has a secondary internal hard drive or SSD (e.g., D:, E: drives), this is the ideal location. It provides a dedicated space, isolating DiskGenius from your main OS. This setup minimizes the risk of accidental overwrites during data recovery operations on your primary OS drive and prevents DiskGenius from consuming resources or fragmenting data on your system drive.
- For Single-Drive Systems with Multiple Partitions: If you only have one physical drive but it’s divided into multiple partitions (e.g., C: for OS, D: for data), install DiskGenius on a data partition (D: or E:) rather than the C: drive. While not as ideal as a separate physical drive, it still offers a layer of separation from the critical OS files and potentially from the partition containing the data you need to recover.
- External Hard Drive or USB Flash Drive: This is an excellent alternative, especially for laptops or systems with limited internal storage/partitions. Installing DiskGenius directly onto an external drive or a sufficiently large USB flash drive provides maximum isolation. This setup is particularly advantageous for its portability, allowing you to use the same DiskGenius installation on multiple machines without reinstalling.
Avoiding the Target Drive: The Ultimate Precaution for Data Recovery
This point cannot be stressed enough: NEVER install DiskGenius on the drive or partition that contains the data you are trying to recover. As discussed, the act of installation involves writing data, which could irreversibly overwrite the very files you are attempting to salvage.
- Scenario 1: Recovering files from your C: drive (OS partition): In this case, DiskGenius absolutely must be installed on a different physical drive, a different logical partition (if C: is not the entire physical drive), or preferably on a bootable USB/CD.
- Scenario 2: Recovering files from a data partition (D: or E:): Install DiskGenius on your C: drive (if your OS is stable) or on a different physical drive/external media.
- Scenario 3: Recovering files from an external USB drive: Install DiskGenius on your internal drive (C:, D:, etc.) – not the external drive itself.
This “avoid the target drive” rule is the cornerstone of successful data recovery efforts when using any disk utility.
SSD vs. HDD Considerations
While the primary concern for DiskGenius installation is data safety and isolation, the type of drive can also play a minor role in performance and longevity.
- SSDs (Solid State Drives): Installing DiskGenius on an SSD can offer slightly faster launch times and potentially quicker execution of certain operations due due to SSDs’ superior random read/write speeds. This is more about convenience than critical performance, as DiskGenius’s heavy lifting often involves scanning the target drive, not just its own program files.
- HDDs (Hard Disk Drives): Perfectly acceptable for installation. The performance difference for DiskGenius specifically, beyond launch times, is often negligible compared to the target drive’s performance.
The most important factor remains the separation of the installation location from the target drive, regardless of whether it’s an SSD or HDD.
Advanced Scenarios and Alternatives
Beyond standard installations, DiskGenius offers flexibility for various advanced use cases, especially concerning emergency data recovery and system maintenance. Understanding these options further enhances your digital security toolkit.
Bootable Media: The Ultimate Safety Net
Creating a bootable DiskGenius USB drive or CD/DVD is arguably the most powerful and safest way to utilize the software, particularly for emergency situations.
- How it Works: A bootable DiskGenius environment allows you to run the software independently of your computer’s installed operating system. You boot your computer from the USB drive, and DiskGenius loads its own miniature OS (usually based on WinPE).
- Why it’s Superior:
- Maximum Data Safety: Since the OS isn’t running from the primary drive, there’s absolutely no risk of DiskGenius or the OS itself overwriting data on the main drive during recovery attempts. This is crucial for heavily corrupted systems or drives with critical data loss.
- Access to Non-Bootable Systems: If your Windows (or other OS) installation is corrupted and won’t boot, a bootable DiskGenius USB provides a lifeline to diagnose, repair, or recover data from the non-functional system drive.
- System Agnosticism: You can use the same bootable media on different computers without installation, which is invaluable for technicians or multi-device households.
- Creation: DiskGenius itself provides a straightforward feature to create a WinPE-based bootable USB drive. This should be a proactive step taken by anyone concerned with robust digital security and data protection.
Portable Versions: Flexibility with Caution
DiskGenius also offers a portable version that does not require installation. It can be run directly from an executable file.
- Advantages:
- No Installation Required: Ideal for quick diagnostics or one-off tasks where you don’t want to install software on a system.
- Portability: Can be carried on a USB drive and run on any compatible Windows system.
- Minimal System Impact: Leaves no traces in the system registry or program files.
- Disadvantages and Caution:
- Still Writes Data: Even a portable application, when launched, might create temporary files or configuration data. If you’re running it from the same drive you’re trying to recover, it still poses a minimal risk of overwriting.
- Limited Functionality (Sometimes): While most core functions work, some advanced features might be restricted compared to a full installed version due to privilege limitations or missing dependencies.
- Always Use from a Separate Drive: Just like with installation, if using a portable version for data recovery, run it from an external USB drive, a secondary internal drive, or a different partition to ensure the target drive remains untouched.
Network Drives and External Storage for Image Backups
While not directly about installing DiskGenius, it’s worth noting the best location for its output – especially for backups and recovered files. When performing disk cloning, creating backups, or recovering data, the target location for these output files should always be on a separate, healthy drive.
- Network-Attached Storage (NAS): An excellent choice for storing disk images or recovered data, offering centralized storage and often redundancy (RAID).
- External Hard Drives: Reliable and portable solutions for backups and data recovery output.
- Secondary Internal Drives: Another good option for local backups.
Never save recovered files or backup images onto the same drive you are recovering from or backing up. This defeats the purpose and can lead to further data loss.
Step-by-Step Installation Principles and Verification
Once you’ve decided on the optimal location, the actual installation process for DiskGenius is quite standard. However, a few principles and a pre-installation checklist can ensure a smooth and secure setup.
Pre-Installation Checklist
Before you even launch the installer, consider these points:
- Identify Target Drive for Recovery (if applicable): If you plan to recover data, clearly identify the source drive/partition and ensure DiskGenius will not be installed there.
- Choose Installation Path: Select a non-system partition (D:, E:), an external drive, or prepare a USB for a portable/bootable version.
- Administrator Privileges: Ensure you have administrator rights on the system, as DiskGenius requires these to perform its low-level disk operations.
- Sufficient Disk Space: DiskGenius itself is not a large application, but ensure the chosen installation location has a few hundred MBs free.
- Disable Antivirus (Temporarily, if issues arise): Some overly aggressive antivirus software might interfere with disk utility installations. If you encounter issues, temporarily disabling it might help, but remember to re-enable it afterward.
Navigating the Installer: Custom vs. Default
When you run the DiskGenius installer (usually an .exe file), you’ll typically be presented with an option for the installation path.
- Avoid Default Installation (C:Program Files): While convenient, the default path usually points to your primary OS drive (C:). Always choose a “Custom Installation” to manually specify the installation directory.
- Specify Your Chosen Path: Browse to your selected location (e.g.,
D:DiskGenius,E:ToolsDiskGenius, or your external USB drive’s root). - Follow Prompts: Proceed with the rest of the installation, accepting licensing agreements, etc.
Post-Installation Verification
After installation, it’s good practice to verify everything is set up correctly:
- Launch DiskGenius: Ensure it launches without errors and recognizes all your drives.
- Check Installation Location: Open File Explorer and navigate to the directory where you installed DiskGenius to confirm it’s in the correct, isolated location.
- Basic Functionality Test (Optional): Perform a simple, non-destructive operation (like viewing partition details) on a non-critical drive to ensure the software is functioning as expected.
- Create Bootable Media (Highly Recommended): If you haven’t already, use the DiskGenius tool to create a bootable USB drive immediately after installation. This prepares you for any future emergencies.
Maximizing DiskGenius Utility and Data Safety
Beyond mere installation, thoughtful usage of DiskGenius is key to maximizing its utility while maintaining robust digital security and data integrity. It’s a powerful tool, and like any powerful tool, it demands respect and careful handling.
Key Usage Tips for Data Recovery
- Act Quickly: The sooner you attempt data recovery after data loss, the higher your chances of success. Every moment the disk is used, the risk of overwriting increases.
- Minimize Disk Activity: If you realize you’ve lost data on a drive, stop using that drive immediately. Do not install new software, download files, or even browse the web if the affected drive is your system drive.
- Target a Separate Output Location: When recovering files, always save them to a different physical drive or partition than the one you are recovering from.
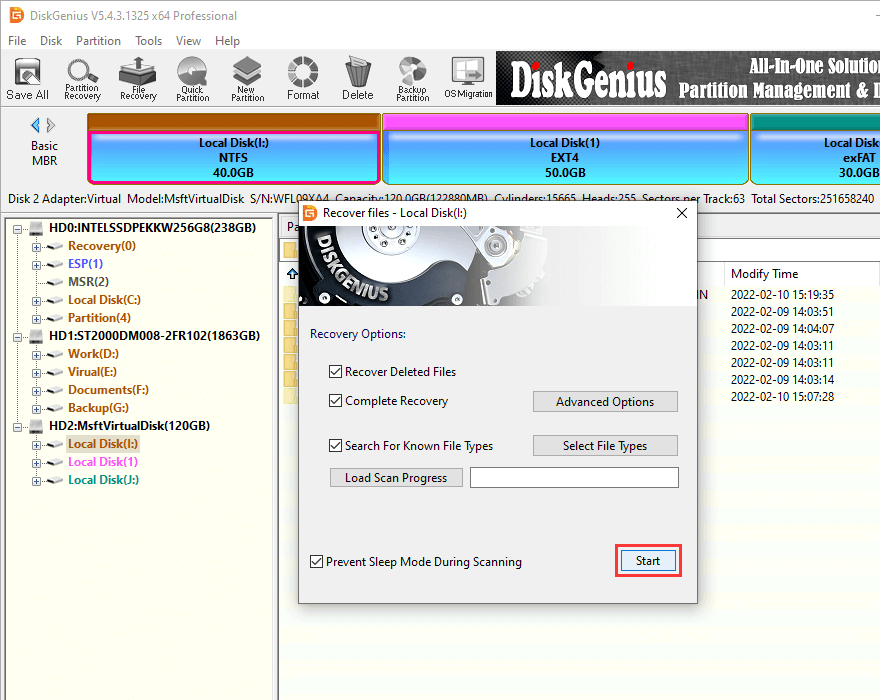
- Perform Deep Scans: For severe data loss, opt for DiskGenius’s “File Recovery” or “Partition Recovery” functions, often involving deep scans that thoroughly search for recoverable data.
- Preview Files: Utilize the preview feature to verify the integrity of recoverable files before saving them, ensuring they are not corrupted.
Best Practices for Partition Management
- Backup Before Changes: Always, always back up critical data before performing any major partition operations (resizing, formatting, deleting, converting partition tables). While DiskGenius is robust, unforeseen circumstances (power failure, system crash) can occur.
- Understand the Risks: Be fully aware of what each partition operation entails. Formatting a drive will erase all data, while resizing carries the risk of data corruption if interrupted.
- Double-Check Selections: DiskGenius provides clear visual representations of disks and partitions. Before clicking “OK” or “Apply,” meticulously double-check that you have selected the correct drive and partition for your intended operation. A misclick can lead to catastrophic data loss.
- Monitor Disk Health: Regularly use DiskGenius’s “Verify and Repair Bad Sectors” or “View S.M.A.R.T. Information” features to keep an eye on your drives’ health. Proactive monitoring can prevent unexpected failures.
Common Pitfalls to Avoid
- Installing on the Target Recovery Drive: This is the most critical mistake, repeatedly emphasized for a reason.
- Ignoring Warnings: DiskGenius often provides warnings for potentially destructive operations. Read them carefully and understand their implications before proceeding.
- Attempting Recovery on a Physically Damaged Drive: If a drive is making clicking noises, grinding, or is otherwise physically damaged, stop using it immediately. Software like DiskGenius cannot fix physical damage. Continued use can worsen the damage and make professional data recovery impossible.
- Running Multiple Disk Utilities Simultaneously: This can lead to conflicts, system instability, and potential data corruption. Stick to one disk utility at a time.
- Failing to Create Bootable Media: Procrastinating on creating a bootable DiskGenius USB leaves you vulnerable if your OS drive becomes unbootable. Make it a priority.
Conclusion
DiskGenius is an exceptionally powerful tool for anyone managing disk partitions, seeking to recover lost data, or ensuring the longevity of their storage devices. Its capabilities are vast, making it an invaluable asset in any tech toolkit. However, the sheer power of DiskGenius also necessitates a meticulous approach to its deployment.
The strategic choice of installation location is not a minor detail but a foundational element of its safe and effective use. By adhering to the golden rule of installing DiskGenius on a separate drive or partition, carefully avoiding the target recovery drive, and proactively creating bootable media, users can dramatically enhance their chances of successful data recovery and secure disk management. In an era where data is increasingly valuable, understanding and implementing these best practices ensures that DiskGenius serves as a robust guardian of your digital assets, rather than an unwitting accomplice in their loss. Embrace these guidelines, and empower yourself with a truly optimized and secure disk management strategy.
aViewFromTheCave is a participant in the Amazon Services LLC Associates Program, an affiliate advertising program designed to provide a means for sites to earn advertising fees by advertising and linking to Amazon.com. Amazon, the Amazon logo, AmazonSupply, and the AmazonSupply logo are trademarks of Amazon.com, Inc. or its affiliates. As an Amazon Associate we earn affiliate commissions from qualifying purchases.