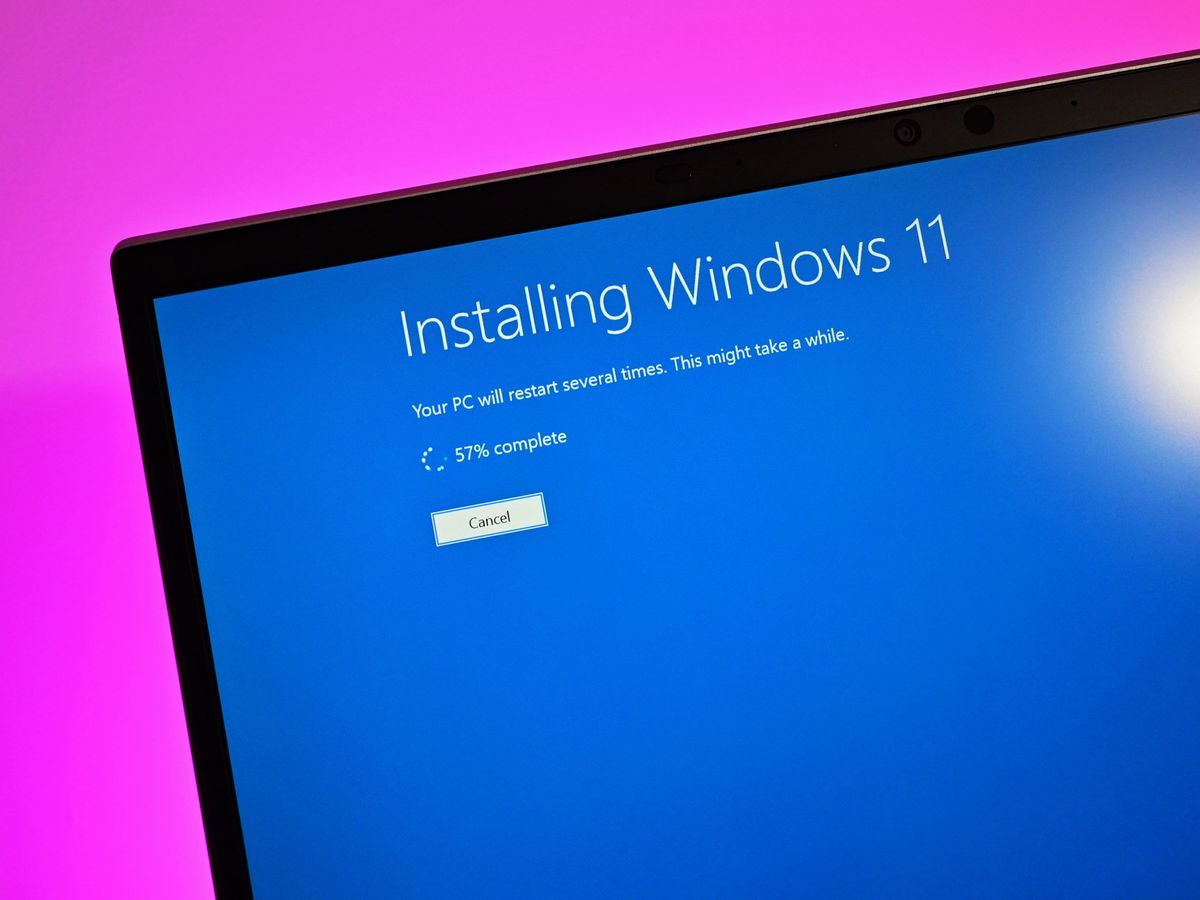
Windows 11, Microsoft’s latest iteration of its flagship operating system, arrived with a sleek new user interface, enhanced productivity features, and a stronger emphasis on security. While many users were eager to upgrade, a significant portion found themselves locked out due to stringent minimum system requirements, particularly the need for a Trusted Platform Module (TPM) 2.0 and Secure Boot. This left countless otherwise capable PCs labeled as “unsupported,” creating a dilemma for users who wanted to experience the new OS without investing in new hardware.
This guide is designed for those who wish to navigate this challenge. We’ll delve into the reasons behind Microsoft’s strict requirements, explain the critical preparatory steps, and provide detailed, step-by-step instructions on how to install Windows 11 on hardware that doesn’t officially meet the criteria. While these methods allow you to bypass the compatibility checks, it’s crucial to understand the implications and proceed with caution. This is an advanced procedure, and while generally safe when followed carefully, it comes with inherent risks that we will thoroughly discuss. Our aim is to empower you with the knowledge to make an informed decision and successfully bring Windows 11 to your “unsupported” machine, unlocking new productivity possibilities and a refreshed digital experience.
The Allure of Windows 11 and Microsoft’s Stance
Windows 11 represents a significant evolution from its predecessor, offering a fresh aesthetic and a host of performance and security enhancements. For many, the desire to upgrade is driven by the promise of a more modern, efficient, and integrated computing experience. However, Microsoft’s official stance on system requirements has been a point of contention and confusion for many users.
Understanding Windows 11’s Minimum System Requirements
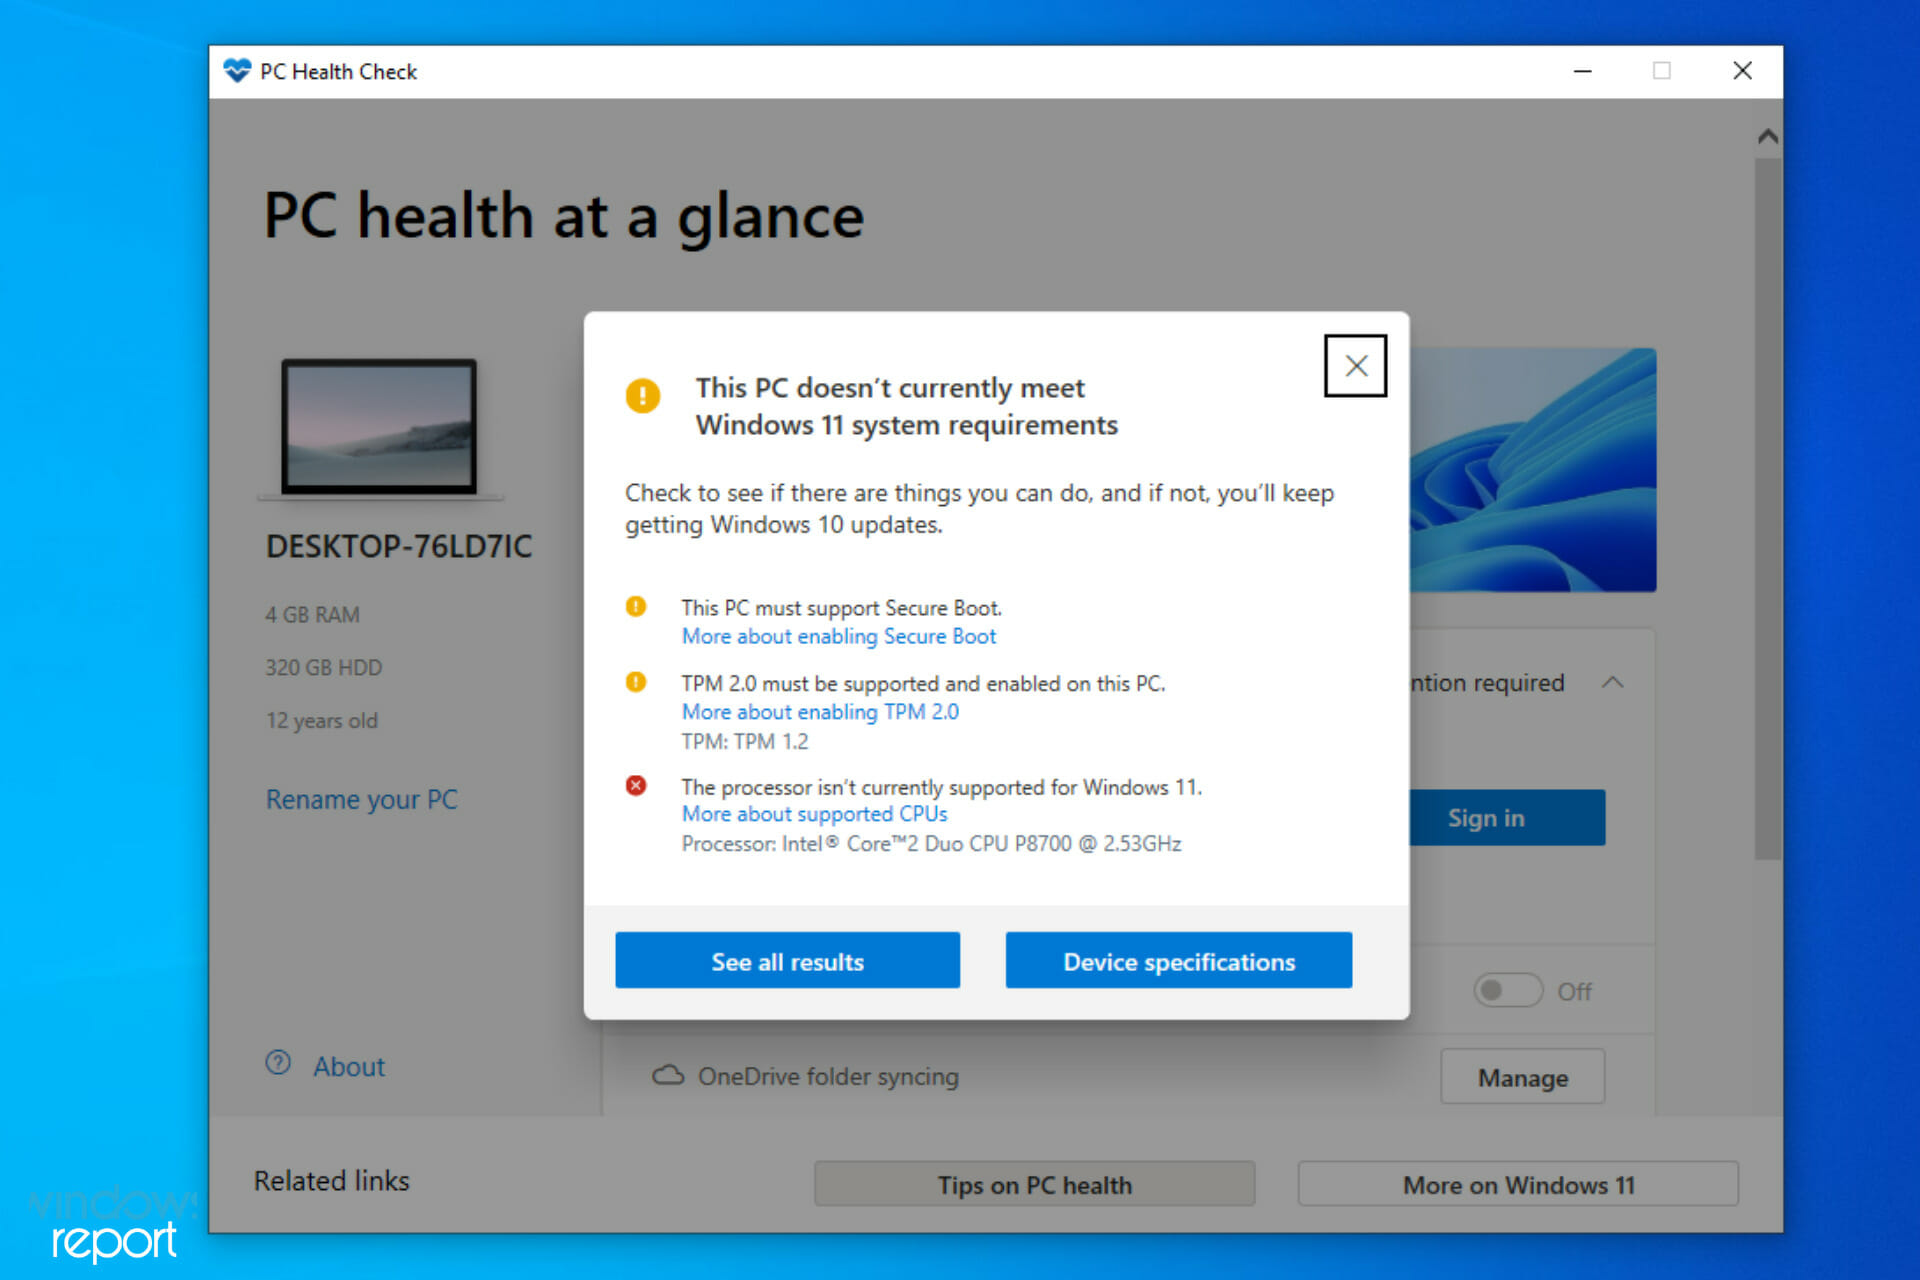
At the heart of the “unsupported PC” issue lies a set of specific hardware requirements that Microsoft deems essential for Windows 11. The most commonly cited blockers are:
- Trusted Platform Module (TPM) 2.0: This is a cryptographic processor that provides hardware-level security functions. Microsoft emphasizes TPM 2.0 for features like Windows Hello for secure login and data encryption, believing it crucial for the OS’s enhanced security posture. Many older, yet still powerful, PCs either lack TPM 2.0 entirely or only support an older version (TPM 1.2).
- Secure Boot: This UEFI firmware feature is designed to prevent malicious software from loading during the system startup process. It ensures that only trusted software (like the operating system) can launch. While many modern PCs have Secure Boot capabilities, it might be disabled by default or not available on some older motherboards.
- Processor Generation: Microsoft specifies a list of supported CPUs, generally limiting Windows 11 to Intel 8th generation and newer, AMD Ryzen 2000 series and newer, and Qualcomm Snapdragon 850 and newer. This leaves out many perfectly capable, slightly older processors that still offer excellent performance.
- RAM and Storage: While 4GB RAM and 64GB storage are relatively low requirements that most PCs meet, the TPM and CPU often present the primary hurdles.
Microsoft’s justification for these strict requirements centers on security, reliability, and the desire to provide a consistent, modern experience. They argue that TPM 2.0 and Secure Boot are fundamental to protecting against evolving cyber threats, while newer processors ensure optimal performance and compatibility with future innovations. While this rationale is understandable from a security and technological standpoint, it leaves many users with otherwise functional hardware feeling unfairly sidelined. This is where the methods to bypass these checks come into play, offering a pathway for those willing to accept the associated risks.
Essential Preparations Before You Begin
Before you embark on the journey of installing Windows 11 on an unsupported PC, meticulous preparation is paramount. Skipping these steps can lead to data loss, system instability, or a failed installation. Think of this as laying a solid foundation for a successful and less stressful upgrade process.
Backing Up Your Data: A Non-Negotiable Step
This is perhaps the single most critical piece of advice. Anytime you perform a major operating system installation or modification, there’s a non-zero risk of data loss. While the methods described here are generally reliable, unforeseen circumstances can always arise.
- Why it’s crucial: An installation error, a power outage, or even a simple mistake during partitioning could render your existing data inaccessible. Backing up ensures that your precious documents, photos, videos, and other files remain safe, regardless of what happens during the installation.
- How to do it:
- External Hard Drive: The most straightforward method is to copy your important files and folders to an external USB hard drive.
- Cloud Storage: Services like Google Drive, OneDrive, Dropbox, or iCloud offer convenient ways to back up critical files, especially if you have a fast internet connection.
- Disk Imaging Software: For a complete system backup (including your operating system, applications, and settings), consider using disk imaging software like Macrium Reflect Free, Acronis True Image, or even Windows’ built-in System Image Backup. This allows you to restore your entire system to its previous state if anything goes wrong.
- Verify your backup: Once you’ve completed your backup, take a moment to verify that the files are accessible on the backup medium. Don’t assume it worked; check it.
Gathering Your Tools: USB Drive, ISO, and Rufus
To successfully install Windows 11 on an unsupported PC, you’ll need a few essential tools:
- A Stable Internet Connection: Necessary for downloading the Windows 11 ISO and Rufus.
- An Empty USB Flash Drive (8GB or larger): This will be used to create the bootable Windows 11 installation media. Ensure it’s empty or contains data you’re willing to lose, as the process will format it.
- Windows 11 ISO File:
- Where to get it: The official Microsoft website is the safest place. Navigate to the “Download Windows 11 Disk Image (ISO)” section and select the desired edition (usually “Windows 11 (multi-edition ISO)”).
- Why ISO: An ISO file is a complete image of an optical disc (like a DVD) that contains all the installation files for Windows 11. We’ll use this with Rufus to create our bootable USB.
- Rufus (Latest Version):
- What it is: Rufus is a free, open-source utility that helps format and create bootable USB flash drives. It’s particularly useful here because it includes a built-in option to bypass Windows 11’s system requirements during media creation.
- Where to get it: Download the latest portable version from the official Rufus website (rufus.ie).
Having these tools ready and your data securely backed up will ensure a smooth and confident start to the installation process.
Step-by-Step Guides to Bypassing Compatibility Checks
Now that your preparations are complete, it’s time to dive into the core methods for installing Windows 11 on an unsupported PC. We’ll cover two primary approaches: using the popular Rufus utility, which simplifies the process, and a manual registry modification method for those who prefer a hands-on approach during the installation.
Method 1: The Rufus Approach – Simplicity and Efficiency
This method is generally recommended for its ease of use and reliability. Rufus automates the process of modifying the installation media to bypass the TPM, Secure Boot, and RAM checks.
- Download and Run Rufus: If you haven’t already, download the latest portable version of Rufus from rufus.ie and run it. No installation is required for the portable version.
- Insert Your USB Drive: Plug your empty 8GB+ USB flash drive into your computer. Rufus should automatically detect it under the “Device” dropdown. If you have multiple USB drives, ensure you select the correct one to avoid accidentally formatting the wrong device.
- Select Your Windows 11 ISO: Click the “SELECT” button next to “Boot selection.” Navigate to where you saved your downloaded Windows 11 ISO file and select it.
- Configure Partition Scheme:
- Image Option: Leave this as “Standard Windows installation.”
- Partition scheme: This is crucial.
- If your PC uses UEFI firmware (most modern PCs), select GPT.
- If your PC uses legacy BIOS (older PCs), select MBR.
- How to check: In Windows, press
Win + R, typemsinfo32and press Enter. Look for “BIOS Mode.” If it says “UEFI,” use GPT. If it says “Legacy,” use MBR.
- Target system: This will automatically adjust based on your partition scheme selection (usually “UEFI (non CSM)” for GPT, or “BIOS (or UEFI-CSM)” for MBR).
- Enable Bypass Options: This is the most important step for an unsupported PC. After selecting your ISO, Rufus will present an “Image Option” dropdown. Change this from “Standard Windows installation” to “Extended Windows 11 Installation (no TPM/no Secure Boot/8GB- RAM).” This is the magic option that tells Rufus to patch the ISO for your unsupported hardware.
- Review Other Settings:
- Volume label: You can leave this as default or give it a custom name (e.g., “Win11_Bypass”).
- File system: Leave as default (NTFS).
- Cluster size: Leave as default.
- Start the Process: Click the “START” button. Rufus will present a warning that all data on the USB drive will be destroyed. Confirm by clicking “OK.”
- Wait for Completion: Rufus will now create the bootable USB drive. This process can take anywhere from 10 to 30 minutes, depending on your USB drive’s speed and your system’s performance. Once it says “READY,” you can close Rufus.
- Boot from the USB Drive:
- Restart your computer.
- Immediately after powering on, repeatedly press the key to enter your BIOS/UEFI settings or the boot menu (common keys include F2, F10, F12, Del, Esc – consult your PC’s manual if unsure).
- In the BIOS/UEFI settings or boot menu, select your USB drive as the primary boot device.
- Install Windows 11: The Windows 11 installer should now launch without the compatibility check errors. Follow the on-screen instructions to install Windows 11 as you normally would. You’ll choose your language, time, keyboard, select “I don’t have a product key” (if you plan to activate later), choose a custom installation, delete/format partitions as needed, and proceed.
Method 2: Manual Registry Modification – For the Tech-Savvy
This method is performed during the standard Windows 11 installation process and involves a quick edit to the Windows Registry. It’s useful if you already have a standard Windows 11 bootable USB or prefer not to use Rufus.
- Boot from Standard Windows 11 Installation Media: Use a standard bootable Windows 11 USB drive (created directly from Microsoft’s Media Creation Tool or by simply copying the ISO to a USB via another tool without bypass options). Boot your unsupported PC from this USB drive as described in step 9 of the Rufus method.
- Encounter the “This PC can’t run Windows 11” Message: Proceed through the initial installer steps (language, region, product key) until you reach the infamous “This PC can’t run Windows 11” screen. This is your cue to intervene.
- Open Command Prompt: While on this error screen, press
Shift + F10(on some laptops, you might need to pressFn + Shift + F10). This will open a Command Prompt window. - Launch Registry Editor: In the Command Prompt, type
regeditand press Enter. This will open the Registry Editor. - Navigate to the Correct Key: In the Registry Editor, navigate to the following path:
HKEY_LOCAL_MACHINESYSTEMSetup - Create a New Key (MoSetup): Right-click on the “Setup” key, select “New” -> “Key,” and name the new key
MoSetup. - Create a New DWORD Value: Right-click on the newly created
MoSetupkey, select “New” -> “DWORD (32-bit) Value,” and name itAllowUpgradesWithUnsupportedTPMOrCPU. - Modify the Value Data: Double-click on
AllowUpgradesWithUnsupportedTPMOrCPU. In the “Value data” field, change it from0to1. Click “OK.” - Close Editors and Resume Installation: Close the Registry Editor, then close the Command Prompt.
- Bypass and Continue: Click the “Back” arrow in the top-left corner of the Windows 11 installer window. Then, click “Next” again. The compatibility check should now be bypassed, and you’ll be able to proceed with the normal installation steps (choosing custom installation, partitioning, etc.).
Both methods achieve the same goal: allowing the Windows 11 installer to proceed on hardware that doesn’t meet the official requirements. Choose the method you’re most comfortable with, but remember to double-check every step, especially when dealing with disk partitions.
Post-Installation: What to Expect and How to Manage
Successfully installing Windows 11 on an unsupported PC is a significant achievement, but the journey doesn’t necessarily end there. Understanding what to expect after installation and how to manage potential issues is crucial for a smooth long-term experience.
Navigating Updates and Potential Hurdles
One of the primary concerns for users running Windows 11 on unsupported hardware is the status of future updates. Microsoft has made it clear that unsupported PCs might not receive critical security updates or feature updates. However, in practice, many users have reported that their “unsupported” Windows 11 installations do receive updates, at least for now.
- Security Updates: Typically, these smaller, more frequent updates (often released on “Patch Tuesday”) address vulnerabilities and bug fixes. Many unsupported systems continue to receive these without issue. Microsoft’s stance could change, but so far, core security patches seem to be distributed.
- Feature Updates: These are the larger, semi-annual updates that introduce new features, design changes, and significant system improvements. While these are also often received, there’s a higher chance of encountering issues or having future feature updates blocked if Microsoft decides to enforce stricter compatibility checks for them.
- Potential Hurdles:
- Driver Compatibility: While Windows 11 has good backward compatibility for drivers, older hardware might not have fully optimized or updated drivers specifically for Windows 11. This could lead to minor performance glitches or certain peripherals not working perfectly. Generally, Windows Update will handle most drivers, but sometimes manual intervention is needed.
- Future Blocks: Microsoft reserves the right to block updates on unsupported hardware at any time. This means your system could potentially be left behind on security patches or miss out on important new features, which is a significant security and productivity risk.
- Performance: While many unsupported PCs run Windows 11 surprisingly well, especially if they were powerful for their generation, some very old or low-spec machines might experience slower performance or less responsiveness compared to Windows 10.
It’s advisable to regularly check for updates and keep an eye on tech news regarding Microsoft’s policies for unsupported installations. Community forums can also be a valuable resource for troubleshooting specific update issues.
Optimizing Your “Unsupported” Windows 11 Experience
Even on unsupported hardware, you can take steps to ensure your Windows 11 experience is as smooth and productive as possible:
- Keep Drivers Updated: Beyond Windows Update, periodically check the website of your PC’s manufacturer (or individual component manufacturers like Intel, AMD, NVIDIA) for the latest drivers, especially for graphics, chipset, and network adapters. Newer drivers can significantly improve stability and performance.
- Disable Unnecessary Startup Programs: Many applications launch automatically with Windows, consuming precious resources. Use Task Manager (Ctrl + Shift + Esc) to go to the “Startup” tab and disable programs you don’t need running immediately.
- Manage Visual Effects: Windows 11’s new UI has more animations and transparency effects. While appealing, these can consume resources. You can adjust them by searching for “Adjust the appearance and performance of Windows” in the Start menu. Choose “Adjust for best performance” or customize individual options.
- Run Disk Cleanup and Defragmentation: Regularly clean up temporary files and optimize your drives (for HDDs, defragment; for SSDs, ensure TRIM is enabled and avoid manual defragmentation) to maintain system responsiveness.
- Monitor System Performance: Use Task Manager’s “Performance” tab to keep an eye on CPU, RAM, disk, and GPU usage. If you notice consistent high usage without apparent cause, it might indicate a background process or driver issue.
- Maintain Regular Backups: Continue your good backup habits even after installation. This is particularly important on an unsupported system where unexpected issues could theoretically arise.
By proactively managing your “unsupported” Windows 11 installation, you can mitigate many potential issues and enjoy a stable and productive computing environment.
Weighing the Risks Against the Rewards
Deciding to install Windows 11 on an unsupported PC is a trade-off. While it offers the appeal of new features and a modern interface, it also comes with a set of inherent risks that Microsoft explicitly warns against. Understanding both sides of this equation is crucial for making an informed decision.
Potential Downsides and Security Considerations
- No Official Support: This is the most significant drawback. If you encounter a critical bug, performance issue, or compatibility problem, Microsoft’s official support channels may refuse assistance since your hardware is not officially supported. You’ll largely be on your own or reliant on community forums.
- Risk of Blocked Updates: As discussed, Microsoft has stated it reserves the right to block security and feature updates for unsupported devices. While many still receive updates, there’s no guarantee this will continue indefinitely. Lack of security updates leaves your system vulnerable to new threats, which is a major digital security concern. Future feature updates might also break functionality.
- Potential for Instability: While many users report stable experiences, there’s always a higher chance of encountering unexpected bugs, crashes, or performance issues when running an OS on hardware it wasn’t designed to support. Driver conflicts are a common culprit.
- Hardware Incompatibility: Some specific hardware components, especially older ones, might not have fully compatible drivers for Windows 11, leading to reduced functionality (e.g., specific features of a graphics card not working), or even complete failure of a component.
- Performance Degradation: Although many unsupported PCs perform adequately, some might experience a noticeable slowdown, especially if the original hardware was already borderline or if certain components (like slower HDDs or minimal RAM) struggle with Windows 11’s demands.
- Security Risks (TPM/Secure Boot Bypass): Bypassing TPM 2.0 and Secure Boot means you’re intentionally opting out of critical hardware-level security features that Windows 11 is designed to leverage.
- TPM: Provides hardware-based encryption and protection against malware tampering with your system’s boot process. Bypassing it means foregoing these robust protections.
- Secure Boot: Guards against rootkits and other low-level malware during startup. Disabling or bypassing it could make your system more susceptible to such attacks.
- For personal finance, digital security, and sensitive data, these are not trivial concerns.

The Benefits of Upgrading to Windows 11
Despite the risks, there are compelling reasons why users opt for Windows 11 on unsupported hardware:
- Modern User Interface: Windows 11 boasts a redesigned user interface with a centered Start menu, rounded corners, new iconography, and improved animations, offering a more visually appealing and streamlined experience.
- Enhanced Productivity Features:
- Snap Layouts and Snap Groups: These features make multitasking and window management significantly more efficient, allowing users to quickly arrange multiple applications on their screen.
- Virtual Desktops: Improved virtual desktop management allows for better organization of work and personal spaces.
- Microsoft Teams Integration: Built directly into the taskbar, facilitating easier communication and collaboration.
- Improved Performance and Efficiency: Windows 11 is designed with optimizations for faster boot times, better memory management, and more efficient resource utilization, leading to a snappier feel on many systems (even some older ones, surprisingly).
- DirectX 12 Ultimate and Auto HDR for Gaming: For gamers, Windows 11 introduces features like Auto HDR (which enhances visuals on compatible HDR monitors) and DirectStorage (for faster game loading times on NVMe SSDs, though its impact is largely dependent on hardware and game support).
- App Experience (Android Apps via Amazon Appstore): The ability to run Android apps natively on Windows 11 (via the Amazon Appstore) opens up new possibilities for app integration and productivity, bridging the gap between mobile and desktop experiences.
- Extended Support Lifespan: While Windows 10 officially ends support in October 2025, Windows 11 offers a longer lifespan of updates and support, potentially deferring the need for new hardware purchases for several years. For budget-conscious users or small businesses, this can be a compelling financial argument.
- Personal Branding & Staying Current: For tech enthusiasts or professionals, using the latest OS can align with personal branding as someone who embraces innovation and stays current with technology trends, even if it means bending the rules a bit.
Ultimately, the decision rests on your individual risk tolerance, the age and capabilities of your PC, and your desire for Windows 11’s features. If your “unsupported” PC is still relatively capable and you’re comfortable with the potential challenges, the reward of experiencing the latest Windows OS might outweigh the risks. However, if your data is highly sensitive or your system is already struggling, it might be wiser to stick with Windows 10 or consider a hardware upgrade.
By carefully considering these factors, you can make an informed choice that best suits your needs and technological comfort level.
aViewFromTheCave is a participant in the Amazon Services LLC Associates Program, an affiliate advertising program designed to provide a means for sites to earn advertising fees by advertising and linking to Amazon.com. Amazon, the Amazon logo, AmazonSupply, and the AmazonSupply logo are trademarks of Amazon.com, Inc. or its affiliates. As an Amazon Associate we earn affiliate commissions from qualifying purchases.