In the vast ecosystem of digital design and productivity, fonts are more than just text – they are the voice, the personality, and often, the silent ambassador of a brand or a message. For Mac users, whether you’re a seasoned graphic designer, a budding content creator, a marketer refining your brand’s visual identity, or simply someone looking to personalize their digital workspace, mastering font installation and management is an indispensable skill.
This guide will demystify the process of installing fonts on your Mac, ensuring you can seamlessly integrate new typographic styles into your creative projects. We’ll delve into the native tools macOS provides, explore advanced management techniques, and even touch upon how effective font usage can bolster your personal and corporate branding, ultimately adding tangible value to your digital endeavors.
Understanding the Power of Typography: More Than Just Letters
Before we dive into the technicalities, let’s appreciate why fonts hold such significant sway. In the digital age, where visual communication reigns supreme, typography plays a critical role in how information is perceived and how brands are recognized.
The Role of Fonts in Design and Branding
A well-chosen font can evoke emotion, convey professionalism, signal innovation, or inject playfulness. Think about the iconic logos of major companies – Apple’s minimalist San Francisco, Coca-Cola’s flowing Spencerian script, or Google’s approachable Product Sans. Their fonts are integral to their brand identity, making them instantly recognizable and relatable.
For individuals, a consistent font choice across your portfolio, personal website, or even social media graphics contributes to your personal brand. It projects an image of cohesion, attention to detail, and professionalism. In the competitive landscape of online content and business, this seemingly small detail can significantly impact how you’re perceived by clients, collaborators, and your audience.
Boosting Productivity and Aesthetic Appeal
Beyond branding, having a diverse and well-managed font library directly impacts productivity for anyone working with text. Designers need specific fonts for client projects, writers might prefer certain typefaces for drafting, and educators can use distinct fonts to highlight information. An accessible font collection empowers you to customize documents, presentations, videos, and graphics to not only look better but also to communicate more effectively. Imagine creating a presentation that captivates your audience not just with its content, but with its elegant and legible typography. This aesthetic appeal translates into a more engaging experience, whether for a sales pitch or an educational module.
The Mac operating system, with its intuitive interface and robust features, offers excellent tools for managing your typographic assets. Let’s explore how to leverage these tools to expand your creative palette.
Your Toolkit: Preparing for Font Installation
Before you start adding new fonts, it’s essential to understand where to acquire them and what types of files you’ll be working with. This preparation ensures a smooth installation process and helps you avoid common pitfalls.
Where to Find New Fonts
The digital world is brimming with font resources, both free and paid. Your choice will often depend on your budget, project requirements, and licensing needs.
- Free Font Websites:
- Google Fonts: A vast library of open-source fonts, ideal for web use and general design. They are free for personal and commercial use.
- DaFont, Font Squirrel, 1001 Free Fonts: Popular repositories offering a wide range of free fonts, often with varying licensing terms (check each font’s license carefully, especially for commercial projects).
- Paid Font Marketplaces:
- Adobe Fonts (formerly Typekit): Included with Adobe Creative Cloud subscriptions, offering a curated collection of high-quality fonts for desktop and web use. Excellent for professionals in design.
- MyFonts, Fontspring, Creative Market: Platforms where you can purchase individual fonts or font families from professional type designers. These often come with more robust licensing agreements suitable for commercial applications.
- Type Foundries: Websites of specific type foundries (e.g., Hoefler&Co, Commercial Type) offer unique and high-quality typefaces directly from their creators.
A Note on Licensing: Always pay attention to the licensing terms when acquiring fonts. Free doesn’t always mean free for commercial use. Using a font without the proper license can lead to legal issues and financial penalties, especially for businesses. When in doubt, invest in a licensed font that covers your intended use. This protects your brand and respects the work of type designers.
Understanding Font File Types
Fonts come in various file formats, each with its own characteristics and historical context. On a Mac, you’ll most commonly encounter:
- TrueType Font (.ttf): Developed by Apple and Microsoft, TTF fonts are widely compatible and have been a standard for decades. They contain both screen and printer font data in a single file.
- OpenType Font (.otf): A more advanced format, also developed by Microsoft and Adobe. OTF fonts offer greater typographic features, such as ligatures, alternate characters, small caps, and old-style figures, making them a favorite for professional designers. They can also contain up to 65,536 glyphs, significantly more than TTF.
- TrueType Collection (.ttc) / Datafork TrueType (.dfont): These formats allow multiple TrueType fonts to be combined into a single file, often used for system fonts.
Most modern operating systems and applications support both TTF and OTF formats seamlessly. When you download a font, it will typically come in a compressed .zip file. You’ll need to unzip it to access the .ttf or .otf files inside.
Installing Fonts on Your Mac: Step-by-Step Methods
macOS provides a straightforward and intuitive way to install and manage your fonts using the built-in Font Book application. There are primarily two methods to get new fonts onto your system.
Method 1: Using Font Book (The Recommended Approach)
Font Book is macOS’s native font management utility. It’s not just for installing; it also allows you to preview, validate, organize, and remove fonts.
Step 1: Locate and Unzip Your Font Files
- After downloading a font, it will usually be in a
.zipfile in yourDownloadsfolder. - Double-click the
.zipfile to uncompress it. This will create a new folder containing the font files (e.g.,.ttf,.otf). If there are multiple styles (bold, italic, light), they might be separate files within this folder.
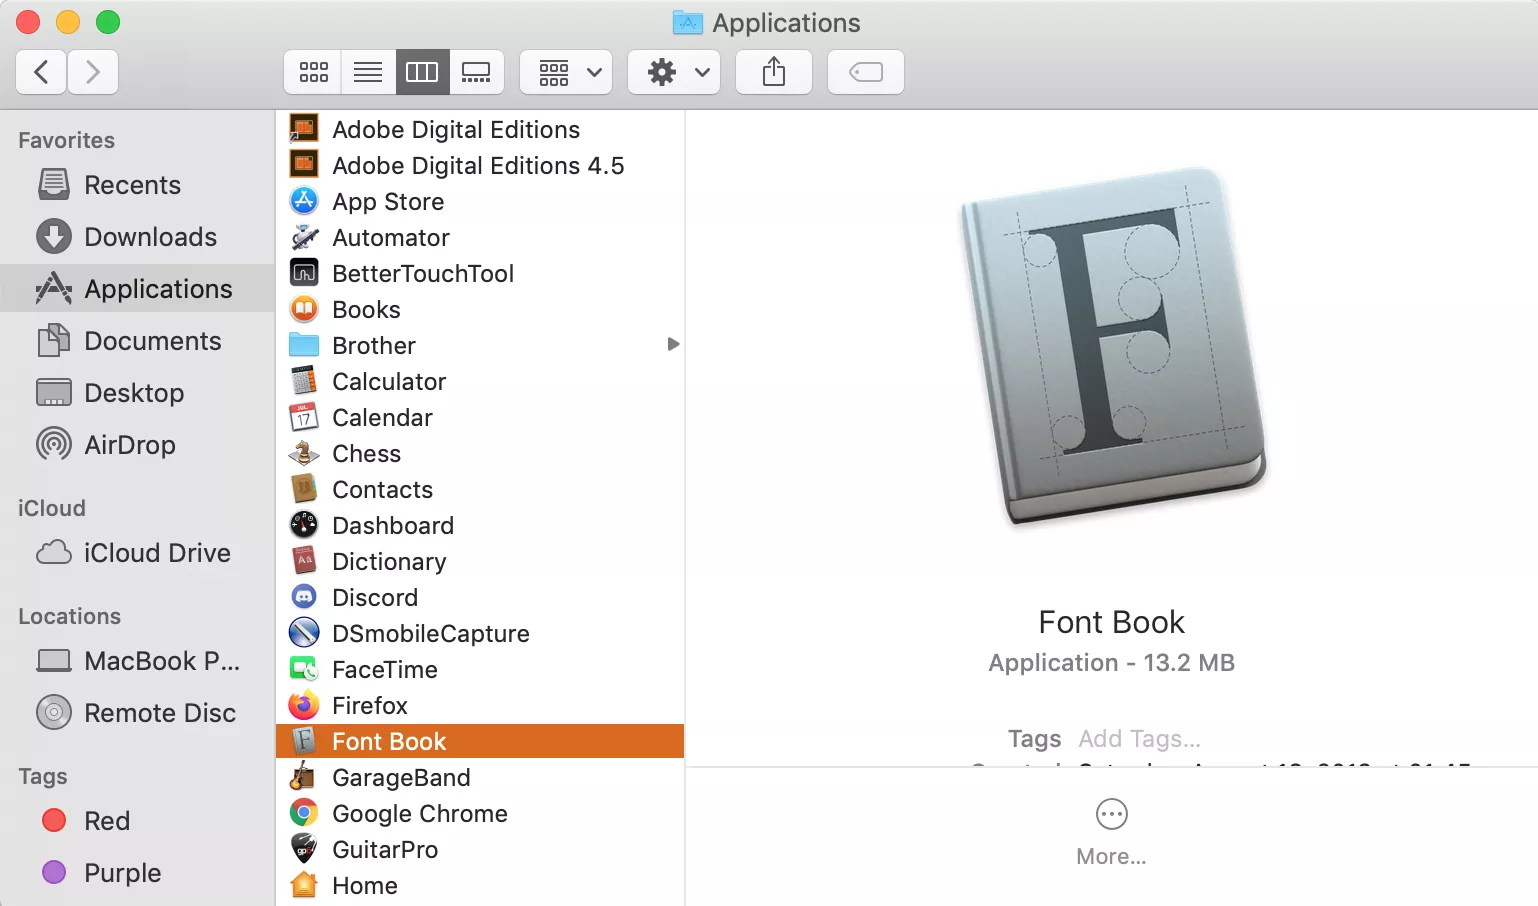
Step 2: Open Font Book
You can open Font Book in a few ways:
- Go to
Finder > Applications > Font Book. - Search for “Font Book” using
Spotlight(Command + Spacebar). - Double-click a font file directly. This is often the quickest method, as it will open the font in Font Book for preview and prompt you to install it.
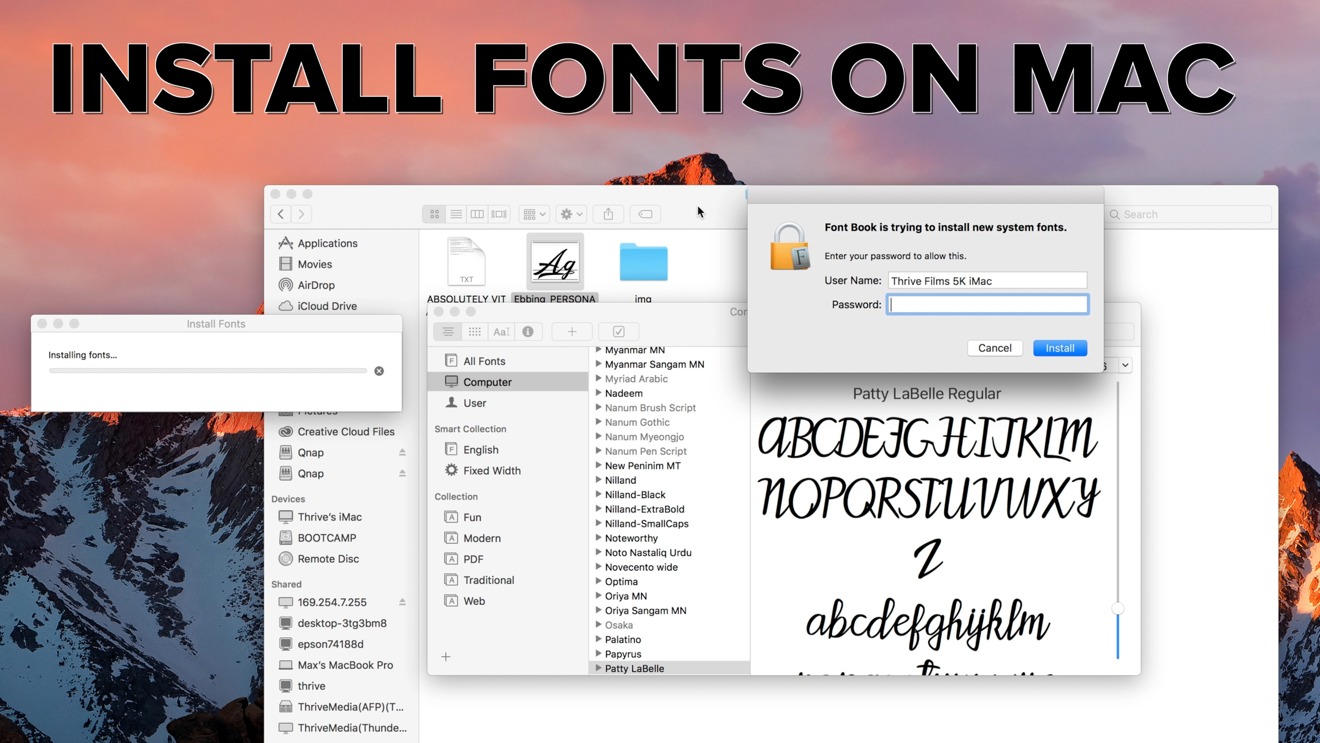
Step 3: Preview and Install the Font
- If you double-clicked a font file, Font Book will open a preview window showing the font, its styles, and some sample text.
- At the bottom of this preview window, click the “Install Font” button.
Step 4: Validate and Resolve Duplicates (Automatic Check)
Before installation, Font Book automatically performs a quick validation check to ensure the font file isn’t corrupted.
- If the font passes validation, it will be installed.
- If issues are found (e.g., minor errors, or if you already have a duplicate of that font installed), Font Book will present a dialog box.
- To resolve duplicates: You’ll be given options like “Resolve Automatically,” “Manual Resolve,” or “Keep Both.” For most users, “Resolve Automatically” or choosing to replace the existing font is sufficient. Keeping both can sometimes lead to confusion in applications.
- For minor errors: You might be prompted to proceed with installation despite the issues. Use caution; severely corrupted fonts can sometimes cause application crashes.
Once installed, the font will appear in your “All Fonts” list within Font Book and become available in all applications on your Mac that support custom fonts (e.g., Pages, Microsoft Word, Adobe Photoshop, Keynote).
Method 2: Manual Installation (Drag and Drop)
While less common, you can also manually install fonts by placing them directly into your Mac’s Fonts folders. This method is generally used for specific scenarios or by advanced users, but Font Book usually handles the underlying process anyway.
Understanding Font Locations
Mac has two primary locations for font storage:
-
System-wide Fonts (for all users):
/Library/Fonts- Fonts installed here are accessible to every user account on your Mac. This is where Font Book usually places fonts when you install them system-wide.
-
User-specific Fonts (for your user only):
~/Library/Fonts(The~represents your Home folder)- Fonts installed here are only available to the user account that installed them. This is useful if you want to keep your font collection separate from other users or for testing purposes.
Note: The user-specific ~/Library folder is hidden by default. To access it:
- In Finder, click on
Goin the menu bar. - Hold down the
Optionkey, andLibrarywill appear as an option. Click it. - Navigate to the
Fontsfolder within.
Steps for Manual Installation:
- Unzip your font file(s) as described in Method 1.
- Open a new
Finderwindow. - Navigate to either
/Library/Fontsor~/Library/Fontsdepending on whether you want the font available to all users or just yourself. - Drag and drop the
.ttfor.otffont file(s) directly into the chosenFontsfolder. - macOS will automatically register the new font, and it should appear in Font Book and your applications. You might need to restart some applications (or even your Mac) for the new fonts to appear, especially if they were open during the installation.
While this method works, using Font Book is generally preferred as it handles validation and duplicate checking automatically, providing a more robust management system.
Mastering Font Management and Troubleshooting
Installing fonts is just the first step. Effective font management is crucial for maintaining system performance, avoiding conflicts, and ensuring your creative workflow remains smooth.
Activating, Deactivating, and Removing Fonts
Over time, your font library can grow substantially. Keeping it lean and organized can prevent slowdowns and reduce visual clutter in your application’s font menus.
-
Activating/Deactivating Fonts: In Font Book, you can temporarily disable fonts without deleting them. This is useful for project-specific fonts or troubleshooting.
- Open Font Book.
- Select the font or collection you wish to manage.
- Right-click (or Control-click) on the selected item, and choose “Disable [Font Name]” or “Disable Collection.” You can also click the checkbox next to the font name to toggle its active status.
- Disabled fonts will appear grayed out and will not be available in applications. To reactivate, simply right-click and choose “Enable [Font Name].”
-
Removing Fonts: To permanently delete a font:
- Open Font Book.
- Select the font you wish to remove.
- Right-click (or Control-click) and choose “Remove [Font Name].”
- Confirm your decision. The font file will be moved to the Trash. Be cautious when removing fonts, especially system fonts, as it can affect macOS’s appearance and functionality. Font Book typically prevents you from removing essential system fonts.
Resolving Duplicate Fonts
Duplicate fonts can cause issues in applications, leading to unexpected font substitutions or rendering problems. Font Book’s validation process helps identify these.
- Open Font Book.
- Go to
File > Validate Fonts. - Font Book will scan your library and report any issues, including duplicates.
- If duplicates are found, select “Resolve Automatically” or manually choose which version to keep. Often, the newer or OpenType version is preferred over older TrueType versions if both exist.
Creating Font Collections for Organization
For professionals, organizing fonts into collections is a game-changer. You can group fonts by client, project type, style (e.g., “Serif Display,” “Handwritten”), or even licensing.
- In Font Book, go to
File > New Collection. - Name your new collection (e.g., “Brand X Project Fonts,” “Editorial Sans-serifs”).
- Drag and drop fonts from “All Fonts” into your new collection.
- You can then activate or deactivate entire collections, streamlining your workflow. This approach links directly to “Brand Strategy” by maintaining consistency and efficiency across various client projects.
Troubleshooting Common Font Issues
Even with Font Book, you might encounter occasional issues. Here are some common problems and solutions:
- Font Not Appearing in Applications:
- Restart the Application: Often, simply restarting the application (e.g., Photoshop, Word) will make the newly installed font appear.
- Restart Your Mac: For stubborn cases, a full system restart can resolve lingering cache issues.
- Check Font Book: Ensure the font is listed in Font Book and is enabled (not grayed out).
- Validate the Font: Re-run validation in Font Book to check for corruption.
- Corrupted Fonts: A corrupted font file can cause applications to crash or display strange characters.
- Delete and Reinstall: Remove the problematic font from Font Book and redownload it from the source. Then, try reinstalling.
- Try an Alternate Version: If available, try a different file format (e.g., OTF instead of TTF) or download from a different reputable source.
- Slow Performance: A massive, unmanaged font library can sometimes contribute to system slowdowns or application launch times.
- Deactivate Unused Fonts: Use collections to deactivate fonts you’re not actively using.
- Remove Unnecessary Fonts: Periodically review your library and delete fonts you no longer need.
- Font Conflicts (Missing Font Errors): When opening a document created on another machine, you might get “missing font” errors.
- Acquire the Missing Font: The easiest solution is to obtain and install the exact font used in the document.
- Use Font Management Software: Professional tools (like Suitcase Fusion, RightFont) can help identify and even temporarily activate missing fonts.
Advanced Tips and Best Practices
For those serious about their digital craft, going beyond basic installation can significantly enhance your workflow and safeguard your assets.
Backing Up Your Font Library
Your curated font collection is a valuable asset, especially if you’ve invested in licensed typefaces. It’s crucial to back it up regularly.
- Manual Backup: Copy your
~/Library/Fontsand/Library/Fontsfolders to an external hard drive or cloud storage (e.g., Dropbox, Google Drive). - Time Machine: macOS’s built-in backup solution, Time Machine, will automatically back up your entire system, including your font folders.
- Cloud Sync Services: Some third-party font managers offer cloud sync capabilities, ensuring your fonts are always available and backed up.
Exploring Third-Party Font Managers
While Font Book is excellent for basic management, professionals who deal with hundreds or thousands of fonts might benefit from dedicated third-party font management software. These tools offer advanced features like:
- Auto-activation: Automatically activating fonts needed by a specific design document.
- Cloud Sync: Syncing fonts across multiple machines or teams.
- Extensive Previews: More advanced previewing options.
- Detailed Metadata: Better organization based on font properties.
- Integration with Design Software: Seamless workflows with applications like Adobe Creative Suite.
Popular options include Adobe Fonts (integrated with Creative Cloud), Suitcase Fusion, RightFont, and FontBase. For teams, these tools are invaluable for maintaining brand consistency and streamlining design processes, directly impacting “Brand Strategy” and “Productivity” (Tech).
The Financial Sense of Good Typography
While installing fonts might seem like a purely creative endeavor, there are significant financial implications, especially for businesses and professionals.
- Brand Value: A strong, consistent brand identity built on thoughtful typography enhances recognition and trust, which can directly translate to customer loyalty and sales. This is a core “Brand Strategy” component.
- Professionalism: High-quality fonts convey professionalism. In proposals, marketing materials, and client deliverables, good typography makes a positive impression, increasing your perceived value and potentially closing deals (“Money”).
- Licensing Compliance: Investing in proper font licenses avoids costly legal disputes down the line. Many free fonts have restrictive licenses, making paid fonts a sound “Money” investment for commercial use.
- Efficiency: For designers and marketers, efficient font management through Font Book or third-party tools saves time. Time saved is money earned, enhancing overall “Productivity” (Tech/Money).
By understanding the technical aspects of font installation and integrating them with strategic thinking about branding and financial prudence, Mac users can elevate their digital output to new heights.

Conclusion
Installing fonts on your Mac is a foundational skill that unlocks a world of creative possibilities. Whether you’re adding a unique typeface for a personal project, ensuring brand consistency across corporate materials, or simply customizing your digital environment, macOS provides robust and intuitive tools to get the job done.
From the straightforward drag-and-drop method to leveraging the powerful features of Font Book for organization and troubleshooting, you now have the knowledge to manage your typographic assets with confidence. Remember to always consider font licensing, back up your valuable collection, and explore advanced tools as your needs evolve. By mastering font installation and management, you’re not just adding new letters to your system; you’re enhancing your productivity, strengthening your brand, and investing in the visual integrity of all your digital creations. Embrace the power of typography and let your Mac be the canvas for your unique visual voice.
aViewFromTheCave is a participant in the Amazon Services LLC Associates Program, an affiliate advertising program designed to provide a means for sites to earn advertising fees by advertising and linking to Amazon.com. Amazon, the Amazon logo, AmazonSupply, and the AmazonSupply logo are trademarks of Amazon.com, Inc. or its affiliates. As an Amazon Associate we earn affiliate commissions from qualifying purchases.