In the fast-evolving digital landscape, staying current with the latest operating systems is crucial for both security and productivity. Windows 11, Microsoft’s newest iteration, promises a refined user experience, enhanced performance, and a host of new features designed to streamline workflows and boost creativity. However, the first hurdle many users face before enjoying these benefits is the installation process itself. “How long does it take to install Windows 11?” is a question frequently asked, reflecting a common concern about downtime and the disruption it might cause to our busy schedules.
The answer, like many things in technology, isn’t a simple fixed number. It’s a dynamic equation influenced by a multitude of factors, ranging from your hardware specifications and internet speed to your chosen installation method and the sheer volume of data involved. Understanding these variables is key to setting realistic expectations and even taking steps to optimize the process. This comprehensive guide will break down every aspect of Windows 11 installation, from the initial download to the final touches of post-setup configuration, helping you prepare for a smooth and efficient transition. We’ll delve into the typical timeframes, identify the most significant bottlenecks, and provide actionable tips to minimize your waiting time, ensuring you can get back to being productive with your new operating system as quickly as possible.
Demystifying Windows 11 Installation: What to Expect
Installing a new operating system can often feel like a black box, a series of progress bars and reboots with an unclear timeline. However, by understanding the distinct phases and the underlying factors that influence them, you can gain a clearer picture of what to expect when you embark on your Windows 11 journey. This section aims to demystify the process, breaking it down into manageable components.
The Phased Approach to Installation
The installation of Windows 11 is not a monolithic event but a series of sequential steps, each contributing to the overall duration. While the exact terminology might vary, these phases are universally present whether you’re performing a clean install or an in-place upgrade:
- Download/Preparation Phase (Pre-Installation): This initial stage involves acquiring the necessary installation files. If you’re upgrading directly through Windows Update, this means downloading gigabytes of data. If you’re performing a clean install, it involves downloading the Media Creation Tool and creating a bootable USB drive or DVD. Your internet speed and the performance of your storage device (for creating media) are critical here. This phase can range from a few minutes on a blazing-fast fiber connection to several hours on a slower DSL line. For those creating a USB installer, the write speed of the USB drive itself also plays a role.
- Copying Files: Once the installation environment is loaded (either from your bootable media or after a reboot for an upgrade), the system begins copying the core Windows files to your chosen drive partition. This is primarily a test of your storage drive’s read/write speed. An SSD (Solid State Drive) will breeze through this, while an older HDD (Hard Disk Drive) will take significantly longer.
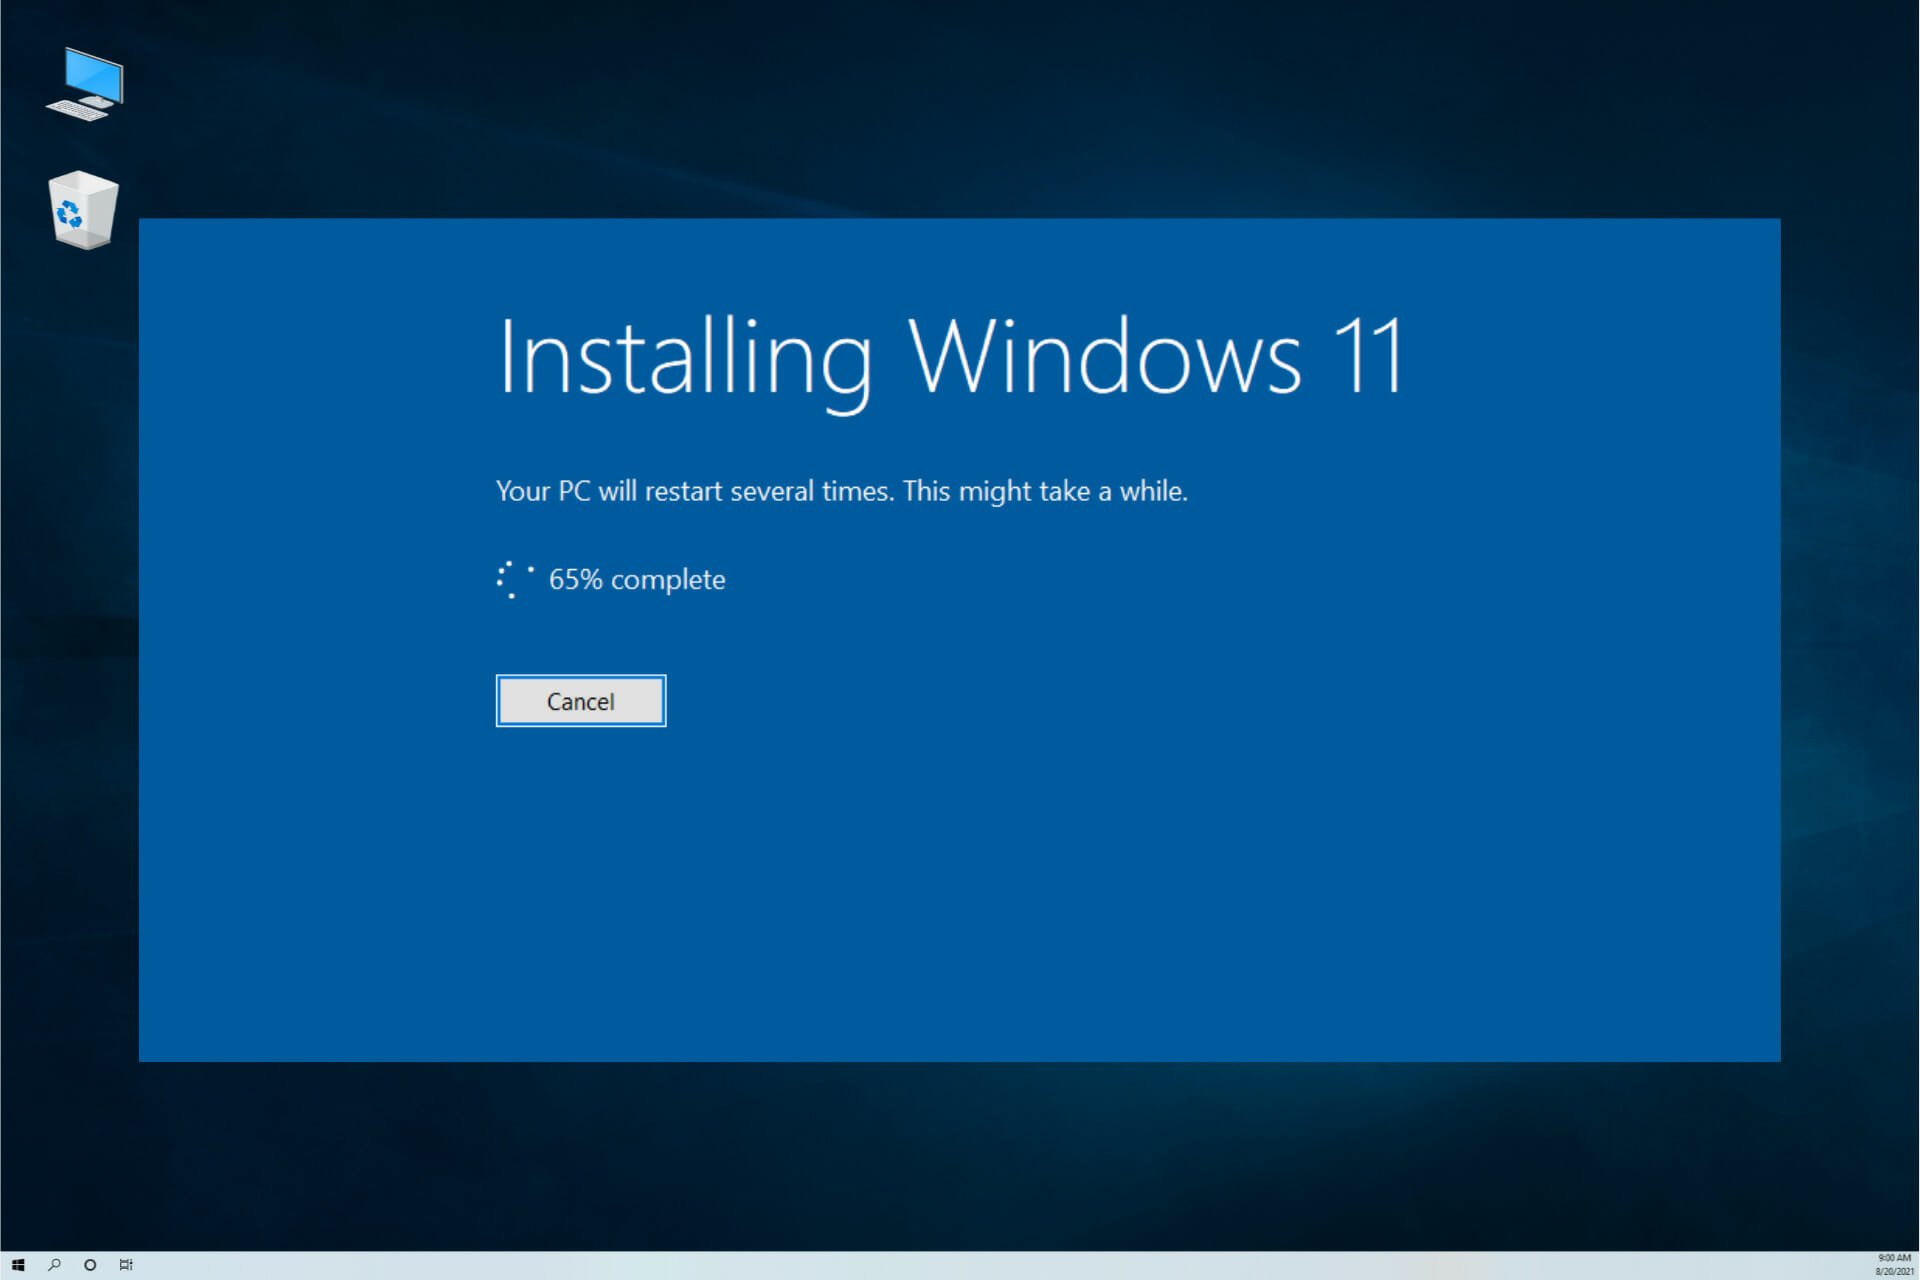
- Getting Devices Ready / Installing Features and Drivers: After the core files are in place, Windows starts detecting your hardware components (graphics card, sound card, network adapter, etc.) and installing generic drivers. It also integrates essential Windows features. This phase often involves several reboots as the system configures itself and optimizes for your specific hardware. The complexity of your system and the number of devices it needs to recognize can influence this duration.
- Configuration and Finalization: This stage involves applying system settings, preparing user profiles, and performing final checks before the graphical user interface appears. It’s often marked by the “Working on updates,” “Just a moment,” or “Preparing your desktop” messages.
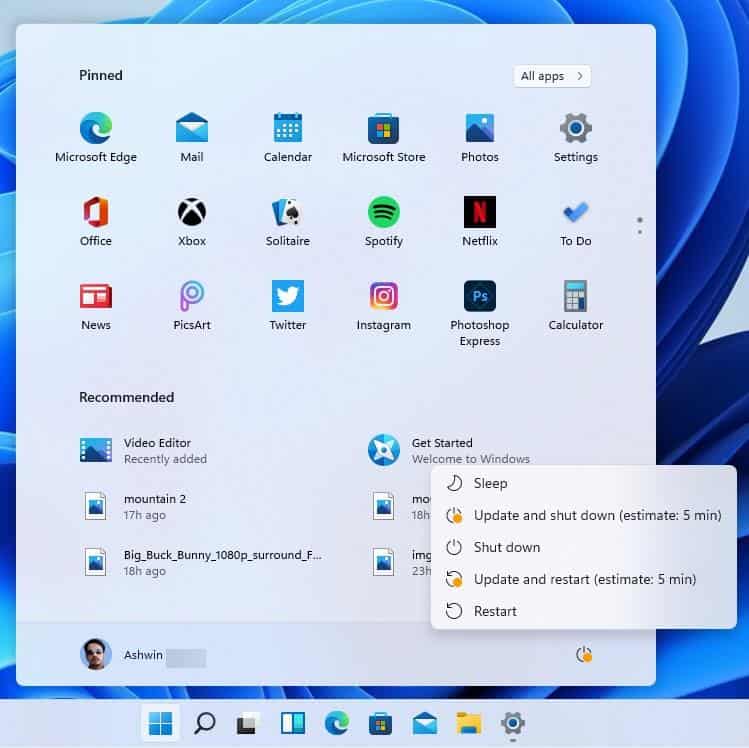
- Out-of-Box Experience (OOBE) / Initial Setup: This is the first time you interact with Windows 11 after the core installation. You’ll be prompted to select your region, keyboard layout, log in with a Microsoft account (or create one), set up PINs, privacy settings, and choose your preferred device usage. While not strictly part of the “installation” time as dictated by the progress bar, it’s an essential part of getting your system ready for use and can add 10-20 minutes to your overall journey.
- Post-Setup Updates: Even after the OOBE, Windows 11 will almost certainly have a backlog of critical and optional updates to download and install. These include security patches, feature updates, and more specific device drivers. This phase, often requiring more reboots, is vital for a secure and stable system but adds significant time.
Key Variables That Dictate Your Installation Timeline
The duration of each phase, and thus the entire installation process, is heavily influenced by several critical variables:
- Hardware Specifications (The Tech Core):
- Storage Drive Type: This is arguably the single most important factor.
- SSD (Solid State Drive): Modern NVMe or SATA SSDs are incredibly fast, reducing file copying and system configuration times dramatically. Expect installation times to be at the lower end of the spectrum (20-40 minutes for the core install).
- HDD (Hard Disk Drive): Traditional mechanical drives are significantly slower. Installation times can easily double or even triple compared to an SSD (45-90+ minutes for the core install).
- Processor (CPU): A faster, multi-core processor (like an Intel Core i5/i7/i9 or AMD Ryzen 5/7/9) will process installation tasks, decompress files, and handle configurations much more quickly than an older, slower CPU.
- RAM (Memory): While not as critical as storage, sufficient RAM (8GB minimum, 16GB recommended) allows the installer to run more smoothly and efficiently, preventing bottlenecks that can occur with insufficient memory.
- Storage Drive Type: This is arguably the single most important factor.
- Internet Connection Speed (The Digital Pipeline): This is paramount for the download/preparation phase, especially if you’re upgrading or need to download Windows Media Creation Tool or post-installation updates. A fast, stable broadband connection can save hours, whereas a slow or intermittent connection can turn a 30-minute download into a multi-hour ordeal.
- Installation Method:
- Clean Install (Boot from USB/DVD): Generally faster for the core installation itself because it doesn’t have to contend with existing data, applications, or potential conflicts. It effectively wipes the slate clean.
- In-Place Upgrade (via Windows Update or ISO): Can take longer. The system needs to analyze existing files, migrate settings, move old program files (to
windows.old), and ensure compatibility with current drivers and applications. This complexity adds overhead.
- Source of Installation Media:
- USB 3.0 Drive: Using a fast USB 3.0 flash drive as your bootable media will significantly speed up the initial file copying phase compared to a USB 2.0 drive.
- DVD: Optical drives are the slowest option, both for reading the installation media and often for the drive itself. Avoid using DVDs if speed is a priority.
- Pre-existing Data and System Condition (for Upgrades): If your current system is cluttered with old files, has a fragmented HDD, or is burdened by numerous applications, an in-place upgrade will take longer as the installer meticulously processes this existing environment. A fresh, optimized system will generally upgrade faster.
- Post-Installation Updates and Drivers: This is often overlooked but adds a significant chunk of time. Windows 11, like its predecessors, will immediately look for updates and download critical drivers after the core installation. This can easily add another 30 minutes to several hours, depending on the update size and your internet speed, often involving multiple reboots.
Understanding these variables empowers you to manage your expectations and even influence the installation duration by making informed choices about your hardware and preparation.
Pinpointing the Installation Timeline: Average Scenarios
Given the numerous factors at play, providing an exact installation time is impossible. However, we can outline typical timeframes for common scenarios, giving you a strong estimate to plan your day around. These figures represent the core installation time, from booting the installer to reaching the Out-of-Box Experience (OOBE) setup, but we’ll also discuss the “real” total time.
Clean Installation: A Fresh Start
A clean installation involves erasing your primary drive (or a chosen partition) and installing Windows 11 from scratch. This is often the preferred method for optimal performance, as it avoids carrying over old system clutter.
- With an SSD (Solid State Drive) and USB 3.0 Media: This is the fastest possible scenario.
- Core Installation Time: 20-40 minutes.
- (Breakdown: File copying is extremely fast, followed by quick driver detection and basic configuration. Your CPU and RAM will be the main determinants here.)
- With an HDD (Hard Disk Drive) and USB 2.0/3.0 Media: The mechanical nature of the HDD significantly slows things down.
- Core Installation Time: 45-90 minutes.
- (Breakdown: File copying is much slower, and the system might spend more time accessing the disk during driver installation and configuration stages.)
It’s important to remember that these times do not include the initial download of the ISO file or the creation of the bootable media, which can add another 15 minutes to several hours depending on your internet speed.
Upgrading Your Current System: The Transition
An in-place upgrade preserves your personal files, applications, and settings while transitioning your operating system from Windows 10 (or eligible previous versions) to Windows 11. This method is convenient but often takes longer due to the complexity of migration.
- With an SSD and Fast Internet Connection (via Windows Update or mounted ISO):
- Core Installation Time: 30-60 minutes.
- (Breakdown: The system needs to analyze your existing setup, migrate data, and move your old Windows installation to a
windows.oldfolder. While the SSD helps with read/write operations, the analysis and migration add overhead.)
- With an HDD and Decent Internet Connection: This scenario combines the slowest storage type with the more complex upgrade process.
- Core Installation Time: 60-120+ minutes (1-2 hours or more).
- (Breakdown: Expect significant waiting during the “copying files” and “getting devices ready” phases, as the HDD struggles with intense read/write operations during the migration.)
For upgrades, the initial download of the Windows 11 update package can be quite substantial (several gigabytes), easily adding another 30 minutes to several hours depending on your internet speed before the actual installation even begins.
The “Real” Total Time: Beyond the Progress Bar
The times quoted above focus primarily on the progress bars you see during the core installation. However, getting your system truly ready for productive work involves several crucial steps that follow. This is what we refer to as the “real” total time, which can significantly extend your overall downtime.
- Downloading the ISO / Preparing Installation Media: (Applicable for clean installs) This alone can range from 15 minutes to 3 hours depending on your internet speed and the speed of your USB drive.
- Out-of-Box Experience (OOBE) Setup: Configuring initial settings, logging into your Microsoft account, setting up privacy, etc. This typically takes 10-20 minutes but requires user interaction.
- Windows Updates: After the OOBE, your system will almost immediately begin downloading and installing a barrage of cumulative updates, security patches, and feature updates that have been released since the core ISO was created. This is non-negotiable for system security and stability. Depending on the volume of updates and your internet speed, this phase can take anywhere from 30 minutes to several hours, often requiring multiple reboots.
- Driver Updates: While Windows 11 installs generic drivers during setup, you’ll likely need to install the latest, optimized drivers for your graphics card, chipset, network adapter, and peripherals directly from the manufacturer’s website. This ensures optimal performance and compatibility. This can add another 15-45 minutes of active work and downloads.
- Software Installation: Reinstalling all your essential productivity applications (web browser, office suite, creative software, games, etc.) can be the longest phase of all. This is highly variable but can easily take 1-4+ hours depending on the number and size of your applications.
When you factor in these post-installation steps, a “quick” 20-minute clean install can easily translate into a 3-6 hour total process before your system is fully configured and ready for peak productivity. For upgrades, the total time might be similar, but with different distribution of effort (less software reinstall, but potentially longer initial installation and troubleshooting). Planning for this extended timeframe is crucial for minimizing disruption to your work or personal life.
Optimizing Your Installation: Tips for a Faster Setup
While some factors like your existing hardware are fixed, there are several proactive steps you can take to significantly reduce the time it takes to install Windows 11 and get your system up and running efficiently. These tips focus on both hardware preparation and software strategy.
Hardware Hacks for Speed
Investing a little time (or even a small amount of money) in your hardware can yield substantial returns in installation speed and overall system performance.
- Upgrade to an SSD (Solid State Drive): If you’re still running Windows on an HDD, this is hands down the single most impactful upgrade you can make. Not only will it drastically cut down Windows 11 installation time, but it will also revolutionize your everyday computing experience – booting faster, launching apps quicker, and improving overall system responsiveness. Even a modest 250GB SSD can make a world of difference for your OS and primary applications. This is a sound investment in your tech and productivity.
- Utilize a USB 3.0 Drive for Installation Media: If performing a clean install, create your bootable USB drive on a high-quality USB 3.0 flash drive (or better, USB 3.1/3.2). Ensure your computer also has a USB 3.0 (or newer) port to plug it into. The increased data transfer speeds compared to USB 2.0 will make the initial file copying phase noticeably faster.
- Meet or Exceed Minimum System Requirements: While Windows 11 has specific minimum requirements (TPM 2.0, Secure Boot, 4GB RAM, 64GB storage, etc.), simply meeting them will provide a baseline experience. For faster installation and better overall performance, aim for 8GB or preferably 16GB of RAM, and a more recent multi-core processor. A system that barely scrapes by will invariably take longer to install and configure.
- Disconnect Non-Essential Peripherals: During the core installation process, temporarily unplug any non-essential peripherals like external hard drives, printers, webcams, or additional monitors. This reduces the number of devices the installer needs to detect and configure, potentially speeding up the “Getting devices ready” phase and reducing the chances of driver conflicts.
Software Strategies for Efficiency
Beyond hardware, smart software preparation and management can also shave off valuable minutes from your installation timeline.
- Ensure a Stable and Fast Internet Connection: Before starting any download or upgrade process, verify that your internet connection is stable and performing at its maximum speed. If possible, use a wired Ethernet connection instead of Wi-Fi, especially for large downloads, to minimize latency and potential dropouts. This directly impacts the download phase for ISOs, Media Creation Tool, and crucial post-installation updates.
- Close Unnecessary Applications (for Upgrades): If you’re performing an in-place upgrade, close all open applications and processes before initiating the upgrade. This frees up RAM and CPU cycles for the installer and reduces potential conflicts or data corruption during the migration process.
- Perform a Quick Disk Cleanup and Defragment (for HDD Upgrades): If you’re upgrading an older system with an HDD, consider running a disk cleanup to remove temporary files and then defragmenting your drive. While less critical for SSDs, this can slightly improve read/write efficiency on HDDs during the upgrade process.
- Backup Your Data (Crucial for Peace of Mind, Not Speed): While backing up your data doesn’t directly speed up the installation, it dramatically speeds up your recovery from a potential problem. Knowing your photos, documents, and important files are safe on an external drive or cloud service (like OneDrive, Google Drive, Dropbox) allows you to proceed with the installation without anxiety, which indirectly makes the process feel faster and less stressful. This is a foundational practice for digital security and productivity.
- Download Essential Drivers in Advance: For a clean install, it’s a good practice to download the latest chipset, graphics card, and network card drivers from your motherboard/laptop manufacturer’s website onto a separate USB drive before starting the installation. This way, you’re not scrambling to get online with a basic network driver after the install, and you can immediately install optimized drivers for better performance and stability.
By implementing these hardware and software strategies, you can take a more proactive approach to your Windows 11 installation, significantly reducing your downtime and ensuring a smoother, more efficient transition to your new operating system.
Beyond Installation: Crucial Post-Setup Steps for Peak Performance
Successfully installing Windows 11 is just the first step. To truly unlock its potential and ensure a stable, secure, and productive computing experience, several critical post-setup steps are essential. Skipping these can lead to performance issues, security vulnerabilities, or a frustrating user experience.
Driver and Windows Updates: The Immediate Essentials
Even after the core installation completes, your system is likely not fully up-to-date or optimized.
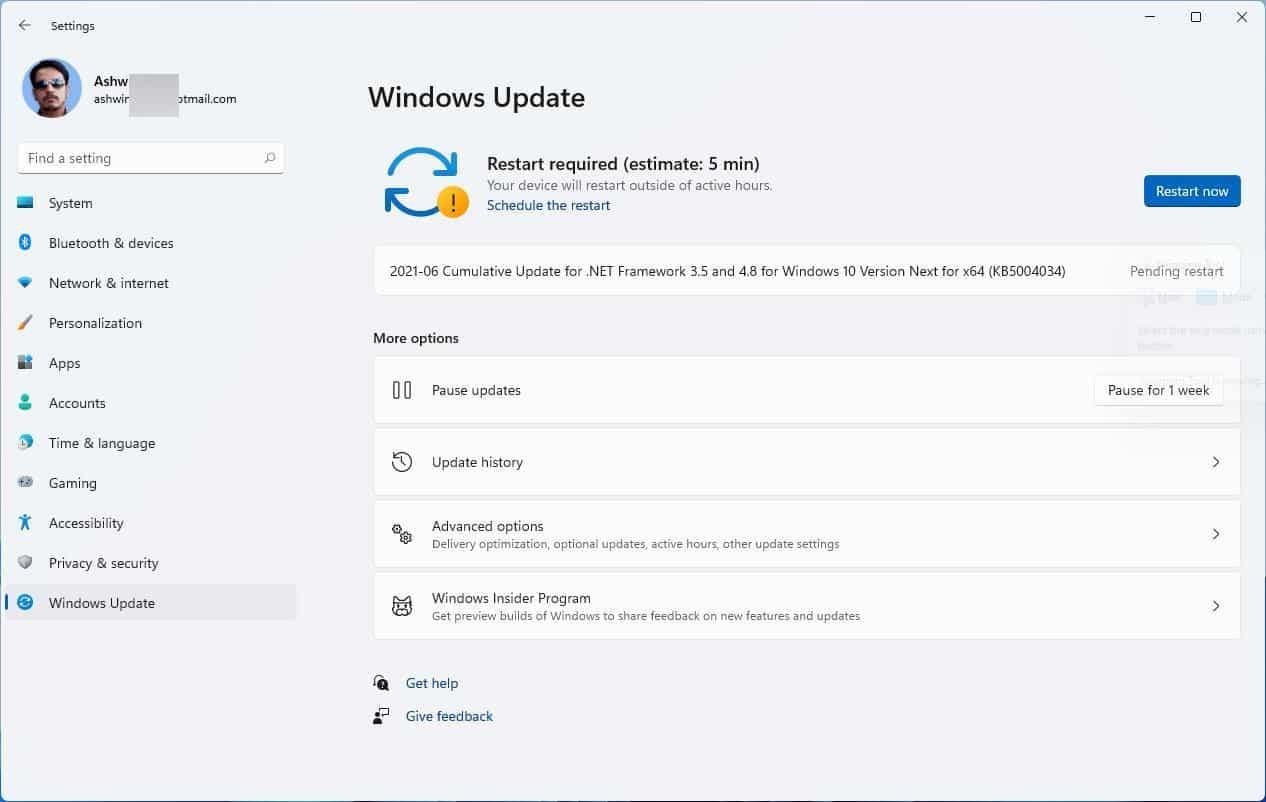
- Run Windows Update Immediately (and Repeatedly): This is the single most important post-installation step. Go to
Settings > Windows Updateand click “Check for updates.” Windows 11 continuously receives security patches, bug fixes, and sometimes feature updates. The installation media you used might be several months old, meaning there’s a backlog of updates waiting. This phase often requires multiple reboots, so be prepared for your computer to restart several times as it applies these crucial updates. Keep checking and restarting until no more updates are found. This ensures your system is secure against the latest threats and stable with the newest fixes. - Install Manufacturer-Specific Drivers: While Windows Update does a decent job of providing generic drivers, for optimal performance and functionality, you should download and install the latest drivers directly from your computer manufacturer’s website (for laptops or pre-built PCs) or your motherboard, graphics card, and peripheral manufacturers’ websites (for custom builds). Pay particular attention to:
- Chipset Drivers: Essential for overall system stability and communication between components.
- Graphics Card Drivers: Crucial for display performance, gaming, and video editing.
- Network (Wi-Fi/Ethernet) Drivers: Ensures robust and fast internet connectivity.
- Audio Drivers: For proper sound output and input.
- Other Peripheral Drivers: For specialized devices like gaming mice, keyboards, or external docks.
Having these optimized drivers ensures that all your hardware components are communicating efficiently with Windows 11, preventing crashes, enhancing performance, and unlocking full functionality.
Personalization and Productivity Tools: Making it Yours
Once your system is stable and updated, it’s time to tailor Windows 11 to your personal preferences and equip it with the tools you need for maximum productivity.
- Install Essential Software: Reinstall all your critical productivity applications. This includes your preferred web browser (Chrome, Firefox, Edge, Brave), office suite (Microsoft 365, LibreOffice), communication tools (Slack, Teams, Zoom), creative software (Adobe Suite, GIMP, Krita), and any specific line-of-business applications. Consider using a tool like Ninite.com for a clean install, which allows you to select multiple popular applications and install them all at once, saving significant time.
- Restore Your Data: If you performed a clean install, now is the time to copy your backed-up personal files (documents, photos, videos, music) back to your primary drive. Organize them logically to maintain a clean digital workspace.
- Configure Privacy and Security Settings: Review Windows 11’s privacy settings (
Settings > Privacy & security) to ensure they align with your preferences. Enable Windows Defender Firewall and ensure your antivirus (whether Windows Security or a third-party solution) is active and updated. Consider setting up Windows Hello for faster, more secure logins using facial recognition, fingerprint, or PIN. - Personalize Your User Experience: Dive into
Settings > Personalizationto customize your desktop background, themes, Start Menu layout, Taskbar widgets, and notification preferences. A well-organized and aesthetically pleasing workspace can significantly boost your productivity and comfort. - Optimize Startup Programs: After installing your software, check your startup programs (
Task Manager > StartuporSettings > Apps > Startup) and disable any unnecessary applications from launching automatically. This will reduce boot times and free up system resources, ensuring your computer starts quickly and runs smoothly.
By diligently following these post-setup steps, you transform a freshly installed operating system into a finely tuned, personalized, and robust productivity machine. This attention to detail after the installation is just as important as the installation itself for leveraging the full power of Windows 11.
Conclusion
The question “how long does it take to install Windows 11?” is far more nuanced than it appears on the surface. While the core installation might span anywhere from 20 minutes to over 2 hours, depending on your hardware and installation method, the real-world total time from initial download to a fully functional and personalized system can easily extend to 3 to 6 hours or even more. This comprehensive journey includes not only the visible progress bars but also crucial preparatory steps, the interactive Out-of-Box Experience, and the often-overlooked yet vital post-installation updates, driver installations, and software setup.
The primary determinants of your installation timeline are your storage drive type (SSD vs. HDD), processor speed, amount of RAM, internet connection quality, and whether you opt for a clean install or an in-place upgrade. An SSD is your best friend in this process, dramatically cutting down the time spent waiting for files to copy and features to configure. A fast and stable internet connection is equally critical for efficient downloads of installation media and essential post-setup updates.
As a website focused on Tech, Brand, and Money, we emphasize that understanding this process is not just about curiosity; it’s about efficient productivity and smart tech investment. Minimizing downtime during an OS upgrade directly translates to less lost work or leisure time. Proactively optimizing your system before installation, like ensuring an SSD or using a fast USB 3.0 drive, is an investment that pays dividends not only in installation speed but also in the long-term performance and responsiveness of your Windows 11 machine. Furthermore, the post-installation phase—meticulously updating drivers, running Windows Updates, and installing your core productivity applications—is paramount for maximizing the return on your tech investment, ensuring your new operating system operates at peak efficiency and security.
In conclusion, approach your Windows 11 installation with realistic expectations and a plan. Back up your data, prepare your media, and be ready for the significant, yet necessary, post-installation tasks. By doing so, you’ll ensure a smoother transition, reduce frustration, and quickly get back to harnessing the full power of Windows 11 for all your digital endeavors.
aViewFromTheCave is a participant in the Amazon Services LLC Associates Program, an affiliate advertising program designed to provide a means for sites to earn advertising fees by advertising and linking to Amazon.com. Amazon, the Amazon logo, AmazonSupply, and the AmazonSupply logo are trademarks of Amazon.com, Inc. or its affiliates. As an Amazon Associate we earn affiliate commissions from qualifying purchases.