In today’s rapidly evolving technological landscape, USB-C has emerged as the undisputed king of connectivity. Its versatility, high speeds, and reversible design have made it the standard for everything from smartphones and laptops to external storage and high-resolution displays. However, many older or budget-oriented desktops still lack sufficient USB-C ports, or any at all. This is where a PCIe USB-C expansion card comes into play. These affordable and relatively simple-to-install components can breathe new life into your existing PC, unlocking the full potential of modern peripherals.
This comprehensive guide will walk you through the entire process of installing a PCIe USB-C expansion card, from understanding what you need to successfully integrating it into your system. We’ll cover the benefits, the selection process, the physical installation, driver setup, and some common troubleshooting tips. Whether you’re a seasoned PC builder or a curious novice, you’ll be equipped with the knowledge to enhance your computer’s connectivity with ease.
Understanding the Benefits of a PCIe USB-C Expansion Card
Before we dive into the installation, it’s crucial to understand why you might want to add a PCIe USB-C expansion card to your system. The advantages are numerous and can significantly improve your computing experience:
Future-Proofing Your System and Enhancing Performance
The primary driver for installing a USB-C expansion card is future-proofing. As more devices adopt USB-C, having ample ports ensures you won’t be left behind. This includes:
- Faster Data Transfer: Many USB-C ports support Thunderbolt 3 or 4, offering speeds up to 40Gbps, which is exponentially faster than older USB standards. This is critical for transferring large files, editing high-resolution video, or working with demanding applications.
- Increased Power Delivery: USB-C with Power Delivery (USB PD) can charge your devices much faster than traditional USB ports. Some cards even offer dedicated high-wattage ports capable of charging laptops or powering demanding peripherals.
- Versatile Connectivity: USB-C is a universal connector. With the right adapter or directly supported cable, you can connect displays (DisplayPort Alt Mode), audio devices, network adapters, and more, all through a single port.
- Improved Workflow for Professionals: For content creators, photographers, videographers, or anyone working with large datasets, the speed and bandwidth offered by USB-C are indispensable. A PCIe card ensures your desktop can keep up with your workflow.
- Decluttering Your Setup: With a single USB-C port, you can often replace multiple older ports and bulky adapters with a single, sleek cable.
Addressing the Limitations of Older Systems
Many desktop computers, particularly those built a few years ago, were not designed with USB-C in mind. You might find yourself with:
- Limited Number of Ports: You may only have a handful of USB-A ports, which are quickly becoming insufficient for the modern user.
- Older USB Standards: Even if you have USB ports, they might be limited to older, slower standards like USB 2.0 or USB 3.0, which can bottleneck your performance.
- Lack of Specific Features: Older ports won’t offer features like Thunderbolt connectivity or high-wattage Power Delivery, limiting your ability to connect advanced peripherals.
A PCIe expansion card directly addresses these limitations by adding one or more high-speed, feature-rich USB-C ports directly to your motherboard, bypassing the constraints of your existing I/O panel.
Selecting the Right PCIe USB-C Expansion Card
With the decision made, the next step is to choose the right card for your needs. This involves considering several key factors:
Understanding PCIe Slots and Card Types
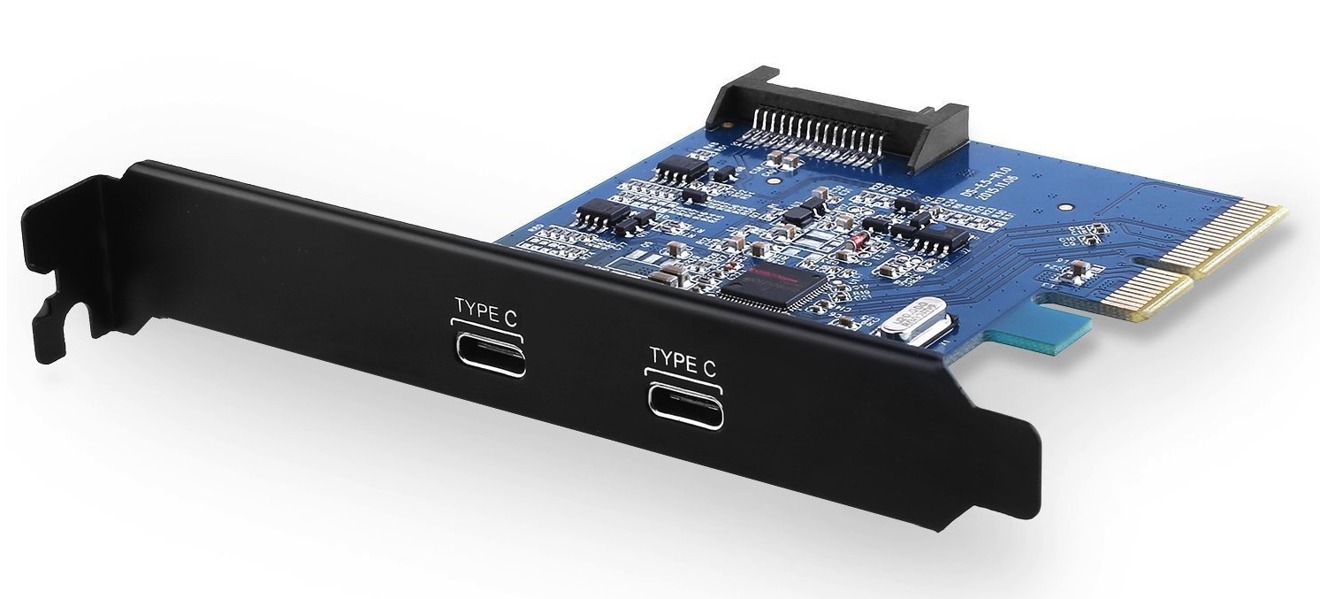
PCIe (Peripheral Component Interconnect Express) is the standard interface for connecting high-bandwidth components to your motherboard. Expansion cards come in various “lanes” (x1, x4, x8, x16), which determine the amount of data bandwidth available.
- PCIe x1: Sufficient for most USB expansion cards, as USB data transfer rates, even at their highest, don’t saturate a PCIe x1 slot.
- PCIe x4 or higher: If your card offers Thunderbolt support or multiple high-speed USB-C ports, it might utilize a PCIe x4 slot for maximum bandwidth. Ensure your motherboard has a compatible slot available.
How to Identify Available Slots:
- Consult your Motherboard Manual: This is the definitive source. It will show the location, type, and orientation of all PCIe slots.
- Visually Inspect your Motherboard: Look for the long, thin expansion slots on your motherboard. They are usually color-coded and marked with their lane count (e.g., PCIe x1, PCIe x4).
- Check your Motherboard Specifications Online: If you don’t have the manual, search for your motherboard model online, and its specifications will be readily available.
Important Note: A card designed for a higher lane slot (e.g., x4) can often be installed in a lower lane slot (e.g., x1) if it physically fits, but it will operate at the speed of the lower lane slot. Conversely, a card designed for a lower lane slot will not physically fit in a higher lane slot unless the higher lane slot has an open-ended design.
Key Features to Consider
When choosing a card, pay close attention to these specifications:
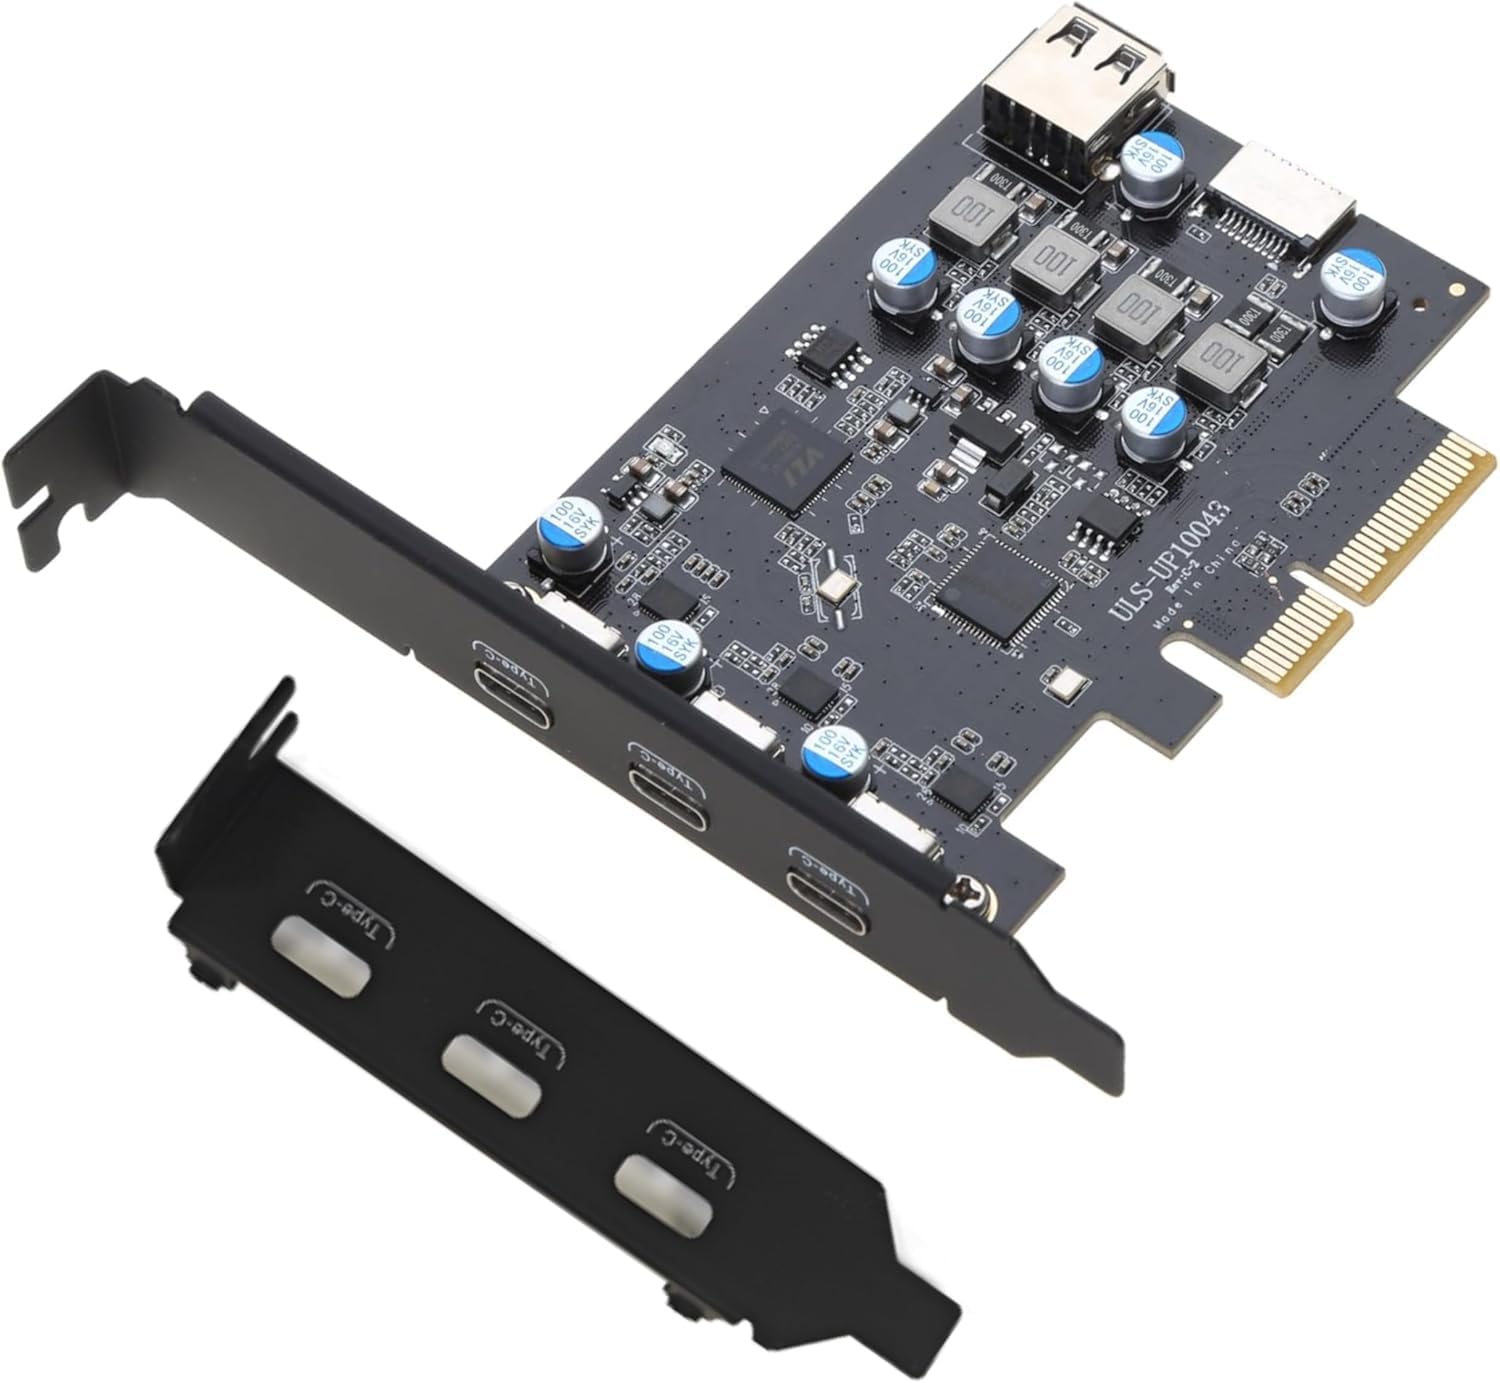
- Number of USB-C Ports: Do you need one, two, or more? Consider your current and future peripheral needs.
- USB Standard:
- USB 3.2 Gen 1 (formerly USB 3.0/3.1 Gen 1): 5Gbps
- USB 3.2 Gen 2 (formerly USB 3.1 Gen 2/3.2 Gen 2×1): 10Gbps
- USB 3.2 Gen 2×2: 20Gbps (less common on expansion cards, but becoming more prevalent)
- Thunderbolt 3/4: 40Gbps. This is the gold standard for high-performance connectivity, offering massive bandwidth for displays, storage, and more. Thunderbolt 3 and 4 ports are USB-C shaped.
- Power Delivery (PD): Does the card support USB PD? If so, what wattage does it provide? This is essential for charging laptops or power-hungry devices.
- Internal Power Connector: Most high-performance expansion cards require additional power directly from your power supply unit (PSU). This is typically a SATA power connector or a 6-pin PCIe power connector. Ensure your PSU has the necessary cables.
- Chipset: Some users prefer cards with chipsets from reputable manufacturers like ASMedia or Renesas, known for their stability and performance.
- Brand Reputation and Reviews: Look for well-known brands with good customer support and positive reviews. Online reviews can offer valuable insights into real-world performance and reliability.
The Installation Process: Step-by-Step
Once you’ve selected your card, it’s time for the physical installation. This process is generally straightforward and requires minimal tools.
Safety First: Preparing Your Workspace
Before you touch any internal components, it’s crucial to take precautions to avoid static discharge, which can damage sensitive electronics.
- Power Down Your PC: Completely shut down your computer through the operating system.
- Unplug the Power Cable: Disconnect the main power cord from the back of your computer.
- Discharge Static Electricity:
- Touch a grounded metal object: The metal frame of your computer case (while it’s still plugged into the wall, but switched off and unplugged) is a good option. Repeatedly touch it before handling any components.
- Use an Anti-Static Wrist Strap: This is the most effective method. Attach one end to your wrist and the other to an unpainted metal part of your computer case.
- Work on a Clean, Well-Lit Surface: Avoid working on carpet, as it generates a lot of static. A wooden table or a hard, non-carpeted floor is ideal.
- Keep Components Organized: Place screws and small parts in a magnetic tray or a small container to avoid losing them.
Opening Your PC Case and Locating a PCIe Slot
With your workspace prepared and static precautions taken, it’s time to access the interior of your PC.
- Remove the Side Panel: Most PC cases have screws on the back that secure the side panel. Unscrew these and carefully slide or lift off the panel. Refer to your case manual if you’re unsure.
- Identify an Available PCIe Slot: Locate the PCIe slots on your motherboard. As discussed earlier, check your motherboard manual or specifications to determine which slots are available and compatible with your expansion card (e.g., PCIe x1, x4).
- Remove Slot Covers: On the back of your PC case, you’ll see metal “slot covers” that correspond to the expansion slots. You’ll need to remove one or two of these to accommodate the bracket of your new USB-C card. Some are held in by screws, while others might be break-off tabs. Carefully remove the appropriate cover(s).
Physically Installing the Expansion Card
Now, the main event: inserting the card.
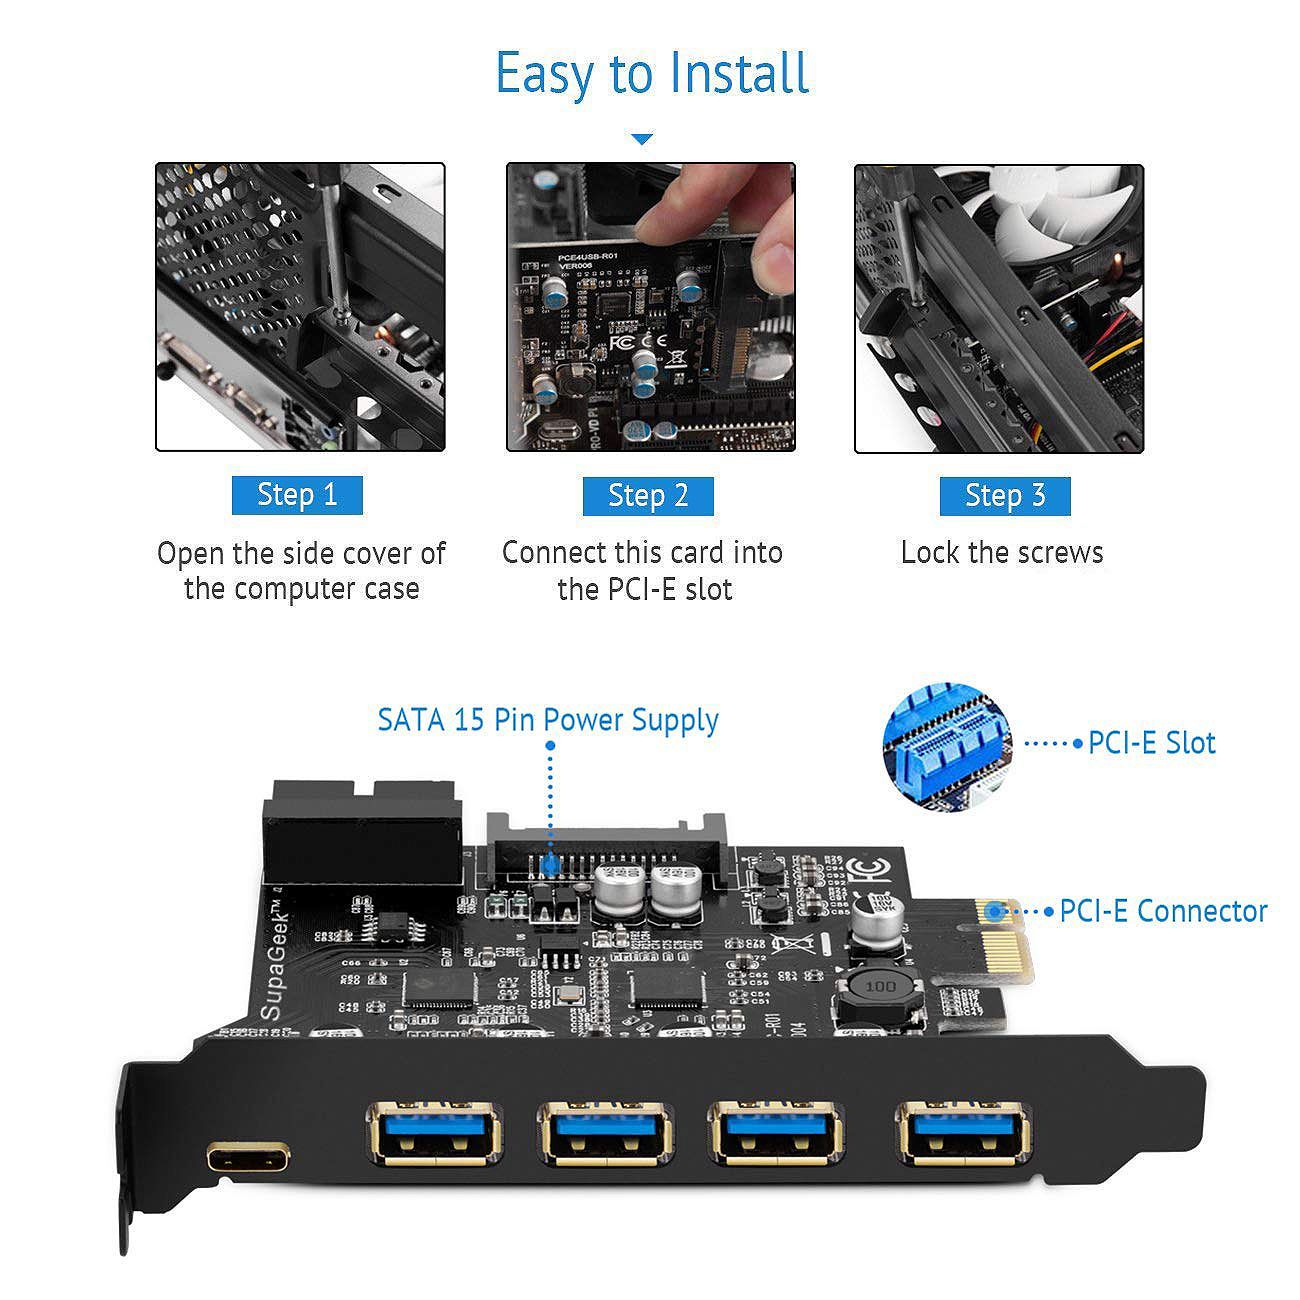
- Align the Card: Carefully align the gold connectors on the bottom of the PCIe USB-C expansion card with the chosen PCIe slot on your motherboard. Ensure the card’s bracket is positioned where you removed the slot cover(s).
- Insert the Card: Gently but firmly push the card straight down into the slot until it is fully seated. You should feel a slight click as it locks into place. Do not force it. If it doesn’t go in smoothly, re-align it and try again.
- Secure the Bracket: Once the card is seated, secure its bracket to the PC case using the screw you removed from the slot cover (or a new one if needed). This prevents the card from vibrating loose.
- Connect Internal Power (If Required): If your card needs additional power, locate the appropriate connector (SATA or 6-pin PCIe) on your PSU cables and plug it firmly into the corresponding port on the expansion card.
Closing Your PC and Connecting Peripherals
Almost there! Time to button up and power on.
- Replace the Side Panel: Carefully reattach the side panel of your computer case and secure it with the screws.
- Reconnect Peripherals: Plug in your monitor, keyboard, mouse, and all other peripherals.
- Connect the Power Cable: Plug the main power cord back into your computer and the wall outlet.
Driver Installation and Verification
With the hardware installed, your operating system needs to recognize and utilize the new ports.
Installing Necessary Drivers
While some PCIe USB-C cards are plug-and-play and will be recognized automatically by Windows or macOS, others may require specific drivers.
- Windows:
- Check Device Manager: Open Device Manager (search for it in the Start menu). Look for any devices with a yellow exclamation mark or under “Other devices.”
- Automatic Driver Update: Right-click on the unknown device and select “Update driver.” Choose “Search automatically for drivers.”
- Manual Driver Installation: If automatic search fails, you’ll need to download the drivers from the manufacturer’s website. Navigate to their support or downloads section, find your specific card model, and download the latest drivers.
- Run the Installer: Once downloaded, run the driver installer executable file and follow the on-screen prompts. You may need to restart your computer after installation.
- macOS:
- Most USB-C devices and expansion cards are natively supported by macOS. If you encounter issues, check the manufacturer’s website for any macOS-specific drivers or firmware updates.
Verifying the Installation
After installing drivers (or if no drivers were needed), it’s time to confirm everything is working correctly.
- Check Device Manager (Windows): In Device Manager, the new USB controllers or USB hubs should now appear without any error icons.
- Test the Ports: Plug in a USB-C device (e.g., a USB drive, external SSD, smartphone) into one of the newly installed ports.
- Data Transfer: Try transferring a file to and from the device to ensure data is flowing correctly.
- Charging: If your card supports Power Delivery, connect a device that can be charged via USB-C and see if it begins charging.
- Display Output (if applicable): If your card supports DisplayPort Alt Mode or Thunderbolt, connect a USB-C monitor and see if it’s detected and displays an image.
- Check System Information (macOS): Go to Apple Menu > About This Mac > System Report. Look under “USB” to see if your new ports and connected devices are listed.
Troubleshooting Common Issues
While the installation is usually smooth, occasional hiccups can occur. Here are some common problems and their solutions:
The PC Doesn’t Boot or Recognize the Card
- Reseat the Card: Power down, unplug, and carefully remove and reinsert the PCIe card. Ensure it’s fully seated.
- Try a Different PCIe Slot: If you used a PCIe x1 slot, try a different one. If you used a PCIe x4 slot, ensure your motherboard supports it.
- Check Power Connection: If your card requires external power, ensure the PSU cable is securely connected to both the PSU and the card.
- Motherboard BIOS Update: In rare cases, an outdated motherboard BIOS might not fully support newer hardware. Check your motherboard manufacturer’s website for the latest BIOS update and instructions. Proceed with caution when updating BIOS.
USB-C Ports Not Working or Showing Errors
- Driver Issues: Reinstall the drivers. Download the latest version from the manufacturer’s website.
- Conflicting Hardware: If you have many expansion cards, they might be competing for resources. Try removing other non-essential cards to see if the USB-C ports start working.
- Faulty Card: If you’ve tried everything else and the ports still don’t function, the card itself might be defective. Contact the manufacturer for a replacement.
- Power Limitations: Ensure your PSU has enough wattage to support all your components, especially if the USB-C card is powering multiple high-draw devices.
Slow Transfer Speeds
- Check USB Standard: Ensure both your USB-C card and your peripheral support the same high-speed standard (e.g., USB 3.2 Gen 2 or Thunderbolt). Using a Gen 1 device on a Gen 2 port will limit you to Gen 1 speeds.
- Use a Quality Cable: Not all USB-C cables are created equal. For high-speed transfers and Thunderbolt, ensure you’re using a certified, high-quality cable designed for the speeds you need.
- Check CPU/Chipset Load: High CPU usage or other demanding tasks on your system can impact storage and USB transfer speeds.
- Motherboard Limitations: Older motherboards might have limitations in their PCIe lanes or chipset that can affect the maximum throughput of expansion cards.
By following these steps and understanding potential pitfalls, you can successfully install a PCIe USB-C expansion card and unlock a world of faster, more versatile connectivity for your desktop computer. Enjoy the convenience and performance boost!
aViewFromTheCave is a participant in the Amazon Services LLC Associates Program, an affiliate advertising program designed to provide a means for sites to earn advertising fees by advertising and linking to Amazon.com. Amazon, the Amazon logo, AmazonSupply, and the AmazonSupply logo are trademarks of Amazon.com, Inc. or its affiliates. As an Amazon Associate we earn affiliate commissions from qualifying purchases.