In the fast-paced digital world, time is a precious commodity. For anyone considering or preparing to upgrade to Windows 11, one of the most pressing questions is often, “How long will this take?” The prospect of a system overhaul can be daunting, conjuring images of hours staring at a progress bar. However, understanding the factors at play, preparing adequately, and knowing what to expect can transform the experience from a potential headache into a smooth, efficient transition. This comprehensive guide from GlobalizeThis.com aims to demystify the Windows 11 installation process, offering insights that not only answer your core question but also equip you with the knowledge to optimize your setup, ensuring minimal downtime and maximum productivity.
Moving to a new operating system isn’t just a technical task; it’s an investment in your digital future. A streamlined installation means you can get back to work, enjoy your entertainment, or engage in your side hustles faster. In the realm of tech, efficiency often translates directly into value – saving you both time and, indirectly, money. Let’s dive deep into the mechanics of Windows 11 installation, exploring everything from the typical timelines to advanced optimization strategies.
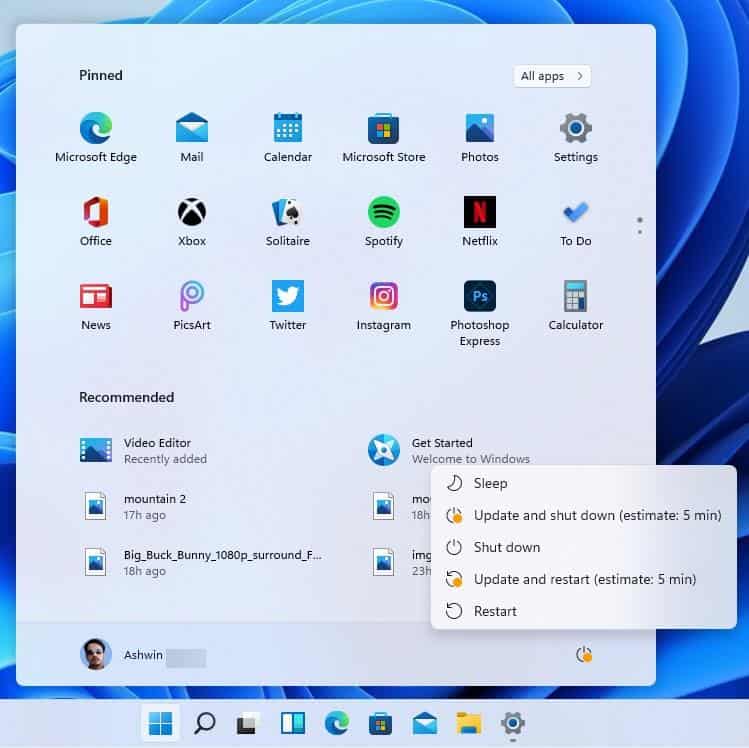
The Core Question: What’s the Typical Windows 11 Installation Time?
When you ask how long Windows 11 takes to install, the honest answer is: it varies significantly. However, we can provide a realistic range and break down why. For most modern systems, a full installation or upgrade can typically range from 30 minutes to 3 hours, with some outliers experiencing shorter or longer periods. This broad range isn’t arbitrary; it’s a reflection of the numerous variables involved, each playing a critical role in dictating your personal installation timeline.
Understanding this timeframe begins with recognizing that “installation” isn’t a single, monolithic step. It’s a series of distinct phases, each with its own demands on your system’s resources and internet connection.
Understanding the Installation Phases
To truly grasp the duration, it’s helpful to dissect the entire process into its key stages. Each stage contributes to the overall time, and bottlenecks in any one can extend the entire operation.
-
Download Phase: This is often the first significant time sink. If you’re upgrading or performing a clean install using Microsoft’s Media Creation Tool, you’ll first need to download the Windows 11 installation files. The size of these files is substantial (typically 4-5 GB), meaning your internet speed is the primary determinant here. A blazing-fast fiber optic connection might complete this in minutes, while a slower DSL or satellite connection could take hours. This phase might also involve downloading initial updates, further extending the wait.
-
Preparation Phase (or “Getting things ready”): Once the files are downloaded, your system needs to prepare for the actual installation. This involves verifying the integrity of the downloaded files, unpacking them, checking system compatibility one last time, and performing preliminary configurations. This stage is primarily CPU and storage-intensive, with SSDs vastly outperforming traditional HDDs.
-
Actual Installation Phase (Copying files, installing features, setting up): This is the core of the installation. Your system will copy Windows 11 files to your drive, install necessary features, drivers, and security updates, and configure core system settings. This is a highly demanding phase for your CPU and storage device. Progress bars might appear to stall or jump suddenly here, which is often normal as the system processes complex tasks in the background.
-
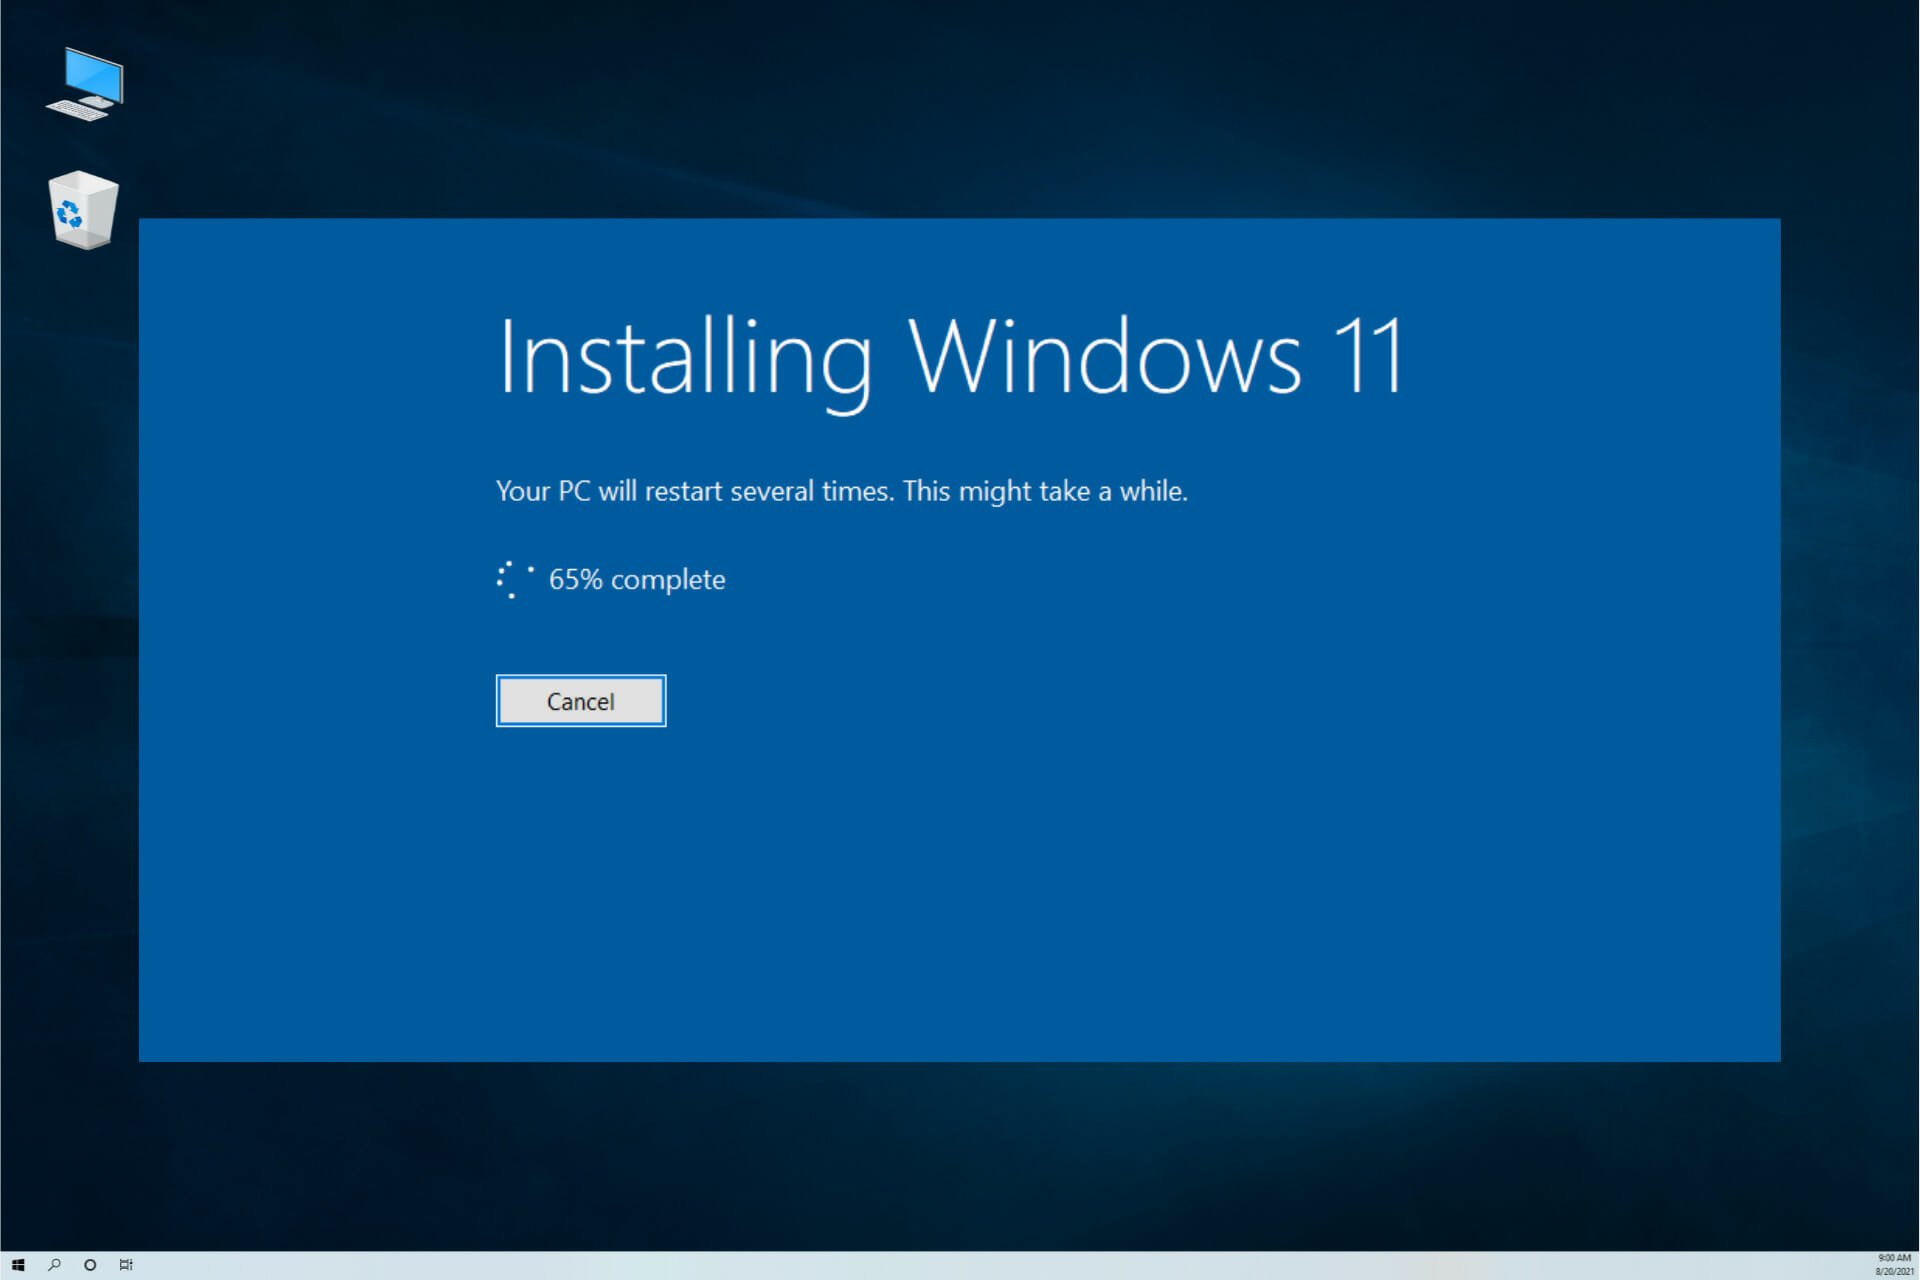
First Boot and Post-Installation Setup: After the main installation files are on your drive, your computer will restart several times. During these reboots, Windows 11 finalizes configurations, installs any remaining critical updates, and prompts you through the initial Out-of-Box Experience (OOBE) setup. This includes setting up your user account, privacy settings, and connecting to Wi-Fi. While typically faster than the core installation, unexpected updates or driver installations can prolong this stage.
The “Quick Answer” and Real-World Scenarios
Given these phases, here’s a more nuanced breakdown of what you might expect:
- High-End System (Modern CPU, 16GB+ RAM, NVMe SSD, Gigabit Internet): You could potentially see the entire process, including download and setup, completed in 30-60 minutes. This is the ideal scenario, reflecting optimized hardware and network conditions.
- Mid-Range System (Mid-tier CPU, 8GB RAM, SATA SSD, Broadband Internet): Expect an upgrade or clean install to take around 1 to 2 hours. This is where most users will likely fall, assuming a relatively modern setup.
- Older System (Older CPU, 4GB RAM, HDD, Slower Broadband): If your system just barely meets Windows 11 requirements and relies on a traditional hard drive and slower internet, the process could stretch to 2.5 to 4 hours or even longer. The I/O performance of an HDD is a major bottleneck.
It’s crucial to remember that these are estimates. Unforeseen issues, such as corrupted downloads, unexpected driver conflicts, or system-specific quirks, can always extend the process. The key takeaway is that preparation and understanding your system’s capabilities are paramount.
Key Factors Influencing Your Windows 11 Installation Speed
The wide range in installation times isn’t random; it’s the direct result of several critical factors interacting. Understanding these influences is your first step towards anticipating and potentially accelerating your Windows 11 upgrade or clean install. For tech enthusiasts and professionals, this knowledge is vital not just for personal use but also for advising others, contributing to your personal brand as a reliable tech authority.
The Critical Role of Your Hardware Specifications
Your computer’s internal components are arguably the most significant determinant of installation speed. Think of it as the engine of a car; a more powerful engine gets you to your destination faster.
- Processor (CPU): A faster CPU can process installation instructions, decompress files, and handle multiple tasks concurrently much more efficiently. Multi-core processors, especially those with higher clock speeds and modern architectures, will significantly reduce the time spent in the “preparation” and “actual installation” phases.
- Random Access Memory (RAM): Sufficient RAM (8GB is the minimum requirement for Windows 11, but 16GB or more is recommended) allows the system to hold more temporary data and instructions in fast memory, reducing the need to constantly access slower storage. This speeds up all phases, particularly those involving data unpacking and configuration.
- Storage Device (SSD vs. HDD): This is perhaps the single most impactful hardware factor.
- Solid State Drives (SSDs): NVMe SSDs (connected via PCIe) are the fastest, followed by SATA SSDs. These drives offer dramatically faster read/write speeds compared to traditional hard drives. For an operating system installation, where millions of small files are being copied and accessed, an SSD can reduce installation time by hours. If you’re still on an HDD, upgrading to an SSD before installing Windows 11 is the most impactful upgrade you can make for overall system responsiveness and installation speed.
- Hard Disk Drives (HDDs): Traditional spinning platter drives are significantly slower due to their mechanical nature. Expect much longer installation times if you’re installing Windows 11 onto an HDD.
Installation Method: Upgrade vs. Clean Install
The way you choose to install Windows 11 also has a profound effect on the timeline.
- Upgrade (from Windows 10): This method involves installing Windows 11 over your existing Windows 10 installation, attempting to retain your files, applications, and settings. While seemingly more convenient, it often takes longer than a clean install. The system needs to carefully migrate data, check for compatibility with existing applications, and handle potential conflicts. This complexity adds overhead and can extend the “preparation” and “actual installation” phases.
- Clean Install: This involves wiping your primary drive and installing Windows 11 from scratch. While requiring you to back up your data and reinstall applications, a clean install is typically faster and results in a more stable, bloatware-free system. The system doesn’t have to deal with legacy files, old drivers, or existing software conflicts, simplifying the process. For optimal performance and speed, especially on older systems, a clean install is almost always the preferred route, even if it requires a bit more post-installation work.
Internet Connectivity and Download Speeds
As mentioned earlier, the download phase is heavily reliant on your internet connection.
- Bandwidth: Higher download speeds (e.g., fiber optic at 100 Mbps or more) will fetch the Windows 11 installation files and subsequent updates in minutes. Slower connections (e.g., DSL at 10-20 Mbps) can turn the download phase into an hour-long wait.
- Stability: A stable connection is crucial. Frequent disconnections can force downloads to restart or encounter errors, significantly delaying the process. Avoid installing during peak network usage times in your household or area if bandwidth is shared.
Storage Management and Pre-Installation State
The condition of your existing storage device can also play a role.
- Available Disk Space: Windows 11 requires a minimum of 64GB of free disk space. If your drive is nearly full, the system might struggle to create temporary files or extract installation components, slowing down the process. Freeing up ample space (ideally 100GB or more) is highly recommended.
- Disk Health and Fragmentation: For HDDs, a highly fragmented drive can slow down file operations. While less of an issue for SSDs, a drive nearing its end-of-life or experiencing errors can significantly impede installation. Running a basic disk health check (e.g.,
chkdskin Windows) beforehand can prevent unexpected delays. - Background Processes and Antivirus: Running numerous background applications or an overly aggressive antivirus during an upgrade can interfere with the installation process, consuming valuable system resources. Temporarily disabling non-essential startup programs and antivirus software (after ensuring your system is clean) can sometimes streamline an upgrade.
By understanding these interwoven factors, you gain a clearer picture of why your Windows 11 installation might take longer or shorter than someone else’s. This knowledge empowers you to make informed decisions and prepare effectively.
Preparing for a Smoother and Faster Windows 11 Installation
While some factors like your hardware are fixed (unless you upgrade), many aspects of the installation process can be optimized through diligent preparation. This proactive approach not only reduces installation time but also minimizes the risk of errors and data loss, a critical concern for both personal users and small businesses where downtime impacts productivity and potential earnings. Thoughtful preparation saves you headaches and, ultimately, money by avoiding costly professional intervention.
Essential Pre-Installation Checklist
Before you even think about clicking “Install,” run through this crucial checklist to set yourself up for success:
- Verify System Compatibility: Use the official PC Health Check app from Microsoft to confirm your system meets all Windows 11 requirements (TPM 2.0, Secure Boot, CPU generation, etc.). Don’t proceed until you pass this check.
- Ensure Stable Power Supply: For laptops, connect to an AC adapter and ensure the battery is fully charged. For desktops, ensure a stable power source. Unexpected power loss during installation can lead to corrupted files and a bricked system.
- Update Your Current OS: If upgrading from Windows 10, make sure your current OS is fully updated to the latest version. This often includes crucial patches and drivers that smooth the transition.
- Update BIOS/UEFI Firmware: Check your motherboard manufacturer’s website for BIOS/UEFI updates. Newer firmware often includes better support for Windows 11 features, improved stability, and may be required for TPM or Secure Boot activation.
- Free Up Disk Space: Aim for at least 100-150 GB of free space on your C: drive, even if Windows 11 only requires 64GB. This provides ample room for temporary files, updates, and comfortable operation.
Data Backup: Your Digital Safety Net
This step cannot be overemphasized. Regardless of whether you’re performing an upgrade or a clean install, a comprehensive backup of your important data is non-negotiable. Data loss can be catastrophic, leading to lost productivity, financial setbacks if crucial documents are gone, and immense personal stress.
- Cloud Services: Utilize services like OneDrive, Google Drive, or Dropbox for documents, photos, and critical files. Ensure they are synced.
- External Hard Drive: Copy all irreplaceable documents, photos, videos, project files, and personal data to an external drive. Create a system image if you want to be able to revert to your exact Windows 10 state.
- Recovery Drive: Create a Windows 10 recovery drive on a USB stick. This can be invaluable if you need to troubleshoot or revert your system.
Consider your backup strategy not just as a precaution, but as a robust digital security measure that protects your intellectual property and financial records.
Optimizing Your System for Installation Success
Beyond the basic checklist, a few extra steps can further streamline the process:
- Disconnect Unnecessary Peripherals: USB drives, printers, external webcams, or other non-essential devices can sometimes interfere with driver detection during installation. Disconnect them until Windows 11 is fully installed.
- Temporarily Disable Antivirus/Firewall: While counter-intuitive, some third-party antivirus and firewall software can actively block or interfere with the installation process. Temporarily disable them before starting the installation, and remember to re-enable them immediately after Windows 11 is up and running.
- Close All Running Applications: Ensure no other programs are running in the background to free up RAM and CPU resources for the installation process.
- Check for Driver Updates (Pre-emptively): While Windows 11 includes many generic drivers, checking your manufacturer’s website for specific Windows 11 drivers for your graphics card, chipset, and network adapters can save time post-installation and prevent compatibility issues. Download them to an external drive, ready for installation.
By meticulously following these preparation steps, you’re not just hoping for a fast installation; you’re actively creating the conditions for one. This methodical approach is a hallmark of good tech hygiene and contributes to a reliable computing experience.
Post-Installation: What Comes Next and Performance Tips
Successfully installing Windows 11 is a significant milestone, but the journey doesn’t end when you see the new desktop. The immediate steps after installation and ongoing optimization are crucial for maximizing your system’s performance, stability, and security. This phase directly impacts your daily productivity and the return on your time investment in the upgrade.
Initial Setup and Essential Updates
Once Windows 11 greets you with its sleek new interface, there are immediate tasks to tackle:
- Complete the Out-of-Box Experience (OOBE): This involves setting up your user account (Microsoft Account is highly recommended for full feature integration), privacy settings, keyboard layout, and Wi-Fi connection. Take a moment to review privacy settings; don’t just blindly click “Next.”
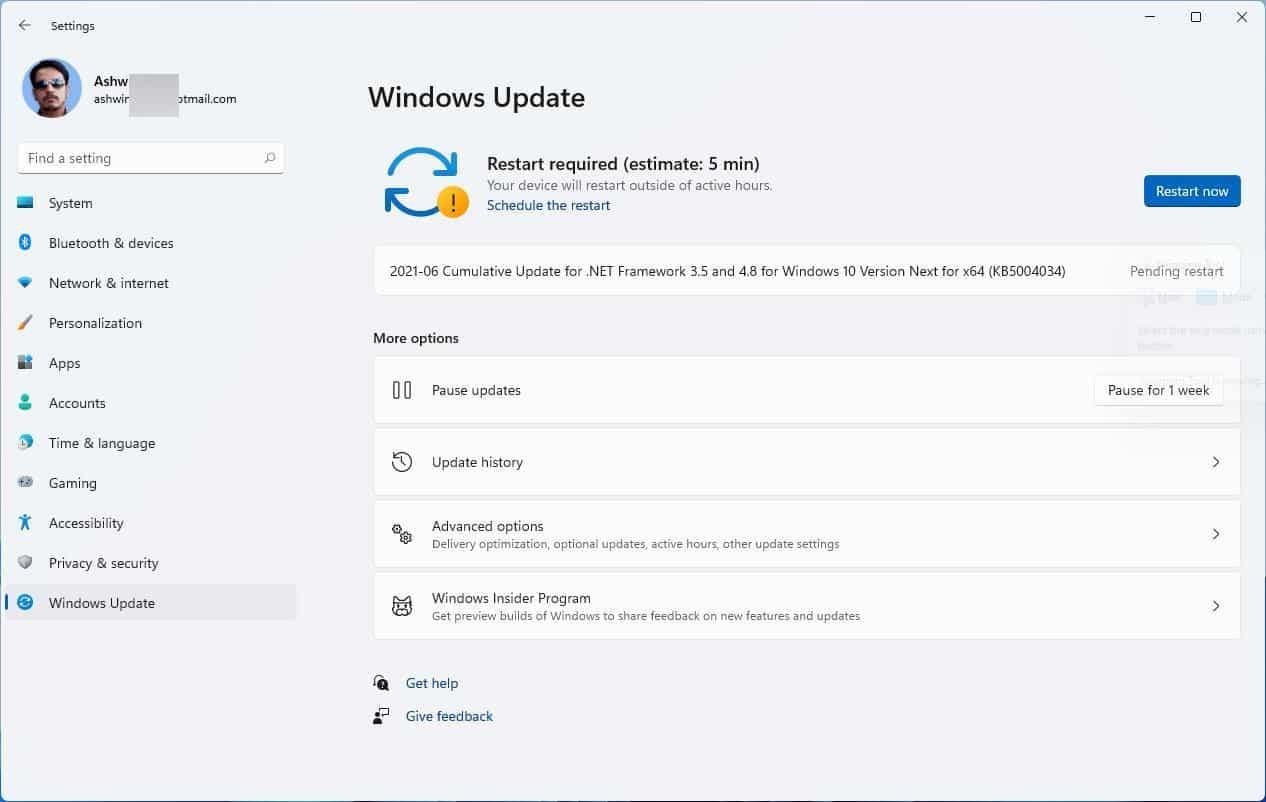
- Run Windows Update: This is paramount. Windows Update will download and install critical security patches, bug fixes, and potentially updated drivers that weren’t included in the initial installation media. Go to
Settings > Windows Updateand click “Check for updates.” Be prepared for several restarts. This phase can take some time, but it ensures your system is secure and stable from the outset. - Re-enable Antivirus/Firewall: If you temporarily disabled your third-party antivirus, re-enable it now. If you’re relying on Windows Security (which is enabled by default), ensure it’s fully up-to-date and scanning regularly.
Driver Installation and Software Integration
Drivers are the critical links between your hardware and the operating system. While Windows 11 often installs many generic drivers, manufacturer-specific drivers often provide better performance and stability.
- Install Graphics Card Drivers: This is especially important for gamers, content creators, or anyone needing optimal display performance. Visit the NVIDIA, AMD, or Intel website (depending on your GPU) and download the latest Windows 11-specific drivers for your model.
- Install Chipset and Other Device Drivers: Check your motherboard manufacturer’s website for the latest chipset drivers, audio drivers, and any specific drivers for peripherals (e.g., specialized keyboards, mice, webcams) that aren’t working optimally.
- Reinstall Essential Applications: Begin reinstalling your most frequently used software. Prioritize productivity tools (Microsoft Office, Google Chrome, Adobe Creative Suite, etc.) and security software. For “Money” related aspects, reinstall financial tracking apps, trading platforms, or tools related to your online income or side hustles. Remember to download installers from official sources to avoid malware.
- Restore Your Data: Copy your backed-up files from your external drive or re-sync them from your cloud services. Organize them logically within your new Windows 11 environment.
Maximizing Your New Windows 11 Experience
With the core setup complete, here are some tips to get the most out of Windows 11 and maintain peak performance:
- Personalize Your Desktop: Customize your desktop, Start menu, and taskbar to suit your workflow. Windows 11 offers a fresh aesthetic; make it your own.
- Explore New Features: Take time to explore new features like Snap Layouts, Widgets, and the redesigned Start menu. Understanding these can significantly boost your productivity.
- Regular Maintenance:
- Keep Windows Updated: Consistently check for and install Windows Updates.
- Driver Updates: Periodically check for updated drivers, especially for your graphics card.
- Disk Cleanup: Use Windows’ built-in Disk Cleanup tool to remove temporary files and free up space.
- Task Manager Review: Periodically review startup programs in Task Manager (
Ctrl+Shift+Esc) and disable unnecessary ones to improve boot times.
- Performance Monitoring: If you notice slowdowns, use Task Manager or Resource Monitor to identify resource-hungry applications or processes. This proactive monitoring helps maintain the efficiency that a clean installation delivers.
A well-configured and maintained Windows 11 system isn’t just a technical achievement; it’s a foundation for enhanced productivity, creativity, and digital security. For anyone using their PC for work, learning, or financial endeavors, a smooth and efficient operating system directly contributes to achieving goals and maximizing output.
Troubleshooting Common Installation Hiccups and Best Practices
Despite thorough preparation, technology can sometimes throw a curveball. Encountering issues during a Windows 11 installation can be frustrating and costly in terms of lost time. However, many common problems have straightforward solutions. Being prepared for these eventualities reinforces your technical expertise and ensures a quicker recovery, safeguarding your productivity and professional image.
Addressing Stalled Installations and Error Messages
A common scenario is the installation appearing to freeze or displaying an cryptic error message. Here’s how to approach these:
- Patience is Key: Sometimes, the progress bar genuinely pauses for an extended period while the system processes complex tasks or downloads background updates. Give it at least an hour if it seems stuck before taking drastic action. Watch for hard drive activity lights – if they’re still flashing, something is likely happening.
- Hard Reboot (Last Resort): If the system is truly unresponsive for a very long time (e.g., several hours with no disk activity), a hard reboot (holding the power button) might be necessary. Be aware this carries a risk of corrupting the installation, potentially requiring a complete restart.
- Error Codes: If you receive an error code, note it down precisely. A quick online search for “Windows 11 installation error [your error code]” often leads to official Microsoft support pages or community forums with specific troubleshooting steps.
- Restart the Installation Process: If the installation consistently fails, consider restarting the entire process from scratch. This might involve re-downloading the ISO or re-creating the bootable USB drive, ensuring the media itself isn’t corrupted.
- Check for Disk Errors: If issues persist, boot into your old OS (if it’s an upgrade that failed to complete) or use a bootable diagnostic tool to check your hard drive/SSD for errors. A failing drive is a common culprit.
- Review BIOS/UEFI Settings: Double-check that TPM 2.0 and Secure Boot are correctly enabled in your BIOS/UEFI settings, as these are strict Windows 11 requirements that can cause installation failures if not configured.
General Tips for a Seamless Transition
Beyond troubleshooting, adopting a few best practices can further enhance your installation experience and long-term system health:
- Use Official Media Creation Tools: Always download Windows 11 installation media directly from Microsoft’s official website using their Media Creation Tool. This ensures you have a legitimate, up-to-date, and uncorrupted installer.
- Invest in a Quality USB Drive: If creating a bootable USB, use a reliable, fast USB 3.0 (or newer) drive from a reputable brand. Cheap, slow, or faulty USB drives can cause installation errors and prolonged waits.
- Document Your Setup: Keep a record of your product keys, important software licenses, and any custom configurations you make. This streamlines future installations or troubleshooting.
- Consider a Staging Environment (for professionals): If you’re a professional managing multiple systems or your primary machine is critical for your livelihood, consider testing the Windows 11 installation on a secondary or virtual machine first. This “staging” process can identify potential issues specific to your hardware or software ecosystem before committing to your main system.
- Leverage Community Support: Online forums (like Microsoft Community, Reddit’s r/Windows11, or dedicated tech forums) are excellent resources for specific issues. Describe your problem clearly, including error messages and what steps you’ve already taken.
The goal of any tech endeavor is not just to complete a task, but to do so efficiently, securely, and with minimal friction. By understanding the common pitfalls and equipping yourself with these troubleshooting strategies and best practices, you ensure that your Windows 11 journey is as smooth and quick as possible. This level of preparedness is invaluable for maintaining productivity, securing your digital assets, and confidently navigating the ever-evolving technological landscape.
In conclusion, while the question “how long does Windows 11 take to install?” doesn’t have a single, definitive answer, this guide provides a comprehensive framework for understanding, optimizing, and executing a successful installation. From anticipating durations based on hardware to meticulous preparation and proactive troubleshooting, every step contributes to a faster, more reliable transition. Embracing Windows 11 isn’t just about getting a new look; it’s about upgrading to a more efficient, secure, and potentially more productive computing environment. By applying the insights shared here, you’re not just installing an operating system; you’re investing in a smoother, more powerful digital future for yourself, your brand, and your financial endeavors.
aViewFromTheCave is a participant in the Amazon Services LLC Associates Program, an affiliate advertising program designed to provide a means for sites to earn advertising fees by advertising and linking to Amazon.com. Amazon, the Amazon logo, AmazonSupply, and the AmazonSupply logo are trademarks of Amazon.com, Inc. or its affiliates. As an Amazon Associate we earn affiliate commissions from qualifying purchases.