In the rapidly evolving world of technology, Python has firmly established itself as one of the most versatile and widely-used programming languages. From web development and data science to artificial intelligence and automation, Python’s extensive ecosystem of libraries and frameworks is a cornerstone of its appeal. At the heart of managing this rich ecosystem lies Pip, Python’s package installer. For anyone looking to embark on Python development on a Windows machine, understanding how to properly install and utilize Pip is not just recommended, it’s absolutely essential.
This comprehensive guide will walk you through everything you need to know about getting Pip up and running on your Windows system, from initial setup to common commands and troubleshooting. By the end, you’ll be well-equipped to manage Python packages with confidence, enhancing your productivity and streamlining your development workflow.
Understanding Pip: The Essential Python Package Manager
Before we dive into the installation steps, let’s take a moment to understand what Pip is and why it plays such a critical role in the Python development landscape.
What is Pip and Why is it Indispensable?
Pip stands for “Pip Installs Packages.” It is the standard package-management system used to install and manage software packages written in Python. Think of it as an app store for Python, but specifically for libraries, frameworks, and tools. When you want to use a third-party library in your Python project – perhaps a machine learning library like TensorFlow, a web framework like Django or Flask, or a data analysis tool like Pandas – Pip is the command-line utility that fetches, installs, and manages these components for you.
Without Pip, integrating external libraries into your projects would be a tedious, manual process involving downloading source code, resolving dependencies, and configuring paths. Pip automates this complexity, allowing developers to focus on writing code rather than wrestling with installation headaches. Its indispensability stems from:
- Simplifying Dependency Management: Python projects often rely on numerous third-party packages, each with its own dependencies. Pip automatically handles these interdependencies, ensuring all required components are installed correctly.
- Access to PyPI: Pip primarily connects to the Python Package Index (PyPI), the official third-party software repository for Python. PyPI hosts thousands of open-source projects, making them easily discoverable and installable via Pip.
- Version Control: Pip allows you to install specific versions of packages, crucial for maintaining compatibility across different projects or ensuring your application works with a known stable version.
- Streamlined Updates and Uninstalls: Keeping packages updated or removing them when no longer needed is straightforward with simple Pip commands.
For anyone working with Python, mastering Pip is a fundamental skill that significantly boosts efficiency and enables access to the vast array of tools available in the Python ecosystem.
The Ecosystem of Python Packages and Libraries
The true power of Python lies in its vibrant and extensive ecosystem of packages and libraries. These pre-written modules of code provide functionalities for almost every conceivable task, saving developers immense amounts of time and effort. From advanced scientific computing with NumPy and SciPy to image processing with OpenCV, natural language processing with NLTK, or even creating graphical user interfaces with PyQt, there’s likely a Python package for it.
This rich ecosystem is one of the primary reasons Python is so popular in cutting-edge tech domains like artificial intelligence, machine learning, and data science. Pip acts as the gateway to this treasure trove of resources. By understanding how to install and manage these packages effectively, you unlock the full potential of Python, transforming it from a mere programming language into a powerful development platform capable of tackling complex challenges.
Setting Up Your Windows Environment for Pip
Before you can effectively use Pip, you need to ensure that Python itself is correctly installed and configured on your Windows machine. Pip is typically bundled with newer Python installations, but it’s always good to verify.
Step 1: Ensuring Python is Installed Correctly
Pip is a Python script, which means it requires a working Python installation to run. Modern Python installers usually include Pip by default, but it’s crucial to confirm.
Verifying an Existing Python Installation
To check if Python is already installed and accessible from your command line:
- Open Command Prompt or PowerShell:
- Press
Win + R, typecmd, and press Enter. - Alternatively, search for “PowerShell” in the Start Menu and open it.
- Press
- Type the Python version command:
bash

python --version
or, ifpythondoesn’t work, try:
bash

py --version
If Python is installed, you should see output similar toPython 3.9.7. If you get an error like ” ‘python’ is not recognized as an internal or external command,” it means Python is either not installed or not added to your system’s PATH environment variables.
Installing Python on Windows (If Needed)
If Python is not installed or you need a specific version:
- Download the Installer: Go to the official Python website:
python.org/downloads/windows/. - Choose Your Version: Download the latest stable Python 3.x version. Make sure to choose the correct installer for your system (e.g., “Windows installer (64-bit)” for most modern systems).
- Run the Installer:
- Double-click the downloaded
.exefile. - Crucially, on the first screen, check the box that says “Add Python X.Y to PATH” (where X.Y is your Python version). This step is vital as it allows you to run Python and Pip commands directly from any command prompt. Forgetting this step is a common reason for “pip is not recognized” errors later on.
- Click “Install Now” (recommended) or “Customize installation” if you have specific needs.
- Follow the prompts to complete the installation.
- Double-click the downloaded
- Verify Installation: After installation, open a new Command Prompt or PowerShell window and run
python --versionagain. It should now display the installed Python version.
Step 2: Verifying Pip’s Presence (and Installing if Absent)
With Python successfully installed, the next step is to confirm that Pip is also ready to use.
Checking Your Pip Version
In your Command Prompt or PowerShell, type:
pip --version
If Pip is installed, you should see something like pip 21.2.4 from C:Python39libsite-packagespip (python 3.9). The version number and path may vary depending on your Python installation. If you see this output, congratulations! Pip is already installed and ready for action. You can skip the next section and move to “Configuring Your System PATH.”
If you get an error like ” ‘pip’ is not recognized,” it means Pip is either not installed, or more likely, its executable path is not included in your system’s PATH environment variables.
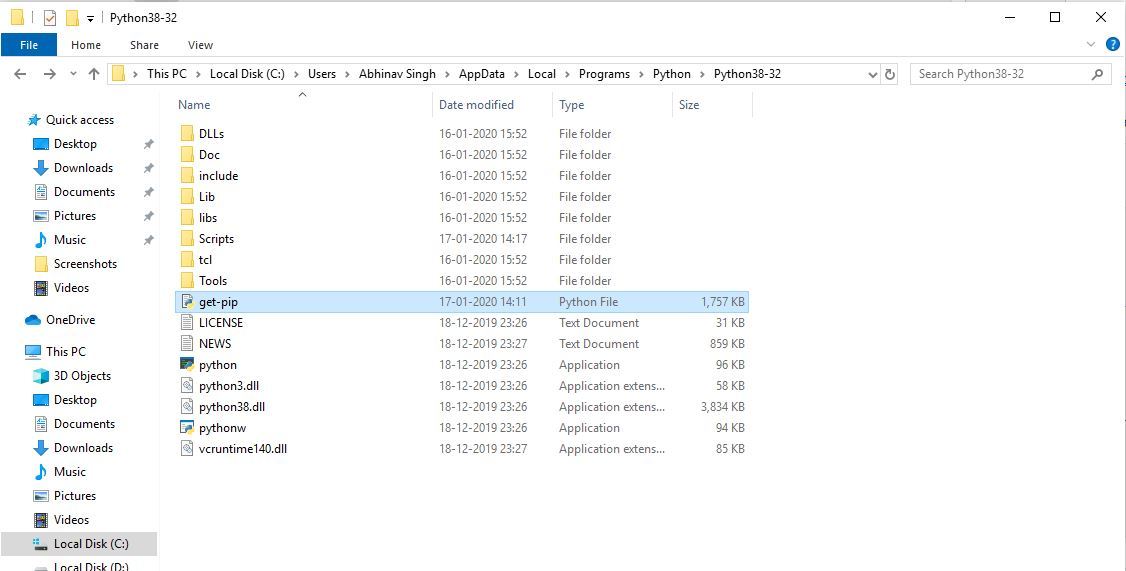
Manually Installing Pip with get-pip.py (If Necessary)
For older Python versions or specific custom installations where Pip might be missing, you can manually install it:
- Download
get-pip.py: Open your web browser and go tobootstrap.pypa.io/get-pip.py. Right-click on the page and select “Save As…” to save the file asget-pip.pyin a directory you can easily access (e.g., your Downloads folder or a temporary folder). - Navigate to the Download Directory: Open your Command Prompt or PowerShell and use the
cdcommand to navigate to the directory where you savedget-pip.py. For example:
bash

cd C:UsersYourUserDownloads
- Run the Installation Script: Once in the correct directory, execute the script using Python:
bash

python get-pip.py
This command will download and install Pip along with its dependencies. You might see a lot of output as packages are downloaded and installed. - Verify Installation: After the script finishes, run
pip --versionagain to confirm Pip is now installed.
Step 3: Configuring Your System PATH Environment Variables
Even if Python and Pip are installed, your system might not know where to find their executable files unless their locations are added to the system’s PATH environment variable. This is often taken care of if you checked “Add Python to PATH” during installation, but sometimes manual intervention is needed.

Why PATH Matters for Pip and Python
The PATH environment variable is a list of directories where your operating system looks for executable files. When you type python or pip into the command prompt, the system scans these directories. If it finds the python.exe or pip.exe file in one of those directories, it executes the command. If not, you get the dreaded “is not recognized” error.
Ensuring Python and Pip are in your PATH allows you to run their commands from any directory in the command prompt, which is crucial for development convenience.
Step-by-Step Guide to Adding Python to PATH
- Locate Python and Pip Paths:
- Python’s executable (
python.exe) is usually inC:UsersYourUserAppDataLocalProgramsPythonPythonXX(whereXXis your Python version, e.g.,Python39). - Pip’s executable (
pip.exe) is in theScriptssubdirectory within your Python installation, typicallyC:UsersYourUserAppDataLocalProgramsPythonPythonXXScripts. - Self-Correction Tip: A quick way to find these paths is to open a Command Prompt, type
where python, andwhere pip. If they return paths, copy those.
- Python’s executable (
- Open Environment Variables:
- Search for “environment variables” in the Windows Start Menu and select “Edit the system environment variables.”
- In the System Properties window, click the “Environment Variables…” button.
- Edit System PATH:
- Under “System variables,” find the variable named
Path(it might bePATHorpath). - Select it and click “Edit…”.
- Under “System variables,” find the variable named
- Add New Paths:
- In the “Edit environment variable” window, click “New.”
- Add the full path to your Python installation directory (e.g.,
C:UsersYourUserAppDataLocalProgramsPythonPython39). - Click “New” again and add the full path to your Python’s
Scriptsdirectory (e.g.,C:UsersYourUserAppDataLocalProgramsPythonPython39Scripts). - Ensure these new entries are at the top or near the top of the list to prevent conflicts with other Python installations if you have multiple.
- Click “OK” on all open windows to save the changes.
- Test the Changes: Close any open Command Prompt or PowerShell windows and open a new one. Try
python --versionandpip --versionagain. Both should now work correctly.
Mastering Pip: Essential Commands and Best Practices
With Pip successfully installed and configured, you’re ready to start managing your Python packages. Here are the most fundamental Pip commands and some crucial best practices, including the use of virtual environments.
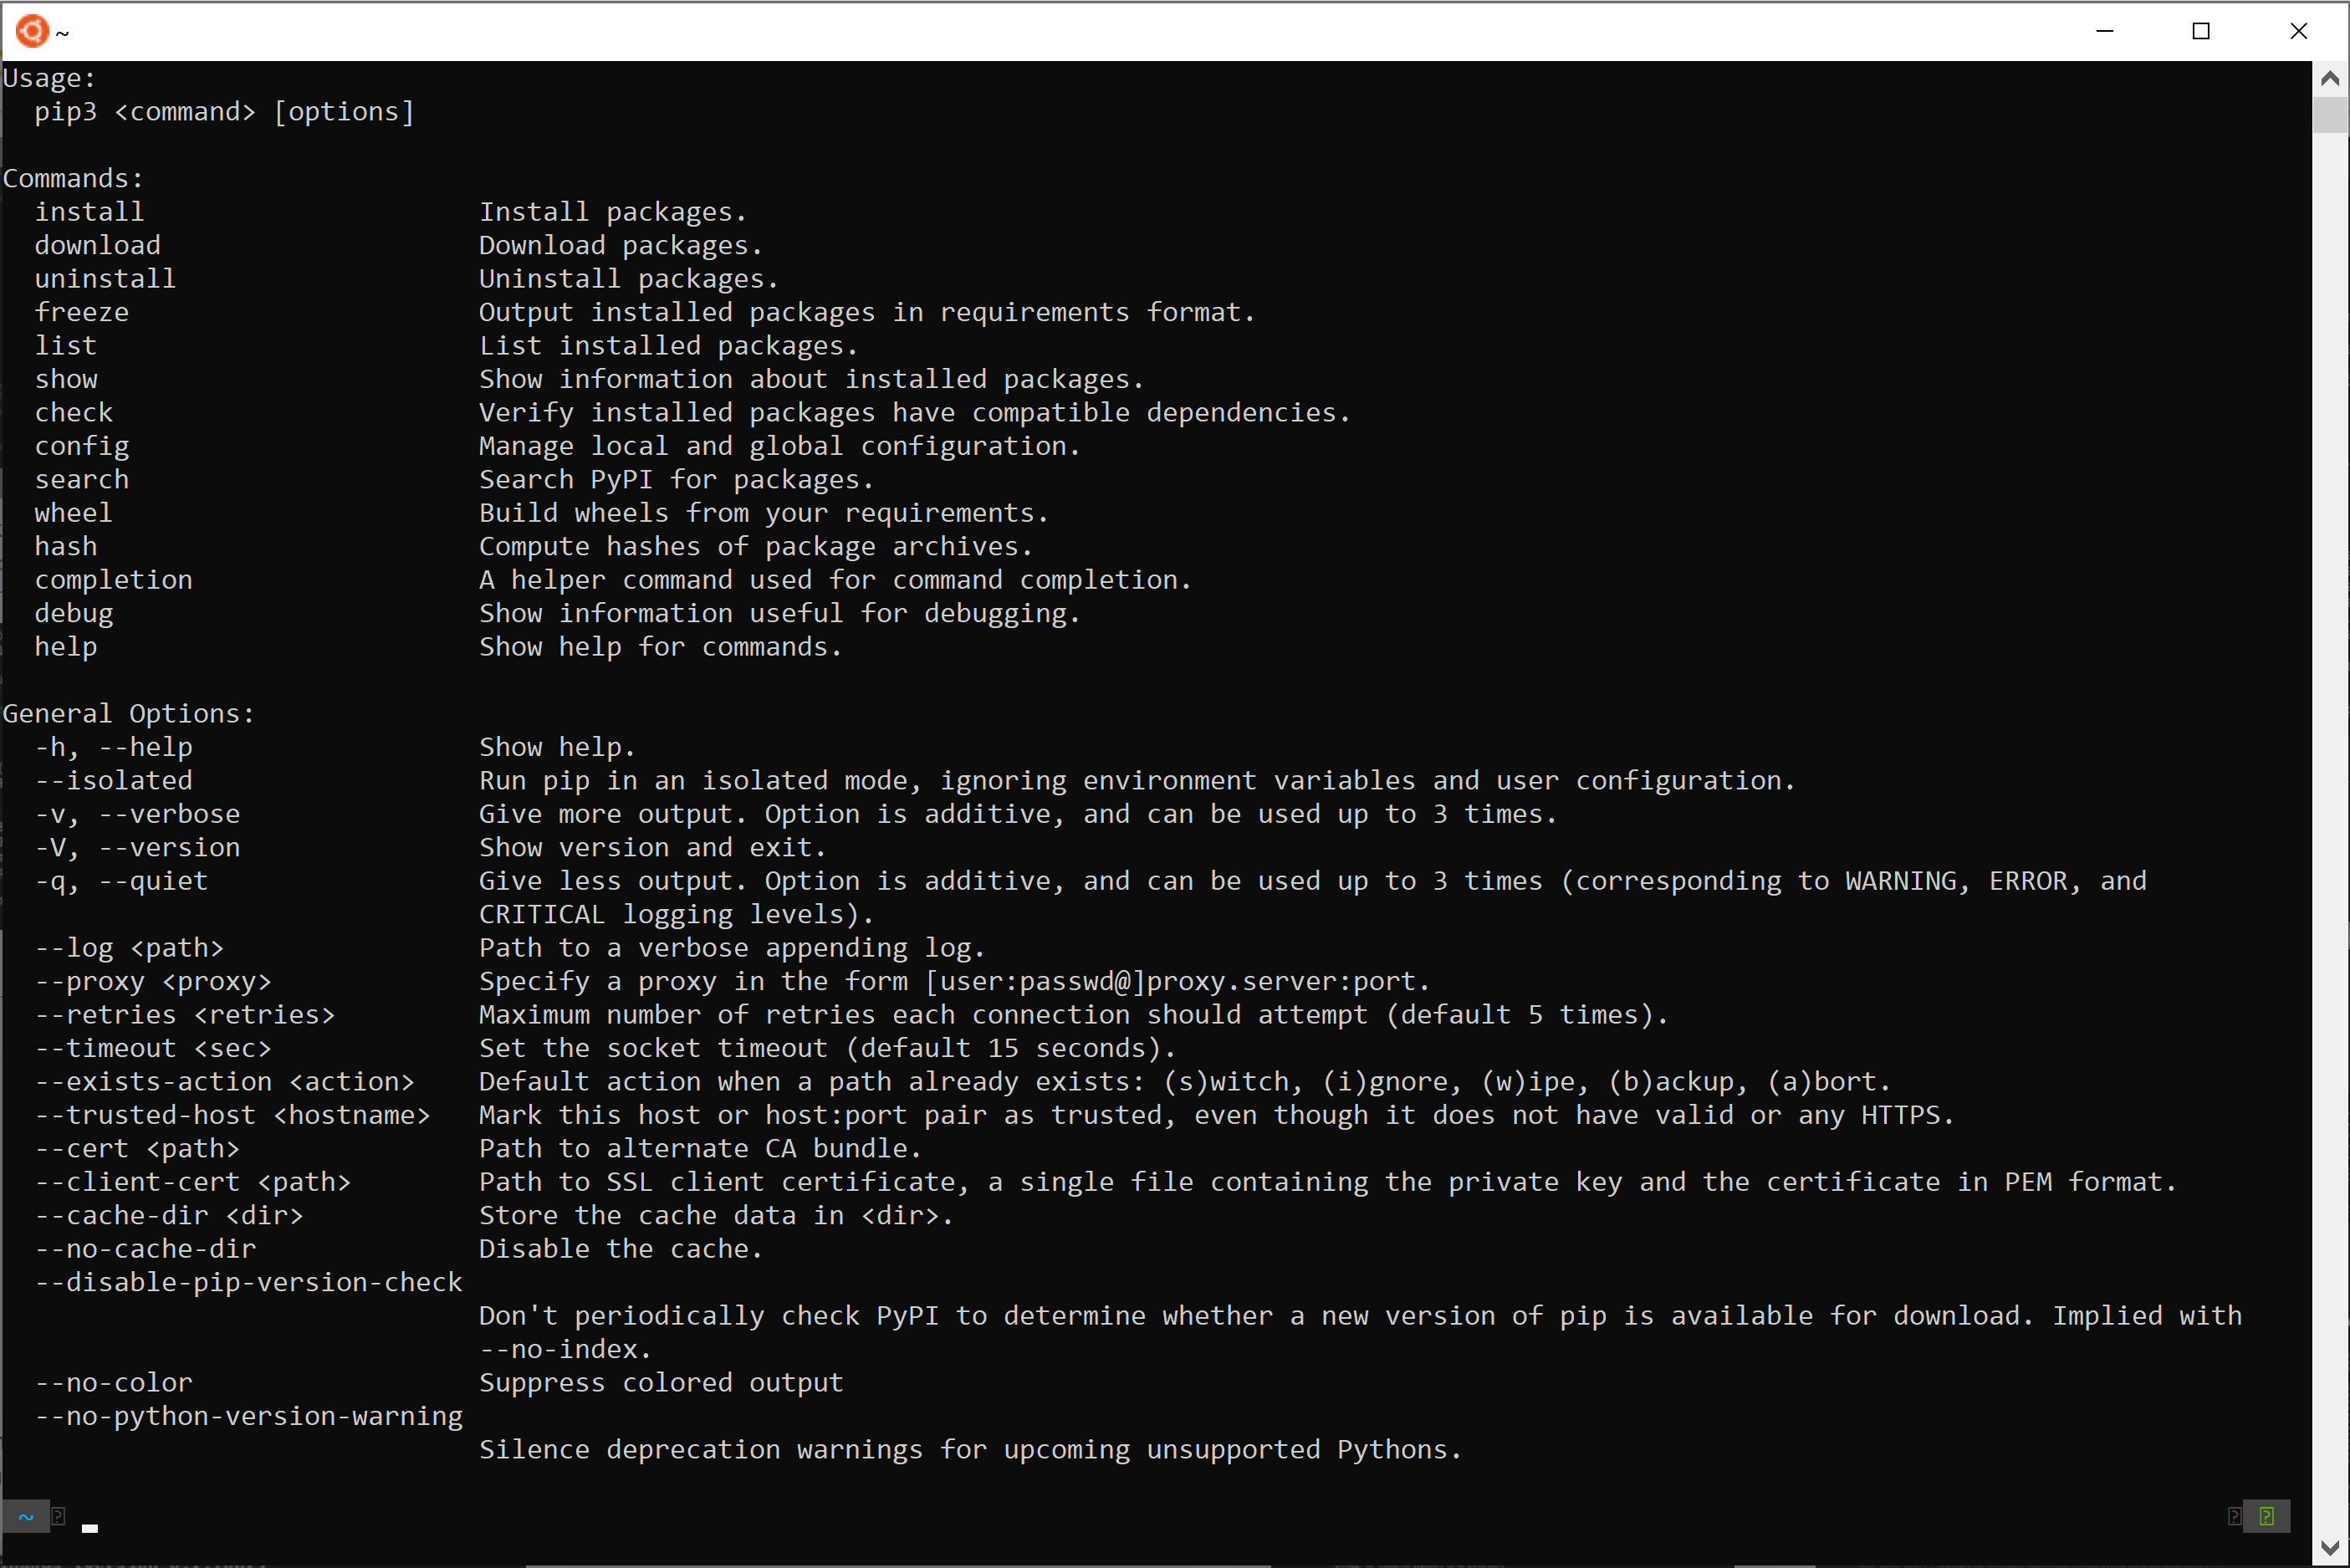
Core Pip Commands for Everyday Use
Installing and Uninstalling Packages
- Install a Package: This is the most common command.
bash

pip install package-name
Example:pip install requests(for HTTP requests)
You can install multiple packages at once:pip install django flask - Install a Specific Version:
bash

pip install package-name==version-number
Example:pip install pandas==1.3.4 - Upgrade a Package:
bash

pip install --upgrade package-name
Example:pip install --upgrade numpy - Uninstall a Package:
bash

pip uninstall package-name
Pip will ask for confirmation before removing the package.
Managing Installed Packages
- List Installed Packages: View all packages currently installed in your environment.
bash

pip list
You can also see outdated packages:pip list --outdated - Show Package Details: Get detailed information about a specific package, including its version, location, dependencies, and author.
bash

pip show package-name
Example:pip show requests - Freeze Requirements: Generate a
requirements.txtfile, which lists all installed packages and their exact versions. This is vital for reproducibility.
bash

pip freeze > requirements.txt
This file can then be used to install the exact same environment on another machine:
bash

pip install -r requirements.txt
Upgrading Pip Itself
It’s a good practice to keep Pip updated to its latest version to benefit from bug fixes and new features.
python -m pip install --upgrade pip
Using python -m pip is a more robust way to run Pip commands, especially when dealing with multiple Python installations or environment issues.
Working with Virtual Environments: A Professional Approach
While you can install all your packages globally, this quickly leads to conflicts when different projects require different versions of the same package. This is where virtual environments come in.
Why Virtual Environments are Crucial
A virtual environment is an isolated Python environment that allows you to install packages specific to a particular project without interfering with other projects or your global Python installation. Each virtual environment has its own independent set of installed packages. This prevents “dependency hell” and ensures project reproducibility.
For instance, Project A might need Django 2.2, while Project B requires Django 4.0. Without virtual environments, installing both simultaneously in a global environment would cause conflicts. With virtual environments, each project gets its own isolated Django version. This practice is a cornerstone of professional Python development and is highly recommended for digital security and stability of your various projects.
Creating and Activating a Virtual Environment
Python 3 includes the venv module for creating virtual environments:
- Navigate to Your Project Directory:
bash

cd C:UsersYourUserDocumentsMyPythonProject
- Create a Virtual Environment:
bash

python -m venv venv
(You can replacevenvwith any name you prefer for your environment, thoughvenvis a common convention.) This creates avenvfolder within your project directory containing a standalone Python installation and its ownpip. - Activate the Virtual Environment:
bash

.venvScriptsactivate
Your command prompt will change to indicate that the virtual environment is active (e.g.,(venv) C:UsersYourUserDocumentsMyPythonProject>). - Install Packages Within the Virtual Environment: Now, any
pip installcommand you run will install packages only within this active virtual environment.
bash

(venv) pip install flask
- Deactivate the Virtual Environment: When you’re done working on the project or want to switch to another, simply type:
bash

deactivate
The prompt will return to normal, and your global Python environment will be active again.
Always remember to activate your virtual environment before installing packages for a specific project. This practice will save you countless hours of troubleshooting and maintain a clean, organized development setup.
Troubleshooting Common Pip Installation and Usage Issues
Despite following the steps, you might encounter some common issues. Here’s how to address them:
“Pip is Not Recognized”: Addressing PATH Problems
This is by far the most frequent issue.
- Symptom: You type
pip --versionorpip installand get ” ‘pip’ is not recognized as an internal or external command, operable program or batch file.” - Cause: The directory containing
pip.exe(usuallyC:UsersYourUserAppDataLocalProgramsPythonPythonXXScripts) is not in your system’s PATH environment variable. - Solution: Follow the steps in “Step 3: Configuring Your System PATH Environment Variables” carefully. Remember to open a new Command Prompt window after making changes to PATH.
Permission Denied Errors
- Symptom: When running
pip install(especially globally), you might see “Permission denied” or “Access is denied” errors. - Cause: You’re trying to install packages to a system-wide directory that requires administrator privileges, and your current Command Prompt isn’t running as administrator.
- Solution:
- Use Virtual Environments: This is the recommended solution. Packages installed in a virtual environment don’t require system-wide permissions.
- Run Command Prompt as Administrator: If you must install globally, close your current Command Prompt, search for “Command Prompt” in the Start Menu, right-click, and select “Run as administrator.” Then try the
pip installcommand again. Be cautious with global installations.
Network and Proxy Issues
- Symptom: Pip fails to download packages with errors like “Could not fetch URL,” “Connection refused,” or “HTTPSConnectionPool(host=’pypi.org’, port=443): Max retries exceeded.”
- Cause: Your internet connection is blocked by a firewall, or you’re behind a corporate proxy server.
- Solution:
- Check Internet Connection: Ensure you have an active internet connection.
- Configure Proxy (if applicable): If you are behind a corporate proxy, you might need to configure Pip to use it. You can set environment variables:
bash

set HTTP_PROXY=http://your.proxy.server:port

set HTTPS_PROXY=https://your.proxy.server:port
Or use Pip’s--proxyflag:
bash

pip install --proxy http://your.proxy.server:port package-name
- Firewall/Antivirus: Temporarily disable your firewall or antivirus to see if it’s interfering, then add exceptions for Python and Pip.
Outdated Pip Version
- Symptom: You might encounter strange errors during package installation or warning messages about an outdated Pip version.
- Cause: Your Pip installation is old and lacks features or bug fixes present in newer versions.
- Solution: Always keep Pip updated. Run the upgrade command regularly:
bash

python -m pip install --upgrade pip
Conclusion: Empowering Your Python Development Journey
Learning how to pip install on Windows is a fundamental step in becoming a proficient Python developer. By understanding Pip, correctly setting up your environment, and adopting best practices like using virtual environments, you gain full control over the vast and powerful ecosystem of Python packages. This empowers you to build more robust, reproducible, and sophisticated applications across various tech domains.
Whether you’re delving into data science, crafting web applications, automating tasks, or exploring AI tools, Pip will be your constant companion, simplifying the process of integrating powerful external libraries into your projects. With this guide, you now possess the knowledge to confidently navigate the world of Python package management on Windows, paving the way for a more productive and enjoyable development journey. Keep experimenting, keep building, and leverage the full potential of Python!
aViewFromTheCave is a participant in the Amazon Services LLC Associates Program, an affiliate advertising program designed to provide a means for sites to earn advertising fees by advertising and linking to Amazon.com. Amazon, the Amazon logo, AmazonSupply, and the AmazonSupply logo are trademarks of Amazon.com, Inc. or its affiliates. As an Amazon Associate we earn affiliate commissions from qualifying purchases.