In the fast-paced world of web development, managing project dependencies efficiently is paramount. Developers constantly grapple with a myriad of packages, libraries, and frameworks that empower modern applications. This is where package managers like Yarn step in, streamlining the process of installing, updating, and managing project dependencies. If you’re looking to enhance your development workflow with speed, reliability, and security, understanding how to install and utilize Yarn is a fundamental step.
This guide will walk you through the entire process of installing Yarn across various operating systems, ensuring you have the tools to build robust and high-performing applications. We’ll explore why Yarn has become a favored choice for many developers, its critical role within the broader tech ecosystem, and provide actionable insights to get you up and running smoothly. By mastering Yarn, you’re not just installing a tool; you’re investing in a more productive and reliable future for your development projects, directly impacting project delivery, efficiency, and ultimately, your financial bottom line through reduced development cycles.

Understanding Yarn’s Place in the Tech Landscape
The modern web development landscape is characterized by a rapid evolution of tools and methodologies. From cutting-edge AI tools integrating into software development to sophisticated frameworks driving user experiences, the reliance on a robust package manager is undeniable. Yarn emerged as a significant player in this arena, addressing some of the pain points associated with its predecessor, npm (Node Package Manager).
Yarn vs. npm: A Brief Comparison
Initially developed by Facebook (now Meta), Yarn was created to solve performance and security issues encountered with npm, especially in large-scale monorepo projects. While npm has significantly improved since Yarn’s inception, Yarn still holds several distinct advantages that make it a compelling choice for many developers and organizations.
- Speed: One of Yarn’s most touted features is its speed. It achieves faster installation times through parallelizing operations and utilizing a global cache for downloaded packages. This means if a package is already installed on your machine for a different project, Yarn can link to it from the cache instead of re-downloading it, saving precious development time. For businesses, this translates directly into reduced waiting periods, accelerating the “time to market” for new features and products.
- Reliability: Yarn introduced the
yarn.lockfile, a critical component that ensures reproducible builds. This file precisely records the exact version of every dependency used in a project. This guarantees that anyone working on the project, or even a continuous integration/continuous deployment (CI/CD) pipeline, will install the identical set of dependencies, eliminating “it works on my machine” scenarios and enhancing project stability and consistency. This reliability is a cornerstone of maintaining a strong brand reputation for software products. - Security: Yarn incorporates checksums for all packages, verifying their integrity before execution. This adds an extra layer of security, protecting against corrupted or tampered packages. In an era where digital security is paramount, this feature helps safeguard your projects from potential vulnerabilities.
- Offline Mode: Thanks to its caching mechanism, Yarn can install packages even when there’s no internet connection, provided the package has been installed previously. This offers incredible flexibility for developers on the go or in environments with unreliable network access.
While npm has adopted many of Yarn’s innovations (like package-lock.json for reproducibility and improved performance), Yarn often maintains an edge in specific scenarios, particularly in large projects with numerous dependencies. Choosing between Yarn and npm often comes down to team preference, existing project tooling, and specific performance requirements. However, understanding and having Yarn in your toolkit significantly broadens your capabilities in modern web development.
Prerequisites for a Smooth Installation
Before you dive into installing Yarn, there’s one essential prerequisite: Node.js. Yarn is built on Node.js and requires it to function. Node.js comes bundled with its own package manager, npm, which can often be used to install Yarn itself.
1. Install Node.js and npm:
If you don’t already have Node.js installed, you’ll need to do so. The easiest way is to download the appropriate installer for your operating system from the official Node.js website (nodejs.org). It’s recommended to install the LTS (Long Term Support) version for stability.
Once Node.js is installed, npm will also be available. You can verify their installation by opening your terminal or command prompt and running:
node -v
npm -v
These commands should output the installed versions of Node.js and npm, respectively. Ensuring a clean and updated Node.js environment is the foundation for a seamless Yarn installation and helps prevent common issues related to mismatched dependencies or outdated tools. This initial setup is crucial for productivity, saving you valuable time and potential financial losses due to project delays.
Step-by-Step Installation Methods for Every Platform
Yarn offers multiple installation methods, catering to the diverse ecosystems of Windows, macOS, and Linux. Choosing the right method often depends on your system preferences and whether you use other package managers like Homebrew or Chocolatey. This section will detail the most common and recommended approaches, ensuring you can get Yarn up and running regardless of your operating system.
Installing Yarn on Windows
Windows users have several convenient options for installing Yarn, each with its own advantages.
Method 1: Using Chocolatey (Recommended for Windows)
Chocolatey is a popular package manager for Windows, akin to Homebrew on macOS. It simplifies the process of installing and updating software.
- Install Chocolatey (if you haven’t already):
Open an administrative PowerShell window (right-click PowerShell and select “Run as Administrator”). Then, run the following command. After execution, close and reopen PowerShell.
powershell

Set-ExecutionPolicy Bypass -Scope Process -Force; [System.Net.ServicePointManager]::SecurityProtocol = [System.Net.ServicePointManager]::SecurityProtocol -bor 3072; iex ((New-Object System.Net.WebClient).DownloadString('https://community.chocolatey.org/install.ps1'))
- Install Yarn using Chocolatey:
Once Chocolatey is installed, simply run this command in your administrative PowerShell or Command Prompt:
bash

choco install yarn
Chocolatey will handle the download and installation, including any necessary dependencies. This method is highly recommended as it makes updating Yarn in the future much simpler (choco upgrade yarn).
Method 2: Using npm
If you already have npm installed via Node.js, you can use it to install Yarn globally.
- Open your Command Prompt or PowerShell (as administrator, if you encounter permission errors).
- Run the installation command:
bash

npm install -g yarn
The-gflag ensures Yarn is installed globally, making it accessible from any directory on your system. While simple, this method ties Yarn’s updates to npm, which might not be ideal for all workflows.
Method 3: Standalone Installer (.msi)
Yarn provides a .msi installer for Windows, which offers a traditional GUI-based installation experience.
- Download the latest
.msiinstaller from the official Yarn website’s installation page (yarnpkg.com/en/docs/install). - Run the installer: Double-click the downloaded
.msifile and follow the on-screen prompts. The installer will automatically add Yarn to your system’s PATH environment variable.- Note: If you install Yarn via the
.msiinstaller, you may need to restart your terminal or command prompt for theyarncommand to be recognized. This method is straightforward for users less familiar with command-line tools.
- Note: If you install Yarn via the
Installing Yarn on macOS
macOS users benefit from the powerful Homebrew package manager, which is the most recommended way to install Yarn.
Method 1: Using Homebrew (Recommended for macOS)
Homebrew simplifies software installation on macOS.
- Install Homebrew (if you haven’t already):
Open your Terminal and run the following command:
bash

/bin/bash -c "$(curl -fsSL https://raw.githubusercontent.com/Homebrew/install/HEAD/install.sh)"
Follow the on-screen instructions, which may include installing Xcode Command Line Tools. - Install Yarn using Homebrew:
Once Homebrew is installed, simply run:
bash

brew install yarn
Homebrew will download and install Yarn, managing its dependencies and ensuring it’s properly configured. This method allows for easy updates usingbrew upgrade yarn.
Method 2: Using npm
Similar to Windows, you can use npm to install Yarn globally on macOS.
- Open your Terminal.
- Run the installation command:
bash

npm install -g yarn
This method is quick if you already have npm set up but lacks the integrated management benefits of Homebrew.
Installing Yarn on Linux
Linux offers the most diverse range of installation options due to its various distributions. The recommended approach is to use the package manager specific to your distribution.
Method 1: Using Distribution-Specific Package Managers (Recommended for Linux)
-
Debian/Ubuntu (using
apt):
First, configure the Yarn repository:curl -sS https://dl.yarnpkg.com/debian/pubkey.gpg | sudo apt-key add - echo "deb https://dl.yarnpkg.com/debian/ stable main" | sudo tee /etc/apt/sources.list.d/yarn.listThen, update your package list and install Yarn. It’s recommended to install
yarnwithoutnodeasnodejsis already a dependency ofyarn.sudo apt update sudo apt install yarnIf you encounter issues, you might need to install
nodejsseparately first:sudo apt install nodejs. -
CentOS/Fedora (using
yumordnf):
First, configure the Yarn repository:
bash

curl --silent --location https://rpm.nodesource.com/setup_16.x | sudo bash - # Installs Node.js repo

curl --silent --location https://dl.yarnpkg.com/rpm/yarn.repo | sudo tee /etc/yum.repos.d/yarn.repo
Then, install Yarn (and Node.js if not already present):
bash

sudo yum install yarn # For CentOS/RHEL 7

sudo dnf install yarn # For Fedora/CentOS/RHEL 8+
Or, if you prefer,sudo yum install nodejs yarnto ensure Node.js is also installed.
Method 2: Using npm
As with other operating systems, you can install Yarn globally via npm on Linux.
- Open your Terminal.
- Run the installation command:
bash

npm install -g yarn
Ensure you havesudoprivileges if you encounter permission errors, especially for global installations.
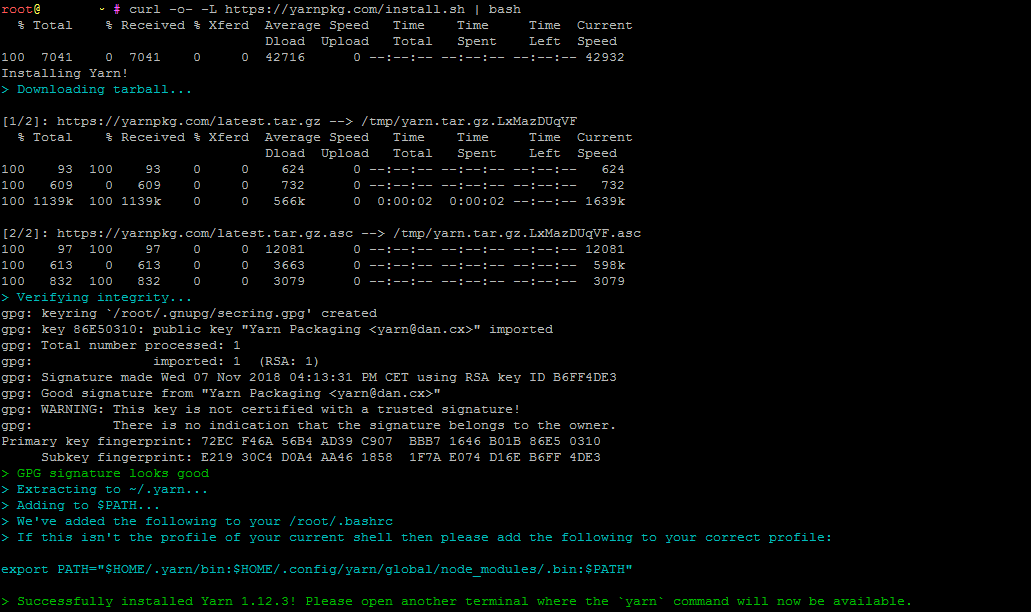
Verifying Your Yarn Installation
Regardless of the method you used, it’s crucial to verify that Yarn has been installed correctly and is accessible from your command line.
- Open a new terminal or command prompt window. This is important, as some installations require restarting the shell to update the PATH environment variables.
- Run the following command:
bash

yarn --version
If Yarn is installed correctly, this command will output its version number (e.g.,1.22.19). If you receive an error like “command not found,” refer to the troubleshooting section.
Successfully installing Yarn is a foundational step, empowering developers to leverage its efficiency. For companies, reducing the friction in setting up development environments means developers can focus more on building, innovating, and delivering value, directly impacting project profitability and competitive advantage.
Getting Started with Yarn: Essential Commands and Best Practices
With Yarn successfully installed, you’re ready to integrate it into your development workflow. Yarn’s command-line interface is intuitive and powerful, designed to streamline package management. Understanding these core commands is crucial for efficient project development, contributing to faster delivery and a polished “brand” of reliability for your software.
Initializing a New Project
Every new project starts with initialization. Yarn provides a simple command to set up your project with a package.json file, which is the heart of your project’s dependency management.
yarn init
Running this command will prompt you to answer a series of questions about your project (name, version, description, entry point, author, license, etc.). You can press Enter to accept the default values for most of these. Once completed, Yarn will create a package.json file in your current directory, ready for you to add dependencies.
Alternatively, to quickly initialize a project with default values, you can use:
yarn init --yes
This command skips all the interactive prompts and creates a package.json file with standard default settings.
Adding and Managing Dependencies
The core function of any package manager is to handle project dependencies. Yarn excels at this, providing clear and concise commands for adding, removing, and updating packages.
-
Adding a New Dependency:
To add a package to your project, use theyarn addcommand. This will download the package, add it to yournode_modulesdirectory, and update yourpackage.jsonandyarn.lockfiles.yarn add [package-name]Example:
yarn add reactYou can specify a version or tag:
yarn add [package-name]@[version-or-tag]Example:
yarn add lodash@4.17.21,yarn add express@latestTo add a development dependency (a package only needed during development, like a testing framework or build tool):
yarn add [package-name] --devExample:
yarn add webpack --devTo add a peer dependency:
yarn add [package-name] --peer -
Installing All Project Dependencies:
When you clone a project or start working on an existing one, you’ll need to install all the dependencies listed in itspackage.jsonfile. Yarn makes this incredibly simple:yarn installThis command reads your
package.jsonandyarn.lockfiles, fetches all required packages, and installs them into yournode_modulesdirectory. Theyarn.lockfile ensures that you get the exact same dependency tree as when the project was last built, preventing dependency hell and ensuring consistency across development environments. -
Removing a Dependency:
To remove an unwanted package from your project:yarn remove [package-name]This command will uninstall the package, remove it from
node_modules, and update yourpackage.jsonandyarn.lockfiles. -
Upgrading Dependencies:
Keeping your dependencies up to date is important for security, performance, and accessing new features.To upgrade a specific package to its latest version (within the version range specified in
package.json):yarn upgrade [package-name]To upgrade all packages to their latest versions (again, within the specified ranges):
yarn upgradeFor interactive upgrades of multiple packages, Yarn offers:
yarn upgrade-interactiveThis command presents a list of outdated packages and allows you to select which ones to update.
Running Scripts
The package.json file can also contain custom scripts defined under the “scripts” field. These scripts are typically used for tasks like starting a development server, running tests, or building your application.
To run a script defined in package.json:
yarn run [script-name]
Example: If your package.json has "start": "node index.js", you can run yarn run start. For common scripts like start, test, install, and stop, you can often omit run: yarn start.
Working with Workspaces (Advanced Feature)
For larger projects or monorepos (repositories containing multiple distinct projects or packages), Yarn Workspaces offer a powerful solution for managing dependencies across related projects. Workspaces allow a single yarn.lock file for the entire monorepo, ensuring consistency and deduplicating dependencies across packages.
To enable workspaces, you define a workspaces field in your root package.json:
{
  "name": "my-monorepo",
  "version": "1.0.0",
  "private": true,
  "workspaces": [
    "packages/*",
    "apps/*"
  ]
}
Then, run yarn install from the root of your monorepo. This will hoist common dependencies to the top-level node_modules and symlink local packages, significantly simplifying dependency management and reducing overall installation size. This feature is particularly valuable for large organizations, enabling them to streamline their software development and reduce infrastructure costs associated with managing multiple separate dependency trees.
By understanding and utilizing these essential Yarn commands, you can efficiently manage your project’s dependencies, ensuring consistency, reliability, and speed in your development workflow. This efficiency directly contributes to project success, faster delivery cycles, and ultimately, helps maintain a competitive edge in the tech market.
Troubleshooting Common Yarn Installation Issues
While the Yarn installation process is generally smooth, you might occasionally encounter issues. Understanding common problems and their solutions can save you significant time and frustration. Effective troubleshooting ensures minimal downtime, which directly translates to cost savings and maintaining productivity.
Path Environment Variables
One of the most frequent reasons for Yarn not being recognized (e.g., “yarn: command not found”) is an incorrectly configured system PATH environment variable. The PATH tells your operating system where to look for executable programs.
- Problem: After installing Yarn, typing
yarn --versionin your terminal returns “command not found” or a similar error. - Solution:
- Restart your terminal/command prompt: Often, simply closing and reopening your terminal window is enough for the system to refresh its PATH.
- Verify Yarn’s installation location:
- If installed via npm (
npm install -g yarn), Yarn is usually located in a global npm directory. You can find this by runningnpm root -g. The Yarn executable will be in that directory or abinsubdirectory. - If installed via Homebrew (
brew install yarn), it’s typically in/usr/local/bin(or/opt/homebrew/binon Apple Silicon Macs). - If installed via Chocolatey (
choco install yarn), it’s usually inC:ProgramDatachocolateybin.
- If installed via npm (
- Manually add Yarn to your PATH (if necessary):
- Windows: Search for “Environment Variables” in the Start menu, click “Edit the system environment variables,” then “Environment Variables…” Under “System variables,” find “Path,” select it, and click “Edit.” Add the directory where Yarn’s executable is located (e.g.,
C:Users<YourUsername>AppDataRoamingnpmif installed via npm, orC:Program Files (x86)Yarnbinif using the MSI installer). - macOS/Linux: Edit your shell configuration file (
~/.bashrc,~/.zshrc, or~/.profile). Add a line likeexport PATH="/path/to/yarn/bin:$PATH"and then runsource ~/.bashrc(or your respective file) to apply the changes.
- Windows: Search for “Environment Variables” in the Start menu, click “Edit the system environment variables,” then “Environment Variables…” Under “System variables,” find “Path,” select it, and click “Edit.” Add the directory where Yarn’s executable is located (e.g.,
Version Conflicts
Running multiple package managers or having different versions of Node.js can sometimes lead to conflicts.
- Problem: Unexpected behavior, errors during
yarn install, or issues specific to certain package versions. - Solution:
- Ensure Node.js is up to date: Outdated Node.js versions can sometimes cause compatibility issues. Consider using a Node Version Manager (NVM for macOS/Linux, nvm-windows for Windows) to easily switch between Node.js versions and keep them updated.
- Clear Yarn cache: Sometimes, corrupted or outdated cached packages can cause issues.
bash

yarn cache clean
- Clean
node_modulesand reinstall: If a project isn’t building correctly, removingnode_modulesand reinstalling can often resolve the issue.
bash

rm -rf node_modules  # On Windows, use 'rd /s /q node_modules'

yarn install
- Check global npm packages: If you installed Yarn via
npm install -g yarn, ensure npm itself is up to date (npm install -g npm@latest).
Network and Proxy Issues
In corporate environments or behind strict firewalls, network configurations can prevent Yarn from downloading packages.
- Problem:
yarn installhangs, fails with network errors, or reports “connection refused.” - Solution:
- Configure proxy settings: If you’re behind a corporate proxy, you might need to configure Yarn to use it.
bash

yarn config set proxy http://username:password@proxy.server:port

yarn config set https-proxy http://username:password@proxy.server:port
Replace with your actual proxy details. - Check firewall rules: Ensure your firewall isn’t blocking outgoing connections on standard HTTP/HTTPS ports (80, 443).
- Use a VPN: In some highly restricted networks, a VPN might be necessary to bypass local network restrictions.
- Use Yarn’s
--no-hoist(for workspaces) or--network-timeout: If specific network issues are causing timeouts, adjusting timeout settings might help, or using--no-hoistfor workspaces if proxying is problematic for hoisted dependencies.
- Configure proxy settings: If you’re behind a corporate proxy, you might need to configure Yarn to use it.
Reinstallation Strategies
If all else fails, a clean reinstallation can often resolve persistent issues.
- Uninstall Yarn:
- Chocolatey:
choco uninstall yarn - Homebrew:
brew uninstall yarn - npm:
npm uninstall -g yarn - MSI (Windows): Use “Add or Remove Programs” in Windows settings.
- Linux (apt/dnf/yum): Use your distribution’s package manager (e.g.,
sudo apt remove yarn).
- Chocolatey:
- Clean up remaining files: Check for any remaining Yarn configuration files or global cache directories.
- Yarn’s global cache is typically in
~/.yarn/cache(macOS/Linux) orC:Users<Username>AppDataLocalYarnCache(Windows). Delete this directory if it exists.
- Yarn’s global cache is typically in
- Reinstall using a recommended method: Follow the installation steps outlined earlier, preferably using a system-level package manager like Chocolatey or Homebrew, which tend to manage dependencies and PATH variables more robustly.
By methodically addressing these common troubleshooting scenarios, you can quickly diagnose and resolve most Yarn installation and usage problems. This proactive approach to digital security and productivity ensures that your development process remains efficient, allowing you to focus on building innovative applications and safeguarding your project’s integrity, thereby securing your financial investment in the development process.

Conclusion
Yarn stands as a powerful, reliable, and efficient package manager that plays a crucial role in modern web development. From accelerating build times to ensuring consistent dependency resolution across diverse development environments, its advantages are clear. By following this comprehensive guide, you’ve not only learned how to install Yarn across Windows, macOS, and Linux, but also gained a deeper understanding of its place in the tech ecosystem, its core commands, and strategies for troubleshooting common issues.
Adopting Yarn into your workflow means embracing a tool that prioritizes speed, security, and developer productivity. For individual developers, this translates into more time coding and less time wrestling with dependency woes. For businesses and development teams, the benefits are even more pronounced: faster project delivery, reduced operational costs due to efficient resource management, and enhanced project reliability contribute directly to a stronger brand reputation and improved financial outcomes. In a competitive digital landscape driven by technology trends and AI tools, optimizing every aspect of your development pipeline is not just an advantage—it’s a necessity.
Whether you’re building a simple static site, a complex single-page application, or managing a large-scale monorepo, Yarn empowers you to manage your JavaScript packages with confidence and ease. Now that you’re equipped with the knowledge to install and wield Yarn effectively, you’re better prepared to tackle the challenges of modern web development and build the next generation of innovative applications. Get started with Yarn today, and experience the difference it makes in streamlining your development journey.
aViewFromTheCave is a participant in the Amazon Services LLC Associates Program, an affiliate advertising program designed to provide a means for sites to earn advertising fees by advertising and linking to Amazon.com. Amazon, the Amazon logo, AmazonSupply, and the AmazonSupply logo are trademarks of Amazon.com, Inc. or its affiliates. As an Amazon Associate we earn affiliate commissions from qualifying purchases.