Spotify, a titan in the music streaming world, offers an unparalleled library of songs, podcasts, and curated playlists. However, for the discerning user who seeks to go beyond the standard interface, the desire for customization and enhanced functionality often arises. This is where Spicetify enters the picture. Spicetify is a powerful command-line tool that allows you to deeply customize the Spotify desktop client, transforming its look and feel and adding new features. Whether you’re a tech enthusiast looking to tinker, a designer wanting a personalized aesthetic, or simply someone who appreciates a more streamlined and visually appealing experience, understanding how to install and use Spicetify is your gateway to a truly bespoke Spotify.
This comprehensive guide will walk you through the entire process of installing Spicetify, demystifying the steps and equipping you with the knowledge to unlock its full potential. We’ll explore the prerequisites, the installation methods, and the initial steps to get you up and running, ensuring a smooth and successful setup for your customized Spotify journey.
Understanding Spicetify and its Prerequisites
Before diving into the installation, it’s crucial to grasp what Spicetify is and what you’ll need to have in place. Spicetify is essentially a collection of scripts and tools that modify the Spotify desktop client. It leverages the underlying structure of Spotify’s web player and injects custom CSS and JavaScript to achieve its transformative effects. This means it’s not a separate application but rather a powerful modifier for the existing Spotify desktop client.
To get started with Spicetify, there are a few key prerequisites:
Essential Software Requirements
The primary requirement for Spicetify is the Spotify desktop client itself. Spicetify works by modifying the files of the official Spotify desktop application. Therefore, ensure you have the latest version of Spotify installed and running on your operating system. Spicetify supports Windows, macOS, and Linux.
Beyond Spotify, Spicetify relies on Node.js and npm (Node Package Manager) for its installation and management. Node.js is a JavaScript runtime environment that allows you to run JavaScript code outside of a web browser, and npm is the package manager for Node.js, used to install and manage software packages.
- Installing Node.js and npm:
- Windows: Download the installer from the official Node.js website (https://nodejs.org/). Run the installer and follow the on-screen instructions. npm is typically bundled with Node.js.
- macOS: You can install Node.js and npm using Homebrew, a popular package manager for macOS. Open your Terminal and run:
bash

brew install node
If you don’t have Homebrew, you can install it from https://brew.sh/. - Linux: The installation process varies slightly depending on your Linux distribution. For Debian/Ubuntu-based systems, you can use:
bash

sudo apt update

sudo apt install nodejs npm
For other distributions, refer to the official Node.js documentation or your distribution’s package manager.
Once Node.js and npm are successfully installed, you can verify their installation by opening your terminal or command prompt and running:
node -v
npm -v
This should display the installed versions of Node.js and npm, confirming they are ready to be used.
Understanding Your Operating System’s File Structure
Spicetify modifies Spotify’s application files. The location of these files can vary depending on your operating system. Knowing where to find them is crucial for some advanced troubleshooting or manual interventions, although Spicetify’s installer generally handles this automatically.
- Windows: Spotify’s application files are typically located in
%APPDATA%Spotifyor%LOCALAPPDATA%Spotify. - macOS: The Spotify application is usually found in
/Applications/Spotify.app. Spicetify will modify files within this application bundle. - Linux: The location can vary, but it’s often in
~/.config/spotifyor within the Spotify installation directory if installed via a package manager.
While you don’t need to manually navigate these directories for the standard installation, understanding their general existence is beneficial for a complete picture.
Installing Spicetify: A Step-by-Step Guide
With the prerequisites in place, we can now proceed with the installation of Spicetify. The process is primarily command-line driven, making it efficient and adaptable across different platforms.
Using the Official Spicetify Installer Script
The recommended and easiest way to install Spicetify is by using its official installer script. This script automates the download and setup process, ensuring that Spicetify is correctly placed and configured.
-
Open Your Terminal or Command Prompt: Launch your preferred command-line interface.
-
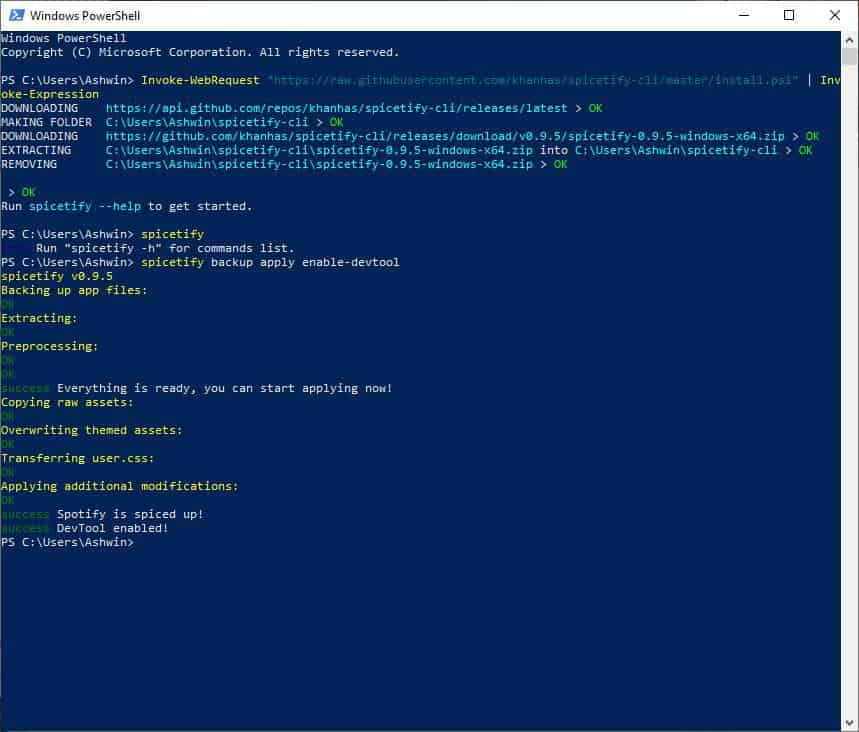
Run the Installation Command: Paste the following command into your terminal and press Enter:
-
For Windows:
iwr -useb https://raw.githubusercontent.com/spicetify/spicetify-cli/main/spicetify.ps1 | iex(Note: This command uses PowerShell. If you are using Command Prompt, you might need to adjust or use the Linux/macOS command after installing Git.)
-
For macOS and Linux:
bash

curl -fsSL https://raw.githubusercontent.com/spicetify/spicetify-cli/main/install.sh | sh
-
-
Follow On-Screen Prompts: The script will guide you through the installation. It will download the latest version of Spicetify, copy the necessary files to the correct locations, and perform initial setup steps. You might be asked to confirm certain actions or provide administrator privileges.
-
Apply Spicetify to Spotify: After the script completes, Spicetify needs to be applied to your Spotify client. Run the following command:
spicetify applyThis command injects the Spicetify modifications into your Spotify desktop client.
-
Restart Spotify: Close and then reopen your Spotify desktop client. You should now see the default Spicetify theme or be presented with options to customize.
Verifying the Installation
To ensure Spicetify has been installed correctly, you can run a simple command to check its version:
spicetify version
This command should output the currently installed version of Spicetify. If you encounter any errors, it’s worth checking that Node.js and npm are correctly installed and that the installation script ran without any issues.
Customizing Your Spotify Experience with Spicetify
Once Spicetify is installed, the real fun begins: customization. Spicetify offers a vast array of options, from simple theme changes to advanced feature integrations.
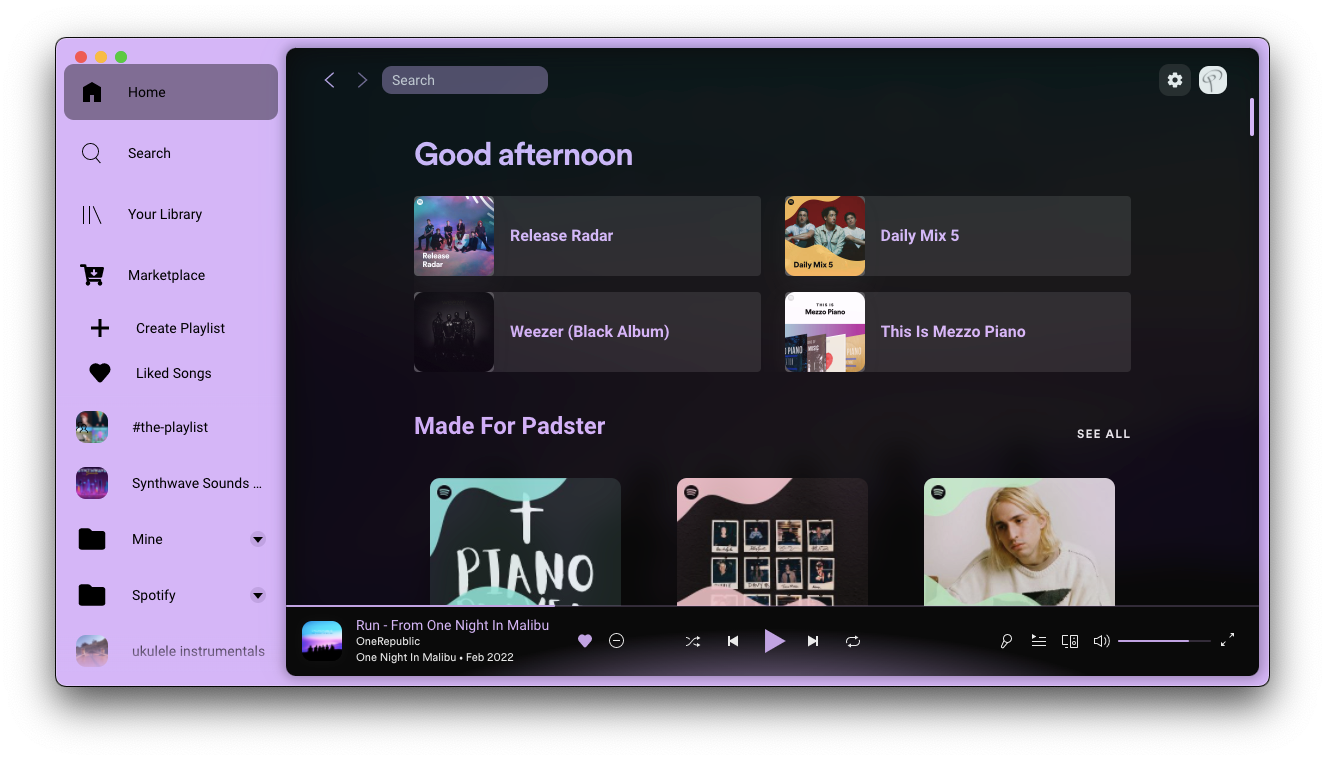
Exploring Themes and Appearance
The most immediate impact of Spicetify is its ability to change the visual theme of your Spotify client. Spicetify comes with a default theme, but the community has developed a rich ecosystem of custom themes that can drastically alter the application’s appearance.
-
Installing Themes:
- Themes are typically found in the Spicetify community themes repository or on platforms like GitHub.
- You’ll often download a theme folder and place it within Spicetify’s theme directory. The location of this directory is usually:
- Windows:
%USERPROFILE%.configspicetifyThemes - macOS/Linux:
~/.config/spicetify/Themes
- Windows:
- After placing a theme folder, you can activate it using the Spicetify command:
bash

spicetify config current_theme <theme_name>

spicetify apply
Replace<theme_name>with the exact name of the theme folder you downloaded.
-
Creating Your Own Themes: For the more adventurous, Spicetify supports custom CSS. You can create your own themes by writing CSS that targets Spotify’s HTML elements. This allows for ultimate control over every aspect of the interface. You’ll be editing files within the
Themesdirectory, often referencinguser.cssfor your custom styles.
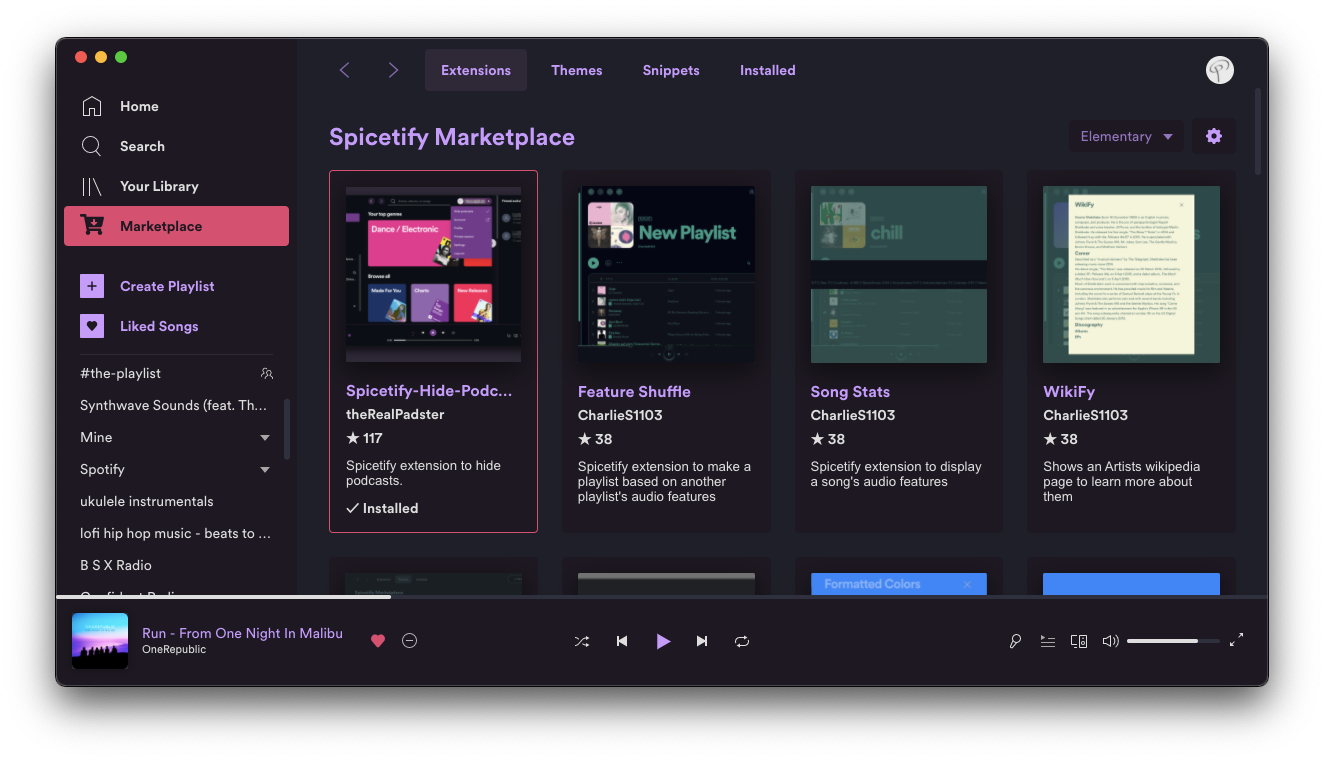
Adding and Managing Extensions
Beyond visual themes, Spicetify allows you to add functionality through extensions. These are JavaScript scripts that can introduce new features, modify existing ones, or provide shortcuts and integrations.
-
What are Extensions? Extensions can do a variety of things, such as:
- Displaying lyrics directly within the Spotify client.
- Adding quick access to artist discographies.
- Integrating with other services.
- Improving playback controls or queue management.
-
Installing Extensions:
- Extensions are typically found on the Spicetify documentation or community forums.
- You’ll usually download an extension file (often a
.jsfile) and place it in Spicetify’s extensions directory:- Windows:
%USERPROFILE%.configspicetifyExtensions - macOS/Linux:
~/.config/spicetify/Extensions
- Windows:
- After placing the extension file, you might need to enable it within Spicetify’s configuration. You can view your current Spicetify configuration with:
bash

spicetify config
You’ll then need to manually edit theconfig.inifile (located in the Spicetify configuration directory) to include the extension in theextensionsarray, or use commands if available to manage extensions. Consult the specific extension’s documentation for precise installation instructions.
-
Managing Extensions: You can enable or disable extensions by editing the
config.inifile, removing or adding their names to theextensionslist. Remember to runspicetify applyafter making any configuration changes to reload Spicetify with the updated settings.
Advanced Usage and Troubleshooting
While Spicetify is designed to be user-friendly, advanced customization and occasional issues may arise. Understanding how to navigate these situations will ensure a seamless experience.
Navigating Spicetify’s Configuration
Spicetify’s behavior is controlled by a configuration file. You can access and modify this file to fine-tune various aspects of the tool.
-
Viewing Configuration:
spicetify configThis command will display your current Spicetify settings.
-
Editing Configuration: The primary configuration file is
config.ini, usually located in:- Windows:
%USERPROFILE%.configspicetifyconfig.ini - macOS/Linux:
~/.config/spicetify/config.ini
You can open this file with any text editor. Here, you can adjust settings related to themes, extensions, Spotify client version compatibility, and more. Always back up this file before making significant changes.
- Windows:
Common Issues and Solutions
- Spicetify Not Applying: If changes aren’t reflected after running
spicetify apply, ensure that Spotify is completely closed before running the command. Sometimes, a full restart of your computer can also resolve stubborn issues. - Spotify Updates Breaking Spicetify: Spotify regularly updates its desktop client. These updates can sometimes break Spicetify’s compatibility. The Spicetify development team is usually quick to release patches. Ensure you are using the latest version of Spicetify by running the installation script again, or check the official Spicetify GitHub repository for updates.
- Theme or Extension Errors: If a specific theme or extension causes issues, try disabling it by removing its entry from the
config.inifile. This will help you isolate the problematic component. - Reverting to Default Spotify: If you wish to remove Spicetify and revert to the default Spotify client, you can use the following command:
bash

spicetify restore
This command will remove Spicetify’s modifications from your Spotify client.
By following these steps and understanding the core concepts, you are well on your way to installing and mastering Spicetify. This powerful tool opens up a world of personalized possibilities, allowing you to tailor your Spotify experience to your exact preferences, making your music listening not just enjoyable, but also uniquely yours.
aViewFromTheCave is a participant in the Amazon Services LLC Associates Program, an affiliate advertising program designed to provide a means for sites to earn advertising fees by advertising and linking to Amazon.com. Amazon, the Amazon logo, AmazonSupply, and the AmazonSupply logo are trademarks of Amazon.com, Inc. or its affiliates. As an Amazon Associate we earn affiliate commissions from qualifying purchases.