In the dynamic world of technology, where innovation in software and AI tools continually reshapes our digital landscape, the realm of game development stands as a captivating frontier. For many aspiring creators, students, and seasoned developers alike, Pygame offers an accessible and powerful gateway into building interactive experiences. As a free and open-source set of Python modules designed for writing video games, Pygame simplifies complex graphics, sound, and input handling, allowing developers to focus on the creative aspects of their projects. This guide will walk you through the essential steps to install Pygame, ensuring you have a robust foundation to embark on your game development journey. We’ll not only cover the core installation process but also delve into best practices, troubleshooting common issues, and understanding the broader context of Pygame within the tech ecosystem. Whether you’re aiming to build your first simple game or looking to refine your Python development skills, mastering the Pygame installation is your critical first step.

I. Understanding Pygame and Its Appeal
Before diving into the mechanics of installation, it’s beneficial to grasp what Pygame is, why it’s a popular choice, and its position within the broader technology trends we observe today. Understanding its purpose will underscore the importance of a smooth setup.
What is Pygame?
Pygame is a cross-platform set of Python modules designed for writing video games. It provides functionality for graphical primitives, sprite management, sound, music, keyboard and mouse input, joystick handling, and more. Essentially, it abstracts away many of the low-level complexities involved in game development, allowing developers to work at a higher level of abstraction using Python – a language renowned for its readability and versatility. Built on top of the Simple DirectMedia Layer (SDL) library, Pygame efficiently handles tasks like rendering graphics, playing audio, and processing user input, making it a robust framework for 2D game development. Its heritage as an open-source project means it benefits from a large, active community continually contributing to its evolution and support.
Why Choose Pygame for Game Development?
The choice of development tools can significantly impact a project’s trajectory, and Pygame consistently emerges as a top contender for several compelling reasons, particularly for those just starting out. Firstly, its integration with Python makes it incredibly accessible. Python’s gentle learning curve, extensive libraries, and widespread use across various tech domains (including AI tools, web development, and data science) mean that developers can leverage existing Python knowledge. This accessibility lowers the barrier to entry for game development, encouraging experimentation and rapid prototyping.
Secondly, Pygame’s focus on 2D game development aligns perfectly with a wide array of game genres, from platformers and puzzle games to arcade classics and educational simulations. Its robust capabilities for handling sprites, animations, and sound effects provide ample power for creating engaging and visually appealing games without the overhead of a full 3D engine. This simplicity allows developers to focus on core game mechanics and design principles, which are crucial for learning and iterating effectively.
Finally, the Pygame community is a significant asset. A thriving ecosystem of developers, tutorials, and forums means that help is readily available, common problems have documented solutions, and inspiration is abundant. This community support is invaluable, especially when encountering complex issues or seeking advice on design patterns, making Pygame an excellent environment for collaborative learning and growth.
The Role of Pygame in the Tech Landscape
In the broader context of technology trends, Pygame plays a crucial role in promoting digital literacy and fostering innovation. For educational institutions and coding bootcamps, Pygame often serves as an introductory tool for programming concepts, computer graphics, and software design. Its hands-on nature makes abstract programming ideas tangible, helping students grasp complex concepts like object-oriented programming, event handling, and algorithmic thinking through the fun medium of game creation.
Furthermore, Pygame’s open-source nature aligns with the ethos of collaborative development and shared knowledge that drives much of the tech industry. It allows developers to inspect, modify, and distribute its code, fostering a deeper understanding of how software works. This transparency is not just beneficial for learning but also for ensuring the library remains relevant and adaptable to new operating systems and Python versions. For indie developers, Pygame offers a cost-effective platform to bring their creative visions to life, potentially leading to independent game releases and contributing to the diverse marketplace of apps and digital experiences. Ultimately, Pygame serves as a vibrant microcosm of the tech world, demonstrating how robust open-source tools can empower individuals to innovate, create, and contribute to the digital frontier.
II. Preparing Your Development Environment: Prerequisites for Pygame
A smooth Pygame installation hinges on a well-prepared development environment. This section will guide you through installing Python, ensuring Pip is ready, and understanding the benefits of virtual environments – a best practice in modern software development.
Installing Python: The Foundation
Pygame is, at its core, a Python library, meaning Python must be installed on your system before you can proceed with Pygame. It’s recommended to use a recent stable version of Python, typically Python 3.x. Older Python 2.x versions are deprecated and no longer supported.
To install Python:
- Visit the Official Python Website: Navigate to
python.org/downloads/. - Download the Installer: Choose the appropriate installer for your operating system (Windows, macOS, or Linux). For Windows, ensure you download the executable installer.
- Run the Installer:
- Windows: When running the installer, crucially, make sure to check the box that says “Add Python X.X to PATH” (where X.X is your Python version). This step is vital as it allows you to run Python and Pip commands from any directory in your command prompt or terminal. Then, proceed with the “Install Now” option.
- macOS: Download the
.pkginstaller and follow the on-screen instructions. macOS often comes with a system version of Python, but it’s best to install your own separate version frompython.orgto avoid conflicts and ensure you have the latest features andpip. - Linux: Many Linux distributions come with Python pre-installed. However, you might need to install development headers or a specific version. Use your distribution’s package manager:
- Debian/Ubuntu:
sudo apt update && sudo apt install python3 python3-pip python3-dev - Fedora:
sudo dnf install python3 python3-pip python3-devel - Arch Linux:
sudo pacman -S python python-pip
- Debian/Ubuntu:
After installation, open a new terminal or command prompt and verify Python is installed correctly by typing:
python3 --version
or simply
python --version
You should see the installed Python version displayed. If not, double-check your PATH environment variable settings.
Confirming Pip: Python’s Package Installer
Pip is Python’s package installer, and it’s the standard tool for installing and managing Python libraries like Pygame. When you install Python from python.org (especially with the “Add Python to PATH” option selected), Pip is usually included and configured automatically.
To confirm Pip is working, open your terminal or command prompt and type:
pip3 --version
or
pip --version
You should see output similar to pip X.X.X from ... (python X.X). If you encounter an error like “command not found,” it means Pip is either not installed or not added to your system’s PATH.
If Pip is missing on Windows, you can usually run python -m ensurepip from your command prompt. On Linux, ensure you installed python3-pip (or python-pip) using your package manager.
The Advantage of Virtual Environments (Optional but Recommended)
While you can install Pygame globally, a best practice in Python development is to use virtual environments. A virtual environment creates an isolated Python installation for your project, meaning any packages you install (like Pygame) are contained within that environment and won’t interfere with other Python projects or your system’s global Python installation. This prevents dependency conflicts and keeps your project dependencies clean and manageable. This is a crucial aspect of good software hygiene and digital productivity.
To set up a virtual environment:
- Navigate to your project directory:
bash

cd my_pygame_project
(Replacemy_pygame_projectwith your desired folder name) - Create the virtual environment:
bash

python3 -m venv venv
This command creates a folder namedvenv(or any name you choose) inside your project directory, containing a new Python interpreter andpip. - Activate the virtual environment:
- Windows:
bash

.venvScriptsactivate
- macOS/Linux:
bash

source venv/bin/activate
Once activated, your terminal prompt will typically show(venv)at the beginning, indicating that you are now working within the isolated environment. Now, anypip installcommand you run will install packages into this specific environment.
- Windows:
Using virtual environments is a powerful way to maintain clean and reproducible development setups, contributing to better long-term project management and collaboration – a valuable lesson for any tech professional.
III. Step-by-Step Pygame Installation Guide
With your Python environment ready, installing Pygame itself is remarkably straightforward. This section will walk you through the primary method of installation and how to confirm its success.
Basic Installation via Pip
The most common and recommended way to install Pygame is using Pip, Python’s package installer. If you’ve followed the previous steps and either activated a virtual environment or ensured Pip is globally accessible, this process is quick and efficient.
- Open your terminal or command prompt.
- If using a virtual environment, activate it first (as described in the previous section). You’ll see
(venv)at the start of your prompt. - Execute the installation command:
bash

pip install pygame
Pip will connect to the Python Package Index (PyPI), download the latest stable version of Pygame, and install it along with any necessary dependencies. You’ll see output indicating the download and installation progress.- Note for Specific OS/Issues: In some cases, particularly on macOS or Linux where system-wide dependencies might be missing, Pip might struggle to build Pygame. If you encounter errors, you might need to install development headers or specific libraries. For example:
- macOS:
brew install sdl2 sdl2_image sdl2_mixer sdl2_ttf(using Homebrew) - Linux (Debian/Ubuntu):
sudo apt-get install python3-dev libsdl2-dev libsdl2-image-dev libsdl2-mixer-dev libsdl2-ttf-dev
However, for most modern setups and Python versions,pip install pygameis usually sufficient, as it often provides pre-compiled “wheels” that simplify installation.
- macOS:
- Note for Specific OS/Issues: In some cases, particularly on macOS or Linux where system-wide dependencies might be missing, Pip might struggle to build Pygame. If you encounter errors, you might need to install development headers or specific libraries. For example:
Verifying Your Pygame Installation
After the installation completes, it’s crucial to verify that Pygame was installed correctly and is accessible from your Python interpreter. This step ensures that when you start coding, Pygame will be available for import.
- Open your terminal or command prompt.
- If in a virtual environment, ensure it is still active.
- Start a Python interactive session:
bash

python
or
bash

python3
Your prompt should change to>>>. - Attempt to import pygame:
python

import pygame
- Check the Pygame version (optional but recommended):
python

print(pygame.__version__)
If the import is successful and no error messages appear, and you see the version number, congratulations! Pygame is correctly installed. You can then exit the Python interpreter by typingexit()and pressing Enter.
If you encounter an ModuleNotFoundError: No module named 'pygame' error, it means the installation was unsuccessful or Pygame was installed into a different Python environment than the one you are currently using. Revisit the previous steps, especially checking your virtual environment activation and ensuring Python/Pip paths.
Platform-Specific Considerations (Brief Overview)
While pip install pygame is the universal command, subtle differences exist across operating systems, primarily related to underlying dependencies Pygame might need or how Python is managed.

- Windows: Generally the most straightforward due to pre-compiled binaries (wheels) available via Pip. The key is ensuring Python and Pip are correctly added to your PATH during the initial Python installation.
- macOS: Similar to Windows,
pipusually handles everything. If you face issues, ensure you have Xcode Command Line Tools installed (xcode-select --install) and consider installingsdl2libraries via Homebrew ifpipfails to build. - Linux: Often requires installing development headers for SDL libraries using your distribution’s package manager before running
pip install pygame. This is because Pygame relies on these C libraries for graphics and sound, and the Python package might need to compile against them. The commands provided earlier (e.g.,sudo apt-get install ...libsdl2-dev) address this.
Understanding these nuances is part of becoming a proficient developer, capable of navigating the varied landscapes of modern operating systems and their unique requirements – a valuable skill in any tech role.
IV. Troubleshooting Common Pygame Installation Issues
Even with the clearest instructions, installation processes can sometimes hit snags. Knowing how to troubleshoot common Pygame installation issues is a critical skill, saving you time and frustration. This section outlines typical problems and their solutions.
Handling Dependency Errors
One of the most frequent issues users encounter during pip install pygame is related to missing dependencies. Pygame relies on underlying C libraries, primarily SDL (Simple DirectMedia Layer) and its extensions (SDLimage, SDLmixer, SDL_ttf). If Pip tries to build Pygame from source and these development headers aren’t present on your system, the installation will fail with compilation errors.
Symptoms:
- Error messages like “command ‘gcc’ failed” or similar compilation errors.
- Messages about missing
SDL.hor related header files.
Solutions:
- Linux: This is most common on Linux. You need to install the SDL development libraries using your distribution’s package manager before running
pip install pygame.- For Debian/Ubuntu-based systems:
bash

sudo apt-get update

sudo apt-get install python3-dev libsdl2-dev libsdl2-image-dev libsdl2-mixer-dev libsdl2-ttf-dev
- For Fedora-based systems:
bash

sudo dnf install python3-devel SDL2-devel SDL2_image-devel SDL2_mixer-devel SDL2_ttf-devel
- For Arch Linux:
bash

sudo pacman -S sdl2 sdl2_image sdl2_mixer sdl2_ttf
- For Debian/Ubuntu-based systems:
- macOS: While less common with modern Pip, if you face issues, installing Homebrew (
/bin/bash -c "$(curl -fsSL https://raw.githubusercontent.com/Homebrew/install/HEAD/install.sh)") and then installing the SDL libraries can help:
bash

brew install sdl2 sdl2_image sdl2_mixer sdl2_ttf
- Windows: Pip usually downloads pre-compiled wheels for Windows, making this issue rare. If it does occur, ensure your Python installation is correct and consider upgrading Pip (
pip install --upgrade pip).
Resolving Path and Environment Variable Problems
Incorrectly configured PATH environment variables are a common source of “command not found” errors for python, python3, pip, or pip3. If your system doesn’t know where to find these executables, it can’t run them.
Symptoms:
python: command not foundpip: command not found- Pygame installation works, but then
pythonorpython3from the command line doesn’t recognize Pygame.
Solutions:
- During Python Installation (Windows): The most critical step is checking “Add Python X.X to PATH” during the initial Python installation. If you missed it, you can either reinstall Python or manually add the Python installation directory (e.g.,
C:UsersYourUserAppDataLocalProgramsPythonPython39andC:UsersYourUserAppDataLocalProgramsPythonPython39Scripts) to your system’s PATH. - Manual PATH Configuration (macOS/Linux): For non-standard Python installations or if you manage multiple Python versions, you might need to manually add Python’s bin directory to your shell’s PATH variable (e.g., in
.bashrc,.zshrc, or.profile). For example:
bash

export PATH="/usr/local/bin:$PATH" # Adjust this path to your Python's bin directory
Remember tosourceyour shell configuration file after making changes (e.g.,source ~/.bashrc). - Using
python -m pip: Ifpipisn’t directly recognized, you can often force Python to run the pip module usingpython -m pip install pygame. This explicitly tells your chosen Python interpreter to use its associated pip, bypassing potential PATH issues.
Addressing Module Not Found Errors
This error occurs after installation, when you try to import pygame in your Python script or interactive session. It indicates that Python cannot find the Pygame module.
Symptoms:
ModuleNotFoundError: No module named 'pygame'when runningimport pygame.
Solutions:
- Virtual Environment Mismatch: This is the most common cause. If you installed Pygame into a virtual environment but are trying to run your Python script using the global Python interpreter (or a different virtual environment), it won’t find Pygame.
- Solution: Ensure your virtual environment is active when you run your Python script. The prompt should show
(venv)at the beginning. If not, activate it.
- Solution: Ensure your virtual environment is active when you run your Python script. The prompt should show
- Multiple Python Installations: If you have multiple Python versions installed (e.g., Python 3.8 and Python 3.9), Pygame might have been installed for one version, but you’re running your script with another.
- Solution: Be explicit. If
pip install pygameinstalled forpython3.9, then run your script withpython3.9 your_game.pyor ensurepythonpoints to the correct version.
- Solution: Be explicit. If
- Installation Failure: The installation itself might have silently failed or completed with warnings that prevent Pygame from being fully functional.
- Solution: Try reinstalling Pygame with the
--no-cache-dirflag (pip install --no-cache-dir pygame) to ensure a fresh download, and carefully review any output for errors.
- Solution: Try reinstalling Pygame with the
Advanced Troubleshooting Tips
- Upgrade Pip: Ensure your Pip version is up-to-date (
pip install --upgrade pip). An outdated Pip can sometimes cause issues. - Clear Pip Cache: Sometimes cached installation files can be corrupted. Clear the Pip cache:
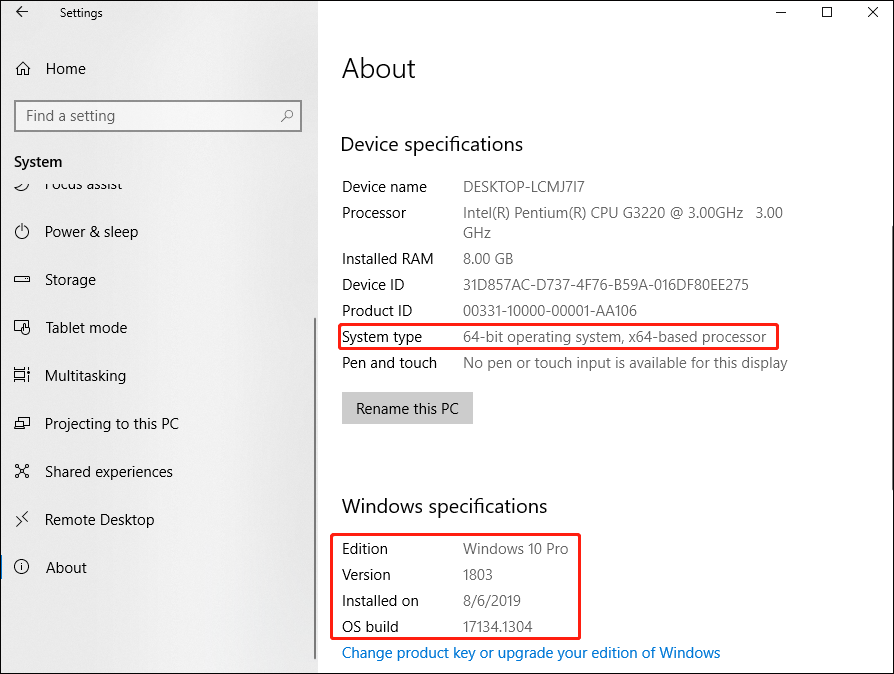
pip cache purge. - Check Python Architecture: Ensure you’re using a Python installer that matches your operating system’s architecture (64-bit Python on 64-bit OS). Mixing them can lead to unexpected issues.
- Run as Administrator/Sudo (Last Resort): While generally discouraged for Pip installations into virtual environments, if you are installing globally and encounter permission errors on Linux/macOS, you might temporarily use
sudo pip install pygame. On Windows, run your command prompt as administrator. Be cautious as this can lead to permission conflicts in the long run.
Mastering troubleshooting is a core competency in technology. It reinforces critical thinking, problem-solving, and resilience – qualities that not only help with game development but also with broader digital security and productivity challenges.
V. Beyond Installation: Leveraging Pygame for Your Projects
With Pygame successfully installed, your journey into game development truly begins. This final section outlines initial steps for using Pygame and touches upon its broader impact within the tech and educational spheres.
Initializing Your First Pygame Project
The best way to solidify your Pygame installation is to create a simple “Hello, World!” equivalent. This ensures everything is set up correctly and introduces you to the basic structure of a Pygame application.
-
Activate your virtual environment (if you’re using one).
-
Create a new Python file (e.g.,
my_game.py) in your project directory. -
Add the following basic Pygame code:
import pygame # Initialize Pygame pygame.init() # Set up the screen dimensions screen_width = 800 screen_height = 600 screen = pygame.display.set_mode((screen_width, screen_height)) pygame.display.set_caption("My First Pygame Window") # Game loop flag running = True # Game loop while running: for event in pygame.event.get(): if event.type == pygame.QUIT: running = False# Fill the screen with a color (e.g., light blue) screen.fill((173, 216, 230)) # Update the display pygame.display.flip()# Quit Pygame
pygame.quit()
-
Run your game from the terminal:
bash

python my_game.py
A window titled “My First Pygame Window” should appear, filled with a light blue color. This confirms that Pygame is fully operational and ready for you to start adding sprites, handling user input, and creating engaging game logic.
The Broader Impact: Pygame in Tech Education and Innovation
Pygame is more than just a tool for building games; it’s a powerful educational platform. In schools and coding bootcamps worldwide, Pygame serves as an approachable entry point for teaching fundamental programming concepts. By engaging students in the creation of something interactive and visually rewarding, Pygame demystifies complex topics like loops, conditional statements, object-oriented programming, and event handling. This hands-on experience not only builds coding proficiency but also fosters problem-solving skills and logical thinking, which are invaluable across all tech disciplines, from AI tools development to digital security.
Moreover, Pygame contributes to the tech innovation ecosystem by empowering indie developers and hobbyists to prototype ideas quickly. Its simplicity allows for rapid iteration, enabling creators to test game mechanics and design concepts without getting bogged down in engine complexities. This accessibility promotes diversity in game development, allowing unique voices and experimental ideas to flourish, enriching the overall digital content landscape. For individuals seeking to build a personal brand or develop a portfolio in software development, creating Pygame projects offers tangible evidence of their coding abilities and creative problem-solving prowess.
Resources for Learning and Community Engagement
The journey doesn’t end with installation. To truly master Pygame, continuous learning and engagement with the community are key.
- Official Pygame Documentation: The first stop for any query. The official website (
pygame.org) hosts comprehensive documentation, tutorials, and examples. - Online Tutorials: Numerous websites, YouTube channels, and online courses offer step-by-step guides for building various types of games with Pygame. Resources like Tech With Tim, Clear Code, and others provide excellent starting points.
- Community Forums and Discord Servers: Engaging with other Pygame developers through forums or Discord servers (often linked from the official Pygame site) provides a support network for troubleshooting, sharing ideas, and collaborating on projects.
- Open-Source Projects: Explore existing Pygame projects on platforms like GitHub. Analyzing how others have built games can be an incredibly effective learning method.
By leveraging these resources, you can continually enhance your skills, connect with a vibrant community, and transform your initial curiosity into tangible game development expertise. The ability to create, troubleshoot, and innovate with tools like Pygame is a cornerstone of modern tech literacy, opening doors to diverse opportunities in software, design, and beyond. Whether your goal is personal enrichment, building a professional portfolio, or even exploring pathways to online income through indie game development, a solid grasp of Pygame is a fantastic asset in your digital toolkit.
aViewFromTheCave is a participant in the Amazon Services LLC Associates Program, an affiliate advertising program designed to provide a means for sites to earn advertising fees by advertising and linking to Amazon.com. Amazon, the Amazon logo, AmazonSupply, and the AmazonSupply logo are trademarks of Amazon.com, Inc. or its affiliates. As an Amazon Associate we earn affiliate commissions from qualifying purchases.