NVIDIA graphics cards are renowned for their powerful performance, making them a cornerstone for gamers, creative professionals, and AI enthusiasts. However, to unlock the full potential of your NVIDIA hardware and ensure smooth operation, keeping your drivers up-to-date is paramount. Outdated or incorrect drivers can lead to a frustrating array of issues, from graphical glitches and stuttering in games to complete system instability. This guide will walk you through the comprehensive process of installing and updating NVIDIA drivers, covering various scenarios and best practices to ensure you’re leveraging the latest advancements and optimizations.
Understanding NVIDIA Drivers and Their Importance
Before diving into the installation process, it’s crucial to understand what NVIDIA drivers are and why they play such a critical role in your system’s performance. NVIDIA drivers are essentially software that acts as an intermediary between your operating system (like Windows) and your NVIDIA graphics card. They provide the necessary instructions and communication protocols for the OS to interact with the hardware effectively.
Why Drivers Matter
- Performance Optimization: NVIDIA constantly releases driver updates that include specific optimizations for new games, software applications, and rendering technologies. These updates can significantly boost frame rates, reduce loading times, and improve overall graphical fidelity.
- Bug Fixes and Stability: Drivers are also responsible for addressing bugs and glitches that can arise with specific hardware configurations or software interactions. Keeping your drivers updated can resolve common issues like crashes, freezes, and visual artifacts.
- New Feature Support: As NVIDIA introduces new technologies and features (e.g., DLSS, RTX, CUDA advancements), driver updates are essential to enable and support them on your hardware.
- Compatibility: Drivers ensure that your graphics card is compatible with your operating system and other hardware components. This prevents conflicts and ensures a stable computing environment.
- Security: While less common, driver updates can sometimes include security patches to address vulnerabilities.
Without the correct and up-to-date drivers, your powerful NVIDIA GPU might perform like a much weaker component, or worse, cause system instability.
Preparing for NVIDIA Driver Installation
A smooth driver installation begins with proper preparation. Rushing into the process without these preliminary steps can sometimes lead to complications.
Identify Your NVIDIA Graphics Card Model
The first and most critical step is to accurately identify your NVIDIA graphics card model. This ensures you download the correct drivers.
How to Find Your GPU Model
- Windows Device Manager:
- Right-click on the Start button and select “Device Manager.”
- Expand the “Display adapters” section.
- Your NVIDIA graphics card model will be listed here.
- NVIDIA Control Panel:
- Right-click on your desktop and select “NVIDIA Control Panel.”
- In the NVIDIA Control Panel, click on “System Information” in the bottom-left corner.
- The “Product Name” field will display your graphics card model.
- System Information (msinfo32):
- Press
Windows Key + R, typemsinfo32, and press Enter. - In the System Information window, navigate to “Components” > “Display.”
- The “Name” field will show your graphics card.
- Press
Determine Your Operating System
You’ll also need to know your operating system version and architecture (e.g., Windows 10 64-bit, Windows 11 64-bit). Most modern systems are 64-bit.
Choose the Right Driver Type
NVIDIA offers two primary types of drivers for consumer-grade GeForce cards:
- Game Ready Drivers (GRD): These are optimized for the latest games and provide the best gaming experience. They are released frequently, often in conjunction with major game launches.
- Studio Drivers (SD): These are optimized for creative applications like video editing, 3D rendering, and graphic design. They prioritize stability and performance in these professional workflows.
For most users, especially gamers, Game Ready Drivers are the recommended choice. If your primary use case is content creation, Studio Drivers might offer better stability.
Installing NVIDIA Drivers: Step-by-Step Guide
There are several methods to install NVIDIA drivers, each with its own advantages. We’ll cover the most common and recommended approaches.
Method 1: Using the NVIDIA GeForce Experience Application
GeForce Experience is NVIDIA’s utility software that simplifies driver updates, game optimizations, and other NVIDIA features. This is often the easiest and most convenient method for most users.
Downloading and Installing GeForce Experience
- Download: Visit the official NVIDIA GeForce Experience download page and download the latest version.
- Install: Run the downloaded installer and follow the on-screen prompts. It’s generally recommended to perform a standard installation.
- Launch and Sign In: Once installed, launch GeForce Experience. You may need to create or sign in to an NVIDIA account.
Updating Drivers via GeForce Experience
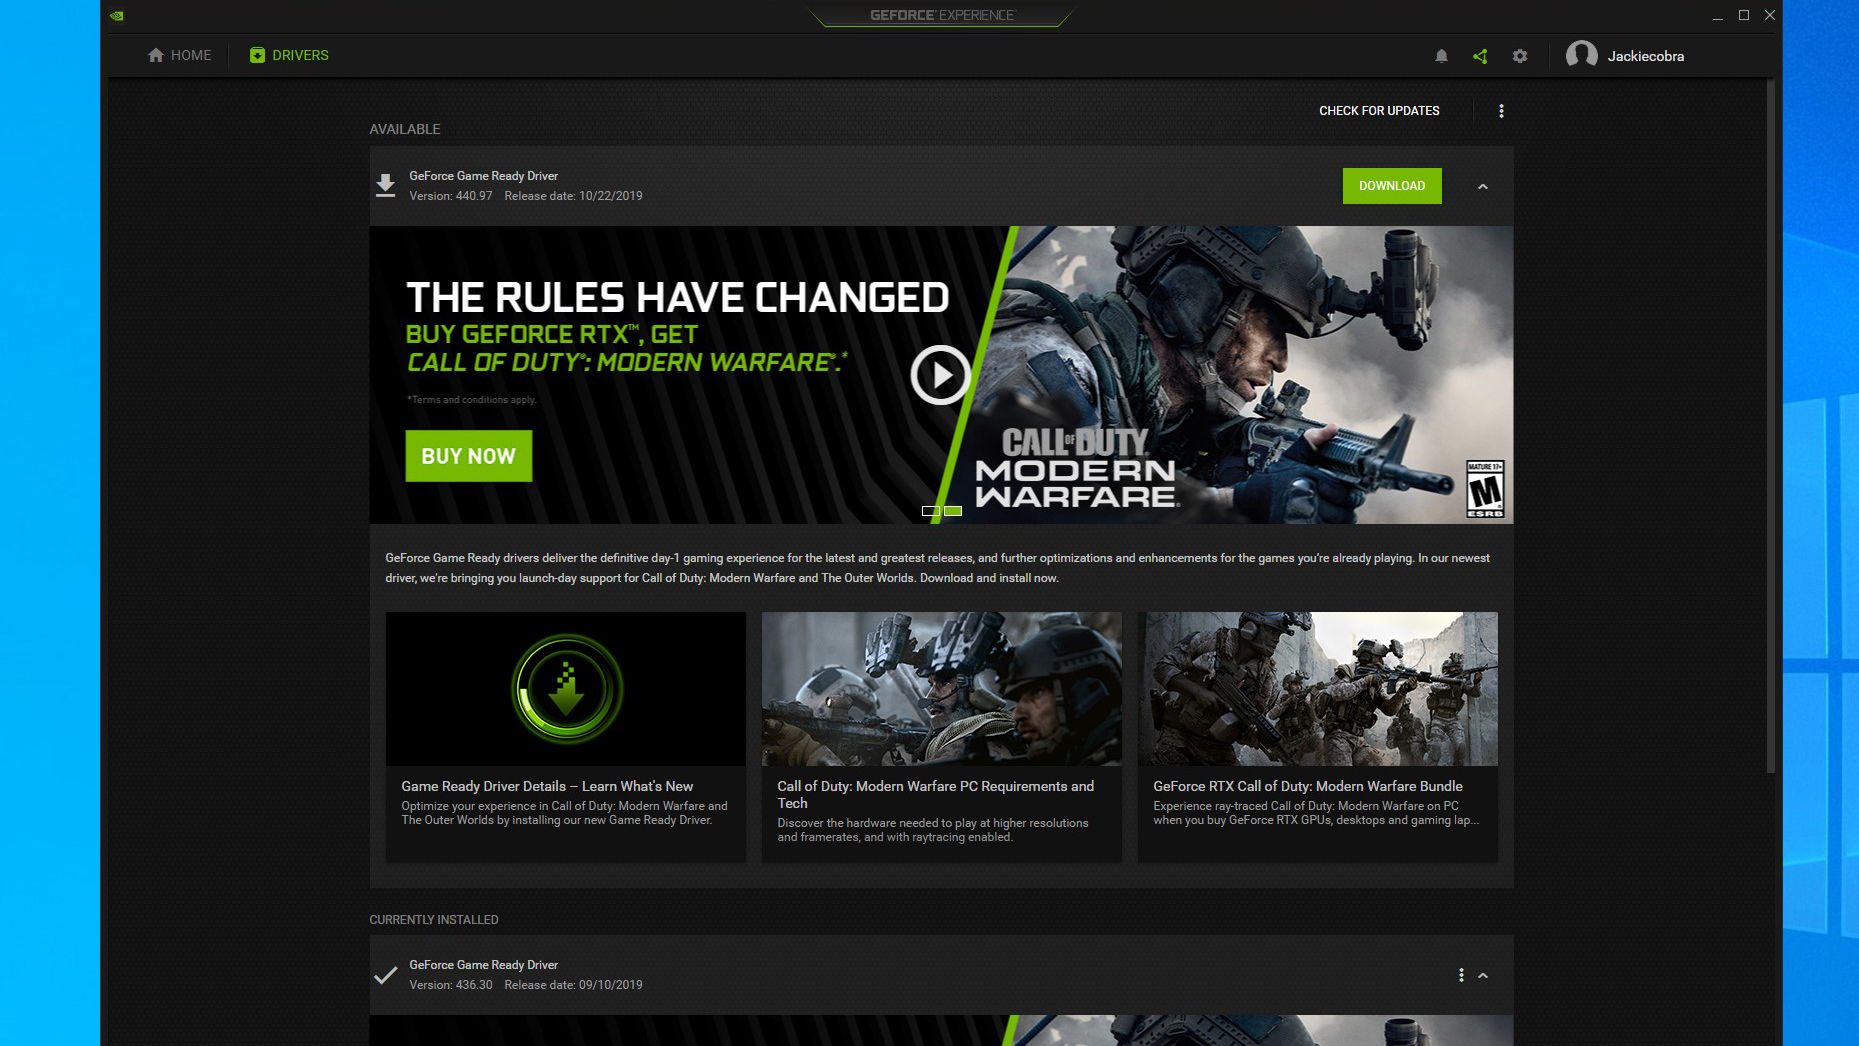
- Check for Updates: After launching GeForce Experience, navigate to the “Drivers” tab (usually on the top-left).
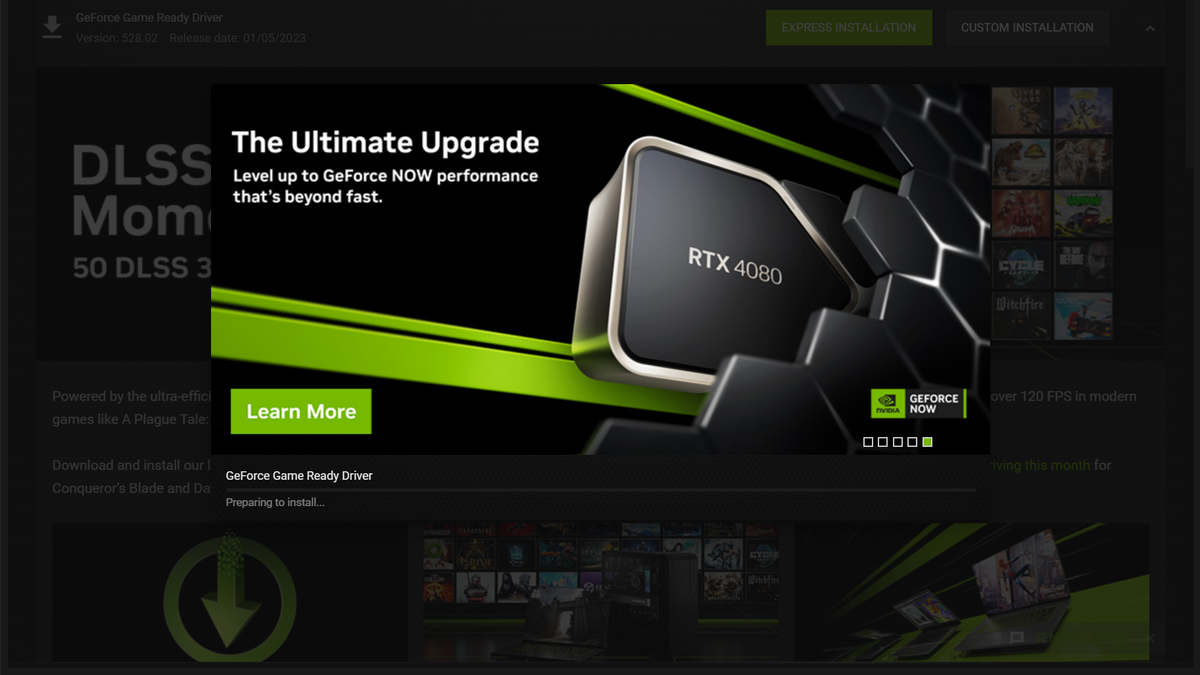
- Download Driver: GeForce Experience will automatically check for the latest available driver. If an update is found, you’ll see a “Download” button. Click it.
- Choose Installation Type: Once the download is complete, you’ll be presented with two installation options:
- Express Installation: This is the recommended option for most users. It installs the new driver with default settings, overwriting the old one.
- Custom Installation: This option allows you to choose which components of the driver package to install and offers advanced features like a “clean installation.”
- Perform Installation:
- Express Installation: Click “Express Installation” and the process will begin. Your screen may flicker or go black temporarily as the drivers are installed. This is normal.
- Custom Installation: If you choose “Custom Installation,” you’ll be prompted to select components. It’s generally recommended to keep all default components unless you have a specific reason to exclude them. Crucially, check the “Perform a clean installation” box. This option removes previous driver files and settings, which can help prevent conflicts and ensure a fresh start. After selecting your options, click “Next.”
- Completion: The installer will proceed with the installation. Once finished, you’ll typically be prompted to restart your computer. It’s highly recommended to restart your system to ensure the new drivers are fully applied.
Method 2: Manual Driver Installation via NVIDIA Website
This method provides more control and is useful if you prefer not to install GeForce Experience or need to download a specific driver version.
Downloading Drivers from NVIDIA’s Website
- Visit the NVIDIA Driver Download Page: Go to the official NVIDIA driver download portal.
- Select Your Product:
- Product Type: Choose “GeForce.”
- Product Series: Select the series your GPU belongs to (e.g., GeForce RTX 40 Series, GeForce GTX 16 Series).
- Product: Select your exact graphics card model (e.g., GeForce RTX 4080, GeForce GTX 1660 SUPER).
- Operating System: Choose your Windows version (e.g., Windows 11, Windows 10 64-bit).
- Download Type: Select “Game Ready Driver (GRD)” or “Studio Driver (SD)” based on your needs.
- Language: Choose your preferred language.
- Search: Click the “Search” button.
- Download: The website will display the latest compatible driver. Click the “Download” button to get the driver installer file.
Installing the Manually Downloaded Driver
- Run the Installer: Locate the downloaded driver file (it will have a
.exeextension) and double-click it to run. - NVIDIA Driver Installer: The NVIDIA installer will launch. It will first extract the driver files to a temporary location. You can choose the default location or specify a different one.
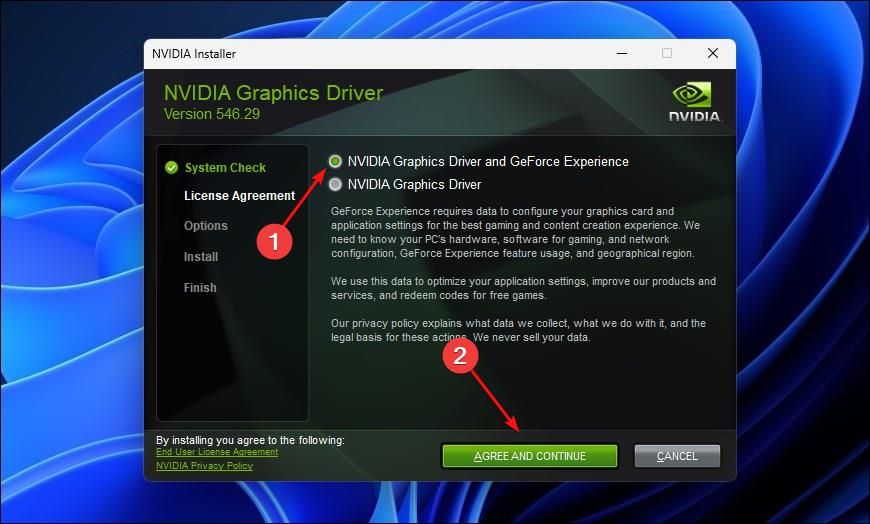
- License Agreement: Accept the NVIDIA software license agreement.
- Installation Options: Similar to GeForce Experience, you’ll be presented with two installation options:
- Express Installation: Installs the driver and its components with default settings.
- Custom (Advanced) Installation: Allows you to select components and perform a clean installation.
- Perform Installation (Recommended: Custom with Clean Install):
- Select “Custom (Advanced) Installation” and click “Next.”
- In the next screen, ensure you check the box for “Perform a clean installation.” This is crucial for removing any remnants of older drivers and configurations.
- Click “Next.”
- Installation Process: The installer will now install the drivers. Your screen may flicker or go black temporarily.
- Restart: Once the installation is complete, you will be prompted to restart your computer. Click “Close” and then restart your PC.
Method 3: Using Display Driver Uninstaller (DDU) for a Thorough Clean
In some cases, especially when troubleshooting persistent driver-related issues or switching between different GPU brands, a clean uninstallation is necessary. Display Driver Uninstaller (DDU) is a third-party utility that thoroughly removes all traces of old drivers and related software.
Preparing for DDU
- Download DDU: Download the latest version of Display Driver Uninstaller from a reputable source (e.g., Wagnardsoft).
- Download New Drivers: Before using DDU, download the NVIDIA drivers you intend to install manually from the NVIDIA website (as described in Method 2). Save the installer file to your desktop or an easily accessible location.
- Disconnect from the Internet: This is a critical step. Disconnect your Ethernet cable or disable your Wi-Fi to prevent Windows from automatically installing a generic driver during the process.
- Boot into Safe Mode:
- In Windows 10/11, search for “System Configuration” and open it.
- Go to the “Boot” tab.
- Under “Boot options,” check “Safe boot” and select “Network” (even though you’ve disconnected from the internet, this option is generally safe and sufficient for DDU).
- Click “Apply” and “OK,” then restart your computer.
Using DDU to Remove Old Drivers
- Run DDU in Safe Mode: Once in Safe Mode, locate and run the DDU executable file.
- Select Device Type: In DDU, select “GPU” from the “Select device type” dropdown.
- Select Manufacturer: Choose “NVIDIA” from the “Select graphics driver” dropdown.
- Clean and Restart: Click the “Clean and restart” button. DDU will now thoroughly remove all NVIDIA driver files, registry entries, and related software. Your computer will restart automatically after the process.
Installing New Drivers After DDU
- Reconnect to the Internet: Once your computer has restarted (it will boot back into normal mode), reconnect to the internet.
- Run the New Driver Installer: Locate the NVIDIA driver installer file you downloaded earlier and run it.
- Install as Normal: Follow the on-screen prompts, choosing “Custom (Advanced) Installation” and ensuring “Perform a clean installation” is NOT checked (as DDU already performed a clean sweep). However, if you skipped the DDU step and are performing a custom install on a standard boot, then do check “Perform a clean installation.”
- Restart: Restart your computer after the driver installation is complete.
Troubleshooting Common NVIDIA Driver Issues
Even with careful installation, you might encounter issues. Here are some common problems and their solutions:
Black Screen After Driver Installation
This is often caused by an incompatible driver or a corrupted installation.
- Solution: Boot into Safe Mode (as described in the DDU section). Use DDU to uninstall the current NVIDIA drivers, then download and install the latest recommended driver from NVIDIA’s website.
Games Not Launching or Crashing
This can be a symptom of outdated or corrupted drivers.
- Solution: Ensure you are using the latest Game Ready Driver. If the issue persists, try performing a clean installation using DDU and then reinstalling the latest driver. Check game-specific forums for known issues with certain driver versions.
Display Resolution Incorrect or Flickering
An incorrect driver can prevent proper resolution detection or cause display instability.
- Solution: Reinstall the latest drivers. Ensure you have selected the correct monitor in the NVIDIA Control Panel and that its native resolution is set.
NVIDIA Control Panel Not Opening
This often indicates a problem with the driver installation or the NVIDIA Display Container service.
- Solution:
- Try restarting the “NVIDIA Display Container LS” service via the Services management console (
services.msc). - If that doesn’t work, perform a clean installation of the NVIDIA drivers.
- Try restarting the “NVIDIA Display Container LS” service via the Services management console (
Driver Installation Fails
This could be due to Windows update interference or corrupted system files.
- Solution:
- Ensure you have disconnected from the internet before starting the installation.
- Run the driver installer as an administrator (right-click the
.exefile and select “Run as administrator”). - Run the System File Checker tool in Windows: Open Command Prompt as administrator and type
sfc /scannowand press Enter.
Conclusion
Installing and updating NVIDIA drivers is a fundamental aspect of maintaining optimal performance and stability for your PC. Whether you prefer the simplicity of GeForce Experience or the granular control of manual installation, understanding the process and employing a clean installation when necessary will ensure your NVIDIA graphics card is always operating at its best. By following these steps, you can avoid common pitfalls, resolve driver-related issues, and fully enjoy the power and capabilities of your NVIDIA hardware for gaming, creativity, and beyond. Remember to periodically check for new driver releases from NVIDIA to benefit from the latest performance enhancements and bug fixes.
aViewFromTheCave is a participant in the Amazon Services LLC Associates Program, an affiliate advertising program designed to provide a means for sites to earn advertising fees by advertising and linking to Amazon.com. Amazon, the Amazon logo, AmazonSupply, and the AmazonSupply logo are trademarks of Amazon.com, Inc. or its affiliates. As an Amazon Associate we earn affiliate commissions from qualifying purchases.