Minecraft, the ubiquitous sandbox game that has captivated millions, offers an unparalleled experience of creativity, exploration, and adventure. While playing on public servers or joining friends on their existing worlds is fun, there’s a unique joy and control that comes with hosting your own Minecraft server. Whether you’re looking to create a private haven for your friends, a dedicated space for your community, or even an experimental playground for modded gameplay, setting up your own server is an achievable and rewarding endeavor. This comprehensive guide will walk you through the process, covering everything from understanding the basics to configuring advanced settings, ensuring you can embark on your self-hosted Minecraft journey with confidence.
Understanding the Foundation: What You Need Before You Begin
Before diving into the technicalities, it’s crucial to grasp the fundamental requirements and concepts involved in running a Minecraft server. This initial understanding will not only simplify the installation process but also empower you to troubleshoot effectively and optimize your server’s performance.
1. Hardware and System Requirements
The most critical factor in running a smooth Minecraft server is the hardware it will reside on. While a dedicated gaming PC can certainly do the job, it’s often not the most efficient or practical solution for long-term server hosting.
1.1 Dedicated Server vs. Home Computer Hosting
-
Home Computer Hosting: This is the most accessible option for many beginners. You can install and run a Minecraft server on your existing computer. However, this comes with several caveats. Your computer will need to be running continuously whenever you want the server to be accessible. This can significantly impact your computer’s performance, especially if you’re also using it for other demanding tasks like gaming, streaming, or video editing. Furthermore, your home internet connection’s upload speed will be a major bottleneck, potentially leading to lag and connection issues for your players. Power outages, system updates, and reboots will also disrupt server availability.
-
Dedicated Server Hosting: This involves renting server hardware from a specialized hosting provider. These providers offer robust infrastructure, high-speed internet connections, and guaranteed uptime, typically with 24/7 support. While this is a more costly option, it offers superior performance, reliability, and scalability. For communities, large modpacks, or those seeking a professional gaming experience, dedicated hosting is the recommended path.
-
Virtual Private Server (VPS) Hosting: A VPS offers a middle ground. You get a dedicated portion of resources on a powerful server, providing more control and better performance than home hosting, but at a lower cost than a full dedicated server. Many Minecraft server hosts offer VPS solutions tailored for gaming.
1.2 Key Hardware Considerations:
Regardless of your chosen hosting method, consider these hardware aspects:
- RAM (Memory): Minecraft servers, especially with multiple players or mods, are RAM-intensive. For a small server with a few friends, 4GB of RAM might suffice. However, for a more robust experience, 8GB or even 16GB is highly recommended. More RAM allows for a larger world, more players, and smoother gameplay.
- CPU (Processor): A strong CPU is essential for processing game logic, player actions, and world generation. While a high core count is beneficial, clock speed is often more critical for server performance.
- Storage (Hard Drive): While less critical than RAM or CPU for basic operation, a Solid State Drive (SSD) will significantly improve world loading times and overall server responsiveness compared to a traditional Hard Disk Drive (HDD).
- Network Bandwidth (Upload Speed): This is arguably the most critical component for home hosting. Your internet connection’s upload speed dictates how much data your server can send to players. A low upload speed will result in lag and rubberbanding. Aim for at least 5-10 Mbps upload for a small server. Dedicated hosting providers will have far superior bandwidth.
2. Software Prerequisites
Before you can run a Minecraft server, you’ll need a few essential software components installed on the machine you intend to use for hosting.
2.1 Java Runtime Environment (JRE)
Minecraft servers, including the official Java Edition server, are built using Java. Therefore, you must have the Java Runtime Environment installed on your server machine.
- Checking for Java: Open your command prompt (Windows) or terminal (macOS/Linux) and type
java -version. If Java is installed, you’ll see version information. - Installing Java: If Java is not installed, download the latest compatible version of the Java Development Kit (JDK) or JRE from the official Oracle website or adoptium.net. For Minecraft servers, it’s generally recommended to use a recent LTS (Long-Term Support) version of Java, such as Java 17. Follow the installation instructions for your operating system.
2.2 The Minecraft Server Software
There are several versions of Minecraft server software available, each offering different features and levels of customization.
- Vanilla Minecraft Server (Official): This is the official server software provided by Mojang. It provides the core Minecraft experience without any modifications. It’s the simplest to set up and a good starting point.
- Spigot/Paper: These are highly optimized forks of the Bukkit API (which is no longer actively developed). Spigot and especially Paper offer significant performance improvements over the vanilla server, making them ideal for larger servers or those experiencing lag. They also support a vast array of plugins that can add new features, game modes, and administrative tools.
- Forge/Fabric: If you intend to run a modded Minecraft server, you’ll need either Forge or Fabric. These are mod loaders that allow you to install and manage mods. You’ll download the server installer for your chosen mod loader and then place the mods you want into the server’s “mods” folder.
Setting Up Your Minecraft Server: From Download to First Launch
With your prerequisites in place, you’re ready to download and configure the Minecraft server software. This section will guide you through the installation process for the most common server types.
1. Downloading the Server Software
The process of obtaining the server software varies slightly depending on which server type you choose.
1.1 Vanilla Minecraft Server Download:
- Visit the Official Minecraft Website: Navigate to the official Minecraft website (minecraft.net).
- Locate the Server Download: Look for the “Download” or “Server Software” section. You’ll typically find a link to download the latest
server.jarfile for the Java Edition. - Save the File: Download the
server.jarfile and save it to a dedicated folder on your computer. It’s a good practice to create a new folder specifically for your server (e.g.,C:MinecraftServeron Windows or/home/user/minecraftserveron Linux).

1.2 Spigot/Paper Server Download:
- Visit the Spigot/Paper Website:
- For Spigot: Search for “Spigot build tools” or visit a trusted Spigot community site. You’ll often need to download “BuildTools.jar.”
- For Paper: Visit the official PaperMC website (papermc.io) and download the latest recommended build of
paperclip.jar.
- BuildTools (for Spigot): If you’re using Spigot, you’ll need to run its
BuildTools.jaronce to compile the server JAR file.- Open a command prompt/terminal in the folder where you saved
BuildTools.jar. - Run the command:
java -jar BuildTools.jar --rev <minecraft_version>(replace<minecraft_version>with the desired Minecraft version, e.g.,1.20.4). - This process can take a while as it downloads and compiles necessary components. Once complete, a Spigot server JAR file (e.g.,
spigot-1.20.4.jar) will appear in the same folder.
- Open a command prompt/terminal in the folder where you saved
- Paper: For Paper, you simply download the
paperclip.jarfile.
1.3 Forge/Fabric Server Download:
- Visit Forge/Fabric Website:
- For Forge: Visit the official Forge website (files.minecraftforge.net) and download the “Installer” for your desired Minecraft version.
- For Fabric: Visit the official Fabric website (fabricmc.net) and download the “fabric-installer.jar.”
- Run the Installer:
- Forge: Double-click the downloaded Forge installer JAR file. Select “Install server,” choose your Minecraft server folder, and click “OK.” Forge will download and set up the necessary files.
- Fabric: Run the
fabric-installer.jar. Select the “Server” tab, choose the Minecraft version and loader version, specify your installation directory, and click “Install.”
2. Initial Server Configuration
Once you have the server JAR file (or the necessary setup files for Forge/Fabric), it’s time to perform the initial launch and configuration.
2.1 Creating the Server Start Script
To launch your server, you’ll need a script that tells Java to run the server JAR with specific parameters.
-
Windows:
- Open a plain text editor (like Notepad).
- Paste the following command, adjusting the JAR file name and RAM allocation:
batch

@echo off

java -Xmx4G -Xms4G -jar server.jar nogui

pause
-Xmx4G: Sets the maximum RAM to 4 Gigabytes. Adjust4Gto your available RAM (e.g.,8Gfor 8GB).-Xms4G: Sets the initial RAM to 4 Gigabytes. It’s good practice to set this the same as-Xmxfor stability.server.jar: Replace with the actual name of your server JAR file (e.g.,spigot-1.20.4.jarorforge-1.20.4-server.jar).nogui: This is recommended as it runs the server without a graphical interface, saving resources. Removenoguiif you want to see the server console window.
- Save the file as
start.batin the same folder as your server JAR.
-
macOS/Linux:
- Open a plain text editor.
- Paste the following command, adjusting the JAR file name and RAM allocation:
bash

#!/bin/bash

java -Xmx4G -Xms4G -jar server.jar nogui
- Adjust
-Xmxand-Xmsas needed. - Replace
server.jarwith your server’s JAR file name.
- Adjust
- Save the file as
start.shin the same folder as your server JAR. - Open a terminal, navigate to your server folder, and make the script executable:
chmod +x start.sh.
2.2 First Launch and EULA Agreement
- Run the Start Script: Double-click
start.bat(Windows) or execute./start.shin the terminal (macOS/Linux). - Server Fails and Generates Files: The first time you run the server, it will likely stop shortly after starting and generate several files and folders, including
eula.txt,server.properties, and alogsfolder. This is normal. - Accept the EULA: Open the
eula.txtfile with a text editor. You’ll see a line that readseula=false. Changefalsetotrue, save the file, and close it. This signifies your agreement to Mojang’s End User License Agreement. - Second Launch: Run your
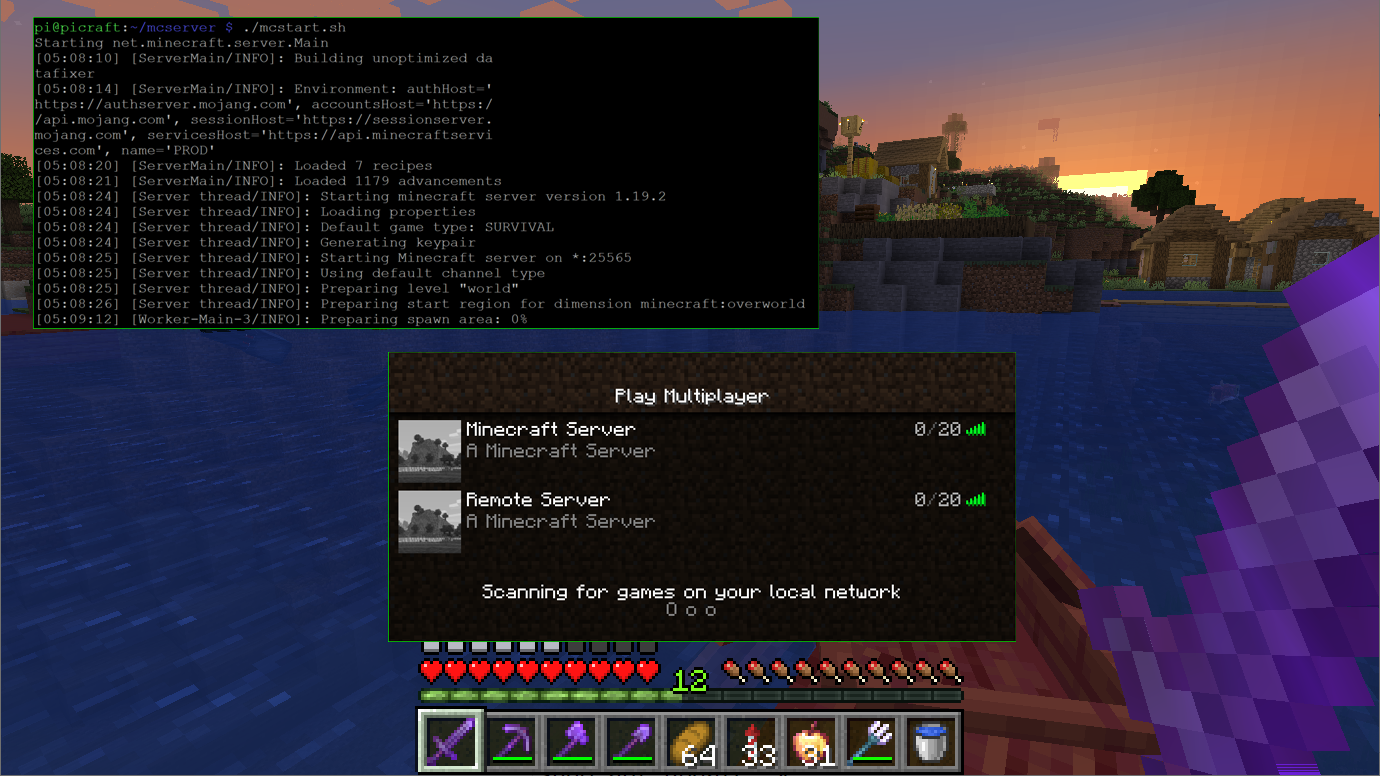
start.batorstart.shscript again. This time, the server should start up fully, generate the world, and display messages in the console indicating it’s ready.
Optimizing and Securing Your Minecraft Server
Running a Minecraft server involves more than just installation; it requires ongoing optimization and security measures to ensure a smooth and safe experience for everyone.
1. Server Configuration: The server.properties File
The server.properties file is the central hub for customizing your Minecraft server’s behavior. Located in your server’s root directory, it contains numerous settings you can tweak.
gamemode: Sets the default game mode for new players (e.g.,survival,creative,adventure,spectator).difficulty: Controls the game’s difficulty level (e.g.,peaceful,easy,normal,hard).max-players: The maximum number of players allowed on the server.online-mode: Set totrueif you only want legitimate, authenticated Minecraft accounts to join (highly recommended). Set tofalsefor offline servers (not recommended for security reasons).pvp: Toggles Player vs. Player combat. Set totrueto enable,falseto disable.level-name: The name of your world folder.motd: The “Message of the Day” that appears in the server list.spawn-protection: Protects the area around the spawn point from being modified by non-operators.view-distance: The number of chunks that are loaded and rendered around each player. Lowering this can significantly improve performance on weaker hardware.server-port: The port your server runs on (default is25565). You’ll need this for port forwarding.
Important: After making changes to server.properties, you must restart your server for them to take effect.
2. Port Forwarding: Making Your Server Accessible
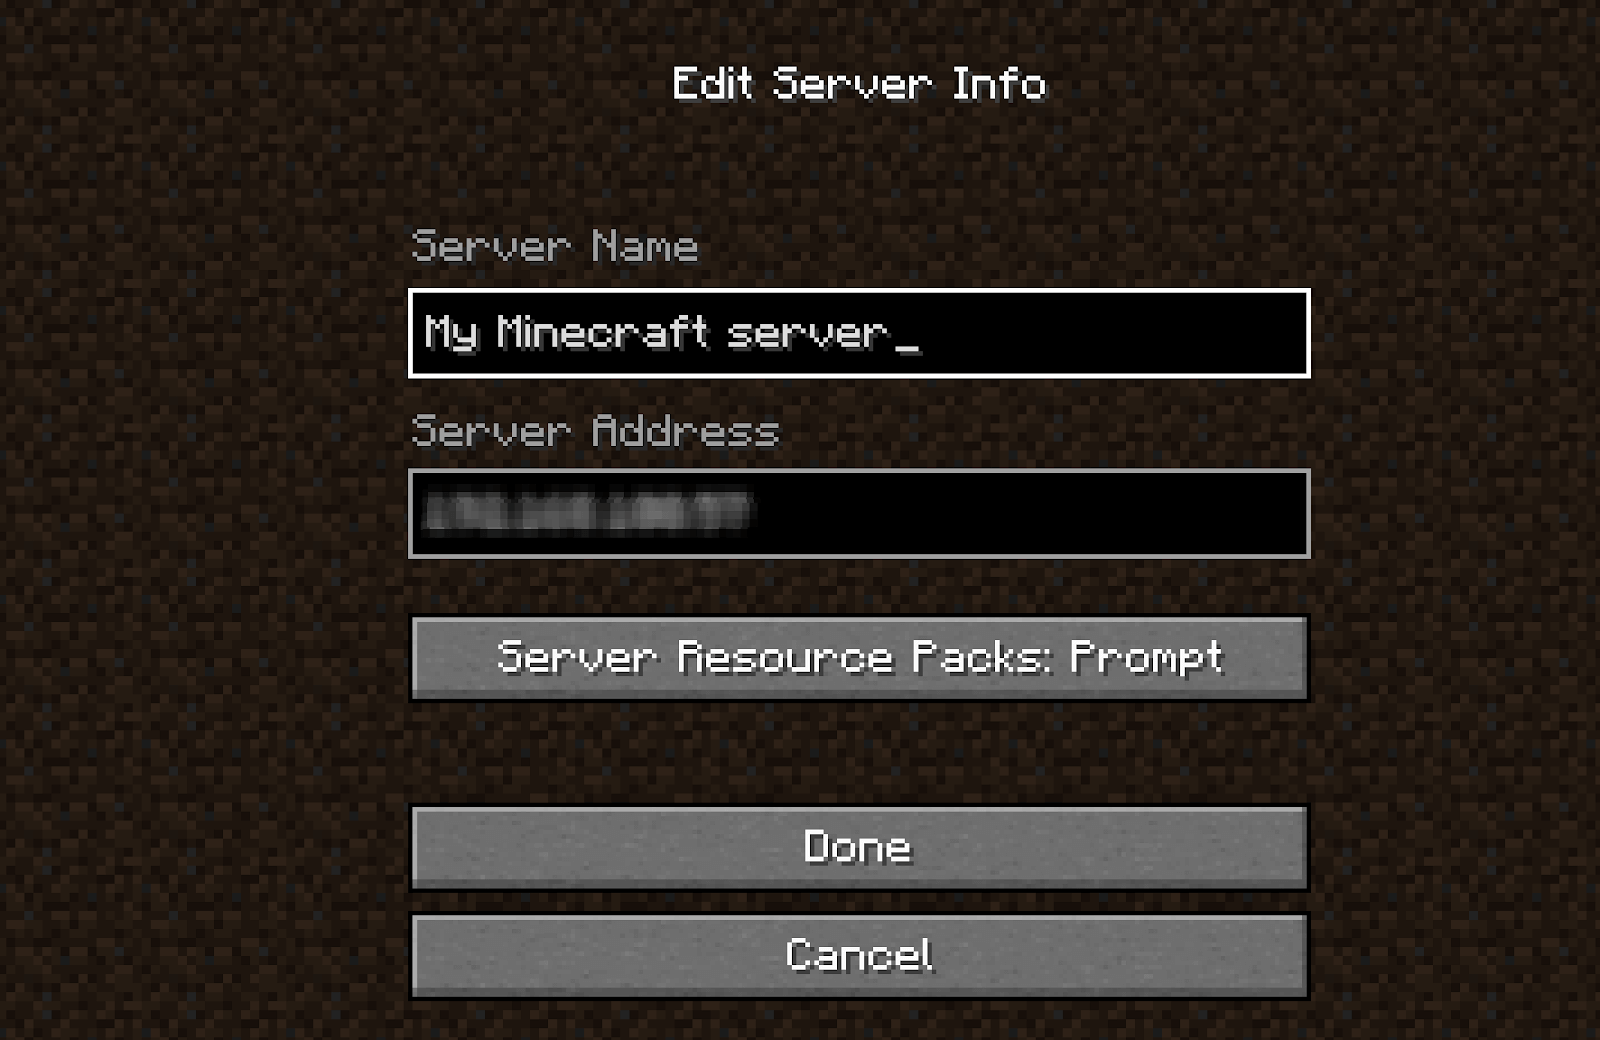
For players outside your local network to connect to your server, you need to configure port forwarding on your router. This tells your router to direct incoming traffic on a specific port (your Minecraft server’s port, usually 25565) to your server machine’s local IP address.
- Find Your Server’s Local IP Address:
- Windows: Open Command Prompt and type
ipconfig. Look for the “IPv4 Address” under your active network adapter. - macOS/Linux: Open Terminal and type
ifconfigorip addr show.
- Windows: Open Command Prompt and type
- Access Your Router’s Settings: Open a web browser and enter your router’s IP address (often
192.168.1.1or192.168.0.1). You’ll need your router’s administrator username and password. - Locate Port Forwarding Settings: This varies by router model but is usually found under “Advanced Settings,” “NAT,” “Firewall,” or “Port Forwarding.”
- Create a New Port Forwarding Rule:
- Service Name: Minecraft Server (or similar)
- Protocol: TCP/UDP (often both are required, or just TCP)
- External Port (or Port Range):
25565 - Internal Port:
25565 - Internal IP Address: Your server machine’s local IP address found in step 1.
- Save and Apply: Save the changes on your router. You may need to restart your router for the changes to take effect.
Note on Dynamic IP Addresses: If your ISP assigns you a dynamic public IP address, it can change periodically. For reliable access, consider using a Dynamic DNS (DDNS) service.
3. Plugins and Mods: Expanding Your Server’s Capabilities
- Plugins (for Spigot/Paper): Plugins add features and functionality without altering the core game files. Popular plugins include EssentialsX (for commands and chat management), WorldEdit (for world manipulation), GriefPrevention (for protecting player builds), and LuckPerms (for permission management).
- Installation: Download the plugin’s
.jarfile and place it in thepluginsfolder within your server directory. Restart your server.
- Installation: Download the plugin’s
- Mods (for Forge/Fabric): Mods fundamentally change gameplay by adding new blocks, items, creatures, dimensions, and mechanics.
- Installation: Both the server and all connecting clients must have the same mods installed. Place the mod
.jarfiles in themodsfolder within your server directory.
- Installation: Both the server and all connecting clients must have the same mods installed. Place the mod
4. Security Best Practices
- Keep Software Updated: Regularly update your Java Runtime Environment, Minecraft server software, and any plugins/mods to patch security vulnerabilities.
- Use
online-mode=true: This prevents cracked or unauthorized accounts from joining. - Whitelisting: Consider enabling the whitelist (
white-list=trueinserver.properties). This allows only players you explicitly add to awhitelist.jsonfile to join. Use the/whitelist add <playername>command in the server console. - Operator Permissions: Grant operator status (
/op <playername>) sparingly. Operators have full control over the server. - Regular Backups: Regularly back up your server world and configuration files. This is crucial for recovering from data loss, corruption, or catastrophic failures.
By diligently following these optimization and security steps, you can ensure your Minecraft server is not only functional but also a secure and enjoyable environment for all your players. Your journey into self-hosted Minecraft gaming has just begun!
aViewFromTheCave is a participant in the Amazon Services LLC Associates Program, an affiliate advertising program designed to provide a means for sites to earn advertising fees by advertising and linking to Amazon.com. Amazon, the Amazon logo, AmazonSupply, and the AmazonSupply logo are trademarks of Amazon.com, Inc. or its affiliates. As an Amazon Associate we earn affiliate commissions from qualifying purchases.