
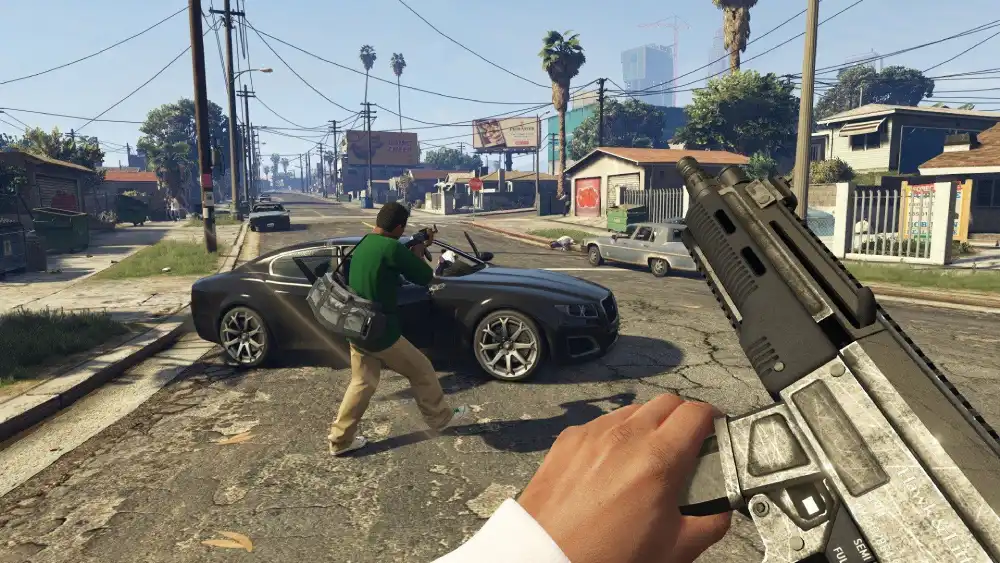
The world of Grand Theft Auto V is vast and offers an incredible sandbox for players. However, for those seeking an experience beyond the standard Rockstar Games offering, FiveM emerges as the definitive solution. FiveM is a modification framework for GTA V that allows players to engage in custom multiplayer servers, each with its unique rules, gameplay mechanics, and communities. Whether you’re dreaming of realistic roleplaying scenarios, high-octane car meets, or adrenaline-pumping law enforcement simulations, FiveM unlocks a universe of possibilities. This comprehensive guide will walk you through the entire process of installing FiveM, ensuring you’re ready to dive into a customized GTA V world.

Before we delve into the installation process, it’s crucial to understand what FiveM is and why it’s become so popular. FiveM isn’t a standalone game; it’s a third-party modification platform that runs parallel to your original GTA V installation. This means it doesn’t alter your core game files, providing a safe and secure way to access custom content. The appeal of FiveM lies in its vibrant community-driven servers. These servers are built and maintained by players, often featuring bespoke scripts, custom vehicles, unique maps, and intricate roleplaying systems that transform GTA V into entirely new gaming experiences. From meticulously detailed city simulations where you can pursue a career as a police officer or a paramedic, to wild and chaotic deathmatch arenas, FiveM offers an unparalleled level of customization.
The Importance of a Legitimate GTA V Copy
One of the most critical prerequisites for installing and running FiveM is owning a legitimate, activated copy of Grand Theft Auto V. FiveM is designed to enhance your existing GTA V experience, not to bypass or circumvent its licensing requirements. Therefore, attempting to install FiveM on a pirated or illegally obtained version of GTA V will not work and can lead to various technical issues, including potential account bans or other security risks. You must have purchased and installed GTA V through official channels, such as Steam, the Epic Games Store, or Rockstar’s own platform. This ensures that you have all the necessary base game files that FiveM relies on to function.
Step 1: Prepare Your Grand Theft Auto V Installation
Before you can install FiveM, ensuring your existing GTA V installation is up-to-date and in good working order is paramount. FiveM relies on the most recent game files to operate correctly. Outdated versions can lead to compatibility issues, crashes, and an inability to connect to servers.
Ensuring Your GTA V is Updated
The first and most crucial step is to ensure your Grand Theft Auto V installation is fully updated. If you acquired GTA V through Steam or the Epic Games Store, the update process is usually automatic. Simply launch the respective game client, and if an update is available for GTA V, it will begin downloading and installing automatically.
For Steam Users:
- Open the Steam client.
- Navigate to your “Library.”
- Right-click on “Grand Theft Auto V.”
- Select “Properties.”
- Go to the “Updates” tab. Ensure that “Always keep this game updated” is selected.
- Steam will automatically download any pending updates when they are released.
For Epic Games Store Users:
- Open the Epic Games Launcher.
- Go to your “Library.”
- Locate “Grand Theft Auto V.”
- If an update is available, you will typically see a download or update button. Click it to initiate the update.
For Rockstar Games Launcher Users:
- Open the Rockstar Games Launcher.
- Navigate to your “Games” tab.
- Find “Grand Theft Auto V.”
- If an update is available, there will be a prompt to download and install it.
It is also recommended to verify the integrity of your game files after any updates or if you encounter persistent issues. This process checks for any corrupted or missing files and replaces them.
Verifying Game Files:
- Steam: Right-click on “Grand Theft Auto V” in your Library > Properties > Local Files > “Verify integrity of game files…”.
- Epic Games Store: In your Library, click the three dots next to “Grand Theft Auto V” > “Manage” > “Verify.”
- Rockstar Games Launcher: In the Rockstar Games Launcher, go to Settings > Games > Grand Theft Auto V > “View Installation.” Click on the three dots next to the game and select “Verify Install.”
Cleaning Up Previous Mods (If Applicable)
If you have previously installed other mods for GTA V, it’s highly advisable to remove them before installing FiveM. While FiveM is designed to work alongside a clean GTA V installation, conflicting mods can cause instability, crashes, or prevent FiveM from launching altogether.
General Steps for Removing Mods:
- Backup: Before deleting anything, make a backup of your GTA V installation folder. This is a crucial safety measure in case you accidentally delete something important.
- Identify Mod Folders: Look for folders commonly associated with modding, such as “mods,” “scripts,” or any custom script files you might have added.
- Remove Script Hook V and NativeUI: If you’ve used Script Hook V or similar modding frameworks, uninstall them by deleting the associated
.asifiles and theScriptHookVDotNetfolders. - Revert Gameconfig and DLClist: If you’ve modified
gameconfig.xmlordlclist.xml, revert them to their original state. Often, modding guides will provide backups of these original files. - Delete Custom Vehicles/Peds: If you’ve added custom vehicles or pedestrian models, remove their corresponding
.rpffiles from thex64e.rpfor other relevant archive files.
A clean GTA V installation is the bedrock of a smooth FiveM experience. Take your time with this step, and consult specific modding guides if you’re unsure about how to remove particular mods you might have installed.

Step 2: Download and Install the FiveM Client
Once your GTA V installation is confirmed to be clean and up-to-date, you are ready to download and install the FiveM client. This is a straightforward process, but it’s essential to download the client from the official FiveM website to avoid any malicious software.
Obtaining the Official FiveM Installer
The FiveM client is exclusively distributed through the official FiveM website. Navigating to the wrong site could expose you to malware or fake installers. Always ensure you are on fivem.net.
- Visit the Official Website: Open your web browser and go to https://fivem.net/.
- Locate the Download Link: On the homepage, you will typically find a prominent “Download FiveM” button or link. Click on it.
- Download the Installer: This will initiate the download of the FiveM installer file (usually an
.exefile). Save it to a convenient location on your computer, such as your Desktop or Downloads folder.
Running the FiveM Installation Process
The installation of FiveM is designed to be user-friendly, requiring minimal technical expertise.
- Run the Installer: Locate the downloaded FiveM installer file and double-click it to run.
- Grant Administrator Privileges: Your operating system may prompt you to allow the application to make changes to your device. Click “Yes” to proceed.
- Choose Installation Location (Optional): The installer will usually detect your GTA V installation directory automatically. However, you may be given the option to choose a different installation location for FiveM. It is generally recommended to let FiveM install in its default location or alongside your GTA V installation, as this helps it locate the necessary game files.
- Wait for Installation to Complete: The installer will now download and extract the necessary FiveM files. This process can take a few minutes, depending on your internet speed. You’ll see a progress bar indicating the status.
- Launch FiveM: Once the installation is finished, you can choose to launch FiveM immediately. A shortcut will also be placed on your desktop for future access.
Important Note on FiveM Updates: FiveM regularly releases updates to ensure compatibility with the latest GTA V patches and to introduce new features. When you launch FiveM, it will automatically check for updates. If an update is available, it will prompt you to download and install it. Always keep your FiveM client updated to avoid connection issues.
Step 3: Launching FiveM and Connecting to Servers
With the FiveM client installed, you are now ready to embark on your customized GTA V adventures. The initial launch involves a brief setup and then opens the gateway to a world of custom multiplayer servers.
First Launch and Account Linking
The first time you launch FiveM, it will likely prompt you to link your Rockstar Games Social Club account. This is a security measure to ensure you own a legitimate copy of GTA V and to identify you within the FiveM ecosystem.
- Launch FiveM: Double-click the FiveM shortcut on your desktop or find it in your Start menu.
- Login/Link Account: FiveM will likely display a login screen. You’ll need to log in with your Rockstar Games Social Club credentials. If you don’t have a Social Club account, you’ll need to create one through the Rockstar Games website.
- Grant Permissions: You may be asked to grant FiveM permission to access your Social Club account. Agree to these terms.
- Wait for Initial Setup: FiveM will perform some initial setup tasks, which might include downloading essential game assets. This can take some time, especially on the first launch.
Exploring and Connecting to Servers
Once the initial setup is complete, you’ll be greeted by the FiveM main interface. This is where you’ll discover the vast array of custom servers available.
- Server Browser: The FiveM interface features a robust server browser. You can see a list of available servers, their player counts, ping (latency), and game modes.
- Filtering and Searching: The server browser allows you to filter servers based on various criteria, such as:
- Tags: Look for specific gameplay styles like “Roleplay,” “Drifting,” “Economy,” “Cop,” “EMS,” etc.
- Player Count: Find servers that are actively populated or less crowded.
- Ping: Filter for servers with low ping for a smoother gameplay experience.
- Server Name/IP: If you know the name or IP address of a specific server, you can search for it directly.
- Adding Favorites: As you find servers you enjoy, you can add them to your “Favorites” list for quick access in the future.
- Connecting to a Server:
- Select a server from the list.
- Click the “Connect” button.
- FiveM will then load GTA V and connect you to the chosen server. This might involve downloading server-specific assets, such as custom vehicles or maps, which can take some time on the first connection to a new server.
Troubleshooting Common Issues
While the installation process is generally smooth, you might encounter a few common issues.
- “GTA V Not Found” Error: This typically means FiveM cannot locate your GTA V installation. Ensure GTA V is installed in a standard location and that your game files are verified. You can sometimes manually point FiveM to your GTA V directory through its settings.
- Crashes on Launch: This is often due to outdated game files, conflicting mods, or an issue with the FiveM client itself. Ensure GTA V and FiveM are fully updated and that you’ve removed any residual mods.
- Connection Problems: High ping, server-side issues, or network restrictions can prevent you from connecting. Try a different server or check your internet connection.
- “Game Build Mismatch” Error: This signifies that your GTA V game build is not compatible with the FiveM client. Ensure GTA V is updated to the latest version.
By following these steps diligently, you’ll be well on your way to experiencing the incredible depth and variety that FiveM offers, transforming your Grand Theft Auto V gameplay into something truly unique and engaging.
aViewFromTheCave is a participant in the Amazon Services LLC Associates Program, an affiliate advertising program designed to provide a means for sites to earn advertising fees by advertising and linking to Amazon.com. Amazon, the Amazon logo, AmazonSupply, and the AmazonSupply logo are trademarks of Amazon.com, Inc. or its affiliates. As an Amazon Associate we earn affiliate commissions from qualifying purchases.