
For many, Google Chrome is the go-to web browser. Its speed, extensive extension library, and seamless integration with Google services make it a popular choice across various operating systems. While Ubuntu, with its default Firefox browser, offers a robust and user-friendly experience, some users prefer the familiar interface and feature set of Chrome. This guide will walk you through the straightforward process of installing Google Chrome on your Ubuntu system, ensuring you can enjoy its benefits without missing a beat.
The process of installing Chrome on Ubuntu is not as direct as installing native Ubuntu applications through the Ubuntu Software Center, which typically features open-source alternatives. However, it’s a simple procedure that involves downloading the Chrome package and installing it through the command line or a graphical package manager. We’ll cover both methods, allowing you to choose the one that best suits your comfort level.

Whether you’re a seasoned Linux user or new to the Ubuntu ecosystem, this guide aims to provide clear, step-by-step instructions. We’ll begin with the most common and recommended method, using the terminal. This approach is often favored by Linux enthusiasts for its precision and the ability to see exactly what’s happening during the installation process. Following that, we’ll explore a more visual, graphical method for those who prefer to work with windows and buttons.
Method 1: Installing Chrome via the Terminal (Recommended)
The terminal, or command line interface, is a powerful tool for interacting with your Ubuntu system. For many software installations, especially those not directly available in the standard Ubuntu repositories, the terminal offers the most efficient and reliable method. Installing Chrome is no exception. This method involves downloading the official Chrome package and then using package management commands to install it.
Downloading the Google Chrome Package
The first step is to download the correct .deb package for Google Chrome. Ubuntu uses the .deb package format, which is a standardized archive format for Debian-based Linux distributions. Google provides a direct download link for its Linux version.
You can initiate the download directly from the terminal using the wget command. This command allows you to download files from the internet directly within your terminal session.
To download the 64-bit version of Google Chrome, which is standard for most modern systems, open your terminal and run the following command:
wget https://dl.google.com/linux/direct/google-chrome-stable_current_amd64.deb
Let’s break down this command:
wget: This is the command-line utility for retrieving files using various network protocols.https://dl.google.com/linux/direct/google-chrome-stable_current_amd64.deb: This is the URL pointing to the latest stable release of Google Chrome for 64-bit Linux systems.
Upon executing this command, wget will download the file to your current directory in the terminal. You’ll see a progress indicator showing the download status. Once the download is complete, you will have the google-chrome-stable_current_amd64.deb file ready for installation.
Installing the Downloaded Package
With the .deb file downloaded, the next step is to install it. The dpkg command is used for managing Debian packages. However, it’s often recommended to use apt to install .deb files, as apt handles dependencies more effectively. If dpkg is used alone and dependencies are missing, you might encounter errors that require a subsequent apt --fix-broken install command. Using apt directly simplifies this.
Navigate to the directory where you downloaded the .deb file if you are not already there. Typically, it will be in your Downloads folder if you initiated the download through your browser, or in your home directory if you used wget in your home directory.
Assuming you downloaded the file to your current terminal directory, use the following apt command to install it:
sudo apt install ./google-chrome-stable_current_amd64.deb
Let’s understand this command:
sudo: This command allows you to execute commands with superuser privileges, which are necessary for installing software on your system. You will be prompted to enter your user password.apt install: This is the command to install packages using the Advanced Packaging Tool../google-chrome-stable_current_amd64.deb: The./specifies that the file is in the current directory. This tellsaptto install the local.debfile.
When you run this command, apt will process the .deb file. It will identify all the necessary dependencies that Chrome requires and install them automatically from the Ubuntu repositories. If any dependencies are missing, apt will prompt you to confirm their installation.
After apt successfully installs Chrome, it will also add the Google Chrome repository to your system’s software sources. This is a crucial step because it means that in the future, when you update your system using sudo apt update && sudo apt upgrade, Google Chrome will also be updated automatically to its latest version. This ensures you always have the most secure and feature-rich version of the browser.
Launching Google Chrome
Once the installation is complete, you can launch Google Chrome in a couple of ways:
1. From the Application Menu:
Click on the “Activities” overview (usually in the top-left corner of your screen or by pressing the Super key, which is typically the Windows key on your keyboard). Type “Chrome” in the search bar. You should see the Google Chrome icon appear. Click on it to launch the browser.
2. From the Terminal:
You can also launch Chrome directly from the terminal by typing:
google-chrome-stable
or simply:
google-chrome
The first time you launch Chrome, it might ask you if you want to set it as your default browser and if you want to help improve Chrome by sending usage statistics and crash reports. You can choose the options that best suit your preferences.
Method 2: Installing Chrome Using the Graphical Software Center
While the terminal method is highly efficient, some users prefer a more visual approach. Ubuntu’s Software Center provides a user-friendly interface for installing applications. While Google Chrome isn’t directly listed in the default Ubuntu repositories, you can install it by first downloading the .deb file and then opening it with the Software Center.
Downloading the Google Chrome Package (Graphical Method)
Open your web browser (which will likely be Firefox by default on Ubuntu). Navigate to the official Google Chrome download page. You can usually find this by searching “download chrome linux” on your preferred search engine, or by going directly to https://www.google.com/chrome/.
On the Chrome download page, click on the “Download Chrome” button. You will be prompted to choose a package format. Select the 64-bit .deb (for Debian/Ubuntu) option.
Once you click download, your browser will download the google-chrome-stable_current_amd64.deb file to your default download location, typically your Downloads folder.
Installing the Downloaded Package with Software Center
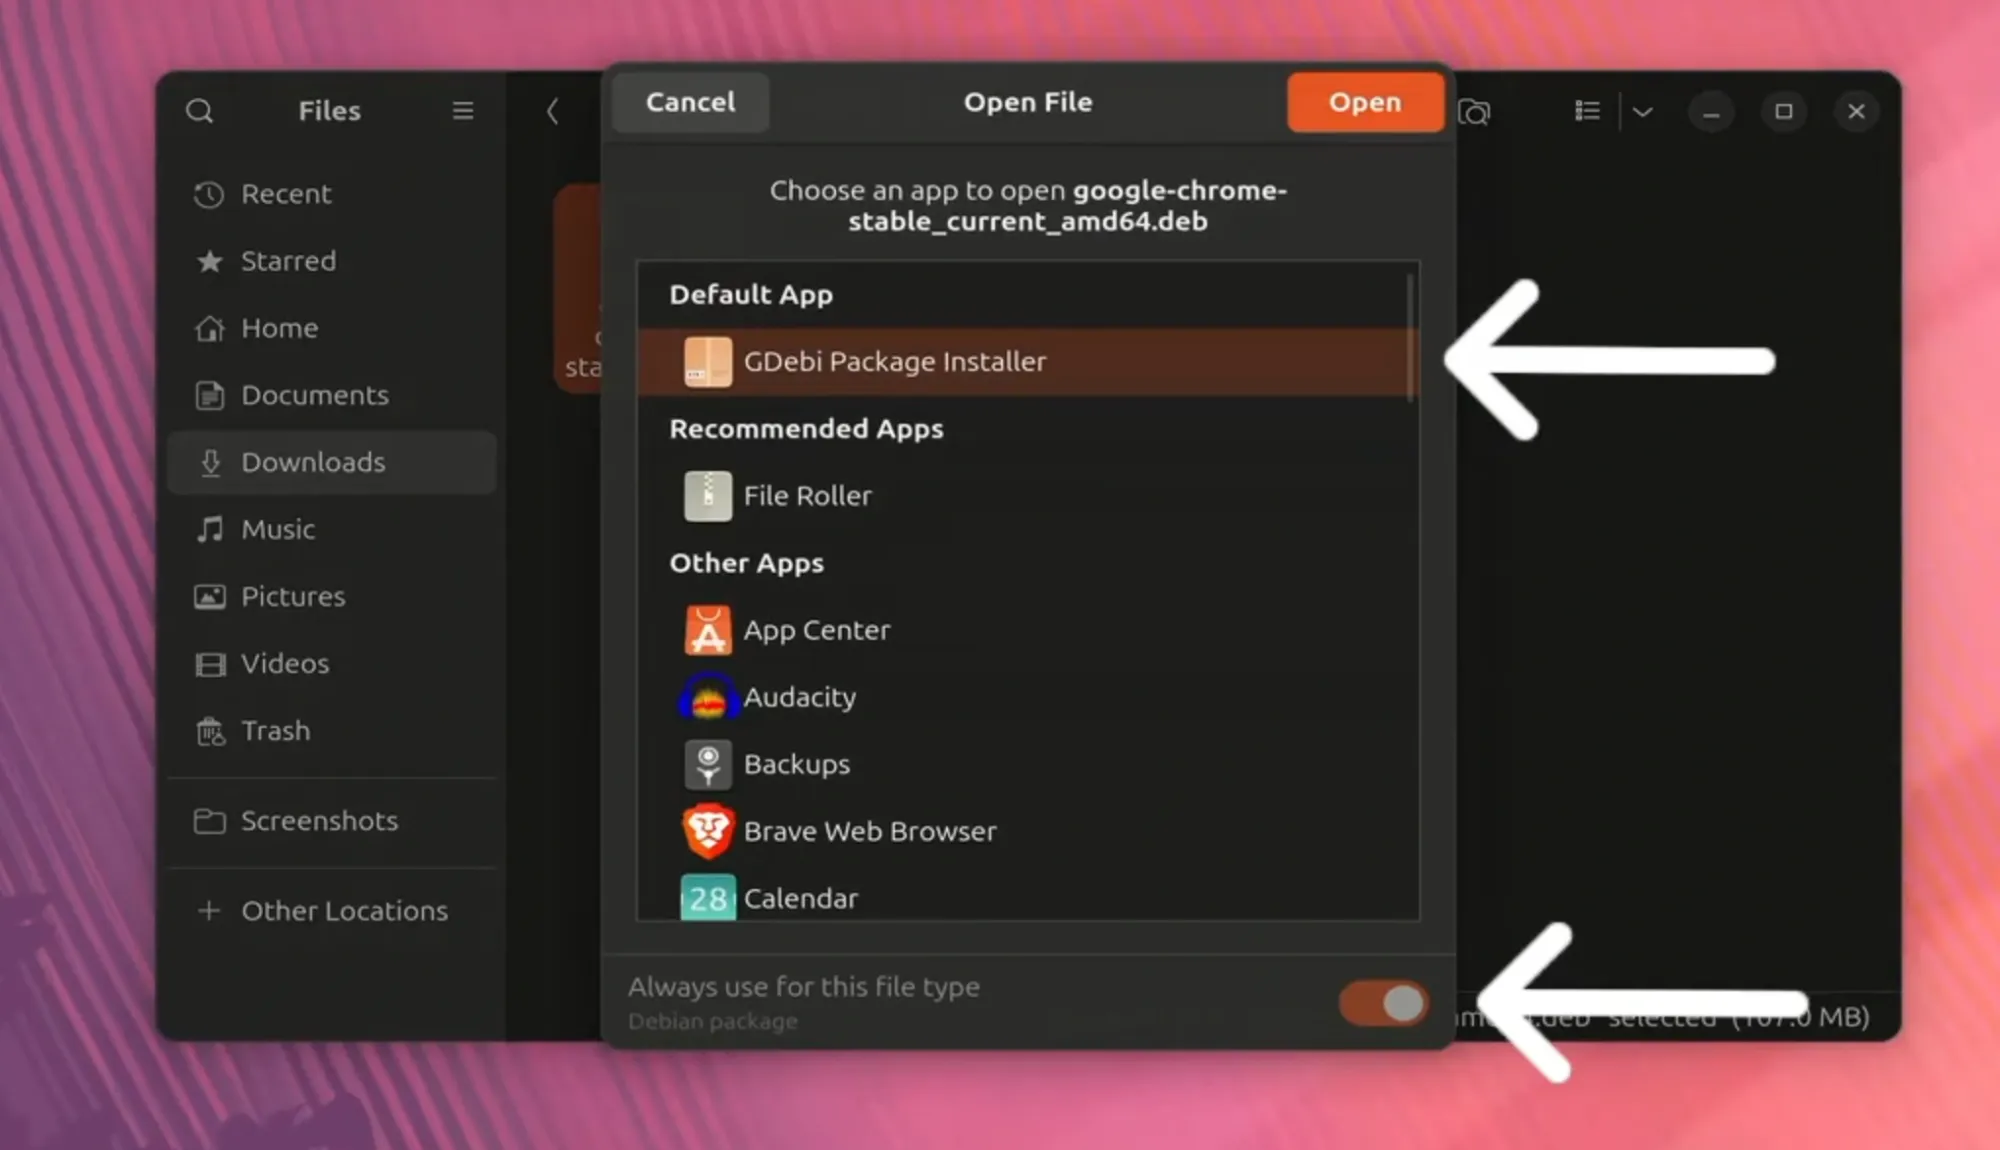
After the download is complete, navigate to your Downloads folder using the file manager. Locate the downloaded file, google-chrome-stable_current_amd64.deb.
Double-click on this .deb file. By default, Ubuntu should open this file with the Software Install application (which is part of the Ubuntu Software Center).
You will see a window displaying information about the Google Chrome package. It will show the name, version, and a description. At the top of this window, you will see an “Install” button. Click on the Install button.
You will be prompted to enter your user password to authorize the installation. Enter your password and click “Authenticate.”
The Software Center will then proceed to install Google Chrome, along with any necessary dependencies. This process is automated and visually represented by a progress bar.
Once the installation is finished, the “Install” button will change to an “Uninstall” or “Launch” button, indicating that Chrome has been successfully installed.
Launching Google Chrome (Graphical Method)
After the graphical installation, you can launch Google Chrome just as you would any other application:
- Click on the Activities overview button (usually in the top-left corner of your screen or by pressing the Super key).
- Type “Chrome” into the search bar.
- Click on the Google Chrome icon when it appears to start the browser.
As with the terminal method, you’ll have the option to set Chrome as your default browser and choose your privacy preferences upon its first launch. The installation through the Software Center also adds the Google Chrome repository to your system, ensuring future updates through the standard system update process.
Managing Chrome: Updates and Uninstallation
Keeping your software up-to-date is crucial for security and performance. Since you’ve added the Google Chrome repository to your system during installation, managing Chrome updates is as simple as updating any other application on your Ubuntu system.
Updating Google Chrome
When Google releases updates for Chrome, they will be available through Ubuntu’s standard package management system. To check for and install any available updates, open your terminal and run the following commands:
sudo apt update
sudo apt upgrade
The sudo apt update command refreshes the list of available packages from all configured repositories, including the Google Chrome repository. The sudo apt upgrade command then installs any updates for packages that are already installed on your system, including Google Chrome if a new version is available.
Alternatively, you can use the graphical Software Updater tool. This tool scans your system for available updates and presents them to you in a user-friendly interface. Simply open the Software Updater, and it will automatically check for updates and prompt you to install them.
Uninstalling Google Chrome
If, for any reason, you decide to remove Google Chrome from your Ubuntu system, the process is also straightforward.
Using the Terminal:
Open your terminal and run the following command to uninstall Chrome:
sudo apt remove google-chrome-stable
This command will remove the Google Chrome package. It’s also a good practice to clean up any residual configuration files that might remain:
sudo apt autoremove
This command removes packages that were automatically installed to satisfy dependencies for other packages and are no longer needed.
To completely remove the Google Chrome repository from your system’s software sources, you can use the following command:
sudo apt purge google-chrome-stable
The purge option not only removes the package but also its configuration files, ensuring a cleaner removal. After purging, you might want to update your package list again:
sudo apt update
Using the Graphical Software Center:
- Open the Ubuntu Software application.
- Click on the Installed tab at the top.
- Find “Google Chrome” in the list of installed applications.
- Click on Google Chrome.
- You will see an “Uninstall” button. Click on it.
- Enter your password when prompted to authorize the removal.
Both methods will effectively remove Google Chrome from your system.

Conclusion
Installing Google Chrome on Ubuntu is a simple yet rewarding process that opens up a world of browsing possibilities for users who prefer this popular browser. Whether you choose the efficiency of the terminal or the visual ease of the Software Center, you’ll be up and running with Chrome in just a few steps. The added benefit of automatically including the Google Chrome repository ensures that your browser stays updated with the latest features and security patches, providing a seamless and secure browsing experience. By following this guide, you can confidently integrate Google Chrome into your Ubuntu desktop environment and enjoy its performance, extensive extension ecosystem, and familiar interface.
aViewFromTheCave is a participant in the Amazon Services LLC Associates Program, an affiliate advertising program designed to provide a means for sites to earn advertising fees by advertising and linking to Amazon.com. Amazon, the Amazon logo, AmazonSupply, and the AmazonSupply logo are trademarks of Amazon.com, Inc. or its affiliates. As an Amazon Associate we earn affiliate commissions from qualifying purchases.