Paint.NET has long stood as a robust and user-friendly image editing software, bridging the gap between basic graphic tools and complex professional suites. Revered for its intuitive interface and powerful capabilities, it has become a go-to for countless digital artists, photographers, and casual users alike. Yet, its true strength often lies beyond its default feature set, nestled within a vibrant ecosystem of community-developed plugins. These extensions transform Paint.NET from a capable editor into an extraordinarily versatile creative powerhouse, introducing new effects, tools, file types, and adjustments that dramatically expand its functionality.
In an age where digital content reigns supreme and visual communication is paramount, having access to efficient and effective image editing tools is not just a convenience—it’s a necessity. Whether you’re a burgeoning designer crafting visuals for a personal brand, a photographer refining your portfolio, or simply someone looking to add a creative flair to your everyday images, Paint.NET plugins offer an accessible pathway to advanced techniques without the steep learning curve or significant financial investment often associated with other high-end software. This comprehensive guide will walk you through everything you need to know about integrating these invaluable tools into your Paint.NET workflow, ensuring you can harness their full potential to elevate your digital creations.
The Power of Paint.NET Plugins: Elevating Your Digital Art
Paint.NET, in its vanilla form, is already impressive. It offers a solid foundation for image manipulation, layering, adjustments, and basic drawing. However, like any good software platform, it’s designed to be expandable. This expandability is where plugins come into play, acting as crucial augmentations that fill specific needs, introduce cutting-edge algorithms, or simply automate complex tasks.
What are Paint.NET Plugins?
At their core, Paint.NET plugins are small software components developed by third-party creators, often members of the active Paint.NET community. These components integrate seamlessly into the Paint.NET application, appearing as new options within menus, additional tools in the toolbox, or new file formats available for opening and saving. They are typically written using languages like C# or VB.NET, leveraging Paint.NET’s open architecture and API (Application Programming Interface).
Think of them as specialized modules that bolt onto the existing structure of Paint.NET. Just as a smartphone becomes infinitely more useful with a diverse array of apps, Paint.NET becomes far more powerful and adaptable with a well-chosen collection of plugins. They extend the program’s capabilities in virtually every direction, from enhancing visual aesthetics to streamlining repetitive tasks, making the editing process more efficient and opening up new avenues for creative expression.
Why Plugins are Indispensable for Digital Creatives
For anyone serious about digital image manipulation, whether for professional endeavors or personal projects, plugins are not just a luxury; they are an indispensable part of a modern creative toolkit. Here’s why:
- Expanded Functionality: The most obvious benefit is the sheer breadth of new features they introduce. From sophisticated noise reduction filters and advanced sharpening algorithms to intricate distortion effects and realistic texture generators, plugins can perform operations that are simply not built into the default Paint.NET application. This means you can achieve professional-grade results without needing to switch to other, often more expensive, software.
- Creative Freedom: Plugins unlock new dimensions of artistic expression. Want to simulate a watercolor painting, apply a vintage film grain, or create intricate geometric patterns with a single click? There’s likely a plugin for that. This empowers artists to experiment freely, push boundaries, and develop unique visual styles that differentiate their work. For those building a personal brand, this visual distinctiveness can be a powerful asset.
- Time-Saving Automation: Many plugins are designed to automate complex or repetitive tasks. Instead of manually applying multiple adjustments or filters, a single plugin might combine several steps into one, saving significant time and effort. For professionals working on tight deadlines, this efficiency translates directly into increased productivity and, potentially, higher output volume for clients.
- Niche Solutions: The community-driven nature of plugin development means that many plugins address very specific or niche needs that might not be practical for a core software developer to include. This ensures that users with unique requirements can still find tools tailored to their projects, whether it’s specialized medical imaging filters or tools for game development assets.
- Cost-Effectiveness: Paint.NET itself is free, and the vast majority of plugins are also freely available. This makes it an incredibly cost-effective solution for acquiring a sophisticated image editing environment, especially for small businesses, startups, or individuals on a budget who still need high-quality visual output.
- Staying Current: The plugin ecosystem is constantly evolving. New plugins are developed and existing ones are updated, often incorporating the latest graphical techniques or addressing new operating system changes. This allows Paint.NET users to keep their software’s capabilities fresh and relevant, adapting to new trends and technological advancements in digital art.
By embracing Paint.NET plugins, users don’t just add features; they fundamentally enhance their entire digital art experience, transforming their workflow and expanding their creative horizons.
Navigating the Plugin Landscape: Where to Find and What to Expect
Before you can enjoy the myriad benefits of Paint.NET plugins, you need to know where to find them and understand the different types available. The quality and safety of plugins can vary, so a discerning approach is essential.
Identifying Trustworthy Plugin Sources
The open-source and community-driven nature of Paint.NET plugins means that they come from various developers, not all of whom are officially affiliated with the Paint.NET team. Therefore, exercising caution and sticking to reputable sources is paramount for digital security and system stability.
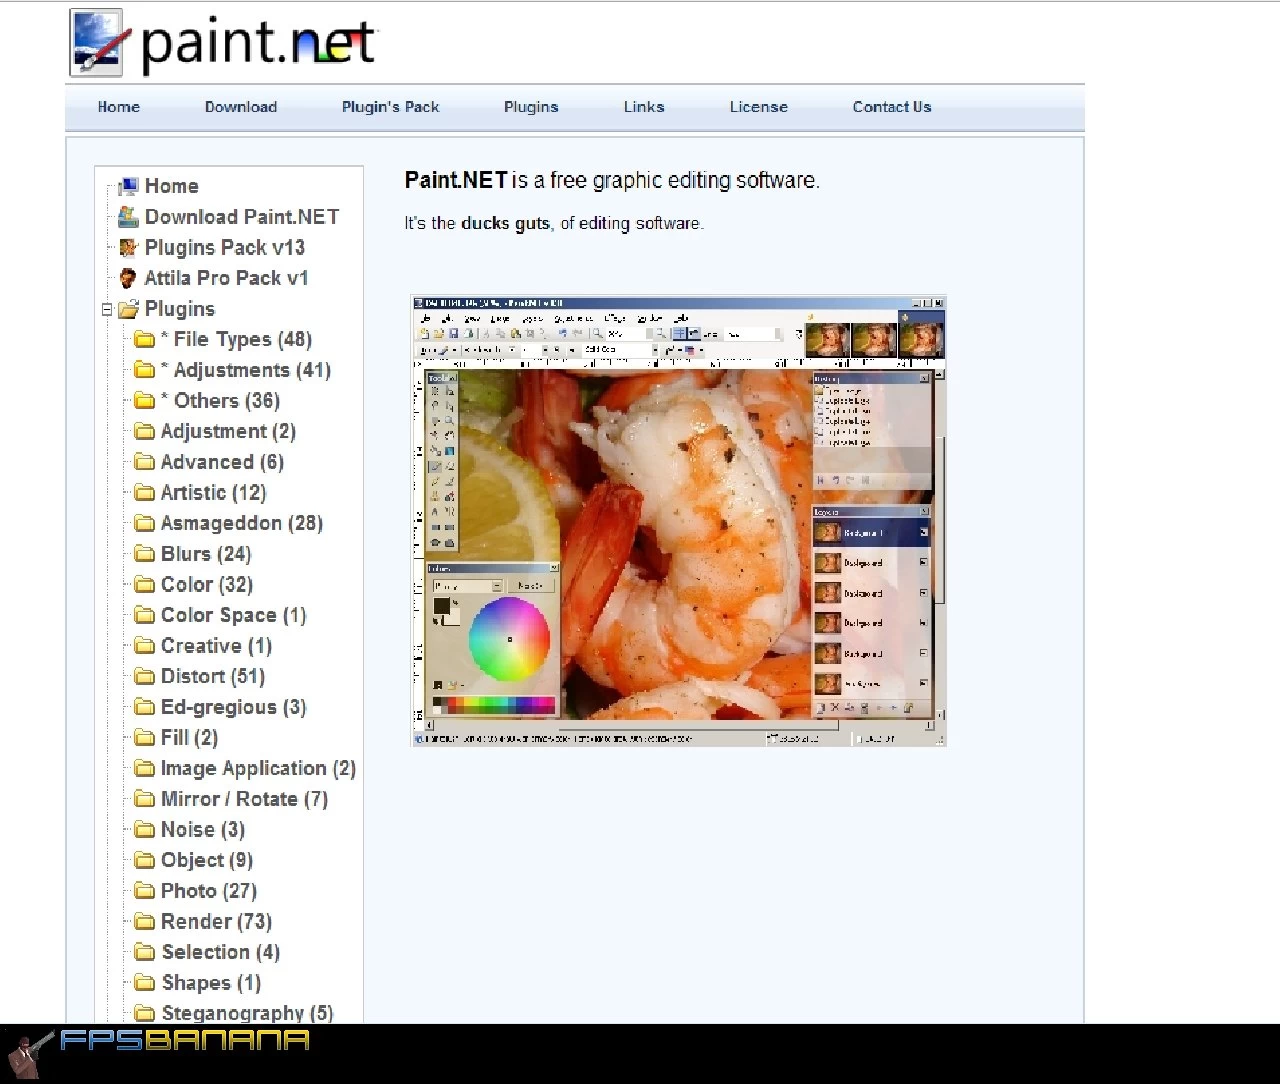
The primary and most reliable hub for Paint.NET plugins is the Official Paint.NET Forum. This platform, found at forums.getpaint.net, hosts a dedicated “Plugins” section where developers share their creations, often with detailed descriptions, screenshots, download links, and user feedback.
Here’s why the official forum is your best bet:
- Community Vetting: Plugins posted on the forum are subject to community scrutiny. Users report bugs, provide feedback, and confirm functionality, giving you a good indication of a plugin’s reliability.
- Direct Developer Support: Many plugin authors actively participate in their respective threads, offering direct support, answering questions, and providing updates.
- Safety and Trust: While not every plugin is officially “certified,” the forum environment encourages responsible development. Developers with a good track record are easily identifiable, and warnings are usually raised if a plugin is suspected of containing malicious code. It’s always good practice to read through the comments before downloading.
- Comprehensive Information: Plugin threads often contain instructions, compatibility information, and examples of what the plugin can do, helping you decide if it meets your needs.
While other sites might host Paint.NET plugins, always be wary of unofficial download portals or sites that seem less credible. Downloading from untrusted sources risks exposing your system to malware, viruses, or poorly coded plugins that could cause Paint.NET to crash or behave erratically. Always prioritize your digital security.
Understanding Different Plugin Types
Paint.NET plugins generally fall into a few key categories, each designed to extend the software in distinct ways:
-
Effects Plugins: These are arguably the most common type. Effects plugins apply visual transformations to your images or selected areas. They can range from simple artistic filters (e.g., watercolor, oil painting, pixelate) and photo enhancements (e.g., advanced sharpening, dehaze, light leaks) to complex geometric distortions, noise generators, and intricate pattern creators. You’ll typically find these under the
Effectsmenu in Paint.NET. They are essential for adding flair, style, and professional polish to your visuals, which can significantly enhance brand identity if used consistently. -
Adjustments Plugins: Similar to effects, but often focused on modifying color, tone, contrast, and other fundamental image properties in a more granular or unique way than Paint.NET’s default adjustments. Examples include advanced curve editors, specialized color balance tools, or plugins that emulate film stocks. These usually appear under the
Adjustmentsmenu. They are crucial for fine-tuning the visual mood and accuracy of your images. -
File Type Plugins: Paint.NET supports a good range of image formats out-of-the-box (JPEG, PNG, GIF, BMP, TIFF, PDN, etc.). File type plugins extend this compatibility, allowing Paint.NET to open and save images in formats it doesn’t natively support. Common examples include plugins for WEBP, ICO (icon files), DDS (DirectDraw Surface, often used in game development), or even Photoshop PSD files (though support may vary). These are invaluable for interoperability with other software and workflows.
-
Tools Plugins: These add new tools to Paint.NET’s toolbox. While less common than effects or adjustments, they can introduce entirely new ways to interact with your canvas, such as advanced selection tools, specialized drawing implements, or unique transformation utilities. They provide alternative methods for performing tasks, often with more precision or automation.
-
Utility Plugins: A broad category that might include plugins for image batch processing, managing layers more efficiently, or generating specific elements like seamless patterns or grids. These often focus on improving workflow and productivity rather than direct visual manipulation.
Understanding these categories will help you target your searches and build a plugin collection that truly complements your creative and professional needs.
Step-by-Step Installation: Getting Your Plugins Up and Running
Installing Paint.NET plugins is a straightforward process, but it requires careful attention to detail. Incorrect placement of files is the most common reason a plugin might not appear. Follow these steps meticulously to ensure a smooth installation.
Preparing Your System for Plugin Installation
Before you even download your first plugin, a few preparatory steps will make the entire process easier and safer:
- Ensure Paint.NET is Updated: Always use the latest stable version of Paint.NET. Plugins are often developed and tested against current versions, and older versions might have compatibility issues or lack necessary API features. You can check for updates directly within Paint.NET (typically via
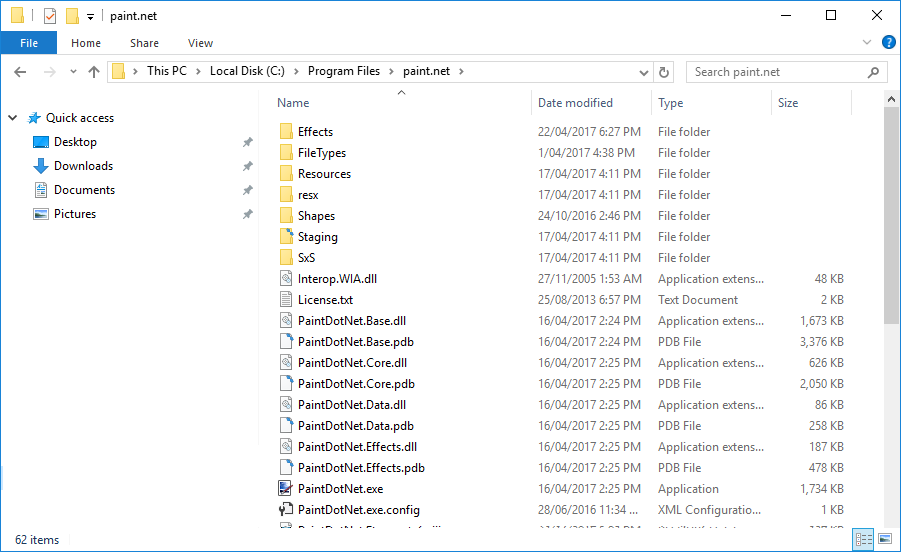
Utilities > Check for Updates). - Locate Your Paint.NET Installation Directory: This is crucial. By default, Paint.NET is usually installed in one of two locations, depending on whether you installed it from the Microsoft Store or the classic desktop installer:
- Microsoft Store Version:
C:Program FilesWindowsAppsdotPDNLLC.paint.net_[version number]__htc99aaz6h4e0Paint.net(TheWindowsAppsfolder is hidden and requires special permissions to access. We’ll discuss how to deal with this.) - Desktop Version (most common):
C:Program Filespaint.netorC:Program Files (x86)paint.net - How to find it easily: The simplest way to find your installation directory is to right-click on your Paint.NET desktop shortcut, select “Open file location,” or “Properties” and then “Open File Location.” This will take you directly to the executable (
PaintDotNet.exe) within its directory.
- Microsoft Store Version:
- Identify Plugin Folders: Within the Paint.NET installation directory, there are specific subfolders where plugins need to be placed:
Effects: This is where most Effects and Adjustments plugins go.FileTypes: This is where File Type plugins go.- Some very rare plugins might require a different location, but the developer will explicitly state this in their instructions. Always refer to the plugin’s documentation.
- Download from Trusted Sources: As emphasized earlier, always download plugins from the official Paint.NET forums or other highly reputable sources. This protects your system from malicious software.
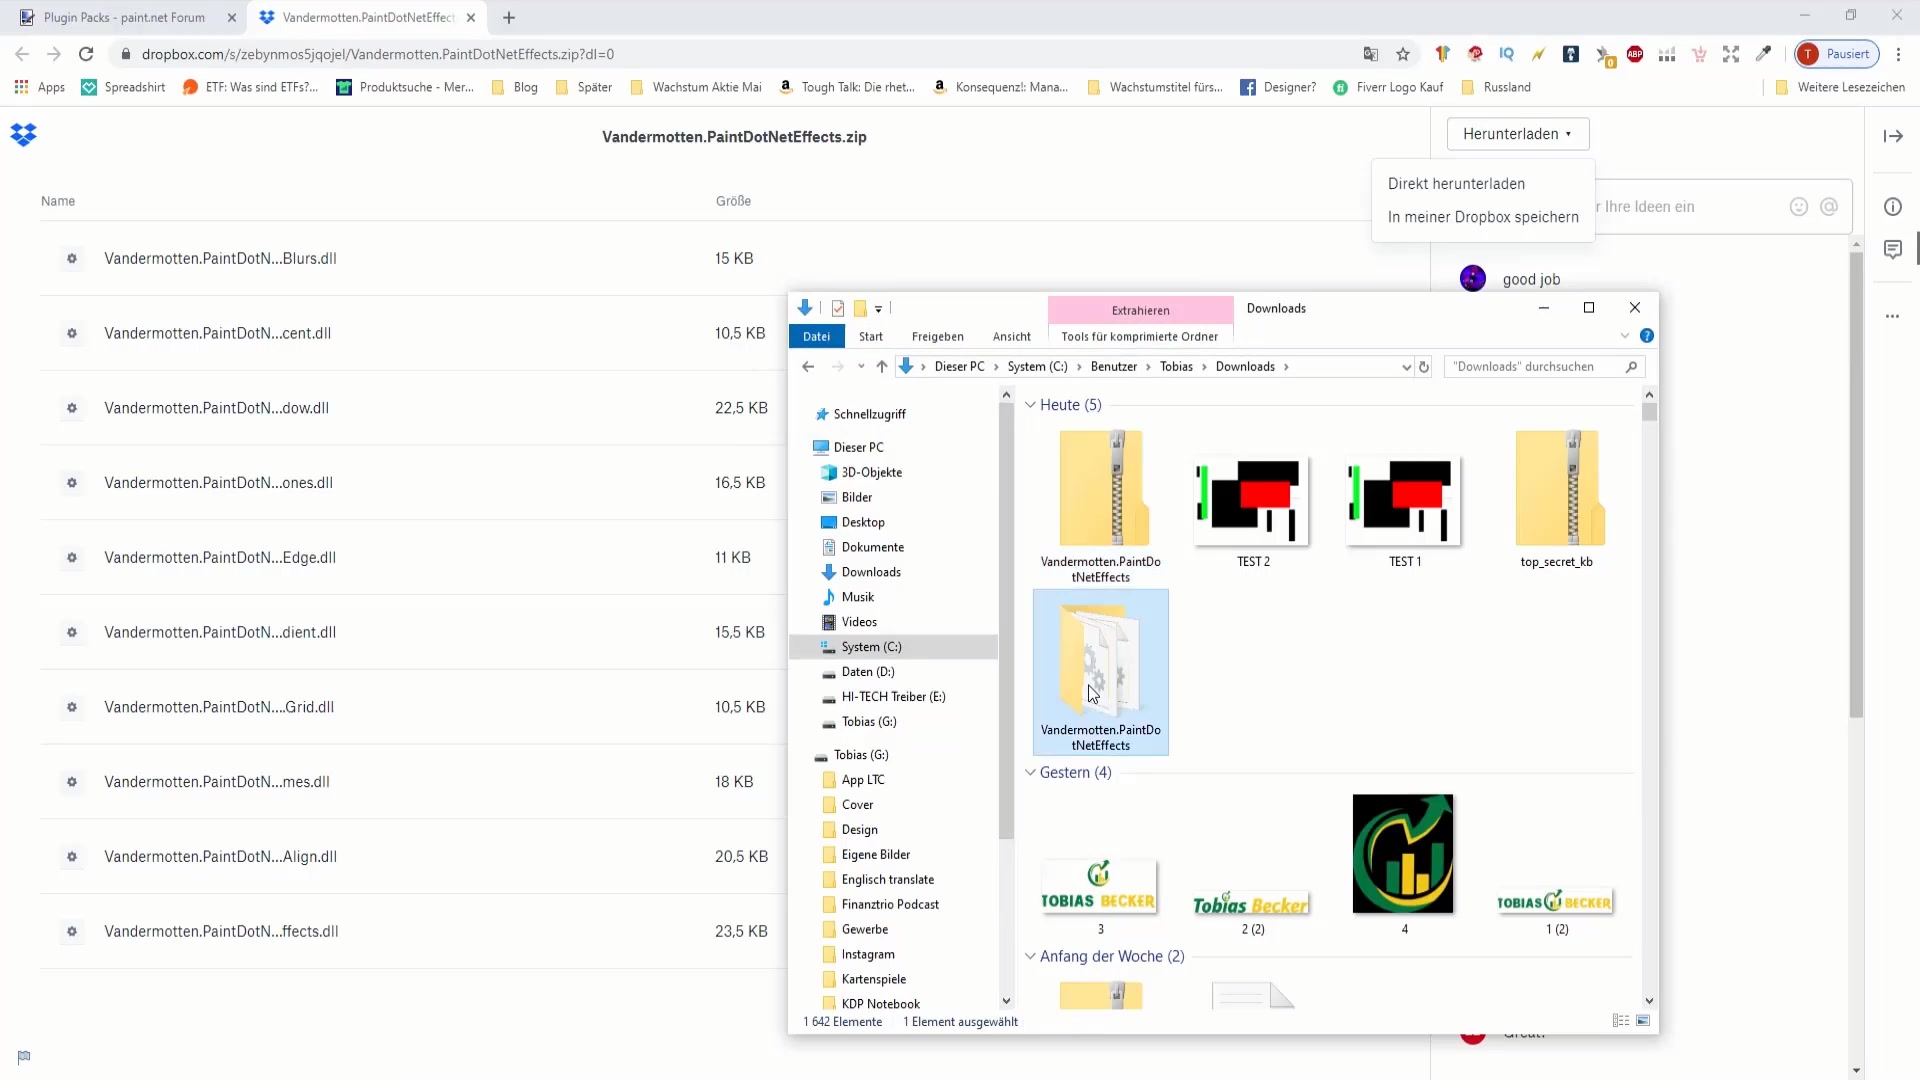
- Extract Compressed Files: Plugins are almost always downloaded as compressed archives, typically
.ZIPfiles. Before you can install them, you’ll need to extract their contents. Right-click the.ZIPfile and select “Extract All” (Windows built-in function) or use a third-party tool like 7-Zip or WinRAR.
The Core Installation Process
Once you’ve prepared, the installation itself involves a few precise steps:
- Download the Plugin: Go to the official Paint.NET forum, find the plugin you want, and download the
.ZIParchive to a temporary location (e.g., your Downloads folder). - Extract the Plugin Files: Right-click the downloaded
.ZIPfile and choose “Extract All…” Follow the prompts to extract the contents. You’ll usually find one or more.DLLfiles, possibly a.TXTor.HTMfile with instructions, or other associated files.- Crucial Tip: Do NOT simply copy the entire
.ZIPfile into the Paint.NET folder. You must extract the contents first.
- Crucial Tip: Do NOT simply copy the entire
- Identify the Core Plugin File(s): Look for the
.DLLfile(s). These are the actual plugin components. Some plugins consist of a single.DLLfile, while others might include multiple.DLLfiles or even additional data folders (e.g., for presets or resources). Read the plugin’s instructions carefully to know what to copy. - Copy Files to the Correct Paint.NET Plugin Folder:
- Navigate to your Paint.NET installation directory (e.g.,
C:Program Filespaint.net). - Determine if the plugin is an Effect/Adjustment or a File Type.
- For Effects/Adjustments: Copy the
.DLLfile(s) (and any associated folders if specified by the plugin author) into theEffectssubfolder (e.g.,C:Program Filespaint.netEffects). - For File Types: Copy the
.DLLfile(s) into theFileTypessubfolder (e.g.,C:Program Filespaint.netFileTypes). - Administrator Permissions: You might encounter a prompt asking for administrator permissions to copy files into
Program FilesorWindowsApps. Click “Continue” or “Yes” to grant these permissions. - Microsoft Store Specifics: If you have the Microsoft Store version, accessing the
WindowsAppsfolder directly can be tricky due to permission restrictions. A common workaround is to copy the.DLLfiles to a different temporary location (like your Desktop), then right-click on them, choose “Copy,” navigate to the targetEffectsorFileTypesfolder withinWindowsApps(which you can reach by finding Paint.NET through your Start Menu and opening its file location, then navigating up the directory tree), and paste them there. Windows will likely prompt for admin permission. Another, sometimes easier method, is to use the “Open Folder” option within Paint.NET’sEffectsmenu (if available) or simply use a tool like “Plugin Browser” or a script to manage permissions if you frequently install plugins. For most users with the desktop version, the process is simpler.
- Navigate to your Paint.NET installation directory (e.g.,
- Restart Paint.NET: After copying the plugin files, you must close and restart Paint.NET. Plugins are loaded when the application starts, so it won’t detect new plugins until it’s relaunched.
Verifying and Utilizing Your New Plugins
Once Paint.NET restarts, your new plugins should be available:
- Effects and Adjustments: Look under the
Effectsmenu orAdjustmentsmenu. You might find a new main category created by the plugin, or the plugin might be listed directly. - File Types: Try
File > Open...orFile > Save As.... The new file types should now appear in the dropdown list of available formats.
Take some time to experiment with your newly installed plugins. Read their documentation to understand their settings and capabilities fully. The best way to learn is by doing!
Troubleshooting Common Issues and Best Practices
Even with careful installation, you might encounter issues. Knowing how to troubleshoot and maintain your plugin ecosystem is key to a smooth creative workflow.
Addressing Plugin Not Showing Up or Errors
If your plugin isn’t appearing or is causing errors, here are the most common culprits and solutions:
- Incorrect Folder Placement:
- Issue: The most frequent problem. The plugin
.DLLfile was placed in the wrong folder (e.g.,FileTypesinstead ofEffects), or directly in the mainpaint.netfolder instead of a subfolder. - Solution: Double-check that the
.DLLfile(s) are in the correctEffectsorFileTypessubfolder. Refer to the plugin’s instructions.
- Issue: The most frequent problem. The plugin
- Files Not Extracted:
- Issue: You copied the
.ZIPfile itself into the plugin folder instead of extracting its contents first. - Solution: Delete the
.ZIPfile from the plugin folder. Extract the contents of the.ZIPfile to a temporary folder, then copy only the.DLLfiles (and any associated folders) into the correct Paint.NET plugin folder.
- Issue: You copied the
- Paint.NET Not Restarted:
- Issue: You installed the plugin but didn’t close and reopen Paint.NET.
- Solution: Simply close Paint.NET completely and launch it again.
- Missing Dependencies:
- Issue: Some advanced plugins might require other
.DLLfiles or components (often related to .NET Framework versions) that are not included in the plugin’s.ZIPor are not installed on your system. - Solution: Check the plugin’s forum thread or documentation carefully. The developer will usually list any required dependencies. Ensure your Windows is up to date, as this often includes necessary .NET Framework updates.
- Issue: Some advanced plugins might require other
- Compatibility Issues:
- Issue: The plugin might be old and incompatible with your current version of Paint.NET or your operating system (e.g., a 32-bit plugin trying to run in a 64-bit environment, though Paint.NET typically handles this well).
- Solution: Check the plugin’s forum thread for compatibility notes or recent updates. If it’s very old and hasn’t been updated in years, it might simply be deprecated. Look for alternative, more current plugins.
- Corrupted Download:
- Issue: The plugin
.ZIPfile was corrupted during download, leading to incomplete or damaged files. - Solution: Delete the downloaded
.ZIPand try downloading it again. Ensure your internet connection is stable.
- Issue: The plugin
- Plugin Error Messages:
- Issue: The plugin appears in the menu but throws an error when you try to use it.
- Solution: Note down the exact error message. This is critical for troubleshooting. Search the plugin’s forum thread for similar errors, or post your issue there with the error message and details about your Paint.NET version and OS. The developer might be able to help.
Maintaining a Healthy Plugin Ecosystem
To ensure your Paint.NET remains stable and efficient, follow these best practices for plugin management:
- Don’t Overload: While it’s tempting to download every cool plugin you find, installing too many unneeded plugins can clutter your menus, potentially slow down Paint.NET’s startup, and increase the likelihood of conflicts. Be selective and install only what you genuinely need and use.
- Keep Plugins Organized: If you have many plugins, sometimes developers categorize them. If not, consider creating subfolders within your
EffectsorFileTypesdirectories (e.g.,EffectsMy Photo Enhancers,EffectsArtistic Filters) to keep things tidy. Paint.NET will still find them. - Regularly Check for Updates: Plugin developers often release updates to fix bugs, improve performance, or add new features. Periodically check the forum threads of your most-used plugins for updates.
- Backup Before Major Changes: Before installing a large number of new plugins or making significant system changes, consider backing up your Paint.NET installation directory or even creating a system restore point. This is a general good practice for any software.
- Uninstall Unused Plugins: If you try a plugin and decide it’s not for you, uninstall it. Simply navigate to the
EffectsorFileTypesfolder and delete the corresponding.DLLfile(s). Remember to restart Paint.NET afterwards. - Read Documentation: Always take a few moments to read the instructions or documentation provided by the plugin author. This can prevent many common installation and usage errors.
By adhering to these best practices, you can enjoy a robust and creative Paint.NET environment without encountering unnecessary headaches.
Expanding Your Creative Horizon: Beyond Basic Installation
Installing plugins is just the first step. The real magic happens when you integrate them thoughtfully into your creative process and continuously explore new possibilities.
Curating Your Plugin Collection for Optimal Workflow
A well-curated plugin collection is like a finely tuned artist’s palette – every tool serves a purpose and contributes to your overall vision. Instead of haphazardly downloading every plugin, consider what you want to achieve and how plugins can help streamline that process.
- Define Your Needs: Are you primarily enhancing photos? Creating web graphics? Designing icons for a mobile app? Each domain has specific requirements. For a personal brand, consistency in visual style is key, so plugins that offer specific artistic filters or color grading tools might be invaluable. For an e-commerce business, plugins that aid in product photo refinement (sharpening, background removal, lighting adjustments) will be more useful.
- Create Thematic Bundles: Many developers release collections of plugins (e.g., “Pyrochild’s Plugins,” “TR’s Plugins”). These bundles often work well together and offer a cohesive set of tools. Installing a few well-regarded bundles can quickly expand your capabilities without much individual searching.
- Test and Evaluate: Don’t be afraid to try out a plugin, see if it fits your workflow, and then uninstall it if it doesn’t meet your expectations. Keep a small, efficient set of tools that you regularly use and master. The goal is to enhance productivity and creativity, not to create clutter.
- Learn Plugin-Specific Techniques: Some plugins have advanced features or specific workflows that can be incredibly powerful once mastered. Explore tutorials (often found on YouTube or the Paint.NET forums) dedicated to particular plugins to unlock their full potential.
Staying Updated and Exploring New Possibilities
The digital landscape is constantly evolving, and so too is the world of Paint.NET plugins. To stay at the forefront of creative possibilities and maintain a robust editing environment, ongoing engagement is crucial.
- Engage with the Community: Regularly visit the official Paint.NET forums. This isn’t just for downloading; it’s a vibrant community where users share tips, showcase their work, and discuss new plugins. Participating can expose you to new techniques and tools you might not have discovered otherwise.
- Monitor for New Releases: Keep an eye on the “Plugins” section of the forum for new and exciting additions. Developers are always pushing the boundaries of what’s possible, and new plugins can sometimes offer revolutionary ways to achieve effects or automate tasks.
- Adapt to Software Updates: As Paint.NET itself receives updates, some older plugins might require updates to remain fully functional. Staying informed about both Paint.NET and your crucial plugin updates ensures compatibility and peak performance.
- Experiment and Innovate: Don’t just use plugins as prescribed. Think about how you can combine different effects, blend adjustment layers, or use tools in unconventional ways to create truly unique and original artwork. The beauty of digital art, augmented by plugins, is the endless scope for experimentation. This constant exploration can even inspire new branding elements or creative campaigns.
By treating plugin installation not as a one-time task but as an ongoing journey of discovery and refinement, you’ll ensure that Paint.NET remains an indispensable tool in your digital arsenal, constantly evolving to meet your creative demands and helping you bring your visual ideas to life with unparalleled ease and power. Embrace the plugin ecosystem, and watch your creative potential flourish.
aViewFromTheCave is a participant in the Amazon Services LLC Associates Program, an affiliate advertising program designed to provide a means for sites to earn advertising fees by advertising and linking to Amazon.com. Amazon, the Amazon logo, AmazonSupply, and the AmazonSupply logo are trademarks of Amazon.com, Inc. or its affiliates. As an Amazon Associate we earn affiliate commissions from qualifying purchases.