In the dynamic world of technology, a Mac stands as a beacon of intuitive design and powerful performance. Millions of users worldwide rely on Apple’s macOS ecosystem for everything from creative endeavors and rigorous professional tasks to casual browsing and entertainment. While Macs are celebrated for their user-friendliness, the process of installing new software sometimes involves more than just a single click. Understanding the various methods and best practices for software installation is crucial not only for maintaining your system’s efficiency and security but also for unlocking the full potential of your device.
This guide delves into the nuances of installing applications on your Mac, ensuring you can confidently navigate common installation types, troubleshoot potential issues, and adopt habits that promote a healthy and high-performing system. Whether you’re a new Mac user or a seasoned professional looking for a refresher, mastering software installation is a foundational skill that enhances your digital productivity and digital security, two cornerstones of the modern tech landscape.
Understanding Mac Software Installation Methods
The macOS environment offers several distinct ways to install applications, each tailored to different types of software and user experiences. Recognizing these methods is the first step toward a smooth installation process. Each method comes with its own set of advantages, particularly concerning ease of use, security, and update management.
The Mac App Store: Simplicity, Security, and Seamless Updates
The Mac App Store is Apple’s curated digital storefront, designed for unparalleled ease of use and stringent security. It’s the primary and often preferred method for installing a vast array of applications, ranging from productivity suites and creative tools to games and utilities.
How it Works: Apps from the Mac App Store are sandboxed, meaning they operate in a restricted environment, limiting their access to other parts of your system. This significantly reduces the risk of malicious software compromising your data. Installation is as simple as clicking “Get” or “Install,” with macOS handling the download, installation, and subsequent updates automatically. Developers must adhere to Apple’s strict guidelines to get their apps listed, ensuring a level of quality and security that is hard to match elsewhere.
Benefits:
- Maximum Security: All apps are vetted by Apple, reducing malware risks.
- Effortless Updates: Apps update automatically in the background or with a single click in the App Store’s Updates tab.
- Easy Installation & Uninstallation: No complex steps; apps are ready to use immediately and can be easily deleted by dragging them to the Trash.
- Family Sharing: Many purchased apps can be shared across family accounts.
When to Use: Always check the Mac App Store first for any software you need. It’s ideal for mainstream applications, everyday utilities, and anyone prioritizing ease of use and security.
DMG Files: The Traditional Drag-and-Drop Installation
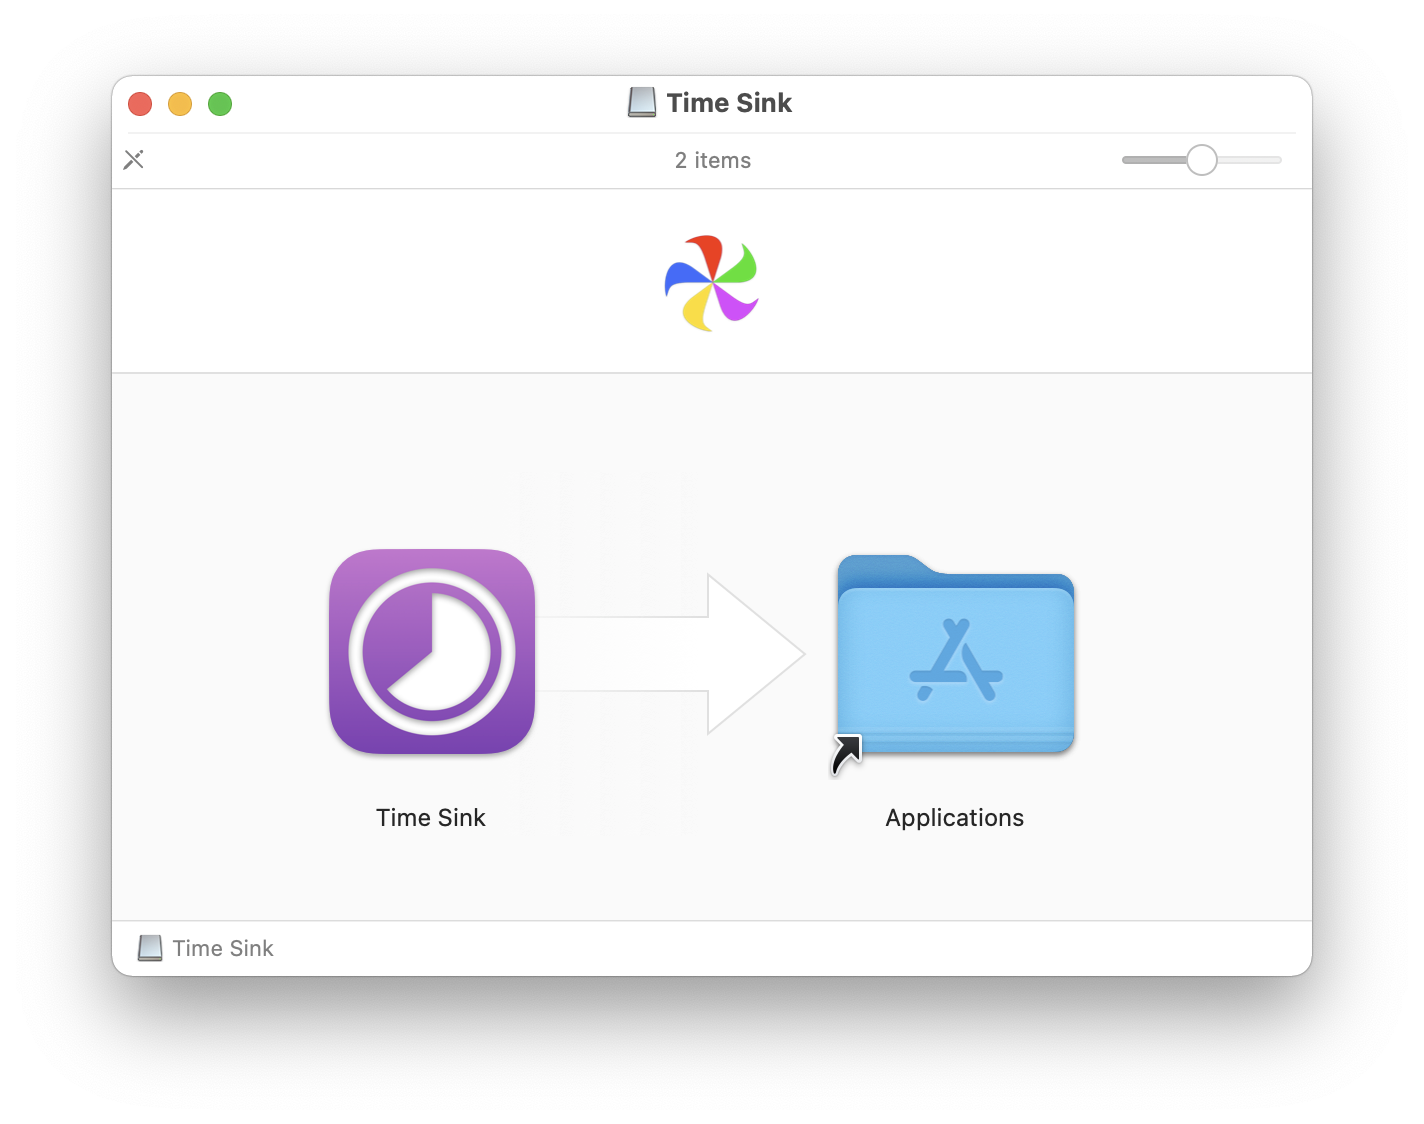
.dmg (disk image) files represent the most common traditional method for installing software not found on the Mac App Store. A DMG acts like a virtual hard drive that you “mount” on your desktop, much like inserting a CD or USB drive.
How it Works: When you download a .dmg file, it contains the application bundle and often a shortcut to your Applications folder. The installation process typically involves opening the .dmg, which mounts the virtual disk, and then dragging the application icon from the mounted disk image window directly into your Applications folder. Once the application is copied, you “eject” the disk image and can then delete the .dmg file.
Benefits:
- Widespread Use: Many professional and specialized applications are distributed this way.
- Self-Contained: The
.dmgoften includes everything needed for installation. - User Control: You retain full control over where the application is installed (though the Applications folder is standard).
When to Use: For software downloaded directly from a developer’s website, especially specialized tools, open-source projects, or applications that predate or don’t fit Apple’s App Store guidelines. Always ensure you download .dmg files from reputable sources to prevent malware.
Package Installers (.pkg files): Guided Setup for Complex Software
.pkg files are installer packages that guide you through a setup wizard, similar to installation processes on Windows. These are typically used for more complex software that requires specific system configurations, drivers, or multiple components to be installed in different locations on your Mac.
How it Works: Double-clicking a .pkg file launches an installer application that walks you through a series of steps: agreeing to terms, selecting an installation location, and sometimes customizing components. You’ll usually need to authenticate with your administrator password during this process.
Benefits:
- Handles Complexity: Ideal for software with multiple dependencies or system-level integrations.
- Automated Configuration: The installer takes care of placing files in the correct directories and setting up necessary system paths.
- Driver Installation: Often used for hardware drivers and peripheral software.
When to Use: For large software suites, operating system updates, drivers for printers or external devices, and applications that require deeper integration with macOS.
Web Downloads and Manual Installation: For Specialized Tools
Sometimes, software isn’t packaged in a .dmg or .pkg. This often applies to smaller utilities, command-line tools, browser extensions, or applications that are simply distributed as a standalone executable file.
How it Works: This method involves downloading the application file (which might be a .zip archive containing the .app bundle) and manually moving it to your desired location, usually the Applications folder. For command-line tools, installation often involves executing a script or using a package manager.
Benefits:
- Lightweight: Often for simpler tools that don’t require extensive installation processes.
- Flexibility: Can be placed almost anywhere on your system.
When to Use: For specific browser extensions, single-file executables, or development tools that don’t come with traditional installers.
Command Line Tools (e.g., Homebrew): For Developers and Power Users
For developers, system administrators, and power users, the command line offers powerful ways to install and manage software, particularly open-source tools and libraries. Homebrew is the most popular package manager for macOS, simplifying the installation of complex command-line utilities.
How it Works: After installing Homebrew itself (a one-time command in Terminal), you can install hundreds of applications and libraries with simple commands like brew install <package_name>. Homebrew handles dependencies, compilation, and system paths, making it incredibly efficient for managing development environments.
Benefits:
- Automation: Install and update multiple tools with single commands.
- Dependency Management: Automatically resolves and installs necessary prerequisites.
- Vast Repository: Access to a huge collection of open-source software not available through traditional GUI methods.
- Efficiency for Developers: Streamlines the setup of development environments.
When to Use: Essential for software developers, data scientists, or anyone who regularly uses Unix-like command-line tools and open-source libraries. This method taps into the deeper technical capabilities of your Mac, aligning perfectly with advanced “Tech” utilization.
Step-by-Step Installation Guides for Common Methods
Now, let’s walk through the practical steps for installing software using the most prevalent methods on your Mac. Following these guides will ensure a smooth and error-free setup.
Installing from the Mac App Store
This is the simplest method and should always be your first choice when available.
- Open the App Store: Click on the blue App Store icon in your Dock or find it in your Applications folder.
- Search for Software: Use the search bar in the top-left corner to find the application you need.
- Select the App: Click on the app’s icon to view its details page, including descriptions, screenshots, and reviews.
- Initiate Installation:
- If the app is free, click the “Get” button, which will then change to “Install.” Click “Install.”
- If the app is paid, click the button displaying its price. You’ll then be prompted to confirm your purchase.
- Authenticate: You may be asked to enter your Apple ID password, use Touch ID, or Face ID (if your Mac supports it).
- Monitor Progress: The app will download and install automatically. You can track its progress on its App Store page or directly in your Launchpad or Applications folder.
- Launch the App: Once installed, the “Install” button will change to “Open.” You can click this or find the app icon in your Applications folder or Launchpad.
Installing using a .dmg File
This is the most common method for software downloaded directly from a developer’s website.
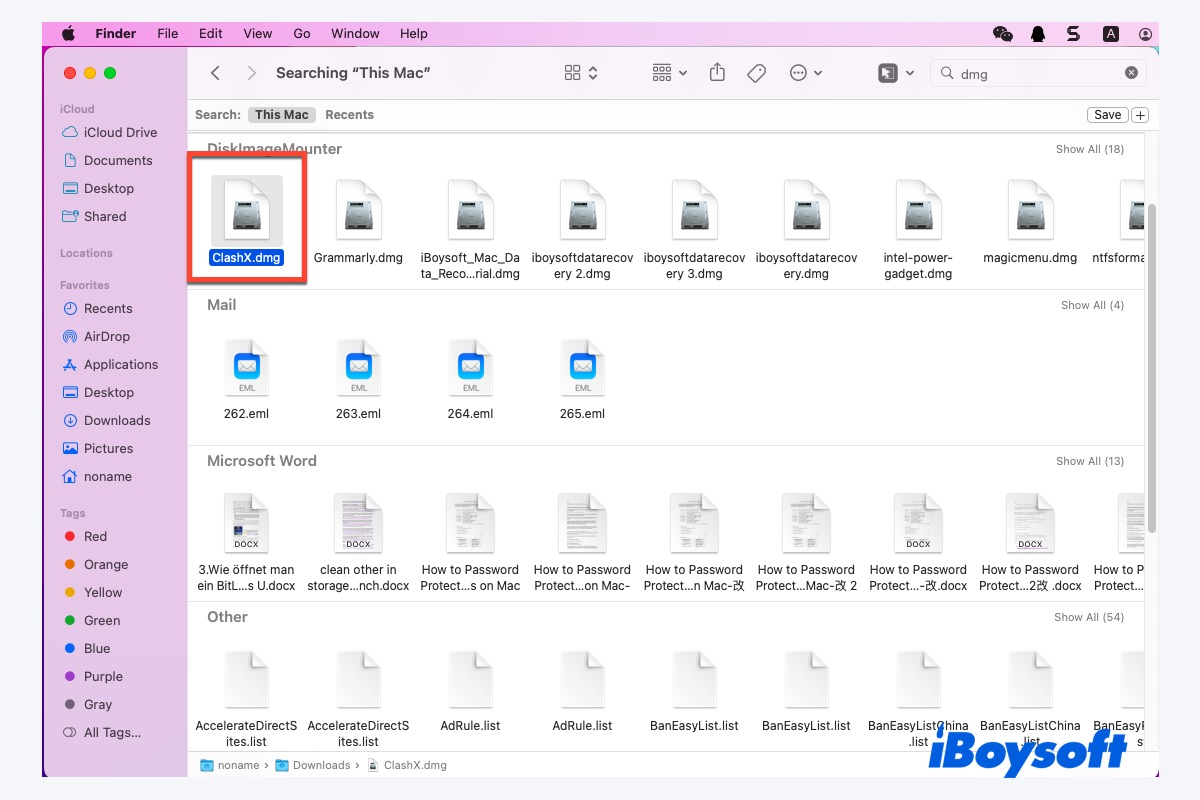
- Download the .dmg File: Navigate to the software developer’s official website and download the
.dmgfile. Always ensure you are on the legitimate site to avoid malicious downloads. The file will typically appear in your Downloads folder. - Open the .dmg File: Double-click the
.dmgfile. macOS will verify the disk image and then mount it, opening a new Finder window. This window typically shows the application’s icon and a shortcut to your Applications folder. - Drag to Applications: Click and drag the application icon from the mounted disk image window directly into the “Applications” folder shortcut provided in the same window. If there’s no shortcut, open a new Finder window and navigate to
/Applications, then drag the app icon there. - Wait for Copying: A progress bar will indicate the application being copied to your Applications folder.
- Eject the Disk Image: Once copied, it’s crucial to eject the virtual disk image. You can do this by:
- Dragging the disk image icon from your desktop to the Trash.
- Clicking the “Eject” button next to the disk image in the Finder sidebar.
- Right-clicking (or Control-clicking) the disk image icon on your desktop and selecting “Eject.”
- Delete the .dmg File: Once ejected, the original
.dmgfile in your Downloads folder is no longer needed and can be dragged to the Trash to free up space. - Launch the App: Go to your Applications folder and double-click the newly installed app. The first time you open an app from an “unidentified developer,” you may need to grant permission (see troubleshooting below).
Installing with a .pkg Installer
For more complex software or system-level components.
- Download the .pkg File: Obtain the
.pkginstaller from the official source. - Open the .pkg File: Double-click the
.pkgfile. This will launch a standard macOS installer window. - Follow the Installer Prompts:
- Click “Continue” through the introduction and license agreement.
- Read the license agreement and click “Agree” if you accept the terms.
- Select the installation location (usually your main hard drive).
- Click “Install.”
- Authenticate: You will be prompted to enter your administrator username and password to authorize the installation. This is necessary because
.pkginstallers often make system-wide changes. - Complete Installation: The installer will copy files and configure the software. Once complete, you’ll see a “Summary” screen. You might be asked to restart your Mac, which is often recommended for system-level changes to take full effect.
- Move Installer to Trash: After successful installation (and a restart if necessary), the installer will offer to “Move the installer to the Trash.” It’s generally safe to do so.
- Launch the App: The installed application will typically appear in your Applications folder.
Common Installation Challenges and Troubleshooting
Even with the most straightforward instructions, you might encounter issues during installation. Here are solutions to common problems that can disrupt your productivity flow.
“App can’t be opened because it is from an unidentified developer.”
This is a common security feature called Gatekeeper. macOS prevents apps from running if they haven’t been notarized by Apple or downloaded from the App Store, protecting you from potentially malicious software.
Solution:
- Right-Click Open: Instead of double-clicking, Control-click (or right-click) the app icon in your Applications folder.
- Select “Open”: From the contextual menu, choose “Open.”
- Confirm: A dialog box will appear, asking if you are sure you want to open the app. Click “Open.” This action typically grants a one-time exception for that specific app.
Alternative (less recommended): You can also temporarily adjust your security settings in System Settings > Privacy & Security > Security. Under “Allow applications downloaded from:”, select “App Store and identified developers.” For specific exceptions, you might see an “Open Anyway” button for recently blocked apps. However, it’s generally best to use the right-click method to avoid broadly lowering your security.
Insufficient Storage Space
If your Mac doesn’t have enough free disk space, installations will fail. Modern software can be quite large, impacting your system’s performance and potentially your financial investment in more storage if not managed.
Solution:
- Check Storage: Go to Apple Menu > System Settings > General > Storage. This gives you an overview of your disk usage.
- Free Up Space:
- Optimize Storage: macOS offers recommendations here to clear space, such as storing files in iCloud, emptying Trash automatically, or removing large attachments.
- Delete Unneeded Files: Manually delete large files (videos, old documents), applications you no longer use, and clear your Downloads folder.
- Empty Trash: Don’t forget to empty your Trash after deleting files.
- Clear Caches/Temporary Files: Third-party cleaning tools can help, but proceed with caution.
Installation Failed or Crashed
This can happen due to various reasons, from corrupted downloads to system conflicts.
Solution:
- Restart Your Mac: A simple restart can often resolve underlying system glitches or resource conflicts.
- Re-download the Software: The original download might have been corrupted. Delete the existing
.dmgor.pkgfile and download it again from the official source. - Check Internet Connection: Ensure a stable internet connection during the download process.
- Verify System Requirements: Double-check that your Mac meets the minimum macOS version, processor, and RAM requirements for the software.
- Contact Support: If all else fails, reach out to the software developer’s support team for specific guidance.
Permissions Issues (Less Common for GUI Installs)
While rare for standard GUI installations, command-line installations or manual file placements can sometimes encounter permission errors.
Solution:
- For command-line tools, using
sudobefore a command (e.g.,sudo brew install <package>) temporarily grants administrative privileges, but use with extreme caution as it bypasses security checks. - For specific file permission issues, use Finder’s “Get Info” (Cmd + I) on the file/folder, unlock the “Sharing & Permissions” section, and ensure your user account has “Read & Write” access.
Post-Installation Best Practices and Maintenance
Installing software is just the beginning. Proper post-installation care and ongoing maintenance are vital for keeping your Mac secure, fast, and productive. These practices align with maintaining peak “Tech” performance and securing your “Digital Security.”
Keeping Your Software Updated
Updates aren’t just about new features; they often include critical security patches and performance enhancements. Neglecting updates leaves your system vulnerable and can lead to compatibility issues.
How to Update:
- Mac App Store Apps: Open the App Store, go to the “Updates” tab, and click “Update All” or update individual apps.
- Non-App Store Apps: Many apps have an “Check for Updates” option within their application menu (e.g., App Name > Check for Updates). Others might prompt you automatically or require you to re-download a new
.dmgor.pkgfrom the developer’s website. - macOS Updates: Go to Apple Menu > System Settings > General > Software Update.
Safely Uninstalling Software
Simply dragging an app to the Trash often doesn’t remove all associated files (preferences, caches, support files). Over time, these can accumulate and consume valuable disk space.
How to Uninstall:
- App Store Apps: Drag the app from your Applications folder to the Trash. Right-click the Trash icon and choose “Empty Trash.”
- .dmg Installed Apps: Drag the app from your Applications folder to the Trash. Check your
~/Libraryfolder (often hidden: in Finder, holdOptionand clickGo > Library) for associated files inApplication Support,Caches, andPreferencesfolders, and delete them if you’re confident they belong to the uninstalled app. Be cautious, as deleting the wrong files can impact other applications. - Apps with Uninstallers: Some complex apps (especially those installed via
.pkgfiles) come with their own uninstaller application, often found in the original.dmgor in the Applications folder itself (e.g., an “Uninstall [App Name]” utility). Use these whenever available. - Third-Party Uninstallers: Tools like CleanMyMac X or AppCleaner can help find and remove all associated files, providing a cleaner uninstallation. However, carefully research and choose reputable tools.
Digital Security Considerations
Every software installation is a potential entry point for security vulnerabilities. Protecting your Mac is paramount, safeguarding your data and even your financial information from malicious actors.
Best Practices:
- Download from Official Sources: Always download software directly from the developer’s official website or the Mac App Store. Avoid third-party download sites that might bundle software with adware or malware.
- Beware of Pirated Software: “Cracked” or pirated software is a major vector for malware. Not only is it illegal, but it’s a significant security risk that can compromise your personal data and system integrity.
- Read Permissions: Pay attention to what permissions an app requests during installation, especially for
.pkginstallers. Does a simple photo editor truly need full system access? - Use Antivirus/Antimalware: While macOS has robust built-in security, an additional layer of protection from reputable antivirus software can catch threats that slip through.
- Regular Backups: In the worst-case scenario, having a Time Machine backup ensures you can restore your system even if an installation goes awry or introduces malware. This is also a crucial “Money” consideration, as data loss can be financially devastating for businesses and individuals.
Optimizing Your Mac’s Performance
A cluttered Applications folder and an accumulation of old, unused software can gradually slow down your Mac. Regular maintenance contributes directly to your productivity and the longevity of your device.
Tips for Optimization:
- Periodically Review Apps: Go through your Applications folder every few months and uninstall anything you no longer use.
- Monitor Startup Items: Many apps configure themselves to launch at startup. Go to System Settings > General > Login Items to disable unnecessary ones, which can significantly speed up boot times.
- Keep Your Desktop Clean: While not directly software installation, a cluttered desktop uses system resources. Move files into organized folders.
- Manage Browser Extensions: Browser extensions, while useful, can consume memory and even track your activity. Periodically review and remove those you don’t need.
Conclusion
Installing software on your Mac doesn’t have to be a daunting task. By understanding the different installation methods—from the secure simplicity of the Mac App Store to the power of .dmg and .pkg files, and even the efficiency of command-line tools like Homebrew—you can ensure a smooth, secure, and efficient experience.
Beyond the initial setup, adopting best practices for updates, uninstallation, and digital security is crucial. These habits not only maintain the peak performance of your investment in Apple technology but also protect your digital life from potential threats. Your Mac is a powerful tool, and by mastering its software management, you unlock its full potential for productivity, creativity, and secure digital exploration. Keep your system clean, updated, and organized, and your Mac will continue to serve you as a reliable partner in all your tech endeavors.
aViewFromTheCave is a participant in the Amazon Services LLC Associates Program, an affiliate advertising program designed to provide a means for sites to earn advertising fees by advertising and linking to Amazon.com. Amazon, the Amazon logo, AmazonSupply, and the AmazonSupply logo are trademarks of Amazon.com, Inc. or its affiliates. As an Amazon Associate we earn affiliate commissions from qualifying purchases.