In the dynamic world of technology, where efficiency and access to robust tools are paramount, macOS stands as a preferred platform for developers, designers, and power users alike. While Apple provides a sophisticated operating system, there often comes a point where native package management capabilities feel limited, especially for those accustomed to the rich ecosystems of Linux distributions. This is where Homebrew, affectionately known as “the missing package manager for macOS,” steps in as an indispensable utility.
Homebrew transforms your Mac into a powerhouse development environment, streamlining the process of installing, updating, and managing command-line tools, utilities, and applications that Apple doesn’t ship by default. Imagine needing to install Node.js, Python, Git, or even a database like PostgreSQL or Redis. Without Homebrew, you’d navigate through countless websites, download .pkg files, or compile from source – a tedious, time-consuming, and often messy affair. With Homebrew, these tasks become as simple as typing a single command into your terminal.
This comprehensive guide will walk you through everything you need to know about installing Homebrew on macOS. We’ll delve into its significance for enhancing productivity, demystify the installation process, equip you with the knowledge to troubleshoot common issues, and empower you to leverage Homebrew to its full potential. Whether you’re a seasoned developer, an aspiring coder, or simply a curious Mac user looking to expand your system’s capabilities, mastering Homebrew is a critical step towards optimizing your macOS experience and aligning with modern tech workflows.
What is Homebrew and Why Every Mac User Needs It
At its core, Homebrew is a free and open-source package management system that simplifies software installation on macOS. It operates from your terminal, allowing you to install a vast array of software packages with straightforward commands. Unlike traditional drag-and-drop installations, Homebrew compiles software from source (or fetches pre-compiled binaries) and manages dependencies, ensuring that all necessary components are present and correctly configured. This elegant solution prevents “dependency hell” and keeps your system tidy.
The philosophy behind Homebrew is to provide a simple, flexible, and powerful way to manage software that lives outside the Mac App Store. It installs packages to their own directories and then symlinks their files into /opt/homebrew (for Apple Silicon) or /usr/local (for Intel Macs), meaning your installations are self-contained and don’t interfere with system files. This design makes Homebrew incredibly robust and easy to maintain.
Streamlining Software Management
One of Homebrew’s most significant advantages is its ability to streamline software management. Before Homebrew, installing command-line utilities often involved manual downloads, complicated build instructions, and the potential for version conflicts. Homebrew abstracts away this complexity. Need a specific version of Python? brew install python@3.9. Want the latest version of Node.js? brew install node. The process is consistent, predictable, and remarkably fast. This centralized approach drastically reduces the time and effort spent on setup and maintenance, freeing you up to focus on your actual work.
Furthermore, Homebrew keeps track of all installed packages and their dependencies. This means updating software is also a breeze. A simple brew update followed by brew upgrade will fetch the latest definitions for all available packages and then update your currently installed packages to their newest versions, all with minimal user intervention. This efficiency is a cornerstone of modern development practices and contributes significantly to developer productivity.
A Gateway to Open-Source Tools
The open-source community is a vibrant hub of innovation, producing countless tools and utilities that drive technological progress. Homebrew acts as a direct gateway to this ecosystem for macOS users. From version control systems like Git to server technologies like Nginx, from monitoring tools like htop to text processing utilities like grep or awk, Homebrew provides easy access to a wealth of open-source software that might otherwise be challenging to install.
For many developers, access to these tools is non-negotiable. Whether you’re working on web development, data science, machine learning, or system administration, the right command-line utilities can dramatically enhance your workflow. Homebrew brings these essential tools to your fingertips, fostering an environment where experimentation and innovation can thrive without the friction of complex setup procedures. It empowers users to explore new technologies and integrate them seamlessly into their daily tasks, expanding the capabilities of their macOS machine far beyond its default offerings.
Enhancing Productivity for Developers and Power Users
For developers and power users, time is money. Every minute spent wrestling with installations or resolving dependency conflicts is a minute not spent coding, designing, or solving problems. Homebrew directly addresses this by making software provisioning incredibly efficient. By standardizing the installation process, it creates a consistent and reproducible development environment. This is particularly beneficial for teams where ensuring everyone has the same toolset and versions can prevent “it works on my machine” scenarios.
Beyond core developer tools, Homebrew also offers Homebrew Cask, an extension that allows you to install macOS applications (like Google Chrome, Visual Studio Code, Docker Desktop, or Spotify) with the same simple brew install --cask <app_name> command. This takes the convenience even further, extending the package manager’s reach from command-line utilities to graphical applications, making initial system setup or migrating to a new Mac significantly faster and less error-prone. This holistic approach to software management is a major boon for productivity, transforming system administration from a chore into a seamless background process.
Preparing Your macOS for Homebrew Installation
Before embarking on the Homebrew installation journey, a couple of essential prerequisites need to be met. These steps ensure that your macOS system has the necessary underlying components that Homebrew relies upon to function correctly. Fortunately, they are straightforward and usually involve a single command.
Essential Prerequisites: Xcode Command Line Tools
The primary prerequisite for Homebrew is the Xcode Command Line Tools. While Xcode itself is a large Integrated Development Environment (IDE) primarily used for iOS and macOS app development, the Command Line Tools package is a much smaller download that provides essential compilers (like gcc and clang), build utilities (like make), and other tools that Homebrew needs to compile and install software from source. Even if Homebrew often fetches pre-compiled binaries, these tools are still fundamental for resolving dependencies and ensuring compatibility.
To install the Xcode Command Line Tools, open your Terminal application (you can find it in Applications/Utilities or by searching with Spotlight). Then, execute the following command:
xcode-select --install
Upon running this command, a pop-up window will typically appear, asking you to confirm the installation. Click “Install” and agree to the license terms. The download and installation process may take several minutes, depending on your internet speed and system performance. Once completed, you won’t receive a direct “success” message in the terminal, but the tools will be available. If you already have them installed, the command might inform you that the command line tools are already installed, which is perfectly fine.
It’s crucial not to skip this step. Without these tools, Homebrew will likely encounter errors during its own installation or when you attempt to install other packages, leading to frustrating troubleshooting sessions.
Understanding Your Terminal Environment
Homebrew operates entirely through your macOS Terminal. For those new to the command line, understanding this environment is key. The Terminal provides a text-based interface to interact with your operating system, offering a powerful way to execute commands and manage files. Homebrew leverages this power to simplify complex tasks into concise commands.
Familiarize yourself with basic terminal navigation (e.g., cd for change directory, ls for list files) and how to copy-paste commands. While Homebrew makes things easy, comfort with the command line will enhance your experience. Modern macOS versions typically use Zsh as the default shell, though Bash is also common. Homebrew is compatible with both. Knowing which shell you’re using (type echo $SHELL in your terminal) can sometimes be helpful for advanced configurations, particularly when setting up your PATH environment variable, which tells your shell where to look for executable programs. For most users, Homebrew handles PATH setup automatically, but understanding its role is beneficial.
Step-by-Step: Installing Homebrew on macOS
With the prerequisites out of the way, you’re now ready for the main event: installing Homebrew itself. The beauty of Homebrew lies in its simplicity; the entire installation process often boils down to executing a single, well-crafted command.
The One-Liner Installation Command
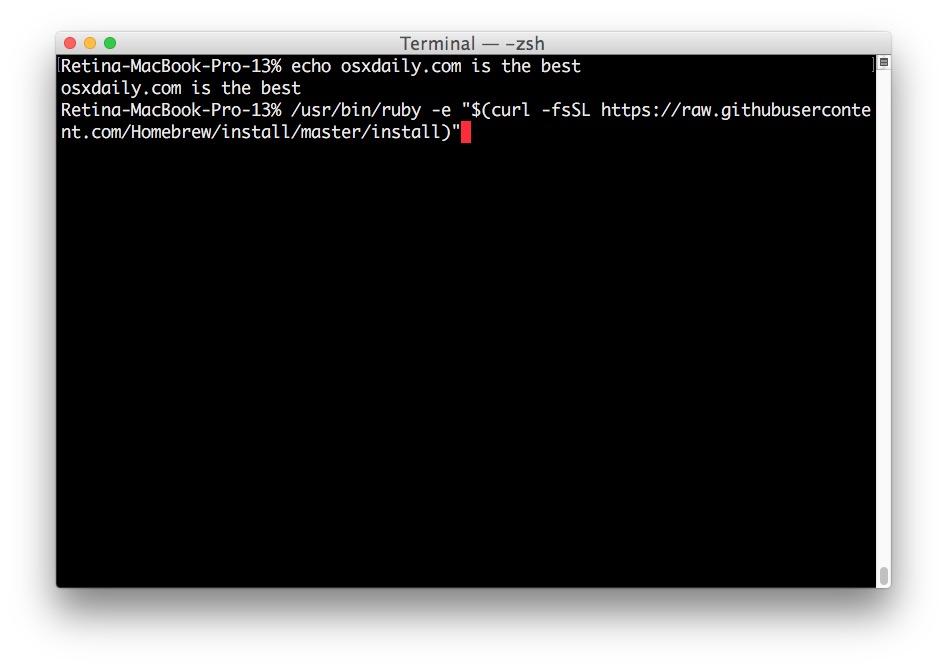
The official and recommended way to install Homebrew is by using the installer script provided by Homebrew’s maintainers. This script is fetched and executed directly from GitHub. It handles all the complexities, from downloading necessary files to setting up the correct directory structure and permissions.
Open your Terminal application (if you haven’t already). Then, copy and paste the following command and press Enter:
/bin/bash -c "$(curl -fsSL https://raw.githubusercontent.com/Homebrew/install/HEAD/install.sh)"
Let’s break down this command for clarity:
/bin/bash -c: This tells your system to execute the following string as a Bash command.curl -fsSL https://raw.githubusercontent.com/Homebrew/install/HEAD/install.sh: This part usescurl(a tool for transferring data with URLs) to fetch the installation script from Homebrew’s GitHub repository.-f: Fail silently (no output at all) on server errors.-s: Silent mode (don’t show progress meter or error messages).-S: Show error messages even if -s is used.-L: Follow redirects.
$(...): This is command substitution in Bash. It executes the command inside the parentheses and substitutes its output into the parent command. So, the output of thecurlcommand (the installation script itself) is then executed by/bin/bash.
Once you press Enter, the script will:
- Prompt for your password: This is necessary to grant Homebrew the required permissions to create its directories and modify system files (specifically for
/usr/localon Intel Macs, or/opt/homebrewfor Apple Silicon). - Display what it will install: It will list the directories it plans to create and modify. Review this, and if you agree, press
Return(Enter) to continue, or any other key to abort. - Download and install: It will then download the Homebrew core files and set up your environment. This process can take a few minutes.
Once the installation is complete, the script will usually print “Installation successful!” or similar messages, often followed by instructions on how to set up your PATH, which we will discuss next.
Verifying Your Homebrew Installation
After the installation script finishes, it’s crucial to verify that Homebrew has been installed correctly and is accessible from your terminal. Homebrew provides a couple of commands specifically for this purpose.
First, run brew doctor:
brew doctor
This command performs a self-check of your Homebrew installation. It inspects your environment for potential issues, missing dependencies, or misconfigurations. Ideally, brew doctor should report “Your system is ready to brew.” If it reports any warnings or errors, it will usually provide clear instructions on how to resolve them. Pay close attention to these messages and address any indicated problems before proceeding. Common warnings might relate to outdated versions of software or permissions issues.
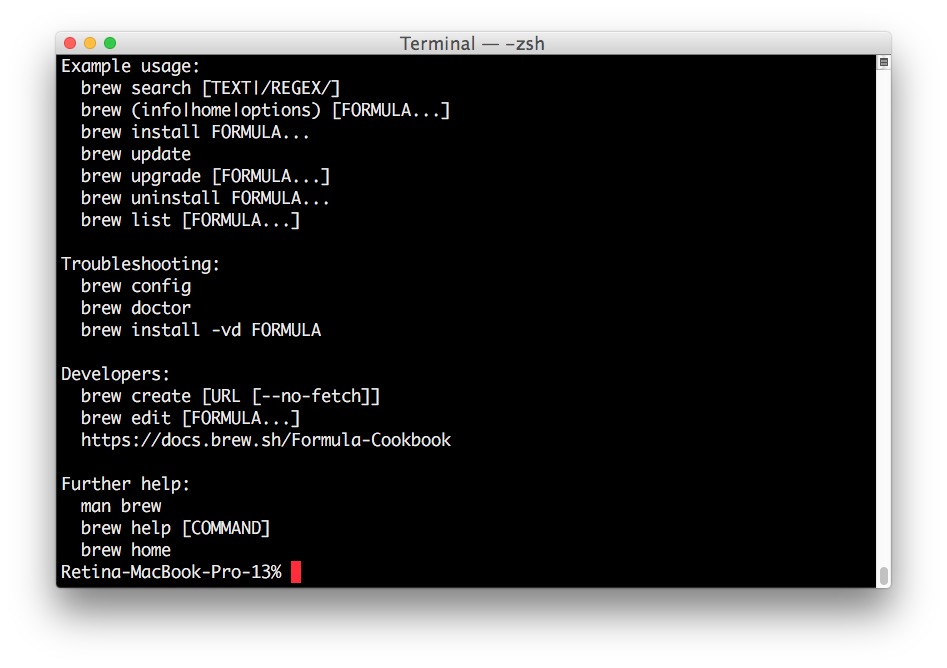
Next, you can simply type brew and press Enter to see a list of available Homebrew commands:
brew
If you see a comprehensive list of commands (e.g., install, update, upgrade, uninstall, search, etc.), it’s a strong indicator that Homebrew is correctly installed and recognized by your shell.
Adding Homebrew to Your PATH (if necessary)
For Homebrew commands like brew install to work directly from your terminal, the brew executable needs to be in your system’s PATH environment variable. The PATH is a list of directories that your shell searches through for commands.
The Homebrew installation script is generally smart enough to attempt to add its executable path to your shell’s configuration file (e.g., .zprofile, .zshrc, or .bash_profile). After installation, the script will often output explicit instructions like:
==> Next steps:
- Add Homebrew to your PATH in /Users/yourusername/.zprofile:
    echo 'eval "$(/opt/homebrew/bin/brew shellenv)"' >> /Users/yourusername/.zprofile
    eval "$(/opt/homebrew/bin/brew shellenv)"
You should follow these instructions precisely. The brew shellenv command outputs the necessary environment variables, including the updated PATH, to allow your shell to find Homebrew.
To ensure this change takes effect immediately without closing and reopening your terminal, you typically need to source your shell configuration file or execute the eval command directly:
# For Zsh (default on modern macOS):
echo 'eval "$(/opt/homebrew/bin/brew shellenv)"' >> ~/.zprofile
eval "$(/opt/homebrew/bin/brew shellenv)"

# For Bash (if you use it):
echo 'eval "$(/usr/local/bin/brew shellenv)"' >> ~/.bash_profile
eval "$(/usr/local/bin/brew shellenv)"
Note: The path /opt/homebrew/bin/brew is for Apple Silicon Macs, while /usr/local/bin/brew is for Intel Macs. Homebrew’s installer will tell you the correct path.
After executing these commands, you can verify your PATH by typing echo $PATH. You should see /opt/homebrew/bin (or /usr/local/bin) listed among the directories. If you don’t perform this step, your system might not recognize the brew command, leading to “command not found” errors even if Homebrew is installed.
Leveraging Homebrew: Your First Steps and Beyond
With Homebrew successfully installed and configured, you’ve unlocked a new realm of possibilities for your macOS system. Now, let’s explore how to use this powerful package manager to install, manage, and maintain your software.
Installing Your First Package
The core function of Homebrew is installing packages. The command is remarkably simple: brew install <package_name>. Let’s try installing a couple of common and useful utilities.
Example 1: Installing wget
wget is a popular command-line utility for retrieving files from the internet. macOS does not ship with it by default.
brew install wget
Homebrew will download the wget formula (a Ruby script that describes how to install a package), fetch the source or pre-compiled binary, and install it. After installation, you can verify it by typing wget --version.
Example 2: Installing htop
htop is an interactive process viewer for Unix-like systems, offering a more user-friendly interface than the default top command.
brew install htop
Once installed, simply type htop in your terminal to launch it and monitor your system’s processes in real-time.
Remember, if you want to install a graphical application, you’ll use brew install --cask <app_name>. For instance:
brew install --cask google-chrome
brew install --cask visual-studio-code
This will download and install the respective applications into your Applications folder, just like a manual download, but with the convenience of command-line management.
Keeping Your Brew Environment Up-to-Date
One of Homebrew’s most powerful features is its ability to easily keep your installed software up to date. Regularly updating your Homebrew environment ensures you have the latest features, bug fixes, and security patches for all your managed packages.
The update process typically involves two commands:
-
brew update: This command updates Homebrew itself and all its formulae (package definitions). It fetches the latest changes from Homebrew’s GitHub repository, ensuring that when you later runbrew upgrade, Homebrew knows about the most recent versions of software available.brew updateIt’s a good practice to run
brew updateregularly, perhaps once a week or before installing any new package. -
brew upgrade: After updating the formulae, this command upgrades all your currently installed packages that have newer versions available.
bash

brew upgrade
If you only want to upgrade a specific package, you can specify its name:brew upgrade <package_name>.
You can also combine these into a single, comprehensive update and upgrade routine that many power users run regularly:
brew update && brew upgrade && brew cleanup
The brew cleanup command removes old versions of installed packages and stale lock files, helping to keep your system tidy and reclaim disk space.
Uninstalling Packages
Just as easily as you can install software with Homebrew, you can remove it. If you no longer need a particular package, simply use the brew uninstall command.
brew uninstall wget
Homebrew will remove the package and its symlinks, along with any dependencies that are no longer needed by other installed packages. If you uninstalled a Cask application, you would use:
brew uninstall --cask google-chrome
This cleans up the application and its associated files installed by Homebrew. This granular control over software installation and uninstallation prevents your system from accumulating digital clutter, maintaining its performance and stability over time.
Practical Examples for Daily Use
Homebrew’s utility extends far beyond simple installation. Here are a few practical examples demonstrating its breadth:
- Developer Tooling: Install
git,node(Node.js),python(Python 3),php,ruby,go,rust, and various database clients likepsqlfor PostgreSQL ormysql-client. - System Utilities: Get
treefor viewing directory structures,ncdufor disk usage analysis,tmuxorscreenfor terminal multiplexing, andzsh-completionsfor enhanced shell autocompletion. - Networking Tools: Install
nmapfor network scanning oriredisfor Redis interaction. - Security Tools: Access tools like
nmaporjohn-the-ripper(for advanced users) for security auditing. - Productivity Applications (via Cask): Manage desktop apps like
firefox,slack,spotify,vlc,docker,forklift, and even development environments likeiterm2oralacritty.
The sheer volume of available packages, accessible through brew search <keyword>, highlights Homebrew’s versatility. It truly centralizes your software management, turning a potentially chaotic collection of individual installations into a coherent, manageable system.
Troubleshooting Common Homebrew Installation Issues
While Homebrew is generally robust, occasional issues can arise during installation or usage. Understanding how to diagnose and resolve these problems is an important part of becoming a proficient Homebrew user. The brew doctor command is your first and best friend for troubleshooting.
Permission Errors
One of the most frequent issues users encounter, especially on older macOS versions or after manual tinkering with system directories, are permission errors. These typically manifest as “permission denied” messages when Homebrew tries to create or modify files in its installation directory (e.g., /usr/local on Intel Macs or /opt/homebrew on Apple Silicon).
Common Symptoms:
Error: Permission deniedduring installation.Failed to install formula!with permission warnings.
Solutions:
- Run
brew doctor: It will often highlight specific directories with incorrect permissions and suggestchmodorchowncommands. - Fix directory permissions (Intel Macs): For
/usr/local(Intel Macs), you might need to ensure your user owns the Homebrew directories.
bash

sudo chown -R $(whoami) /usr/local/*
Caution: Usesudocommands with care, as incorrect usage can affect system stability. - Fix directory permissions (Apple Silicon Macs): For
/opt/homebrew(Apple Silicon Macs), similar commands might be needed, but it’s less common for these to be an issue if Homebrew installed correctly.
bash

sudo chown -R $(whoami) /opt/homebrew
- Check for existing, conflicting installations: Sometimes, previous manual installations of software into
/usr/localcan interfere with Homebrew.brew doctorshould alert you to these.
Network or Firewall Problems
Homebrew relies heavily on an active internet connection to download its installer script, formulae, and packages from GitHub and other sources. Network connectivity issues or restrictive firewalls can prevent Homebrew from functioning correctly.
Common Symptoms:
curl: (7) Couldn't connect to hostduring the initial installation.Error: Download failed!orConnection refusedwhen trying to install packages.
Solutions:
- Check your internet connection: Ensure you have a stable connection.
- Verify firewall settings: If you use a corporate network or a strict personal firewall, ensure that connections to
raw.githubusercontent.comand other GitHub domains are not blocked. You might need to temporarily disable your firewall (with caution) or adjust its rules. - Proxy configuration: If you are behind a corporate proxy, you might need to configure
curlto use it. This usually involves setting environment variables likeHTTP_PROXYandHTTPS_PROXYin your shell configuration file. Consult your IT department or proxy documentation for details.
Reinstalling Homebrew
In rare cases where your Homebrew installation becomes severely corrupted or you’re experiencing persistent, unresolvable issues, a complete reinstallation might be the quickest path to recovery.
Steps for Reinstallation:
- Run the uninstall script: Homebrew provides an uninstall script that attempts to clean up everything it installed.
bash

/bin/bash -c "$(curl -fsSL https://raw.githubusercontent.com/Homebrew/install/HEAD/uninstall.sh)"
This script will ask for confirmation and might prompt for your password. - Manually remove remaining files (if necessary): After running the uninstall script, you might want to manually check and remove any lingering Homebrew directories, especially
/usr/local/Homebrew,/opt/homebrew, and their contents, if the script didn’t remove them completely. Userm -rfwith extreme caution. - Re-run the installation command: Once thoroughly removed, follow the installation steps outlined earlier in this guide.
Remember, patience and careful reading of brew doctor output are your best allies when troubleshooting. The Homebrew community is also very active, so searching online forums or the Homebrew GitHub issues page can often yield solutions for specific problems.

Conclusion: Empowering Your macOS Experience with Homebrew
You’ve now successfully navigated the installation of Homebrew, transforming your macOS machine into a significantly more capable and efficient environment. From simplifying the installation of essential developer tools to streamlining the management of countless open-source utilities and even graphical applications via Cask, Homebrew stands as a testament to the power of well-designed, community-driven software.
In the fast-evolving landscape of technology, staying current with the right tools is not just a convenience; it’s a necessity. Homebrew ensures that macOS users, whether they are budding coders, seasoned developers, or simply tech enthusiasts, have effortless access to the software they need to innovate, create, and be productive. It embodies the spirit of open source, providing a flexible and robust platform that empowers users to customize their systems precisely to their specifications.
By embracing Homebrew, you’re not just installing a package manager; you’re adopting a smarter, cleaner, and more efficient workflow that aligns perfectly with modern software development practices. Take the time to explore its vast ecosystem using brew search and discover the incredible array of tools at your disposal. Keep your system updated with brew update && brew upgrade, and regularly brew cleanup to maintain a pristine environment.
The journey into leveraging your Mac’s full potential has just begun. With Homebrew as your trusted companion, you are well-equipped to tackle any technical challenge, explore new technologies with ease, and truly unlock the power hidden within your macOS operating system. Happy brewing!
aViewFromTheCave is a participant in the Amazon Services LLC Associates Program, an affiliate advertising program designed to provide a means for sites to earn advertising fees by advertising and linking to Amazon.com. Amazon, the Amazon logo, AmazonSupply, and the AmazonSupply logo are trademarks of Amazon.com, Inc. or its affiliates. As an Amazon Associate we earn affiliate commissions from qualifying purchases.