The Amazon Fire TV Stick has revolutionized the way many of us consume media. This compact, plug-and-play device transforms any television with an HDMI port into a smart TV, granting you access to a vast universe of streaming services, apps, games, and more. Whether you’re a seasoned tech enthusiast or just looking to upgrade your home entertainment setup without buying a brand-new TV, understanding how to install a Fire Stick is a fundamental skill. This comprehensive guide will walk you through every step, from unboxing your device to navigating its features and troubleshooting common issues.
Getting Started: Unboxing and Setup
The journey to unlocking a world of entertainment begins with the unboxing and initial setup of your Fire Stick. Amazon has designed this process to be as user-friendly as possible, ensuring that even those with limited technical experience can have their device up and running in minutes.
What’s Inside the Box?
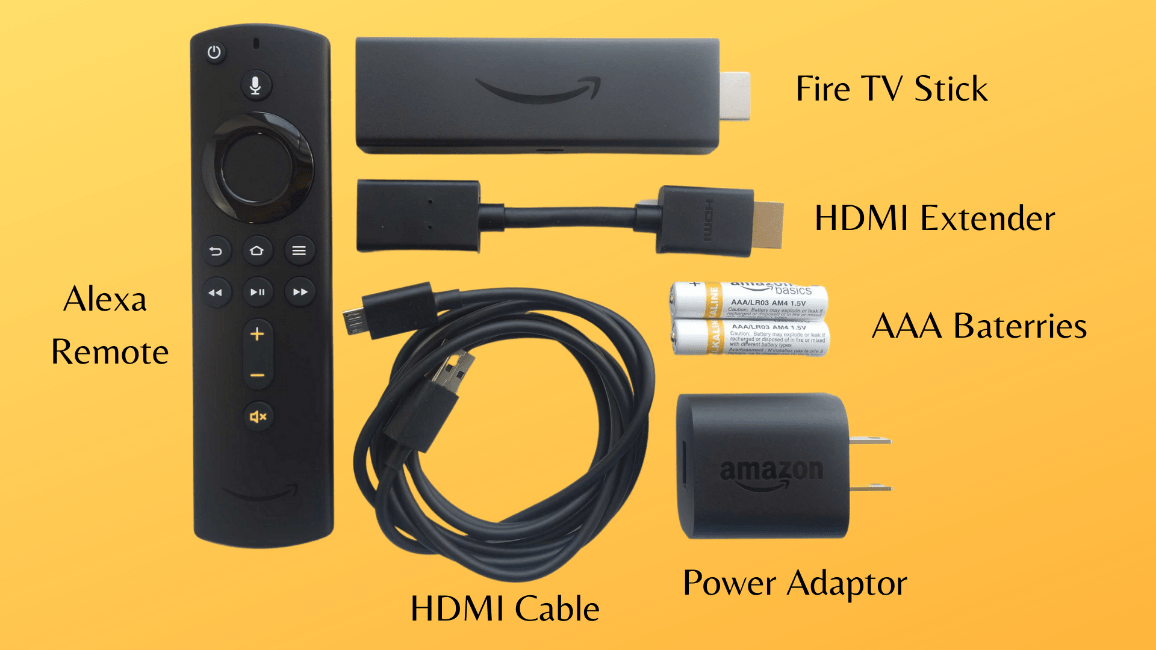
Upon opening your Fire Stick packaging, you’ll typically find a few essential components. These usually include:
- The Fire TV Stick device: This is the core of your setup, a small stick that plugs directly into your TV’s HDMI port.
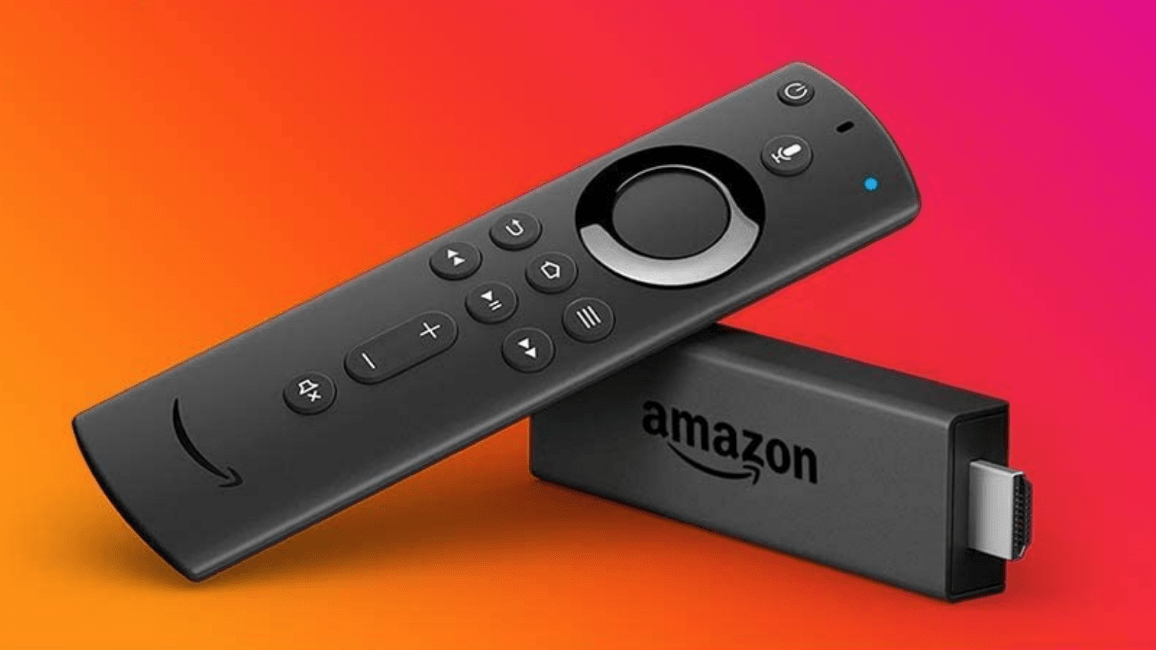
- Amazon Fire TV Remote: Designed for intuitive navigation, this remote is your primary tool for controlling the Fire Stick. It often comes with voice control capabilities via Alexa.
- HDMI Extender Cable: While not always necessary, this cable can be useful if your TV’s HDMI port is difficult to access or if you experience Wi-Fi signal issues due to the Fire Stick being too close to the back of the TV.
- Power Adapter and USB Cable: The Fire Stick requires a constant power source to function.
- Quick Start Guide: This booklet provides a basic overview of the installation process and essential features.
It’s important to have these items readily available before you begin the installation.
Essential Prerequisites
Before you can dive into the installation, ensure you have the following in place:
- A Television with an HDMI Port: This is non-negotiable. Your Fire Stick connects via HDMI. Most modern TVs have multiple HDMI ports, so choose one that is easily accessible.
- A Stable Wi-Fi Network: The Fire Stick relies entirely on your internet connection to stream content. A strong and reliable Wi-Fi signal is crucial for a smooth viewing experience. Make sure you know your Wi-Fi network name (SSID) and password.
- An Amazon Account: You’ll need an active Amazon account to set up and register your Fire Stick. If you don’t have one, you can create one for free on the Amazon website.
Plugging In Your Fire Stick
This is the most straightforward part of the installation.
- Locate an HDMI Port: Find an available HDMI port on your television. They are usually labeled “HDMI 1,” “HDMI 2,” etc.
- Connect the Fire Stick: Gently insert the Fire Stick directly into the chosen HDMI port. Ensure it’s seated firmly.
- Connect the Power: Using the provided USB cable and power adapter, plug the USB cable into the Fire Stick and the other end into the power adapter. Then, plug the power adapter into a wall outlet. For optimal performance, it’s highly recommended to use the wall outlet and not to power the Fire Stick via a USB port on your TV, as TV USB ports may not provide sufficient or consistent power.
- Turn on Your TV: Power on your television.
- Select the Correct HDMI Input: Using your TV remote, cycle through the input or source options until you find the HDMI input where you connected the Fire Stick. This will display the Fire Stick’s setup screen.
Navigating the Setup Process
Once your Fire Stick is powered on and displaying on your TV, you’ll be guided through a series of setup steps. This is where your Amazon account and Wi-Fi credentials come into play.
Connecting to Wi-Fi
The first major step after powering up is connecting your Fire Stick to your home Wi-Fi network.
- Network Selection: Your Fire Stick will scan for available Wi-Fi networks. A list of detected networks will appear on your screen.
- Choose Your Network: Select your home Wi-Fi network from the list.
- Enter Your Password: Using the on-screen keyboard and your Fire TV remote, carefully enter your Wi-Fi password. Pay close attention to capitalization and special characters.
- Connect: Once the password is entered, select “Connect.” Your Fire Stick will then attempt to establish a connection to your network.
If the connection is successful, you’ll see a confirmation message. If it fails, double-check your password and ensure you’ve selected the correct network. Sometimes, restarting your router can also resolve connectivity issues.
Registering Your Fire Stick
To unlock all the features of your Fire Stick, you need to register it with your Amazon account.
- Sign In to Your Amazon Account: You’ll be prompted to sign in using your Amazon email address or phone number and password.
- Enter Credentials: Use the on-screen keyboard to enter your Amazon account details.
- Confirmation: Once logged in, your Fire Stick will be linked to your account. This allows Amazon to personalize your experience, manage your subscriptions, and track your purchases.
If you encounter issues signing in, ensure you are using the correct credentials for your Amazon account. You may also have the option to create a new Amazon account if you don’t have one.
Device and Software Updates
After successful registration, your Fire Stick will likely check for and install any available software updates. This is a critical step as updates often include new features, performance improvements, and security patches.
- Automatic Updates: The Fire Stick is designed to download and install updates automatically when connected to the internet.
- Manual Checks: You can also manually check for updates by navigating to Settings > My Fire TV > About > Check for Updates.
It’s a good practice to allow these updates to complete fully before proceeding to explore the Fire Stick’s interface. This might take a few minutes, depending on the size of the update and your internet speed.
Exploring Your Fire Stick Interface and Features

Once the initial setup and updates are complete, you’ll be greeted by the Fire TV home screen. This is your central hub for accessing all the content and applications available on your device.
The Home Screen and Navigation
The Fire TV home screen is organized into several sections:
- Your Apps & Channels: This prominent section displays your most frequently used apps and channels. You can customize this by pinning your favorite apps for quicker access.
- Recommendations: Amazon’s algorithms will suggest movies, TV shows, and apps based on your viewing history and interests.
- Categories: Browse through various genres like Movies, TV Shows, Apps, Games, Music, and more.
- Search Bar: A powerful tool to find specific titles, actors, directors, or apps. You can also use the voice search function on your remote.
Navigating the Interface:
- Remote Control: Your Fire TV remote is your primary navigation tool. The circular directional pad allows you to move up, down, left, and right. The center button is for selection, and the back button (often an arrow) takes you to the previous screen. The home button brings you back to the main screen.
- Voice Control (Alexa): Many Fire TV remotes feature a microphone button. Press and hold this button, then speak your command or query into the remote. You can ask Alexa to find a specific movie, play a song, launch an app, or even control compatible smart home devices.
Installing and Managing Apps
The true power of the Fire Stick lies in its ability to run a vast array of applications.
Installing Apps
- Access the Appstore: From the home screen, navigate to the “Apps” section or use the search bar to find “Appstore.”
- Browse or Search: You can browse through categories or use the search function to find specific apps you want to install (e.g., Netflix, Hulu, Disney+, YouTube, Spotify, Twitch, etc.).
- Select and Download: Once you find an app, select it. You’ll see details about the app, including reviews and screenshots. Click “Get” or “Download” to begin the installation.
- Installation: The app will download and install automatically. You’ll see a progress indicator.
- Launch: After installation, you’ll have the option to “Launch” the app immediately or to “Done.”
Managing Apps
- Moving Apps: To rearrange the order of apps on your home screen, highlight an app, press the Menu button (the button with three horizontal lines on your remote), and select “Move.” Then, use the directional pad to position it and press the select button.
- Uninstalling Apps: If you need to free up space or no longer use an app, highlight it, press the Menu button, and select “Uninstall.”
- Clearing App Cache/Data: For apps that are misbehaving or running slowly, you can clear their cache and data. Go to Settings > Applications > Manage Installed Applications, select the app, and choose “Clear Cache” or “Clear Data.” Be aware that clearing data will reset the app to its default state, meaning you might need to log in again.
Setting Up Streaming Services
Once your favorite streaming apps are installed, you’ll need to sign in to your respective accounts for each service.
- Launch the App: Select the app you wish to use from your home screen.
- Sign In: You will be prompted to sign in with your username and password for that particular streaming service.
- Browse and Watch: After signing in, you can browse the content library of that service and start streaming.
This process is generally consistent across all streaming apps available on the Fire Stick.
Troubleshooting Common Fire Stick Issues
Even with its user-friendly design, you might occasionally encounter minor hiccups with your Fire Stick. Here are solutions to some common problems.
Fire Stick Not Responding or Freezing
- Restart Your Fire Stick: The simplest solution is often the most effective. Unplug the power adapter from the wall outlet, wait for 30 seconds, and then plug it back in. This is akin to restarting a computer and can resolve many temporary glitches.
- Check Power Connection: Ensure the power adapter is securely plugged into both the Fire Stick and the wall outlet.
Wi-Fi Connection Problems
- Check Router: Restart your Wi-Fi router by unplugging it for 30 seconds and plugging it back in.
- Signal Strength: Ensure your Fire Stick is within a reasonable range of your Wi-Fi router. Walls and other electronic devices can interfere with the signal. If possible, try using the HDMI extender cable to move the Fire Stick away from the back of the TV, which can sometimes improve Wi-Fi reception.
- Re-enter Password: Go to Settings > Network and try reconnecting to your Wi-Fi network, carefully re-entering your password.
Apps Not Loading or Crashing
- Restart the App: Go to Settings > Applications > Manage Installed Applications, select the problematic app, and choose “Force Stop.” Then, try launching it again.
- Clear App Cache and Data: As mentioned earlier, go to Settings > Applications > Manage Installed Applications, select the app, and choose “Clear Cache” or “Clear Data.”
- Uninstall and Reinstall: If the issue persists, uninstall the app and then reinstall it from the Appstore.
- Check for Updates: Ensure both the Fire Stick’s system software and the app itself are up to date.
Remote Not Working
- Check Batteries: Replace the batteries in your remote. Low battery power is a common culprit.
- Re-pair the Remote: If you have a newer Fire TV remote, you might need to re-pair it with the Fire Stick. Press and hold the Home button for at least 10 seconds. If that doesn’t work, go to Settings > Remotes & Bluetooth Devices > Amazon Fire TV Remotes > Select your remote > Unpair. Then, press and hold the Home button again for 10 seconds to re-pair.
- Bluetooth Interference: Ensure there are no other Bluetooth devices causing interference.
No Picture or Sound
- Check HDMI Connection: Ensure the Fire Stick is securely plugged into the HDMI port, and the HDMI cable (if using an extender) is also properly seated.
- Correct HDMI Input: Verify that your TV is set to the correct HDMI input source.
- Try a Different HDMI Port: Connect the Fire Stick to a different HDMI port on your TV to rule out a faulty port.
- Check TV Settings: Ensure your TV’s volume is turned up and not muted.
By following these steps, you can effectively install your Amazon Fire Stick, navigate its intuitive interface, and resolve most common issues, ensuring a seamless and enjoyable home entertainment experience. Your gateway to a world of streaming content is now officially open!
aViewFromTheCave is a participant in the Amazon Services LLC Associates Program, an affiliate advertising program designed to provide a means for sites to earn advertising fees by advertising and linking to Amazon.com. Amazon, the Amazon logo, AmazonSupply, and the AmazonSupply logo are trademarks of Amazon.com, Inc. or its affiliates. As an Amazon Associate we earn affiliate commissions from qualifying purchases.