
In the vast landscape of operating systems, Windows 11 stands as a testament to modern computing, offering a sleek interface, enhanced security features, and a refined user experience. However, even the most robust systems can, over time, accumulate digital clutter, unwanted software, and residual files that impede performance. This is where the concept of a “clean install” becomes not just a maintenance task, but a powerful strategy for revitalizing your PC. A clean install is more than just an upgrade; it’s a complete overhaul, wiping your drive clean and installing Windows 11 from scratch. It’s akin to giving your computer a brand new brain, free from the accumulated baggage of years past.
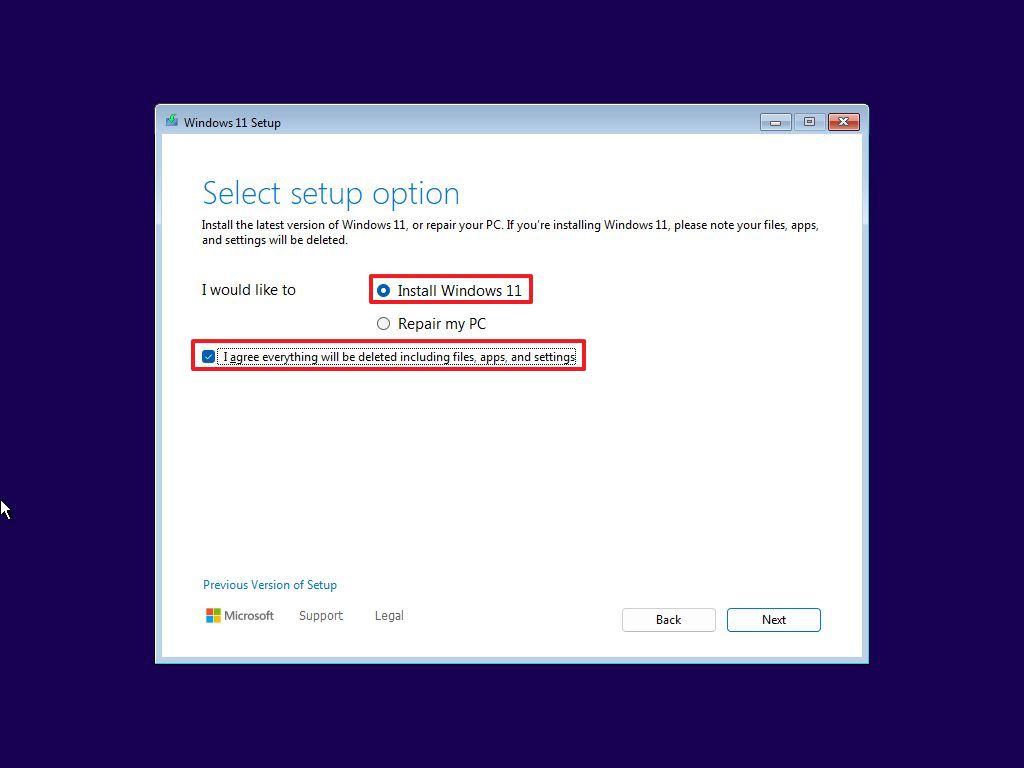
This comprehensive guide will walk you through every step of performing a clean installation of Windows 11. Whether you’re a seasoned tech enthusiast or someone looking to breathe new life into an aging machine, understanding this process is invaluable. From meticulous preparations to the final touches of post-installation optimization, we’ll ensure you have all the knowledge to transform your computing experience, making your Windows 11 system faster, more stable, and more secure than ever before. Embrace the power of a fresh start, and unlock the true potential of your hardware with a pristine Windows 11 installation.
Why a Clean Install is Your PC’s Best Friend
The decision to perform a clean install isn’t merely about fixing a broken system; it’s often a proactive step to ensure optimal performance and longevity. While regular updates and software maintenance are crucial, they can’t always undo the deep-seated issues that accumulate over time. A clean install, by its very nature, addresses these problems at their root, providing a foundation for a superior computing experience.
Revitalizing Performance and Stability
Over months or years of use, your Windows installation can become sluggish. This slowdown is often attributed to several factors:
- Bloatware and Unnecessary Software: Every application you install, even those you uninstall, can leave behind residual files, registry entries, and background services that consume system resources. Over time, these accumulate, bogging down your PC. A clean install removes all third-party software and only installs the core operating system, giving you a truly fresh start.
- Fragmented Registry and Corrupted Files: The Windows Registry, a hierarchical database that stores low-level settings for the operating system and applications, can become fragmented or corrupted. Similarly, system files can become damaged due to improper shutdowns, malware, or software conflicts. These issues can lead to slower boot times, application crashes, and general instability. A clean install rebuilds the registry and ensures all system files are pristine.
- Driver Conflicts and Outdated Components: Installing and uninstalling various hardware components or drivers can sometimes lead to conflicts. While Windows is generally good at managing these, a fresh installation guarantees that only the latest, most compatible drivers are installed, reducing the likelihood of system crashes and hardware malfunctions. The result is a system that boots faster, launches applications more quickly, and responds with greater fluidity, making your daily computing tasks significantly more enjoyable.
Troubleshooting Persistent Issues
Sometimes, your PC might suffer from problems that seem insurmountable through conventional troubleshooting. These could range from recurring blue screen errors, inexplicable application crashes, or persistent performance dips that defy diagnosis. Malware infections, especially rootkits or advanced persistent threats, can embed themselves deep within the operating system, making them incredibly difficult to remove with standard antivirus software. In such scenarios, a clean install acts as the ultimate reset button. By completely erasing the existing operating system and its associated data, you effectively eliminate any deeply entrenched malware, corrupted system files, or intractable software conflicts that were causing the issues. It’s a guaranteed way to start anew, free from the digital ghosts of problems past, ensuring a secure and stable environment going forward.
A Fresh Start for a New Chapter
Beyond troubleshooting or performance boosts, a clean install is invaluable in specific scenarios:
- Selling or Donating Your PC: Before parting ways with your computer, a clean install is imperative for data security. It ensures that all your personal information is irretrievably erased, protecting your privacy and preventing potential identity theft.
- Major Hardware Upgrades: If you’re upgrading core components like your motherboard or processor, a clean install is often recommended. It helps avoid driver conflicts that can arise from significant hardware changes and ensures that the new components are fully utilized with a fresh OS environment.
- Personal Preference: Some users simply prefer the feeling of a brand new, unburdened operating system every year or two. It’s a routine maintenance step that keeps their digital workspace pristine and optimized, offering a consistent peak performance experience. It’s about taking control of your digital environment and ensuring it perfectly aligns with your current needs and preferences.
Essential Preparations Before You Begin
A clean install is a destructive process in the sense that it erases everything on the target drive. Therefore, thorough preparation is not just recommended, but absolutely critical. Skipping these steps can lead to irreversible data loss and a frustrating experience. Consider this phase as laying the groundwork for a smooth and successful transition to your newly installed Windows 11 system.
Safeguarding Your Data: The Non-Negotiable Backup
This is the most important step. Everything on your primary drive (where Windows is currently installed) will be erased. Take the time to back up all important files, documents, photos, videos, music, and any other data you cannot afford to lose.
- External Hard Drive: The most common and reliable method. Simply copy and paste your files, or use a backup utility.
- Cloud Storage: Services like OneDrive, Google Drive, Dropbox, or iCloud offer convenient ways to back up your files. Ensure all your critical data is synced before proceeding.
- Network Attached Storage (NAS): If you have a home server or NAS, this is an excellent option for large-scale backups.
- Disk Imaging Software: Tools like Macrium Reflect or Acronis True Image can create a complete image of your entire drive. While a clean install implies not restoring the OS itself, this can be useful for granular recovery of specific files or applications later, or for creating a “point of no return” safety net.
Double-check your backups. It’s always better to be safe than sorry. Consider unplugging your backup drive once the backup is complete to prevent accidental data loss during the installation process.
Meeting the Windows 11 System Requirements
Windows 11 has stricter system requirements than previous versions. Before you start, ensure your PC meets them:
- Processor: 1 GHz or faster with 2 or more cores on a compatible 64-bit processor or System on a Chip (SoC).
- RAM: 4 GB or greater.
- Storage: 64 GB or greater available storage.
- System Firmware: UEFI, Secure Boot capable.
- TPM: Trusted Platform Module (TPM) version 2.0.
- Graphics Card: Compatible with DirectX 12 or later with WDDM 2.0 driver.
- Display: High definition (720p) display that is greater than 9” diagonally, 8 bits per color channel.
- Internet Connection and Microsoft Account: Required for initial setup of Windows 11 Home edition and for ongoing feature updates.
You can use Microsoft’s PC Health Check app to verify compatibility, or simply check your BIOS/UEFI settings for TPM and Secure Boot status.
Acquiring Your Windows 11 Installation Media
You’ll need a bootable USB drive (at least 8GB) containing the Windows 11 installation files.
- Download the Windows 11 Media Creation Tool: Go to the official Microsoft website and download the “Create Windows 11 Installation Media” tool.
- Run the Tool: Insert your USB flash drive. Run the downloaded tool, accept the terms, select your language and edition (usually “Windows 11”), then choose “USB flash drive” as the media to use.
- Follow On-Screen Instructions: The tool will guide you through downloading the necessary files and creating the bootable USB. This process can take some time depending on your internet speed.
Alternatively, you can download the Windows 11 ISO file directly and use a third-party tool like Rufus to create a bootable USB. The Media Creation Tool is generally the most straightforward option.
Gathering Critical Drivers and Software Licenses
While Windows 11 typically has a good range of inbox drivers, it’s wise to be prepared, especially for network functionality.
- Network Drivers: Download your wired (Ethernet) and wireless (Wi-Fi) drivers from your motherboard manufacturer’s website (for desktops) or laptop manufacturer’s website (for laptops). Store them on a separate USB drive or your backup drive. Having these ensures you can connect to the internet immediately after installation to download other updates and drivers.
- Chipset Drivers: Also important, found on your manufacturer’s website.
- Graphics Drivers: While Windows will install a basic driver, download the latest dedicated graphics drivers for NVIDIA, AMD, or Intel from their respective websites for optimal performance.
- Other Essential Drivers: If you have specific hardware (e.g., sound cards, specialized peripherals), download their drivers as well.
- Software Licenses and Installers: Note down any product keys for software you plan to reinstall (e.g., Microsoft Office, Adobe Creative Suite). Store installers for critical applications on your backup drive or a separate USB to quickly get back up and running.
BIOS/UEFI Settings: Boot Order and Secure Boot Considerations
You’ll need to configure your computer to boot from the USB installation media.
- Access BIOS/UEFI: Restart your computer and repeatedly press the designated key (often F2, F10, F12, DEL, or ESC) to enter your BIOS/UEFI settings. The exact key varies by manufacturer.
- Change Boot Order: Navigate to the “Boot” section and set your USB drive as the first boot device.
- Secure Boot: Windows 11 requires Secure Boot to be enabled. Ensure it is enabled in your UEFI settings. If it’s disabled, enable it now. (Occasionally, for older systems or specific configurations, temporarily disabling it might be necessary to boot from USB, but re-enable it before starting the Windows installation).
- Save and Exit: Save your changes and exit the BIOS/UEFI. Your computer should now restart and boot from the USB drive.
The Step-by-Step Clean Installation Process
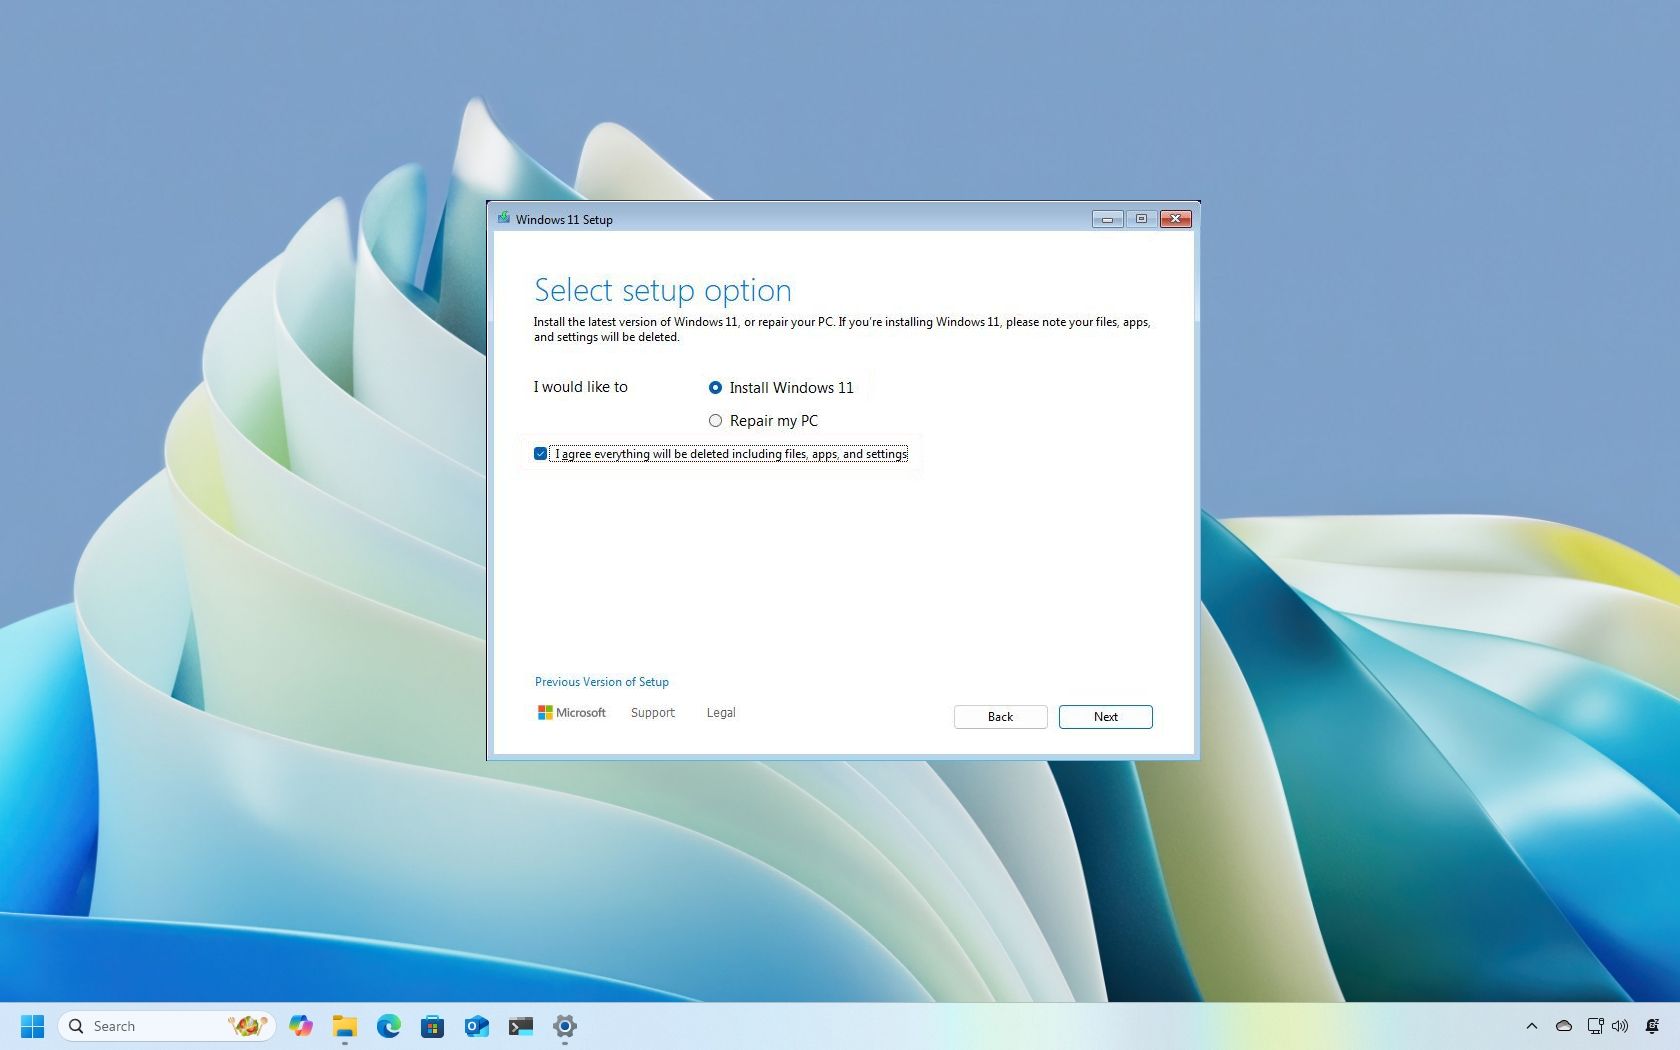
With all preparations meticulously completed, you’re ready to embark on the actual installation. This phase is largely guided by the Windows Setup Wizard, but critical decisions must be made, particularly regarding disk partitioning.
Initiating the Setup: Booting from Your USB Drive
Once you’ve configured your BIOS/UEFI to boot from your USB drive and restarted your computer, the process will begin:
- Press Any Key: You’ll likely see a message like “Press any key to boot from USB…” Press a key quickly to start the Windows 11 setup. If you miss it, your computer will boot into your old OS (if it exists) or try the next boot device. Restart and try again.
- Windows Logo Appears: After a moment, the Windows logo will appear, indicating that the setup program is loading.
Navigating the Windows Setup Wizard
The initial screens of the setup wizard are straightforward:
- Language, Time, and Keyboard: The first screen will ask you to select your language, time and currency format, and keyboard or input method. Make your selections and click “Next.”
- Install Now: On the next screen, click “Install now.”
- Product Key: You’ll be prompted to enter your product key.
- If you have a digital license tied to your Microsoft account, you can click “I don’t have a product key” and Windows will activate automatically once connected to the internet and signed in with your Microsoft account.
- If you have a physical product key, enter it now.
- If you’re reinstalling Windows 11 on a machine that previously had an activated Windows 10/11, you can generally skip this step and it will activate automatically.
- Operating System Selection: If your product key covers multiple editions (e.g., Home and Pro), you might be asked to choose which edition of Windows 11 you want to install. Select the appropriate one and click “Next.”
- License Terms: Read through the Microsoft Software License Terms, check the “I accept the license terms” box, and click “Next.”
Custom Installation and Disk Partitioning
This is the most crucial step where you decide where Windows 11 will be installed and how your storage drive will be managed. Proceed with extreme caution, as mistakes here can lead to data loss.
- Choose Installation Type: You’ll be presented with two options: “Upgrade: Install Windows and keep files, settings, and applications” or “Custom: Install Windows only (advanced).” For a clean install, you MUST choose “Custom: Install Windows only (advanced).”
- Where Do You Want to Install Windows?: This screen shows all available drives and their partitions.
- Identify Your Primary Drive: Carefully identify the drive where you want to install Windows 11. This is typically “Drive 0” and will usually have multiple partitions if an OS was previously installed.
- Delete Existing Partitions: To ensure a truly clean install, you need to delete all partitions associated with the old Windows installation. Select each partition on your target drive (e.g., “Drive 0 Partition 1,” “Drive 0 Partition 2,” etc. – including System Reserved, Recovery, and Primary partitions) and click the “Delete” button. Confirm each deletion carefully. This will erase all data on those partitions. Do NOT delete partitions on other drives if you have multiple storage devices (e.g., a separate data drive).
- Unallocated Space: After deleting all relevant partitions, your target drive will show as “Drive X Unallocated Space.”
- Create New Partition (Optional but Recommended): Select the “Unallocated Space” and click “New.” The setup wizard will automatically suggest the maximum size for a single partition. You can accept this to create one large partition for Windows and your data, or you can specify a smaller size if you want to create multiple partitions (e.g., one for the OS and one for data). Click “Apply.” Windows will often create additional small partitions (like System, MSR) automatically.
- Format: Select the newly created “Primary” partition where you intend to install Windows (usually the largest one) and click “Format.” This ensures the partition is ready for the new operating system.
- Select and Proceed: With the primary partition formatted and selected, click “Next.”
The Installation Phase: Patience is a Virtue
Once you click “Next” after partitioning, the actual installation of Windows 11 will begin.
- Copying Files: The setup wizard will start copying Windows files to your drive.
- Installing Features and Updates: It will then proceed to install features, drivers, and any available updates.
- Multiple Restarts: Your computer will restart several times during this phase. Do NOT press any key when prompted to boot from USB during these restarts. Let the computer boot from its internal drive to continue the installation.
This process can take anywhere from 15 to 45 minutes, depending on your system’s speed (especially storage type – SSDs are much faster than HDDs).
Initial Configuration: Personalizing Your Windows 11 Experience
After the final restart, you’ll be greeted by the Out-Of-Box Experience (OOBE), where you’ll configure your initial Windows 11 settings.
- Region: Select your country or region.
- Keyboard Layout: Choose your preferred keyboard layout. You can add a second layout if needed.
- Network Connection: Connect to a Wi-Fi network or plug in an Ethernet cable. An internet connection is required to proceed, especially for Windows 11 Home.
- Name Your Device (Optional): You can name your PC now or skip this step.
- Microsoft Account Sign-in: Sign in with your Microsoft account (Outlook.com, Live.com, Hotmail.com). If you don’t have one, you’ll be prompted to create one. This account will be linked to your digital license if you have one.
- PIN Creation: Create a PIN for faster and more secure sign-ins.
- Privacy Settings: Review and adjust the privacy settings (Location, Find my device, Diagnostic data, Inking & typing, Tailored experiences, Advertising ID). Microsoft recommends leaving most enabled for full functionality, but you can disable those you’re uncomfortable with.
- Customize Your Experience (Optional): Select how you plan to use your device (e.g., Gaming, Creativity, School, Business) for tailored suggestions.
- OneDrive Setup: You’ll be asked to set up OneDrive. You can choose to use it, restore files from a previous OneDrive backup, or decline for now.
- Windows Hello (Optional): Set up facial recognition or fingerprint login if your device supports it.
- Final Preparations: Windows will then spend a few minutes “getting things ready for you.” Do not turn off your PC during this phase.
Finally, you’ll arrive at your brand-new Windows 11 desktop!
Post-Installation: Optimizing Your Fresh Windows 11 System
Getting to the desktop is a significant milestone, but a few crucial steps remain to fully optimize and secure your fresh Windows 11 installation. This phase ensures your system is stable, up-to-date, and ready for your daily tasks.
Installing Essential Drivers
Although Windows 11 usually installs basic drivers, it’s vital to ensure you have the most current and compatible ones for optimal performance and stability.
- Start with Network Drivers: If you used the prepared network drivers, install them now. This will allow your PC to connect to the internet. If Windows automatically connected, you can skip this step, but it’s still a good idea to update from the manufacturer’s site.
- Chipset Drivers: Install the latest chipset drivers from your motherboard or laptop manufacturer’s website. These are crucial for overall system stability and performance.
- Graphics Drivers: Install the latest drivers for your dedicated graphics card (NVIDIA, AMD) or integrated graphics (Intel). This is particularly important for gaming, video editing, or any graphically intensive tasks.
- Other Drivers: Install any other specific drivers for audio, peripheral devices, or special features your hardware might have.
- Device Manager Verification: Open Device Manager (search for it in the Start menu) and check for any devices with yellow exclamation marks. These indicate missing or problematic drivers. Right-click on such devices and choose “Update driver,” or manually install the drivers you downloaded.
Updating Windows 11: Security and Feature Enhancements
Windows Update is your primary tool for keeping your system secure and up-to-date with the latest features and bug fixes.
- Check for Updates: Go to
Settings > Windows Updateand click “Check for updates.” - Install All Updates: Allow Windows to download and install all available updates. This might involve multiple restarts. Repeat the “Check for updates” process until no more updates are found. This ensures you have the latest security patches, performance improvements, and feature updates.
- Optional Updates: Sometimes, “Optional updates” might appear, offering additional drivers or non-critical updates. Review these and install them if they apply to your hardware or preferences.
Reinstalling Your Applications and Restoring Data
Now comes the process of getting your software back and your data in place.
- Prioritize Essential Applications: Start by installing your most frequently used applications (e.g., web browser, office suite, antivirus, communication apps). Use the installers you saved or download the latest versions from official websites.
- Restore Your Data: Copy your backed-up files from your external drive or cloud storage back to their appropriate locations on your primary drive (Documents, Pictures, Music, Videos folders). If you used cloud storage, let your chosen service (e.g., OneDrive) sync your files.
- Reconfigure Settings: For certain applications, you might need to reconfigure settings or log back into accounts.
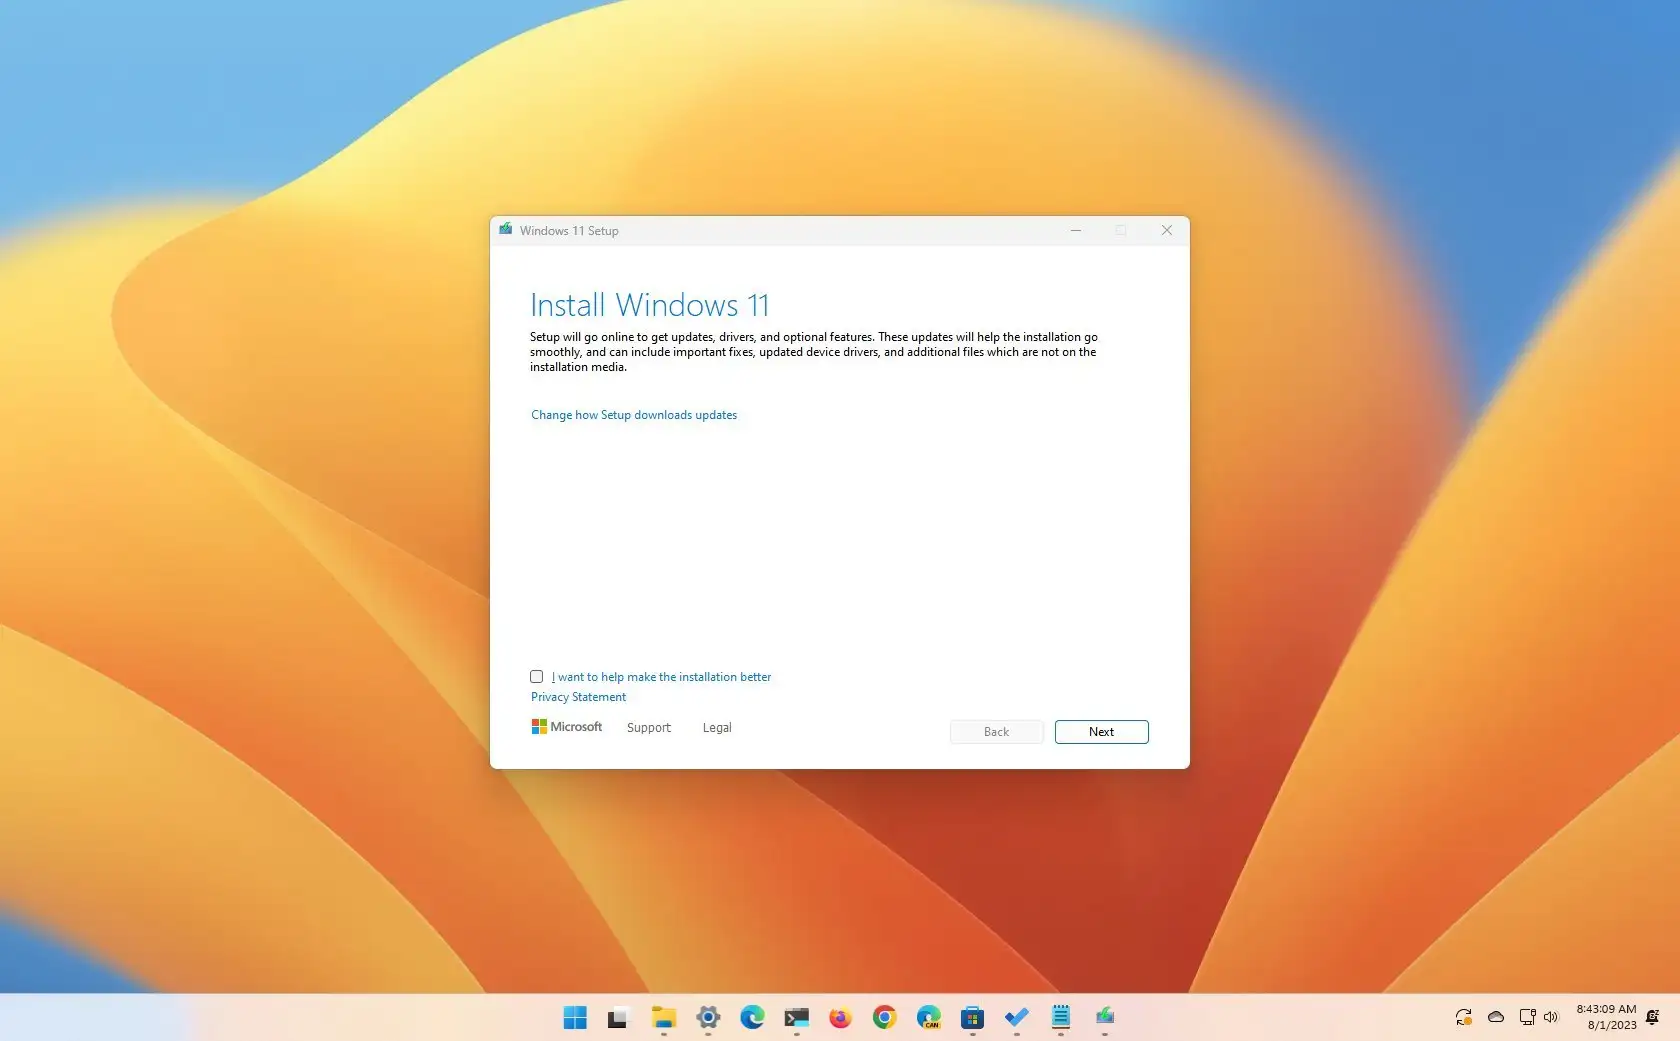
Fine-Tuning Settings and Personalization
After the core setup, take some time to personalize your Windows 11 experience to your liking.
- Privacy Settings: Revisit
Settings > Privacy & securityand adjust any settings you skipped during the OOBE. Configure app permissions, activity history, and diagnostic data to your comfort level. - Notifications & Focus Assist: Tweak notification settings in
Settings > System > Notificationsto minimize distractions. Configure Focus Assist to automatically silence notifications during specific times. - Power Options: Adjust power plans in
Settings > System > Power & batteryto optimize for performance or energy efficiency based on your usage. - Personalization: Customize your desktop background, themes, colors, and lock screen in
Settings > Personalization. Pin your favorite applications to the Taskbar and Start Menu for quick access. - Default Apps: Set your preferred default applications for web browsing, email, media playback, and more in
Settings > Apps > Default apps. - Storage Sense: Enable Storage Sense (
Settings > System > Storage) to automatically free up space by deleting temporary files and managing your Downloads folder.
By diligently following these post-installation steps, your Windows 11 system will not only be clean and fast but also secure, fully functional, and perfectly tailored to your needs. This renewed foundation will provide a significantly improved computing experience, ensuring stability and performance for the long haul.
A clean install of Windows 11 is a transformative process, akin to giving your computer a new lease on life. It’s an investment in performance, stability, and security that pays dividends in a smoother, more reliable computing experience. While the process demands careful preparation and attention to detail, the outcome is a pristine operating environment free from digital clutter and legacy issues. By following this guide, you’ve not only mastered a critical skill for maintaining your digital assets but have also unlocked the full potential of your Windows 11 device. Enjoy the speed, responsiveness, and peace of mind that comes with a truly fresh start.
aViewFromTheCave is a participant in the Amazon Services LLC Associates Program, an affiliate advertising program designed to provide a means for sites to earn advertising fees by advertising and linking to Amazon.com. Amazon, the Amazon logo, AmazonSupply, and the AmazonSupply logo are trademarks of Amazon.com, Inc. or its affiliates. As an Amazon Associate we earn affiliate commissions from qualifying purchases.