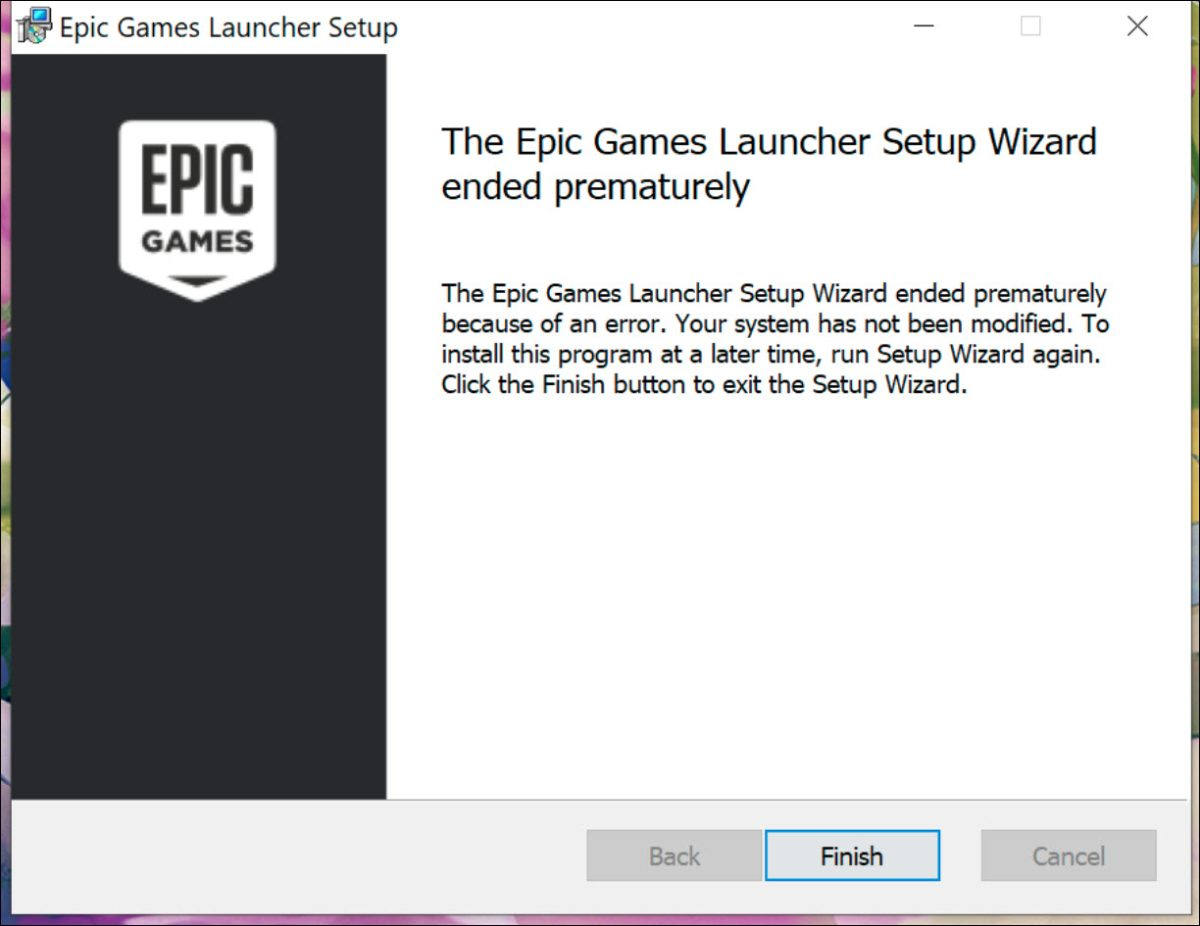
Encountering an error when trying to install the Epic Games Launcher can be an incredibly frustrating experience for any PC gamer or developer looking to access the vast library of titles, development tools, or free games offered by Epic. What should be a straightforward process can sometimes be riddled with unexpected roadblocks, ranging from simple oversight to deeper system conflicts. As a leading digital storefront and game developer, Epic Games aims for a seamless user experience, but the complexities of diverse PC configurations mean that issues can occasionally arise.
This comprehensive guide is designed to walk you through a series of troubleshooting steps, addressing the most common reasons why the Epic Games Launcher might refuse to install. Drawing on best practices in tech support and software deployment, we’ll cover everything from basic checks to more advanced system diagnostics. Our goal is not just to provide solutions, but to equip you with the knowledge to diagnose and resolve similar software installation challenges in the future, enhancing your digital security and productivity. Let’s dive in and get you back to gaming.
The Foundation: Initial Checks and Common Pitfalls
Often, the solution to an installation problem lies in the simplest of checks. Before delving into more complex system adjustments, it’s crucial to rule out the most common and easily rectifiable issues. These initial steps are fundamental to any software troubleshooting process and can save you a significant amount of time and effort. Ensuring your system meets the basic requirements and is prepared for the installation is the first line of defense against frustrating errors.
Verify System Requirements
One of the most overlooked reasons for installation failure is that the user’s system simply doesn’t meet the minimum requirements for the software. While the Epic Games Launcher itself is not particularly demanding, it’s essential to confirm that your PC configuration aligns with Epic’s specifications.
Epic Games Launcher Minimum System Requirements (as of current typical specifications):
- Operating System: Windows 7/8/10/11 (64-bit versions)
- Processor: Intel Core 2 Duo or AMD equivalent, 2.8 GHz or faster
- Memory: 4 GB RAM
- Graphics: DirectX 11 compatible graphics card (e.g., NVIDIA GeForce 7800 GTX or ATI Radeon HD 2900 XT)
- Storage: At least 2 GB of free disk space for the launcher itself, plus additional space for games.
To check your system specifications:
- For Windows 10/11: Right-click on the Start button, then select “System.” This will display your OS version, processor, and installed RAM.
- For Graphics Card: Open the “Run” dialog (Windows key + R), type
dxdiagand press Enter. Navigate to the “Display” tab to see your graphics card information.
If your system falls short of any of these requirements, it’s highly likely that the installation will fail or the launcher will not function correctly. Upgrading hardware or operating system, if feasible, would be necessary in such cases.
Run the Installer as Administrator
Windows operating systems have robust security features, and one common cause of installation issues is insufficient permissions. The Epic Games Launcher, like many other applications, often needs administrative privileges to write files to protected system directories, create registry entries, or modify network settings. Without these elevated permissions, the installer might encounter errors when trying to perform necessary actions, leading to a failed installation.
To run the installer as an administrator:
- Locate the downloaded Epic Games Launcher setup file (usually
EpicInstaller.msiorEpicInstaller.exe). - Right-click on the file.
- Select “Run as administrator” from the context menu.
- If prompted by User Account Control (UAC), click “Yes” to grant permission.
This simple step bypasses many permission-related obstacles and is often the quick fix many users need. It ensures that the installer has the necessary authority to make changes to your system, which is crucial for a successful software deployment.
Free Up Disk Space
While the Epic Games Launcher itself doesn’t require an enormous amount of space (typically around 2 GB for installation), your system’s primary drive (C: drive) needs sufficient free space not just for the application, but also for temporary files created during the installation process, system updates, and overall operating system functionality. A severely low amount of free disk space can prevent any new software installation, as the installer might not have room to unpack its components or create necessary temporary files.
To check and free up disk space:
- Check Free Space: Open “This PC” or “My Computer.” You’ll see your drives listed with their free space. Aim for at least 10-15 GB of free space on your primary drive for smooth operation.
- Free Up Space:
- Disk Cleanup: Search for “Disk Cleanup” in the Windows search bar. Select your C: drive, then choose “Clean up system files.” This tool can remove temporary files, old Windows update files, and more.
- Uninstall Unused Programs: Go to “Settings” > “Apps” > “Apps & features” (Windows 10/11) and uninstall any programs you no longer use.
- Move Large Files: Transfer large personal files (videos, photos) from your C: drive to another internal or external drive, or cloud storage.
Ensuring ample disk space is a good practice for overall system health and responsiveness, not just for installing new applications.
Clear Temporary Files and Cache
Over time, your operating system accumulates a significant amount of temporary files and cache data from various applications, web browsing, and system processes. While most are harmless, a corrupted or excessively large temporary file directory can sometimes interfere with new software installations. These files might confuse the installer, lead to corrupted unpacking of installation components, or simply clog up the system resources needed for the installation.
To clear temporary files:
- Open the “Run” dialog (Windows key + R).
- Type
%temp%and press Enter. This will open your user’s temporary files folder. - Select all files and folders within this directory (Ctrl + A) and press Delete. Skip any files that are currently in use.
- Repeat the process, but this time type
temp(without percent signs) in the “Run” dialog. This often accesses a different system-wide temporary folder. Delete its contents. - Empty your Recycle Bin.
Additionally, if you’ve previously tried to install the launcher, some residual files might remain. Clearing these ensures you’re starting with a clean slate for the new installation attempt, minimizing conflicts that could lead to installation failure.
Tackling Software Conflicts and System Interference
Once the basic checks are out of the way, if you’re still facing installation issues, the problem often lies deeper within your system, typically related to software conflicts or outdated components. These issues can stem from security software being overly protective, outdated system drivers, or even corrupted Windows components. Addressing these requires a slightly more nuanced approach, focusing on isolating the problem by temporarily disabling potential interferers or updating crucial system elements.
Temporarily Disable Antivirus and Firewall
Security software, while essential for digital security and protecting against malware and online threats, can sometimes be overzealous. Antivirus programs and firewalls are designed to monitor and block suspicious activity, and they might mistakenly flag parts of the Epic Games Launcher installer as a threat, preventing it from executing correctly or writing necessary files. This is particularly common with new software versions or less common installers.
To troubleshoot this:
- Disable Antivirus: Locate your antivirus icon in the system tray (usually near the clock). Right-click it and look for options like “Disable protection,” “Pause protection,” or “Exit.” Choose to disable it temporarily (e.g., for 10-15 minutes). Remember to re-enable it after attempting the installation.
- Disable Windows Firewall:
- Search for “Windows Defender Firewall” in the Windows search bar and open it.
- Click “Turn Windows Defender Firewall on or off” on the left-hand side.
- Select “Turn off Windows Defender Firewall” for both private and public networks. Click OK.
- Crucially, remember to turn it back on immediately after you’ve attempted the installation, regardless of the outcome, to maintain your digital security.
Attempt the Epic Games Launcher installation again with your security software temporarily disabled. If the installation succeeds, you may need to add an exception for the Epic Games Launcher in your antivirus/firewall settings to prevent future conflicts. This approach highlights the delicate balance between security and software compatibility.
Update Your Graphics Drivers and Windows
Outdated drivers, especially graphics drivers, can lead to a myriad of system instabilities and software compatibility issues. While less common for the launcher installation itself, an outdated system or graphics driver can sometimes prevent prerequisite components from installing or cause the installer to crash unexpectedly. Moreover, an outdated Windows operating system can lack critical updates or components that the Epic Games Launcher installer might rely upon for a smooth process. Regular updates are fundamental for system stability, performance, and security.
To ensure your system is up-to-date:
- Update Windows:
- Go to “Settings” > “Update & Security” (Windows 10) or “Settings” > “Windows Update” (Windows 11).
- Click “Check for updates” and install any available updates. Restart your PC if prompted.
- Update Graphics Drivers:
- NVIDIA: Go to the NVIDIA website (nvidia.com/drivers) or use the GeForce Experience application.
- AMD: Go to the AMD website (amd.com/drivers) or use the Radeon Software Adrenalin Edition.
- Intel: Use the Intel Driver & Support Assistant or visit the Intel website.
- Always download drivers directly from the manufacturer’s official website to ensure authenticity and avoid potential malware. Perform a “clean installation” if the option is available within the driver installer.
Keeping your system and drivers updated is a key aspect of maintaining a healthy and productive computing environment, crucial not just for gaming but for all software applications.
Perform a Clean Boot
A “clean boot” starts Windows with a minimal set of drivers and startup programs. This helps eliminate software conflicts that occur when you install a program or an update, or when you run a program. Essentially, it allows you to isolate whether a background application or service is interfering with the Epic Games Launcher installation. This is a more advanced troubleshooting step but can be highly effective in pinpointing elusive conflicts.
To perform a clean boot:
- Open the “Run” dialog (Windows key + R), type
msconfigand press Enter to open the System Configuration utility. - Go to the “Services” tab. Check the “Hide all Microsoft services” box.
- Click “Disable all.”
- Go to the “Startup” tab. Click “Open Task Manager.”
- In Task Manager, for each startup item, select it and click “Disable.” Close Task Manager.
- Click “OK” in the System Configuration window and restart your computer.
After the clean boot, attempt to install the Epic Games Launcher.
- If it installs successfully: You know a background program or service was the culprit. You’ll need to re-enable services and startup items one by one (or in small groups) and restart each time to find the specific conflict.
- If it still fails: The issue is likely not related to startup programs or third-party services.
Remember to revert your system to a normal startup after troubleshooting by going back intomsconfig, selecting “Normal startup” on the “General” tab, and re-enabling all services and startup items.
Repair Corrupted System Files
Windows system files are critical for the stable operation of your operating system and all installed applications. If these files become corrupted due to unexpected shutdowns, malware, or disk errors, they can lead to various problems, including software installation failures. The Epic Games Launcher, like any application, relies on the integrity of these underlying system components. Windows provides built-in tools to scan for and repair these issues, helping to restore system health and ensure a stable environment for new software.
To check and repair system files:
- Open Command Prompt as an administrator: Search for “cmd” in the Windows search bar, right-click “Command Prompt,” and select “Run as administrator.”
- Type the following command and press Enter:
sfc /scannow- This command initiates the System File Checker, which scans for corrupted Windows system files and attempts to repair them. The process can take some time.
- If SFC finds errors it cannot fix, or if the problem persists, you can try using the Deployment Image Servicing and Management (DISM) tool. In the same administrator Command Prompt, type these commands one by one, pressing Enter after each:
DISM /Online /Cleanup-Image /CheckHealthDISM /Online /Cleanup-Image /ScanHealthDISM /Online /Cleanup-Image /RestoreHealth
These DISM commands help repair the Windows image itself, which SFC relies upon.

After running these commands and allowing them to complete, restart your computer and attempt the Epic Games Launcher installation again. A healthy operating system foundation is paramount for smooth software operation and robust digital security.
Ensuring Network Stability and Installer Integrity
A significant number of installation problems, particularly with large digital distribution platforms like the Epic Games Launcher, can be traced back to issues with the network connection or the integrity of the downloaded installer file. An unstable internet connection can lead to corrupted downloads, while restrictive network settings can block the installer from communicating with Epic’s servers. Ensuring a robust connection and a pristine installer package is crucial for a successful setup.
Check Your Internet Connection
The Epic Games Launcher installer, even the initial small download, often requires an active and stable internet connection to fetch additional files, verify components, and communicate with Epic’s servers during installation. A flaky or slow internet connection can cause timeouts, corrupted data transfers, or simply fail to connect to the necessary update servers, leading to installation errors.
To check and improve your internet connection:
- Test Connection: Open a web browser and try accessing several different websites (e.g., google.com, epicgames.com). If pages load slowly or not at all, you have an internet issue.
- Restart Router/Modem: Unplug your router and modem from power for about 30 seconds, then plug them back in. Wait for them to fully boot up (usually indicated by stable lights).
- Wired Connection: If you’re using Wi-Fi, try connecting your PC directly to your router with an Ethernet cable. Wired connections are generally more stable and faster than wireless, reducing the chance of packet loss or interference.
- No VPN/Proxy: Ensure you are not using a VPN or proxy server unless specifically required for your network. These can sometimes interfere with connectivity to gaming servers. (More on this below)
A stable internet connection is not just important for installing the launcher but also for downloading games, receiving updates, and maintaining an uninterrupted online gaming experience.
Re-download the Epic Games Launcher Installer
One of the most common reasons for a failed installation, especially after several attempts, is a corrupted installer file. During the download process, even a brief interruption, a minor network glitch, or an issue on the server side can lead to the installer file being incomplete or corrupted. When you try to run a corrupted installer, it will often fail with generic errors or simply refuse to launch.
To ensure you have a pristine installer:
- Delete the Old Installer: Locate any previously downloaded
EpicInstaller.msiorEpicInstaller.exefiles on your computer and delete them. Also, check your Downloads folder and your Recycle Bin. - Download Anew: Go directly to the official Epic Games website (epicgames.com) and navigate to the “Get Epic Games” or “Download” section. Download a fresh copy of the installer.
- Use a Different Browser (Optional): If you’ve had consistent issues, try downloading the installer using a different web browser (e.g., if you used Chrome, try Firefox or Edge) just in case there’s a browser-specific issue with the download manager.
This step ensures that you’re working with a known good installation package, eliminating a major source of potential problems right at the start. It’s a simple yet highly effective troubleshooting technique.
Adjust DNS Settings
DNS (Domain Name System) servers translate human-readable website names (like epicgames.com) into machine-readable IP addresses. If your default DNS servers (provided by your ISP) are slow, unreliable, or experiencing issues, it can impact your ability to connect to Epic Games’ servers, download content, or even complete the installation process. Switching to public, reliable DNS servers can often improve connectivity and resolve connection-related installation problems.
Common public DNS servers include Google DNS and Cloudflare DNS, known for their speed and reliability.
- Open “Control Panel” and go to “Network and Sharing Center.”
- Click on your active internet connection (e.g., “Ethernet” or “Wi-Fi”).
- Click “Properties.”
- Select “Internet Protocol Version 4 (TCP/IPv4)” and click “Properties.”
- Select “Use the following DNS server addresses.”
- Enter one of the following:
- Google DNS:
- Preferred DNS server:
8.8.8.8 - Alternate DNS server:
8.8.4.4
- Preferred DNS server:
- Cloudflare DNS:
- Preferred DNS server:
1.1.1.1 - Alternate DNS server:
1.0.0.1
- Preferred DNS server:
- Google DNS:
- Click “OK” on both windows to apply the changes.
- Restart your computer or flush your DNS cache (open Command Prompt as administrator and type
ipconfig /flushdns) for changes to take full effect.
This adjustment can significantly improve how your system resolves domain names, potentially smoothing out connectivity issues that might have been hindering the Epic Games Launcher installation.
Beware of Proxy Servers and VPNs
While VPNs (Virtual Private Networks) and proxy servers offer benefits like enhanced privacy and geo-unblocking, they can also introduce significant complications when installing or running applications, especially those that connect to specific game servers or content delivery networks. They can reroute your internet traffic through different servers, potentially causing latency, connection drops, or even blocking access to Epic Games’ infrastructure due to IP restrictions or firewall rules on the VPN/proxy server itself.
If you are using a VPN or a proxy server:
- Temporarily Disable: The first and most straightforward step is to temporarily disable your VPN client or proxy settings. Many VPN applications have a “Disconnect” or “Turn Off” option.
- Check Proxy Settings:
- Windows 10: Go to “Settings” > “Network & Internet” > “Proxy.” Ensure “Automatically detect settings” is on and “Use a proxy server” is off.
- Windows 11: Go to “Settings” > “Network & internet” > “Proxy.” Ensure “Automatically detect settings” is on and “Use a proxy server” is off.
- Router VPN (Advanced): If you have a VPN configured on your router, this is more complex. You might need to access your router settings to temporarily disable it or connect your PC outside of the VPN network.
Attempt the installation again with no VPN or proxy active. If this resolves the issue, you may need to configure your VPN or proxy to allow traffic to Epic Games’ servers, or simply disable it whenever you need to install or update the launcher. This ensures direct communication, preventing network intermediaries from disrupting the installation process.
Advanced Strategies and Seeking Expert Help
If you’ve meticulously followed all the previous steps and the Epic Games Launcher still refuses to install, it’s time to consider more advanced strategies. These typically involve deeper system diagnostics or a complete reset of relevant components. When all personal troubleshooting efforts are exhausted, knowing how and when to escalate the issue to expert support becomes crucial.
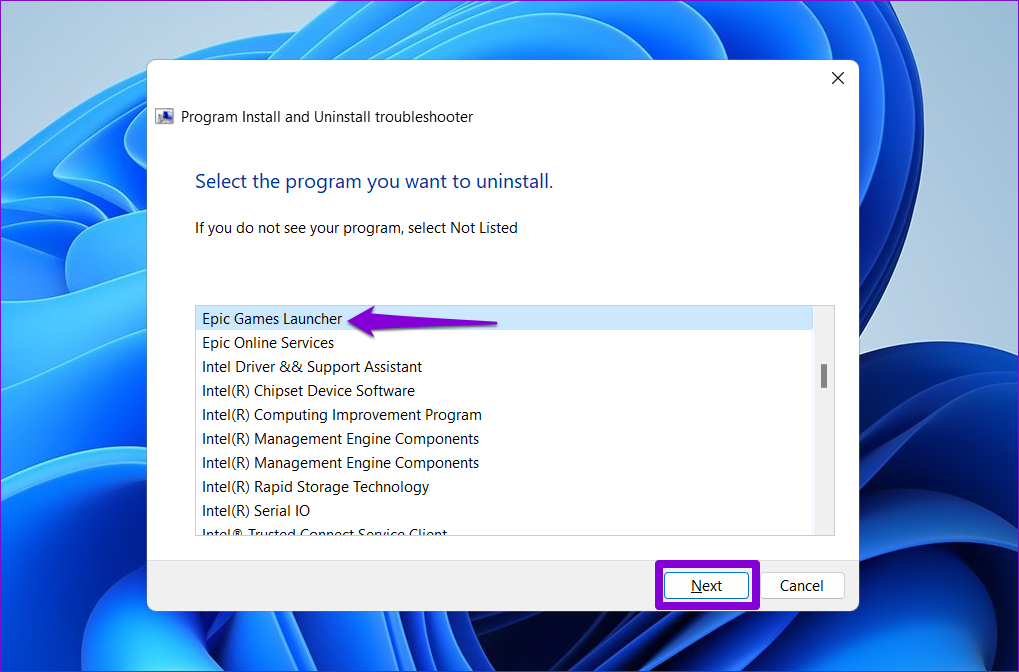
Manually Remove Previous Installation Remnants
Sometimes, a failed or incomplete previous installation attempt can leave behind corrupted or conflicting files and registry entries. These remnants can prevent a fresh installation from succeeding, as the new installer might detect existing (but faulty) components and get stuck. Standard uninstallation tools might not catch all these stray files, necessitating a manual cleanup.
This process requires caution as incorrectly deleting system files can cause problems.
- Uninstall via Control Panel: First, try to uninstall any existing “Epic Games Launcher” or “Epic Online Services” entries from “Settings” > “Apps & features” (Windows 10/11) or “Control Panel” > “Programs and Features.”
- Delete Remaining Files:
- Navigate to these locations and delete any
Epic Gamesfolders you find:C:Program FilesEpic GamesC:Program Files (x86)Epic GamesC:Users[YourUsername]AppDataLocalEpicGamesLauncherC:Users[YourUsername]AppDataRoamingEpicC:ProgramDataEpic
- Note:
AppDataandProgramDataare hidden folders. You may need to enable “Show hidden files, folders, and drives” in File Explorer’s “View” options.
- Navigate to these locations and delete any
- Clean Registry Entries (Advanced – Use with Caution): This step is for advanced users. Using a registry cleaner or manually deleting Epic Games related entries can be risky. If you proceed, create a system restore point first. Search for “regedit” (Registry Editor) and carefully search for and delete keys related to “Epic Games” under
HKEY_LOCAL_MACHINESOFTWAREandHKEY_CURRENT_USERSOFTWARE. If you are uncomfortable, skip this step.
A thorough cleanup ensures that the next installation attempt genuinely starts from scratch, free from any legacy issues.
Create a New User Account
Windows user profiles can occasionally become corrupted, leading to various system malfunctions, including problems with software installations. A corrupted profile might have issues with permissions, registry access, or specific settings that prevent new software from being installed correctly. Creating a new local user account on your Windows system can help determine if the problem is specific to your current user profile or a broader system-wide issue.
To create a new user account:
- Windows 10: Go to “Settings” > “Accounts” > “Family & other users.” Click “Add someone else to this PC.”
- Windows 11: Go to “Settings” > “Accounts” > “Family & other users.” Click “Add account” next to “Add other user.”
- Follow the prompts to create a new local account (you don’t need a Microsoft account for this). Make sure to grant it administrative privileges.
- Log out of your current account and log into the newly created account.
- Attempt to install the Epic Games Launcher from this new user account.
If the installation succeeds under the new user account, it indicates that your original user profile is likely corrupted or has conflicting settings. You might consider migrating your data to the new profile or further troubleshooting your original profile’s issues. This isolation technique is powerful for identifying user-specific problems.
Utilize System Restore
If the installation issues started recently, perhaps after a Windows update, another software installation, or a system change, you might be able to revert your system to an earlier state using System Restore. This Windows feature allows you to undo recent system changes without affecting your personal files, restoring your computer’s system files, installed applications, Windows Registry, and system settings to a point in time when the Epic Games Launcher could be installed correctly.
To use System Restore:
- Search for “Create a restore point” in the Windows search bar and open it.
- In the System Properties window, click on “System Restore…”
- Click “Next” and choose a restore point from before the issue began. If you don’t see any restore points, ensure System Protection is turned on for your C: drive.
- Follow the on-screen instructions to complete the restoration. Your computer will restart.
System Restore can be a lifesaver for quickly undoing problematic changes, acting as a powerful recovery tool for software and system integrity issues.
When All Else Fails: Contact Epic Games Support
After diligently working through all these troubleshooting steps, if you still cannot install the Epic Games Launcher, it’s time to leverage the expertise of Epic Games’ official support team. There might be a unique system configuration conflict, a specific error code you’re encountering that requires specialized knowledge, or an issue with their servers that only they can resolve.
When contacting support, provide them with as much detail as possible:
- The exact error message(s) you received. Screenshots are highly valuable.
- A detailed list of the troubleshooting steps you’ve already attempted (referencing this guide can be helpful).
- Your system specifications (OS, processor, RAM, graphics card).
- Any recent changes to your system (new hardware, software, updates).
- Log files: Epic Games Support might request specific log files generated during the failed installation attempts. Know how to locate and provide these.
Epic Games is invested in ensuring a positive brand experience for their users, and their support team is equipped to handle complex issues. Engaging with them provides access to solutions that might be beyond general troubleshooting capabilities, ensuring you eventually get the launcher installed and can access their platform.
Conclusion
The inability to install the Epic Games Launcher can be a major roadblock to accessing a world of games and development tools. However, by systematically approaching the problem with the troubleshooting steps outlined in this guide, you significantly increase your chances of finding a resolution. From verifying basic system requirements and freeing up disk space to tackling intricate software conflicts, network issues, and even deep system file corruption, we’ve covered the spectrum of common installation hurdles.
Remember, persistence and methodical elimination of variables are key. Each step brings you closer to diagnosing and fixing the root cause. This process not only aims to get your launcher installed but also enhances your overall tech literacy, equipping you with valuable skills for managing software on your system, maintaining digital security, and optimizing your PC for peak performance.
Should you find yourself reaching the advanced troubleshooting stage, don’t hesitate to contact Epic Games Support. They are your ultimate resource for unique or persistent problems. With these strategies in hand, you’re well-equipped to overcome installation challenges and finally dive into the Epic Games ecosystem, ensuring a smooth and productive digital experience.
aViewFromTheCave is a participant in the Amazon Services LLC Associates Program, an affiliate advertising program designed to provide a means for sites to earn advertising fees by advertising and linking to Amazon.com. Amazon, the Amazon logo, AmazonSupply, and the AmazonSupply logo are trademarks of Amazon.com, Inc. or its affiliates. As an Amazon Associate we earn affiliate commissions from qualifying purchases.