
The ASUS Eee PC 1005HA remains a nostalgic icon of the late 2000s netbook craze. With its “Seashell” design and impressive battery life for its time, it was the quintessential portable machine. However, in the current era of resource-heavy operating systems and demanding web applications, the original hardware—typically powered by an Intel Atom N270 or N280 processor and a meager 1GB or 2GB of RAM—struggles to run a standard version of Windows 10.
Enter Tiny10. Developed by NTDEV, Tiny10 is a lightweight, stripped-down version of Windows 10 designed specifically for low-end hardware. By removing unnecessary services, telemetry, and bloatware, Tiny10 provides a modern environment that can actually function on legacy devices. This guide explores the technical intricacies of installing Tiny10 on the Eee PC 1005HA, transforming a dusty relic into a functional tool for writing, light browsing, or a dedicated distraction-free terminal.

Why Tiny10 is the Ultimate Choice for the Eee PC 1005HA
Standard Windows 10 is designed with modern multi-core processors and high-speed SSDs in mind. On an Eee PC, the background processes alone can consume 100% of the CPU and 80% of the RAM before you even open a browser. Tiny10 changes the equation by focusing on the core essentials of the NT kernel.
Overcoming the Hardware Limitations of the Intel Atom N270
The Intel Atom N270 is a single-core, 32-bit processor. While it supports Hyper-Threading, it lacks the instruction sets required for modern software efficiency. Standard Windows 10 installs include thousands of system files and background services like Cortana, Windows Search Indexing, and heavy telemetry services that overwhelm the Atom’s limited cache. Tiny10 reduces the system footprint significantly, often using less than 500MB of RAM on boot, which is crucial for a machine that caps out at 2GB.
Debloating Windows 10: What Tiny10 Strips Away
Tiny10 is not just Windows with a few things turned off; it is a fundamental reduction of the OS. It removes the Microsoft Store, built-in apps like Mail and Weather, and complex graphical elements that tax the Intel GMA 950 integrated graphics. By focusing purely on the core components required to run Win32 applications, Tiny10 allows the 1005HA to remain responsive. Furthermore, because Tiny10 is based on the LTSC (Long-Term Servicing Channel) versions of Windows, it avoids the frequent and heavy feature updates that often break legacy drivers.
Essential Pre-Installation Steps
Before diving into the installation, preparation is key. Dealing with decade-old hardware requires a specific approach to ensure the installation doesn’t fail due to hardware bottlenecks or incompatible settings.
Hardware Upgrades: RAM and SSD Considerations
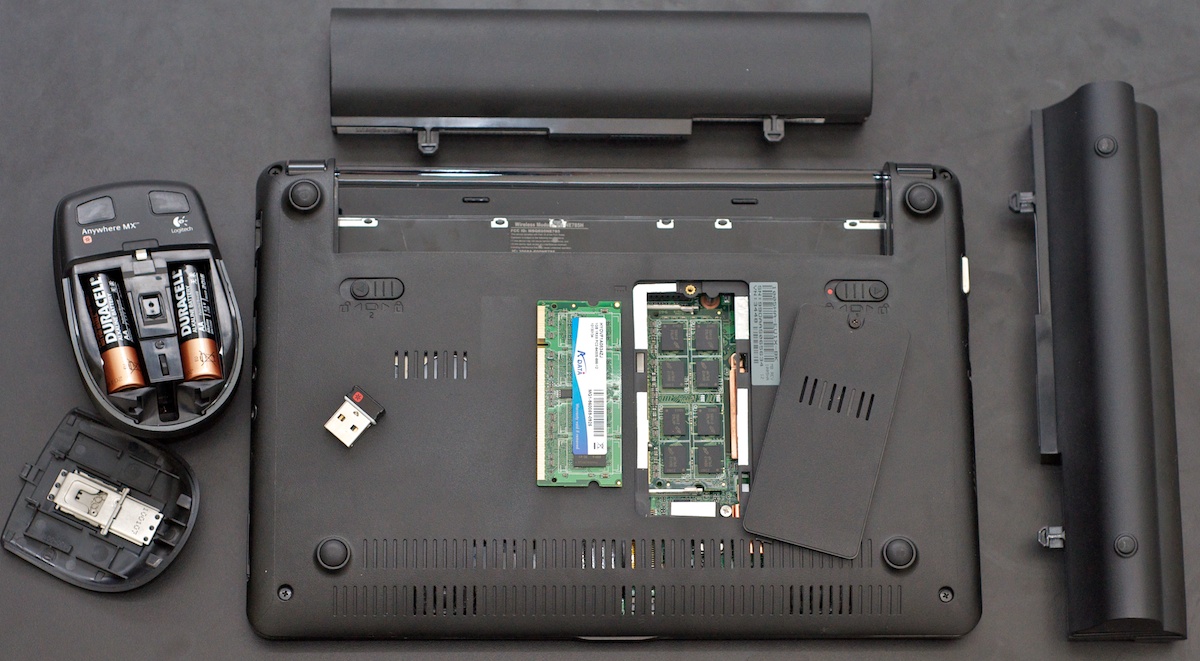
While Tiny10 is efficient, it cannot perform miracles on aging mechanical drives. If your 1005HA still has its original 160GB or 250GB HDD, the single best tech upgrade you can make is a cheap SATA SSD. An SSD eliminates the seek-time latency that makes netbooks feel sluggish. Additionally, ensure your RAM is maxed out. Most 1005HA models support up to 2GB of DDR2 RAM. This small leap from 1GB to 2GB provides the necessary breathing room for the OS and a web browser to coexist.
Creating the Bootable Media with Rufus
Since the 1005HA lacks an internal optical drive, you must install via USB.
- Download the ISO: Ensure you download the 32-bit (x86) version of Tiny10. The Intel Atom N270/N280 does not support 64-bit architecture.
- Use Rufus: Insert a USB drive (4GB is sufficient) and open Rufus.
- Partition Scheme: This is critical. Select “MBR” for the partition scheme and “BIOS (or UEFI-CSM)” for the target system. The 1005HA uses a traditional BIOS, not the modern UEFI found in newer laptops.
- Format: Use NTFS or FAT32 as the file system and click “Start” to burn the ISO to the drive.
BIOS Configuration for the 1005HA
To boot from your USB drive, you must adjust the BIOS settings:
- Power on the Eee PC and tap the F2 key repeatedly to enter the BIOS Setup.
- Navigate to the “Boot” tab.
- Select “Hard Disk Drives” and ensure the USB Flash Drive is set as the 1st Drive.
- Go back to “Boot Device Priority” and ensure the USB drive is listed as the first boot device.
- Press F10 to save and exit.
The Step-by-Step Installation Guide
With the hardware prepared and the BIOS configured, the installation process for Tiny10 is remarkably straightforward, though it requires patience due to the limited processing power of the Eee PC.
Navigating the Setup Process
Once the machine boots from the USB, you will see the familiar Windows 10 logo. However, the setup will feel much faster than a standard installation.
- Select your language and keyboard layout.
- Click “Install Now.”
- When prompted for a product key, you can select “I don’t have a product key” to proceed to the installation (you can activate later if you have a valid Windows 10 Pro/LTSC license).
- Select the Tiny10 version available in the ISO.
Partitioning and Clean Installation
For the best performance, a clean install is mandatory.
- Choose “Custom: Install Windows only (advanced).”
- You will see a list of partitions. Delete all existing partitions on the primary drive until you have “Drive 0 Unallocated Space.”
- Click “New” to create a fresh partition structure, or simply click “Next” to let Windows handle the formatting.
- The installation will begin copying files. On an Intel Atom processor, this can take anywhere from 20 to 45 minutes, depending on whether you are using an SSD or a traditional HDD.
Driver Management and Post-Install Optimization
One of the biggest hurdles in running Windows 10 on an Eee PC 1005HA is driver compatibility. ASUS never released official Windows 10 drivers for this model, so we must rely on legacy Windows 7 drivers and compatibility modes.
Finding Compatible Drivers for Legacy ASUS Hardware
Most core components in the 1005HA will be recognized by Tiny10 automatically, but a few require manual intervention:
- Graphics (Intel GMA 950): Tiny10 might install a generic Microsoft Basic Display Adapter. For better performance and the correct 1024×600 resolution, download the Windows 7 drivers for the Intel Graphics Media Accelerator 3150/950. You may need to run the installer in “Compatibility Mode” for Windows 7.
- ACPI (Hotkey Service): To get your Fn keys working (brightness, volume), you need the ASUS ACPI driver and the “Hotkey Service” utility.
- Audio and Wi-Fi: These usually work out of the box with Tiny10’s built-in driver library, but if not, the Windows 7 drivers from the ASUS support site are your best bet.
Fine-tuning Services for Peak Performance
Even though Tiny10 is lightweight, you can squeeze out more performance with a few tech-savvy tweaks:
- Disable Visual Effects: Go to System Properties > Advanced > Performance Settings and select “Adjust for best performance.” This removes animations that tax the GPU.
- Virtual Memory: Manually set the Paging File size. Since the machine likely has 2GB of RAM, setting a fixed page file of 2048MB-4096MB on an SSD can prevent system hangs.
- Disable Search Indexing: Right-click your C: drive, go to Properties, and uncheck “Allow files on this drive to have contents indexed.” This reduces background disk activity significantly.
Longevity and Security on Legacy Hardware
Running an Eee PC in 2024 and beyond is a rewarding tech project, but it requires an understanding of the machine’s limitations regarding modern security and web standards.
Managing Updates on a Modified OS
Tiny10 removes the Windows Update component in some versions, or modifies it in others to prevent the installation of unwanted “bloat.” While this keeps the system fast, it means you must be more proactive about security. Use a lightweight, third-party firewall and ensure that you are not using the machine for highly sensitive financial transactions unless you are confident in your manual patching process.

Recommended Software for Lightweight Computing
To keep your Tiny10-powered Eee PC 1005HA snappy, avoid heavy applications:
- Browser: Skip Chrome or full-featured Edge. Instead, use Thorium (a lightweight Chromium fork optimized for older CPUs) or Pale Moon, which is designed for legacy hardware.
- Office Suite: Instead of Microsoft Office 365, use LibreOffice Portable or AbiWord.
- Media: Use VLC Media Player, which handles hardware decoding much better than the modern Windows Media Player.
By following this guide, the ASUS Eee PC 1005HA transcends its status as e-waste. With Tiny10, it becomes a testament to the longevity of well-designed hardware, providing a functional, portable computing experience that defies its age and original specifications. Whether used as a dedicated terminal for coding, a distraction-free writing tool, or a portable server monitor, the 1005HA proves that with the right software optimization, old tech can still find a place in a modern world.
aViewFromTheCave is a participant in the Amazon Services LLC Associates Program, an affiliate advertising program designed to provide a means for sites to earn advertising fees by advertising and linking to Amazon.com. Amazon, the Amazon logo, AmazonSupply, and the AmazonSupply logo are trademarks of Amazon.com, Inc. or its affiliates. As an Amazon Associate we earn affiliate commissions from qualifying purchases.