
When Sony launched the PlayStation 5, it introduced a paradigm shift in console gaming through its ultra-high-speed custom NVMe SSD. However, as modern AAA titles balloon in size—often exceeding 100GB per installment—the internal 825GB (with only roughly 667GB of usable space) quickly becomes a bottleneck for enthusiasts. Fortunately, Sony engineered the PS5 with a dedicated M.2 expansion slot, allowing users to increase their storage capacity significantly.
Installing an SSD is not merely a matter of “plug and play.” It requires a technical understanding of hardware compatibility, thermal management, and delicate physical assembly. This guide provides an exhaustive walkthrough for gamers and tech enthusiasts looking to upgrade their console’s storage while maintaining peak performance.
1. Understanding Hardware Requirements and Compatibility Standards
Before opening your console, it is critical to understand that not every M.2 SSD is compatible with the PlayStation 5. Sony has established stringent technical specifications to ensure that expanded storage matches the speed and efficiency of the built-in drive. Using an incompatible drive can result in poor performance, graphical glitches, or even system instability.
M.2 SSD Interface and Performance
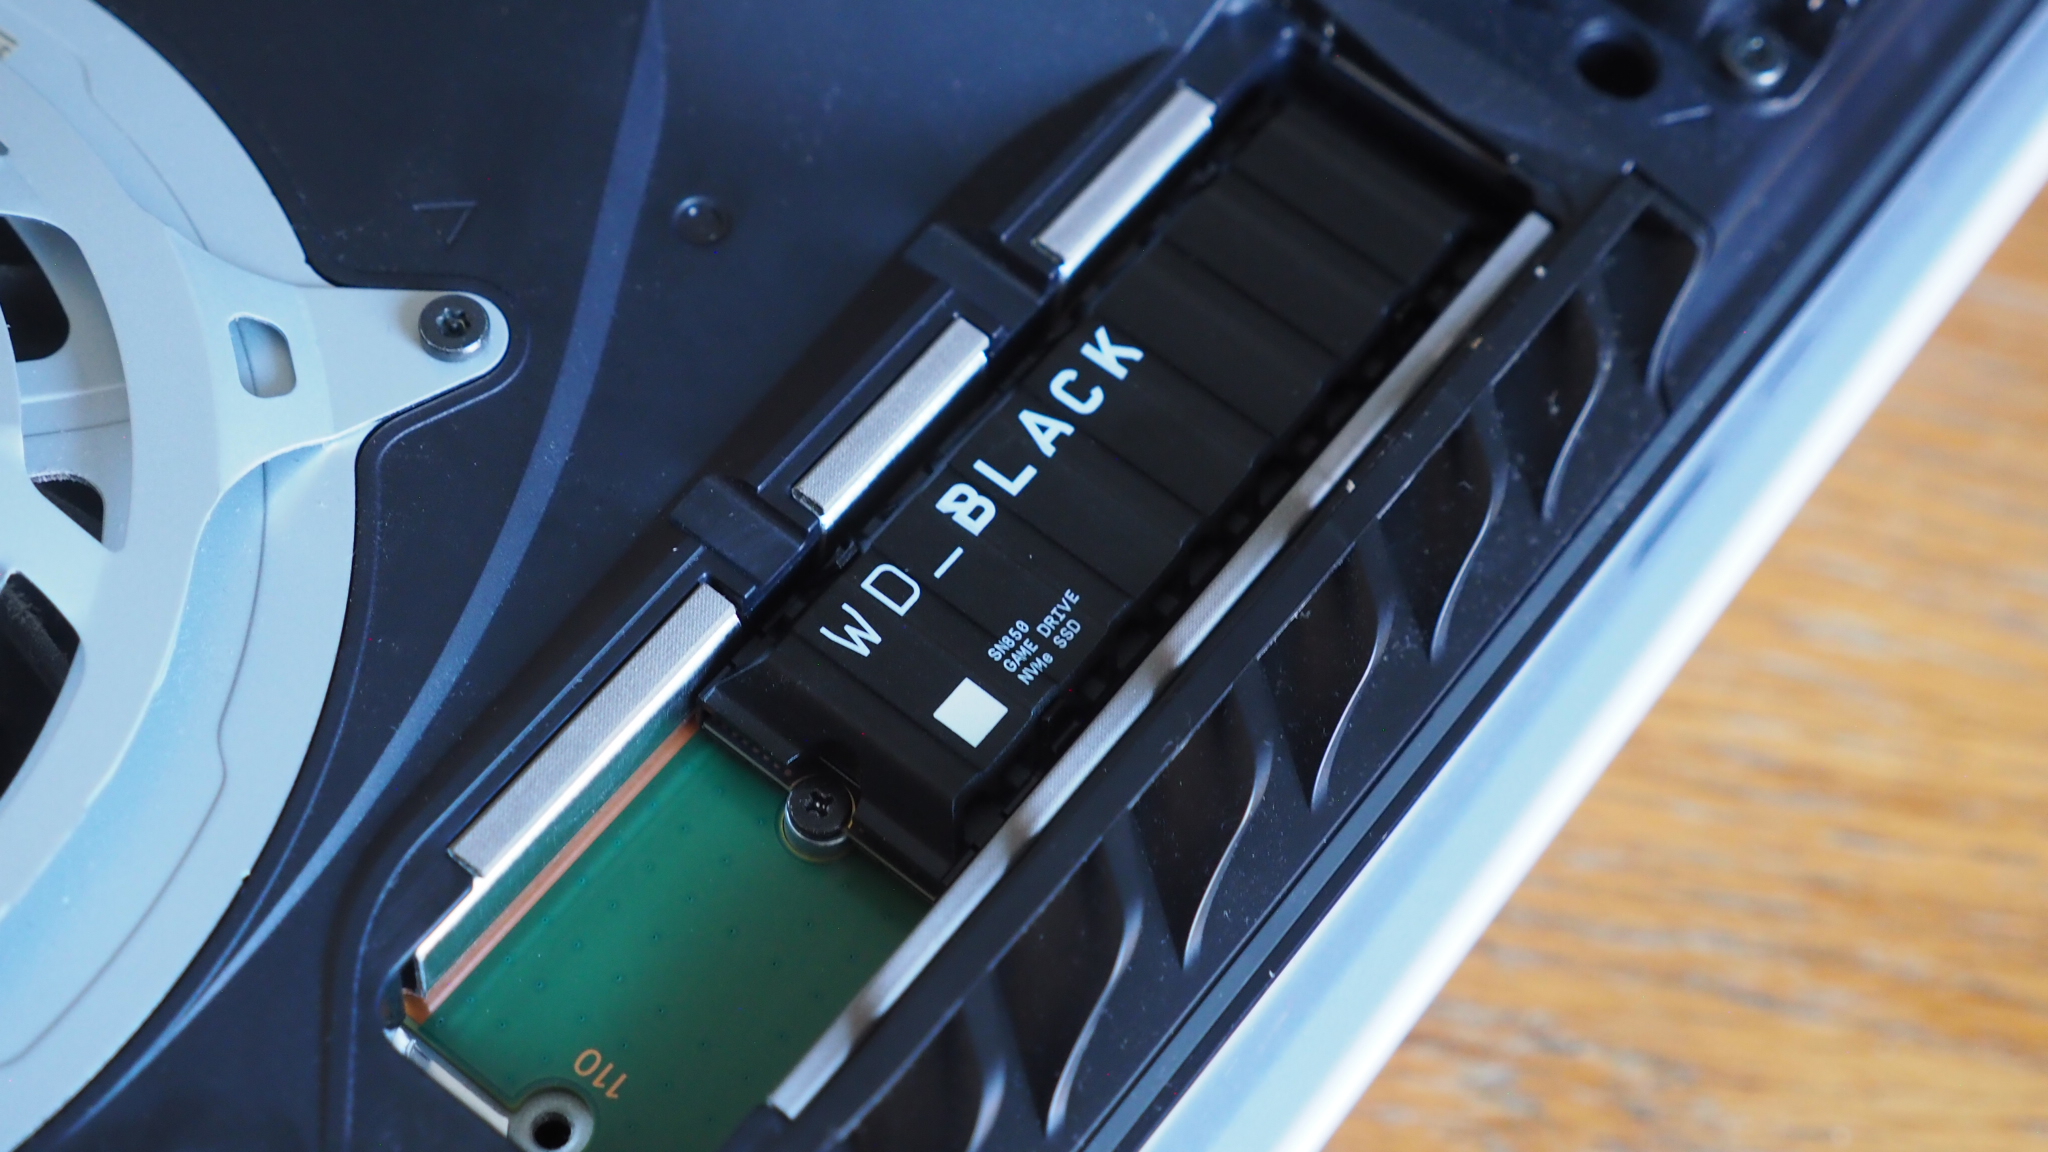
The PS5 requires a PCIe Gen4 x4 M.2 NVMe SSD. While older PCIe Gen3 drives may physically fit into the slot, they lack the bandwidth necessary to handle the PS5’s data throughput requirements. For an optimal experience, Sony recommends a sequential read speed of at least 5,500 MB/s. High-performance drives like the Samsung 980 Pro, Western Digital Black SN850, or the Seagate FireCuda 530 are industry favorites that meet and often exceed these benchmarks.
Physical Dimensions and Form Factor
The expansion slot supports several M.2 form factors, specifically 2230, 2242, 2260, 2280, and 22110. The most common size for consumer drives is 2280 (22mm wide and 80mm long). However, thickness is the most crucial physical constraint. The total assembly (including the heatsink) must not exceed 11.25mm in height, with specific limits on how much can be above (8mm) and below (2.25mm) the circuit board.
The Necessity of a Heatsink
Thermal management is a vital component of the PS5’s architecture. Gen4 SSDs generate significant heat during sustained read/write operations. Sony mandates the use of a heatsink with any M.2 SSD installed in the console. You can either purchase a drive with a pre-installed heatsink or buy a standalone heatsink to attach yourself. Operating an SSD without a heatsink in the enclosed PS5 expansion bay can lead to thermal throttling, where the drive slows down to protect itself, drastically reducing game loading speeds.
2. Pre-Installation Preparation and Safety Protocols
Working with sensitive electronics requires a controlled environment. Before you begin the physical installation, you must prepare the system software and your workspace to prevent accidental damage to the console’s internal components.
System Software Updates
Prior to hardware modification, ensure your PS5 is running the latest system software. Early versions of the PS5 firmware did not support the M.2 expansion slot. To update, navigate to Settings > System > System Software > System Software Update and Settings. If your console is not updated, it will not recognize the new drive, and you may be greeted with a warning screen upon boot-up.
Essential Tools and Workspace Setup
You will need a clean, flat surface and a few specific tools:
- A well-lit area with a non-abrasive surface (a microfiber cloth or a large mousepad) to prevent scratching the PS5’s white “wings.”
- A #1 Phillips head screwdriver.
- Optional: A small flashlight to see into the expansion bay.
Electrostatic Discharge (ESD) Awareness
Static electricity can be the silent killer of computer hardware. Before touching any internal components, ground yourself by touching a large metal object. Avoid working on carpets or in environments with high static potential. Handling the SSD by its edges and avoiding the gold contact pins will further minimize the risk of ESD damage.
3. The Step-by-Step Physical Installation Process
The PlayStation 5 is designed to be user-serviceable, but the process of removing the outer covers requires a specific technique that can feel counter-intuitive to first-time users.
Removing the PS5 Faceplate
First, power down your PS5 completely (do not leave it in Rest Mode). Unplug all cables, including the HDMI and power cord, and wait for the console to cool down. If you have the standard Edition (with a disc drive), lay the console flat with the disc drive facing up and situated at the bottom-right corner.
To remove the cover, grip the top-left corner and the bottom-right corner of the plate. Gently lift the top-left corner upward while sliding the entire plate toward the bottom of the console. It should pop off with a clicking sound, revealing the cooling fan and the rectangular expansion slot cover.
Accessing the M.2 Expansion Bay
Located near the fan, you will see a silver metal cover secured by a single screw marked with the iconic PlayStation symbols (Square, Triangle, Circle, Cross). Use your Phillips screwdriver to remove this screw and lift away the cover.
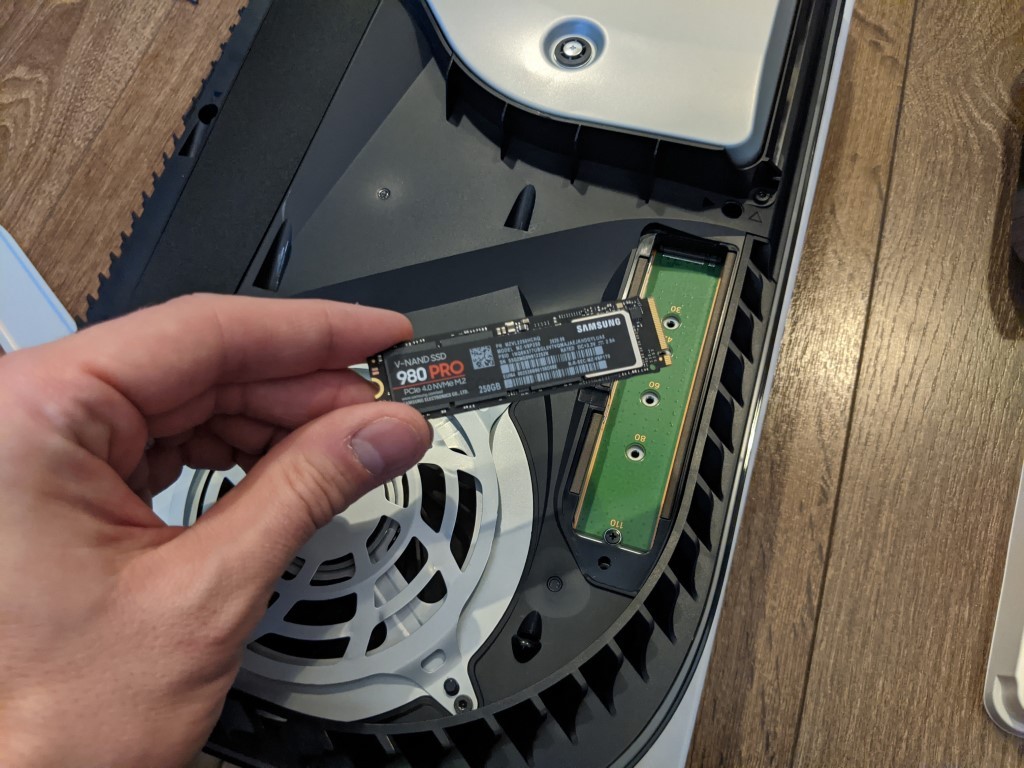
Inside, you will find a green PCB with several holes marked with numbers (30, 42, 60, 80, 110). There is a small metal spacer and a screw located in the “110” position. Remove this screw and the spacer, then move the spacer to the hole that matches the length of your SSD (usually the “80” mark).
Seating the Drive and Reassembly
Hold your M.2 SSD at a slight diagonal angle (about 30 degrees). Align the notch on the SSD’s connector with the ridge in the expansion slot. Firmly push the drive into the slot until it is fully seated. If installed correctly, the drive will be angled upward.
Press the SSD down so it rests on the spacer you positioned earlier. Secure the drive by replacing the small screw through the SSD’s notch and into the spacer. Finally, replace the silver expansion bay cover and slide the PS5’s outer white plate back into position until it clicks.
4. Final Configuration, Formatting, and Management
Once the hardware is physically installed, the final stage involves software initialization and data management to make the new storage usable for gaming.
Formatting the M.2 SSD
Reconnect your PS5 to the power and TV and turn it on. Upon startup, the console will automatically detect the new hardware and present a “M.2 SSD Storage” formatting screen. This is a mandatory step; the console must format the drive to its proprietary file system.
Select Format M.2 SSD. The console will perform a read-speed test once formatting is complete. If your drive meets the requirements, you should see a read speed above 5,500 MB/s. Select OK to proceed to the home screen.
Configuring Default Install Locations
To make the most of your new storage, you should tell the PS5 where to install new games. Navigate to Settings > Storage > Installation Location. Here, you can choose to install PS5 games and PS4 games to either the “Console Storage” (internal) or the “M.2 SSD Storage.”
Moving existing games is equally simple. Go to the Storage menu, select Console Storage, then Games and Apps. You can select multiple titles and choose Move to transfer them to the M.2 SSD. Because of the Gen4 speeds, moving 100GB of data typically takes less than a minute.
Troubleshooting and Performance Monitoring
If the console does not recognize the drive after installation, the most common culprit is an improperly seated M.2 connector. You may need to reopen the console and ensure the drive is pushed all the way into the slot before being screwed down.
If you experience “stuttering” in high-end games, it may be due to the SSD overheating or failing to meet the minimum speed requirements. Always monitor the system for any “Overheating” warnings. If such warnings appear, ensure your heatsink is properly seated with adequate thermal pad contact.

Conclusion
Expanding your PS5 storage with an M.2 SSD is one of the most impactful upgrades a gamer can perform. It eliminates the “storage anxiety” of deciding which games to delete to make room for new updates. By following the technical specifications for Gen4 speeds and ensuring proper thermal management with a heatsink, you can enjoy a seamless experience that is indistinguishable from the console’s built-in storage. With a 1TB or 2TB expansion, your PlayStation 5 becomes a true media powerhouse, ready to handle the massive digital libraries of the current console generation.
aViewFromTheCave is a participant in the Amazon Services LLC Associates Program, an affiliate advertising program designed to provide a means for sites to earn advertising fees by advertising and linking to Amazon.com. Amazon, the Amazon logo, AmazonSupply, and the AmazonSupply logo are trademarks of Amazon.com, Inc. or its affiliates. As an Amazon Associate we earn affiliate commissions from qualifying purchases.