
In the dynamic world of technology, staying equipped with the right tools is paramount, whether you’re a seasoned developer, an aspiring data scientist, or simply someone looking to harness the power of automation on your Mac. At the heart of Python’s incredible versatility lies a humble yet mighty tool: Pip. This guide will walk you through everything you need to know about installing Pip on your macOS system, ensuring you can effortlessly manage Python packages and unlock a universe of possibilities.
For those immersed in the “Tech” landscape – exploring software development, AI tools, or enhancing digital productivity – Pip is not just a utility; it’s a gateway. It empowers you to integrate cutting-edge libraries, from machine learning frameworks to web development tools, directly into your projects. Understanding how to correctly install and use Pip is a foundational skill that can significantly boost your efficiency, contributing to both your “Productivity” and your ability to craft innovative solutions. Furthermore, a solid grasp of these technical fundamentals can bolster your “Personal Branding” as a competent developer, opening doors to new opportunities and potentially impacting your “Online Income” through sophisticated project development.

Understanding Pip and Its Indispensable Role
Before diving into the installation process, it’s crucial to understand what Pip is and why it holds such a pivotal position in the Python ecosystem, especially for Mac users.
What is Pip? The Package Installer for Python
Pip stands for “Pip Installs Packages,” a recursive acronym that perfectly encapsulates its function. In essence, Pip is the standard package-management system used to install and manage software packages written in Python. Think of it as an app store specifically for Python libraries and frameworks. Just as you use the App Store on your Mac to download applications, you use Pip to download and manage Python packages from the Python Package Index (PyPI), a vast repository of community-contributed software.
Python’s strength lies in its extensive collection of libraries that simplify complex tasks. Whether you need to perform data analysis with Pandas, build a web application with Django or Flask, delve into machine learning with scikit-learn or TensorFlow, or automate repetitive tasks, there’s likely a Python package for it. Pip is the command-line utility that makes accessing, installing, upgrading, and removing these packages incredibly straightforward. Without Pip, managing external Python dependencies would be a convoluted and time-consuming manual process, severely hindering development speed and efficiency.
Why Pip is Indispensable for Mac Users
Mac users, particularly those involved in development, data science, or academic research, rely heavily on Python. macOS comes with a version of Python pre-installed, but it’s often an older version (Python 2 in many cases) and is primarily for internal system use. Directly modifying this system Python can lead to unforeseen issues with macOS functionalities, posing a “Digital Security” risk in an indirect sense by destabilizing core system components.
This is where Pip, coupled with a properly managed Python installation, becomes invaluable.
- Access to Modern Libraries: Pip allows you to install and utilize the latest versions of Python packages, many of which are only compatible with Python 3. This ensures you can leverage current technologies and best practices in your projects.
- Simplified Dependency Management: For any real-world Python project, you’ll inevitably depend on multiple external libraries. Pip automatically handles these dependencies, fetching and installing everything required for a package to function correctly. This significantly boosts “Productivity” by eliminating manual dependency resolution.
- Consistent Development Environments: By facilitating the use of virtual environments (a topic we’ll cover later), Pip helps maintain isolated project dependencies. This prevents “dependency hell” – conflicts arising when different projects require different versions of the same package – ensuring a stable and predictable development environment.
- Community and Innovation: The PyPI ecosystem, powered by Pip, is a testament to Python’s vibrant global community. Access to this wealth of open-source tools means developers can stand on the shoulders of giants, accelerating innovation and contributing to a thriving “Tech” landscape.
In essence, Pip transforms your Mac into a powerful development workstation, ready to tackle anything from intricate AI models to robust web services, all while maintaining system integrity and developer efficiency.
Preparing Your Mac for Pip Installation
Before you jump into executing commands, a small amount of preparation and understanding of your macOS environment can save you a lot of headaches. This section ensures your Mac is ready for a smooth and successful Pip setup.
Checking Your Python Installation
The first step is to determine if Python is already installed on your system and, more importantly, which version. As mentioned, macOS includes a system Python, but for development purposes, you’ll almost always want Python 3.
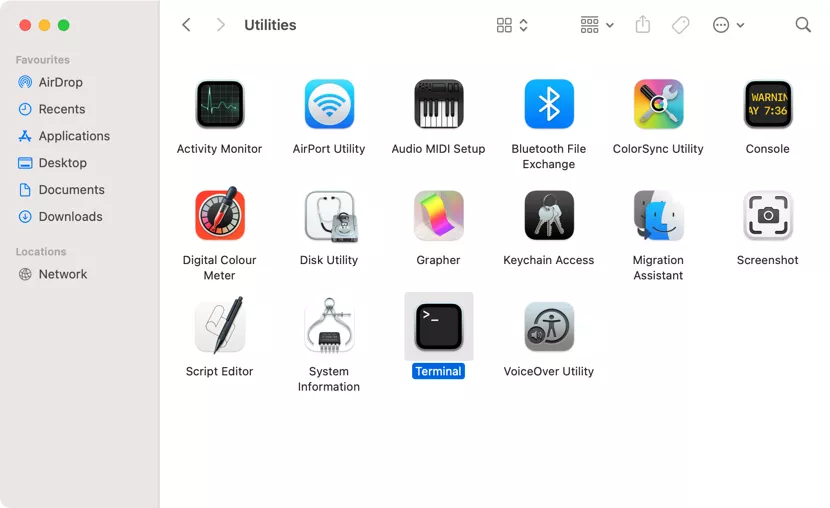
Open your Terminal application (you can find it in Applications/Utilities or by searching with Spotlight).
Type the following commands and press Enter:
python --versionpython2 --versionpython3 --version
You might see output like Python 2.7.x for python --version and Python 3.x.x for python3 --version. If python3 --version returns an error like command not found, it means Python 3 is not readily accessible in your system’s PATH, or not installed as a globally recognized command.
Crucial Note: If you see Python 2.x.x as the default for python --version, it’s vital to avoid installing packages directly into this system-managed Python 2 environment. Doing so can break system utilities that rely on specific Python 2 packages, creating a “Digital Security” or stability risk for your OS. Always aim to use pip3 and associate it with a Python 3 installation.
Understanding macOS Default Python vs. Homebrew
This is arguably the most critical distinction for Mac developers.
-
macOS System Python: Apple pre-installs Python (typically Python 2, though newer macOS versions might omit it or link to Python 3 in an unconventional way) for its own internal scripts and tools. This installation is located in
/usr/bin/python. It’s generally a bad idea to install or upgrade packages into this environment because:- It can interfere with macOS functionality.
- You might lack the necessary permissions, leading to frustrating
Permission deniederrors. - It’s often an outdated version not suitable for modern development.
-
Homebrew: Homebrew is a free and open-source software package management system that simplifies the installation of software on macOS (and Linux). It’s essentially “the missing package manager for macOS.” When you install Python via Homebrew, it installs it in a separate, user-managed location (
/usr/local/bin/python3or/opt/homebrew/bin/python3on Apple Silicon Macs), completely independent of the system Python.
Why Homebrew is the Recommended Path:
- Safety and Isolation: Homebrew installations are isolated from the system, preventing conflicts and ensuring system stability.
- Ease of Management: Upgrading Python or installing other developer tools becomes a simple command (
brew upgrade python). - Up-to-Date Versions: Homebrew typically provides the latest stable versions of Python, ensuring you have access to modern features and security patches.
- Automatic Pip Installation: When you install Python 3 via Homebrew, Pip (specifically
pip3) is automatically installed alongside it, pre-configured to manage packages for that Homebrew-managed Python 3 environment.
For these reasons, installing Python 3 via Homebrew is the unequivocally recommended method for Mac users to get Pip and manage their Python development environment effectively. This approach aligns perfectly with best practices in “Tech” development for “Productivity” and “Digital Security.”
Step-by-Step Pip Installation Methods
With your preparation complete, let’s proceed with the actual installation. We’ll prioritize the Homebrew method due to its superior benefits, followed by a fallback option.
Method 1: Installing Python (and Pip) via Homebrew (Recommended)
This is the most robust and future-proof way to get Python 3 and Pip on your Mac.
Step 1: Install Homebrew (If You Don’t Have It)
If you don’t have Homebrew installed, open your Terminal and paste the following command. This command is directly from the official Homebrew website and is safe to use.
/bin/bash -c "$(curl -fsSL https://raw.githubusercontent.com/Homebrew/install/HEAD/install.sh)"
Press Enter and follow any on-screen prompts (you might need to enter your user password). The installation can take a few minutes. Homebrew will also install Xcode Command Line Tools if they aren’t already present, which are essential for many development tasks.
After installation, Homebrew might suggest adding its executables to your PATH. Follow these instructions, which usually involve commands like:
echo 'eval "$(/opt/homebrew/bin/brew shellenv)"' >> ~/.zprofile
eval "$(/opt/homebrew/bin/brew shellenv)"
(Note: the exact path might differ slightly for Intel Macs vs. Apple Silicon Macs. Always follow Homebrew’s specific instructions.)
Restart your Terminal or run source ~/.zprofile (or ~/.zshrc or ~/.bash_profile depending on your shell) for the changes to take effect.
Verify Homebrew is working by typing:
brew doctor
It should report “Your system is ready to brew.”
Step 2: Install Python 3 via Homebrew
Once Homebrew is set up, installing Python 3 is a single command:
brew install python
This command will install the latest stable version of Python 3. Homebrew intelligently handles dependencies and ensures a clean installation. It will also automatically install pip3 (Pip for Python 3) alongside Python.
Step 3: Verify Your Python and Pip Installation
After the Homebrew installation completes, verify that Python 3 and Pip are correctly installed and linked:
python3 --version
pip3 --version
You should see output indicating the versions of Python 3 and Pip that Homebrew installed (e.g., Python 3.10.x and pip 22.x.x). The pip3 command is now correctly configured to manage packages for the Homebrew-installed Python 3.
You might also find that python now points to your Homebrew Python 3, but always prefer python3 and pip3 to be explicit and avoid any potential ambiguity with the system Python 2.
Method 2: Installing Pip with get-pip.py (Fallback/Manual)
This method is generally not recommended if you can use Homebrew, as it doesn’t manage Python itself and can sometimes lead to permissions issues if not used carefully. However, it’s a viable fallback if Homebrew isn’t an option for some reason, or if you have a standalone Python 3 installation (not from Homebrew) that didn’t come with Pip.
Step 1: Download get-pip.py
Open your Terminal and download the official Pip bootstrap script:
curl https://bootstrap.pypa.io/get-pip.py -o get-pip.py
This command downloads the get-pip.py script into your current directory.
Step 2: Run the Script with Python 3
Now, execute the script using your Python 3 interpreter. Crucially, ensure you use python3 and not python to install Pip for Python 3.
python3 get-pip.py
If you encounter Permission denied errors, it means your Python 3 installation isn’t configured for easy user package management. Avoid using sudo python3 get-pip.py unless you absolutely understand the implications. Using sudo can install packages globally and potentially lead to conflicts. If you hit permission issues, it’s a strong indicator that Homebrew is the better path, or you should consider using virtual environments more diligently (see next section).
Step 3: Clean Up
After successful installation, you can delete the get-pip.py script:

rm get-pip.py
Step 4: Verify Installation
As with Method 1, verify Pip’s presence:
pip3 --version
Method 3: Ensuring Pip is Up-to-Date
Once Pip is installed, it’s good practice to keep it updated to its latest version to benefit from bug fixes, performance improvements, and security enhancements.
pip install --upgrade pip
or, more explicitly for Python 3 Pip:
pip3 install --upgrade pip
This command tells Pip to upgrade itself to the newest available version. It’s a fundamental step for maintaining a healthy and “secure” development environment.
Mastering Pip: Essential Commands and Best Practices
Installing Pip is just the beginning. To truly leverage its power for “Productivity” and efficient “Tech” development, you need to know its core commands and adopt best practices like using virtual environments.
Key Pip Commands You Need to Know
Once Pip is installed, here are the commands you’ll use most frequently:
-
Install a Package:
pip3 install <package_name>
Example:pip3 install requests(to install the Requests library for making HTTP requests) -
Install a Specific Version of a Package:
pip3 install <package_name>==<version_number>
Example:pip3 install Django==3.2.1 -
Upgrade a Package:
pip3 install --upgrade <package_name>
Example:pip3 install --upgrade pandas -
Uninstall a Package:
pip3 uninstall <package_name>
Example:pip3 uninstall numpy -
List Installed Packages:
pip3 list
This command shows all currently installed Python packages and their versions within your active environment. -
Search for a Package (from PyPI):
pip3 search <keyword>(Note:pip searchfunctionality has been removed in recent Pip versions. It’s now recommended to search directly on PyPI’s website: pypi.org) -
Show Package Details:
pip3 show <package_name>
This provides detailed information about an installed package, including its version, location, dependencies, and author. -
Generate a Requirements File:
pip3 freeze > requirements.txt
This essential command outputs a list of all installed packages and their exact versions into a file namedrequirements.txt. This file is crucial for sharing your project’s dependencies with others, ensuring they can replicate your environment. -
Install Packages from a Requirements File:
pip3 install -r requirements.txt
If you’ve received a project with arequirements.txtfile, this command installs all necessary packages, making project setup a breeze.
The Power of Virtual Environments (venv)
For professional development, understanding and using virtual environments is not just a best practice; it’s a necessity. Virtual environments address the “dependency hell” problem by creating isolated Python environments for each project.
Imagine Project A needs Django==3.0 and Project B needs Django==4.0. Without virtual environments, installing both would lead to conflicts or force you to constantly uninstall and reinstall versions. A virtual environment solves this by giving each project its own independent set of installed Python packages.
Why Virtual Environments Are Crucial:
- Isolation: Each project gets its own clean slate, preventing package conflicts between different projects. This significantly boosts “Productivity” by reducing debugging time spent on environment issues.
- Reproducibility: You can precisely define project dependencies using
requirements.txtand easily recreate the exact environment on another machine or for a team member. This is vital for collaborative “Tech” development. - Cleanliness: You avoid cluttering your global Python installation with project-specific packages.
- Security: By isolating project dependencies, you minimize the risk of a package in one project unintentionally affecting another or the global system.
How to Use venv (the built-in module for virtual environments):
Step 1: Navigate to Your Project Directory
Open your Terminal and cd into the directory where your project resides or where you want to start a new project.
cd ~/my_project
Step 2: Create a Virtual Environment
Use the python3 -m venv command, followed by the name you want to give your environment (e.g., venv or env).
python3 -m venv venv
This creates a directory named venv (or whatever you called it) inside your project folder. This directory contains a copy of the Python interpreter, the Pip installer, and space for all your project’s specific packages.
Step 3: Activate the Virtual Environment
To start using the virtual environment, you need to activate it. The command varies slightly depending on your shell:
- For Bash/Zsh (most common on Mac):
bash

source venv/bin/activate
Your terminal prompt will change to indicate that you are now inside the virtual environment (e.g.,(venv) user@macbook project %).
Step 4: Install Packages within the Virtual Environment
Once activated, any pip install or pip3 install command you run will install packages only into this active virtual environment.
(venv) user@macbook project % pip install requests beautifulsoup4
Step 5: Deactivate the Virtual Environment
When you’re done working on your project, you can deactivate the environment:
(venv) user@macbook project % deactivate
Your terminal prompt will revert to normal, and you’ll be back in your global Python environment.
By making virtual environments a routine part of your workflow, you adopt a professional and highly productive approach to Python development, a hallmark of effective “Tech” practitioners.
Troubleshooting Common Pip Installation Issues
Even with careful preparation, you might encounter issues. Here’s how to diagnose and resolve some of the most common Pip installation and usage problems on macOS.
“pip command not found” or “pip3 command not found”
Cause: This usually means the directory where Pip (or pip3) is installed is not in your system’s PATH environment variable, or Python 3/Pip was not installed correctly.
Solution:
- Check Python 3 Installation: Ensure
python3 --versionreturns a valid Python 3 version. If not, reinstall Python 3, preferably via Homebrew (Method 1). - Verify Pip Installation: If Python 3 is present, but
pip3isn’t, try runningpython3 -m ensurepipto install Pip for that Python 3 version. Then runpython3 -m pip --versionto verify. - Update PATH: If Pip is installed but not found, you might need to manually add its directory to your shell’s PATH. For Homebrew installations, this is usually handled automatically, but you might need to follow Homebrew’s post-installation instructions. The relevant path for Pip often looks something like
/usr/local/bin(Intel) or/opt/homebrew/bin(Apple Silicon), which should already be in your PATH for Homebrew Python.
You can find Pip’s location by runningfind / -name "pip3" 2>/dev/null(this might take a while). Once found, add its parent directory to your shell config file (~/.zprofile,~/.zshrc, or~/.bash_profile):
export PATH="/path/to/pip/directory:$PATH"
Thensourcethe file.
Permission Denied Errors During Package Installation
Cause: This typically happens when you try to install packages globally (outside a virtual environment) into a Python installation where your user account doesn’t have write permissions, like the system Python, or a Homebrew installation that somehow got its permissions messed up.
Solution:
- Use Virtual Environments (Highly Recommended): This is the best solution. Activate your virtual environment, and then
pip installwill work without permissions issues because you’re writing to a directory you own within your project. - Avoid
sudo pip install: Whilesudowill force the installation, it’s generally a bad practice. It can lead to packages being installed with root ownership, potentially causing further permission issues down the line, or mixing system-level packages with user-installed ones in an unmanageable way. It’s a “Digital Security” best practice to avoid unnecessarysudouse. - Check Homebrew Permissions: If you installed Python via Homebrew and are still getting permission errors within a virtual environment, it’s highly unusual. You might need to check Homebrew’s permissions (
brew doctorand investigate its suggestions).
“No module named pip”
Cause: This error usually means that while Python might be present, the Pip module itself is missing or corrupted for that specific Python interpreter.
Solution:
- Re-run
ensurepip: For the specific Python version you’re trying to use, runpythonX -m ensurepip. For Python 3, it would bepython3 -m ensurepip. - Reinstall Python: If
ensurepipdoesn’t work, consider reinstalling Python 3, preferably via Homebrew (Method 1), which automatically includes Pip.
SSL Certificate Errors (e.g., “CERTIFICATEVERIFYFAILED”)
Cause: This can happen if your system’s SSL certificates are outdated or if you’re behind a corporate proxy that interferes with secure connections.
Solution:
- Update macOS: Ensure your macOS is fully updated, as this often includes certificate updates.
- Update Certifi: Sometimes, updating the
certifipackage (which provides trusted certificates for Python) can help:pip install --upgrade certifi. - Install Certs for Python (if using
python.orginstaller): If you installed Python frompython.org, check theApplications/Python X.Xfolder for a script namedInstall Certificates.commandand run it. - Temporary Bypass (Use with Caution): As a last resort, for testing purposes only and never in production, you can temporarily disable SSL verification:
pip install --trusted-host pypi.python.org --trusted-host pypi.org --trusted-host files.pythonhosted.org <package_name>. This is a significant “Digital Security” risk and should be avoided if possible.
Conclusion
Installing Pip on your Mac is a fundamental step toward unlocking the full potential of Python development. Whether you’re building sophisticated AI models, crafting robust web applications, or simply automating daily tasks, Pip serves as your essential package manager, connecting you to an ever-expanding ecosystem of libraries and tools.
By following the recommended Homebrew installation method, you ensure a clean, stable, and easily manageable Python environment, fostering both “Productivity” and “Digital Security” in your tech endeavors. Mastering Pip’s core commands and, critically, embracing virtual environments, will elevate your development workflow from amateur to professional, making you an efficient and sought-after practitioner in the “Tech” world.
The ability to seamlessly integrate new technologies and manage complex project dependencies is a cornerstone of modern software development. As you continue your journey in Python, remember that a well-configured environment, starting with Pip, empowers you to focus on innovation rather than infrastructure. This foundational skill not only enhances your technical capabilities but also contributes to your “Personal Branding” as a competent developer, potentially paving the way for lucrative “Online Income” streams or successful ventures rooted in well-engineered solutions. Keep exploring, keep building, and let Pip be your guide through the vast and exciting landscape of Python.
aViewFromTheCave is a participant in the Amazon Services LLC Associates Program, an affiliate advertising program designed to provide a means for sites to earn advertising fees by advertising and linking to Amazon.com. Amazon, the Amazon logo, AmazonSupply, and the AmazonSupply logo are trademarks of Amazon.com, Inc. or its affiliates. As an Amazon Associate we earn affiliate commissions from qualifying purchases.