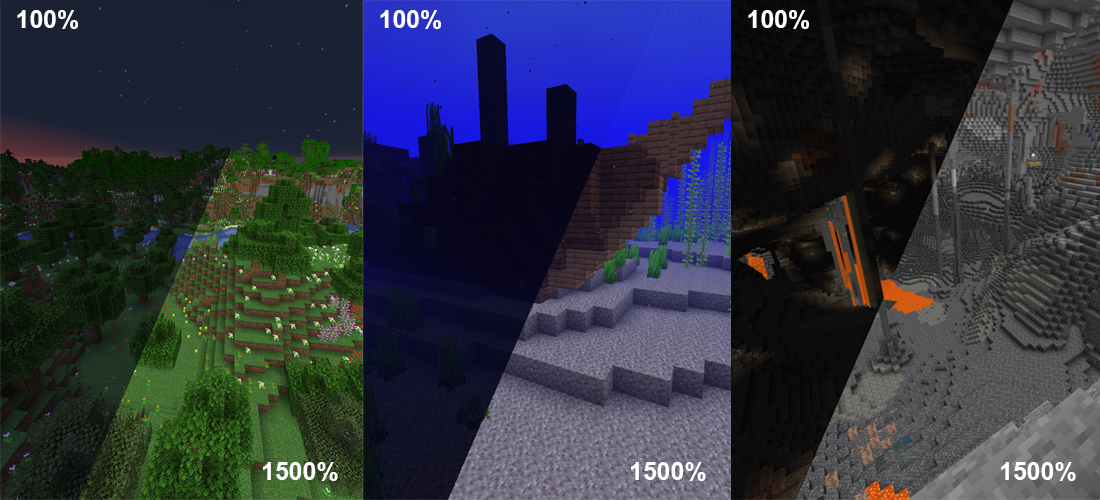
Minecraft, a game celebrated for its boundless creativity and endless exploration, offers an even richer experience through its vibrant modding community. While the “vanilla” game provides a solid foundation, mods unlock new dimensions of gameplay, aesthetics, and functionality. Among the myriad of available modifications, the “Gamma Mod” (or equivalent brightness/lighting enhancement mods) stands out as a quality-of-life improvement that significantly enhances visibility in darker areas, making underground adventures, night-time explorations, and dimly lit builds far more enjoyable and less frustrating.
Navigating the world of Minecraft modding can seem daunting to newcomers. Different mod loaders, compatibility issues, and manual file management often deter players from customizing their experience. However, thanks to powerful tools like CurseForge, installing mods has become remarkably streamlined and user-friendly. CurseForge acts as a centralized hub, simplifying the discovery, installation, and management of mod packs and individual mods, ensuring a smooth and often one-click process even for complex setups. This comprehensive guide will walk you through every step of installing a Gamma Mod (or a similar brightness enhancement mod) into your vanilla Minecraft game, leveraging the intuitive power of the CurseForge application. By the end of this tutorial, you’ll be equipped not only to brighten your Minecraft world but also to confidently explore the vast potential of the modding ecosystem.
Preparing Your Minecraft Environment for Modding
Before diving headfirst into the exciting world of modding, a few preparatory steps are essential to ensure a smooth installation process and safeguard your existing game data. Modding, while generally safe with reputable tools like CurseForge, always carries a slight risk of unforeseen issues. Taking a moment to understand your current setup and implement basic safety measures can save you a lot of headache down the line.
Understanding Vanilla Minecraft and Modding Compatibility
“Vanilla Minecraft” refers to the game in its original, unmodified state, as downloaded directly from Mojang. It’s the purest form of the game, free from any third-party additions. When you introduce mods, you’re essentially modifying this vanilla experience. It’s crucial to understand that mods are typically built for specific versions of Minecraft (e.g., 1.18, 1.19, 1.20). A mod designed for Minecraft 1.18 will almost certainly not work correctly, if at all, on Minecraft 1.20.
Furthermore, most complex mods require a “mod loader” like Forge or Fabric to function. These loaders are not mods themselves but rather frameworks that allow multiple mods to run together harmoniously. CurseForge simplifies this by automatically detecting and installing the necessary mod loader when you create a modded instance or install a mod. However, knowing that these components exist helps in understanding potential issues and future troubleshooting. For this guide, we assume you’re starting with a clean vanilla installation and will let CurseForge handle the underlying mod loader setup.
Backing Up Your Worlds: A Crucial Safety Measure
This step cannot be stressed enough: always back up your Minecraft worlds before making significant changes like installing mods. While CurseForge is incredibly reliable, unforeseen compatibility issues or user errors can sometimes corrupt game files, including your precious world saves. Losing hours, days, or even years of building and progress is a disheartening experience that is entirely preventable.
How to back up your Minecraft worlds:
- Locate your Minecraft saves folder:
- Windows: Press
Windows Key + R, type%appdata%.minecraftsavesand press Enter. - macOS: Open Finder, click “Go” in the menu bar, hold down the
Optionkey, and select “Library”. Then navigate toApplication Support/minecraft/saves. - Linux: Navigate to
~/.minecraft/saves.
- Windows: Press
- Copy the entire ‘saves’ folder: Select the entire
savesfolder and copy it to a safe location on your computer. This could be another drive, a cloud storage service (like Google Drive, Dropbox, or OneDrive), or even a USB stick. - Label your backup: Name the copied folder something descriptive, like “MinecraftSavesPreModding_[Date]”. This way, you’ll know exactly when the backup was made and what it contains.
This simple act provides an invaluable safety net, allowing you to restore your worlds to their original state should anything go wrong with your modded installation.
Introducing CurseForge: Your Gateway to Minecraft Mods
CurseForge has emerged as the definitive platform for discovering, installing, and managing Minecraft mods and mod packs. It transforms the often-complex modding process into an intuitive, user-friendly experience, making it accessible even to those with minimal technical expertise. Understanding why CurseForge is so highly regarded and how to get started with its application is fundamental to a successful modding journey.
Why CurseForge is the Preferred Platform
CurseForge’s popularity stems from several key advantages:
- Centralized Repository: It hosts an enormous collection of mods, ensuring you can find almost any mod you’re looking for, from performance enhancers like OptiFine to sprawling content additions.
- Ease of Installation: Its desktop application features one-click installation for mods and mod packs. This eliminates the need for manual file dragging, dealing with mod loaders, or complex configurations.
- Automatic Mod Loader Management: CurseForge automatically handles the installation of necessary mod loaders (like Forge or Fabric) for your chosen mods or mod packs, ensuring compatibility without manual intervention.
- Version Control: The platform makes it easy to find mods compatible with specific Minecraft versions and helps manage updates, keeping your modded game current and stable.
- Safety and Reliability: Mods on CurseForge are generally vetted, reducing the risk of malicious software. It provides a secure environment compared to downloading from less reputable sources.
- Instance Management: You can create and manage multiple separate Minecraft “instances,” each with its own set of mods and world saves. This allows you to switch between different mod packs or vanilla without conflicts.
- Community Support: As the largest modding platform, it fosters a strong community, making it easier to find support, tutorials, and reviews for mods.
For anyone looking to dive into Minecraft modding, CurseForge is an indispensable tool that dramatically lowers the barrier to entry.
Downloading and Installing the CurseForge App
The first step to harnessing CurseForge’s power is to download and install its official desktop application.
- Visit the Official Website: Open your web browser and navigate to the official CurseForge website. You can usually find it by searching “CurseForge” or “CurseForge app.”
- Download the Installer: Look for the “Download” button, typically prominently displayed on the homepage. Ensure you select the correct version for your operating system (Windows, macOS, or Linux).
- Run the Installer: Once the download is complete, locate the installer file (e.g.,
CurseForge-Setup.exeon Windows) and double-click it to begin the installation process. - Follow On-Screen Prompts: The installer will guide you through the process. Accept the license agreement, choose an installation location (the default is usually fine), and complete the installation.
- Launch CurseForge: After installation, launch the CurseForge application. You may be prompted to log in with an Overwolf account (CurseForge is part of Overwolf) or create one. This is recommended for full functionality but might not be strictly necessary for basic mod installation.
Setting Up Your Minecraft Instance within CurseForge
Once the CurseForge app is installed and running, you need to set up a Minecraft “instance.” An instance is essentially a self-contained version of Minecraft with its own game files, saves, and mods. This separation prevents conflicts between different mod packs or between modded and vanilla versions of the game.
- Select Minecraft: On the left sidebar of the CurseForge application, select “Minecraft” from the list of supported games.
- Create Custom Profile / Browse Modpacks:
- For installing a single mod like Gamma Mod, you have two primary approaches:
- A. Create Custom Profile: Click “Create Custom Profile” (or a similar button). This allows you to choose a specific Minecraft version and mod loader (Forge or Fabric). This is ideal for building a custom mod list from scratch.
- B. Install a Modpack and Add Gamma: Alternatively, you could install an existing lightweight modpack and then add Gamma Mod to it. For this specific guide, creating a custom profile is more direct for just one mod.
- For installing a single mod like Gamma Mod, you have two primary approaches:
- Configure Custom Profile:
- Profile Name: Give your new instance a descriptive name, e.g., “Vanilla+ Gamma” or “My Bright World.”
- Minecraft Version: Select the desired Minecraft version (e.g., 1.20.1, 1.19.2). It’s crucial to pick a version for which the Gamma Mod you intend to use is available. If you’re unsure, generally newer stable versions are a good choice.
- Mod Loader: Choose either “Forge” or “Fabric.” Many modern mods, especially quality-of-life ones, are available for both. If the Gamma Mod you find later specifies one, choose that. If not, Fabric is often preferred for lighter, performance-focused mods. For common mods like Gamma, either will usually work, but it’s good to keep this in mind.
- Game Version: This will auto-populate based on your Minecraft Version selection.
- Click “Create.”
CurseForge will then download and set up the necessary files for this new instance, including the chosen mod loader. This process might take a few minutes. Once complete, your new instance will appear in your Minecraft list within CurseForge.
Locating and Installing the Gamma Mod
With your modding environment prepared and a new Minecraft instance ready, the next step is to find and install the Gamma Mod itself. While “Gamma Mod” is a general term for brightness enhancement, there might be several specific mods that achieve this effect. CurseForge’s search functionality makes discovering them straightforward.
Searching for “Gamma Mod” or Equivalent Brightness Mods
- Navigate to your Custom Instance: In the CurseForge app, click on your newly created custom profile (e.g., “Vanilla+ Gamma”) from the “My Modpacks” list on the left.
- Add More Content: Within the instance’s details, you’ll see a button like “Add More Content” or “Get More Content.” Click this.
- Search for the Mod: In the search bar at the top, type “gamma,” “brightness,” “full bright,” or similar keywords.
- Important Note on “Gamma Mod”: Be aware that often, adjusting the in-game gamma is done by modifying the
options.txtfile directly, and a dedicated “Gamma Mod” might not be strictly necessary for some basic brightness adjustments. However, many players seek a mod that offers more dynamic control, better performance, or works around specific visual limitations. Mods like “Full Bright” or “Light Level Overlay” (which helps you see light levels for mob spawning, but also brightens areas) or even larger optimization mods like OptiFine or Sodium (with Lithium and Phosphor/Iris) often include superior lighting management features that effectively serve the “gamma” purpose. - For this guide, we’re assuming you want a mod that specifically enhances brightness beyond vanilla limits or offers more control. Look for mods explicitly designed for “full bright,” “night vision,” or “gamma control.”
- Important Note on “Gamma Mod”: Be aware that often, adjusting the in-game gamma is done by modifying the
- Filter Results: You can use the filters on the left to narrow down results by Minecraft version and mod loader (Forge/Fabric) to ensure compatibility with your instance. It’s crucial that the mod’s version matches your instance’s Minecraft version.
Understanding Mod Dependencies
As you browse mods, you might encounter terms like “dependencies.” A dependency is another mod or library that a particular mod requires to function correctly. For example, a graphics mod might require a “core library” mod to be installed first.
- CurseForge’s Advantage: One of the greatest benefits of CurseForge is that it often automatically handles dependencies. When you click to install a mod, CurseForge will usually prompt you if it has dependencies and offer to install them for you. This removes a significant hurdle that manual mod installation often presents.
- Checking Mod Pages: If you’re ever unsure, click on a mod to view its details page. This page usually lists required dependencies and often provides installation instructions or compatibility notes. For a simple brightness mod, dependencies are usually minimal, perhaps just the mod loader itself.
One-Click Installation via CurseForge
Once you’ve found a suitable “Gamma Mod” or brightness enhancement mod that matches your Minecraft version and desired mod loader:
- Select the Mod: Click on the mod’s listing to view its page.
- Install Button: Look for the “Install” button. This button typically appears for the latest compatible version of the mod.
- Confirm Installation: Click “Install.” CurseForge will download the mod and place it directly into your custom instance’s mods folder. It will also handle any necessary dependencies.
- Repeat for Other Mods (Optional): If you wish to install other complementary mods (e.g., a mini-map, an inventory sorter), you can repeat this process within the same instance. For a truly “Vanilla+” experience, keeping the mod list light is key.
After the installation is complete, the mod will appear in the “Installed Mods” section of your custom instance’s page within the CurseForge app.
Configuring and Launching Minecraft with the Gamma Mod
With the Gamma Mod successfully installed into your custom CurseForge instance, the final steps involve launching the game, verifying the mod’s functionality, and understanding how to troubleshoot any potential issues.
Launching Your Modded Instance
- Return to CurseForge: Open the CurseForge application and navigate back to your custom Minecraft instance (e.g., “Vanilla+ Gamma”).
- Click “Play”: On the instance’s main page, you’ll see a prominent “Play” button. Click this button.
- Minecraft Launcher: Clicking “Play” in CurseForge will launch the standard Minecraft Launcher. You’ll notice that the selected profile in the Minecraft Launcher is automatically set to your CurseForge instance (e.g., “Vanilla+ Gamma [Forge]” or “Vanilla+ Gamma [Fabric]”).
- Start Game: Click the green “Play” button within the Minecraft Launcher to start the game.
The game will now load with the mod loader (Forge or Fabric) and all the mods you installed through CurseForge, including your Gamma Mod. The initial load time might be slightly longer than vanilla Minecraft, especially if you have many mods.
Verifying the Mod’s Installation In-Game
Once Minecraft loads:
- Check Mod List: Many mod loaders add a “Mods” button to the main menu (often under “Options” or directly on the main screen). Click this to see a list of all active mods. Your Gamma Mod or brightness enhancement mod should be listed here.
- Enter a World: Load an existing world or create a new one.
- Test Brightness: Head into a dark area – a cave, an unlit building, or simply wait for nightfall. Observe the difference.
- If the mod is working as intended, dark areas should be significantly brighter, allowing you to see clearly without placing torches.
- Some Gamma Mods might have in-game configuration options accessible through a hotkey (check the mod’s CurseForge page for details) or through the “Mod Options” menu accessible from the main menu.
- Adjust Settings (if applicable): If your chosen mod offers configuration, explore its settings to fine-tune the brightness to your preference.
If the brightness change is evident, congratulations! You’ve successfully installed your first Minecraft mod using CurseForge.
Troubleshooting Common Issues
While CurseForge simplifies modding, occasional issues can still arise. Here are some common problems and their solutions:
- Game Crashes on Startup:
- Mod Version Mismatch: The most common cause. Ensure the mod’s version exactly matches your Minecraft instance’s version.
- Mod Loader Mismatch: Verify if the mod requires Forge or Fabric and that your instance is set up with the correct loader.
- Conflicting Mods: If you’ve installed multiple mods, they might be incompatible. Try removing all but the Gamma Mod to isolate the issue.
- Outdated Java: Ensure your Java installation is up to date, although CurseForge often bundles its own or manages this.
- Insufficient RAM: Modded Minecraft, especially with many mods, requires more RAM. In the Minecraft Launcher, go to “Installations,” select your CurseForge profile, click “Edit,” then “More Options,” and increase the “JVM arguments”
-Xmxvalue (e.g.,-Xmx4Gfor 4GB RAM).
- Mod Not Appearing In-Game:
- Incorrect Installation Location: Double-check that the mod was installed into the correct CurseForge instance.
- Mod Not Enabled: Some mod loaders or mod management tools allow you to toggle mods on/off. Ensure it’s enabled.
- Lag or Performance Issues:
- Too Many Mods: Each mod adds overhead. If you’re experiencing lag, consider removing non-essential mods.
- Graphics Settings: Lower your in-game graphics settings (render distance, fancy graphics, etc.).
- Optimization Mods: Install performance optimization mods like OptiFine (which also has gamma controls) or Sodium/Lithium/Phosphor (for Fabric).
- CurseForge App Issues:
- Restart App/Computer: A simple restart can often resolve minor glitches.
- Reinstall CurseForge: If persistent, try a clean reinstall of the CurseForge application.
Always refer to the specific mod’s CurseForge page or its developer’s documentation for detailed troubleshooting tips, as some mods have unique requirements or known issues.
Beyond Gamma: Exploring the World of Minecraft Modding
Installing a Gamma Mod is just the first step into the vast and rewarding world of Minecraft modding. CurseForge empowers you to customize your gameplay experience in virtually limitless ways, transforming vanilla Minecraft into something entirely new and tailored to your preferences.
Discovering Other Essential Quality-of-Life Mods
Once you’re comfortable with the process, consider exploring other popular quality-of-life mods that enhance gameplay without drastically altering the core experience:
- Minimaps (e.g., JourneyMap, Xaero’s Minimap): Essential for navigation and marking points of interest in your expansive worlds.
- Inventory Management (e.g., Inventory Sorter, JEI – Just Enough Items): Streamline item organization and provide recipes for crafting, making survival much less cumbersome.
- Performance Boosters (e.g., OptiFine, Sodium/Lithium/Phosphor): Improve frame rates, add graphical enhancements (like shaders), and offer more video settings control. OptiFine, in particular, often includes its own gamma controls.
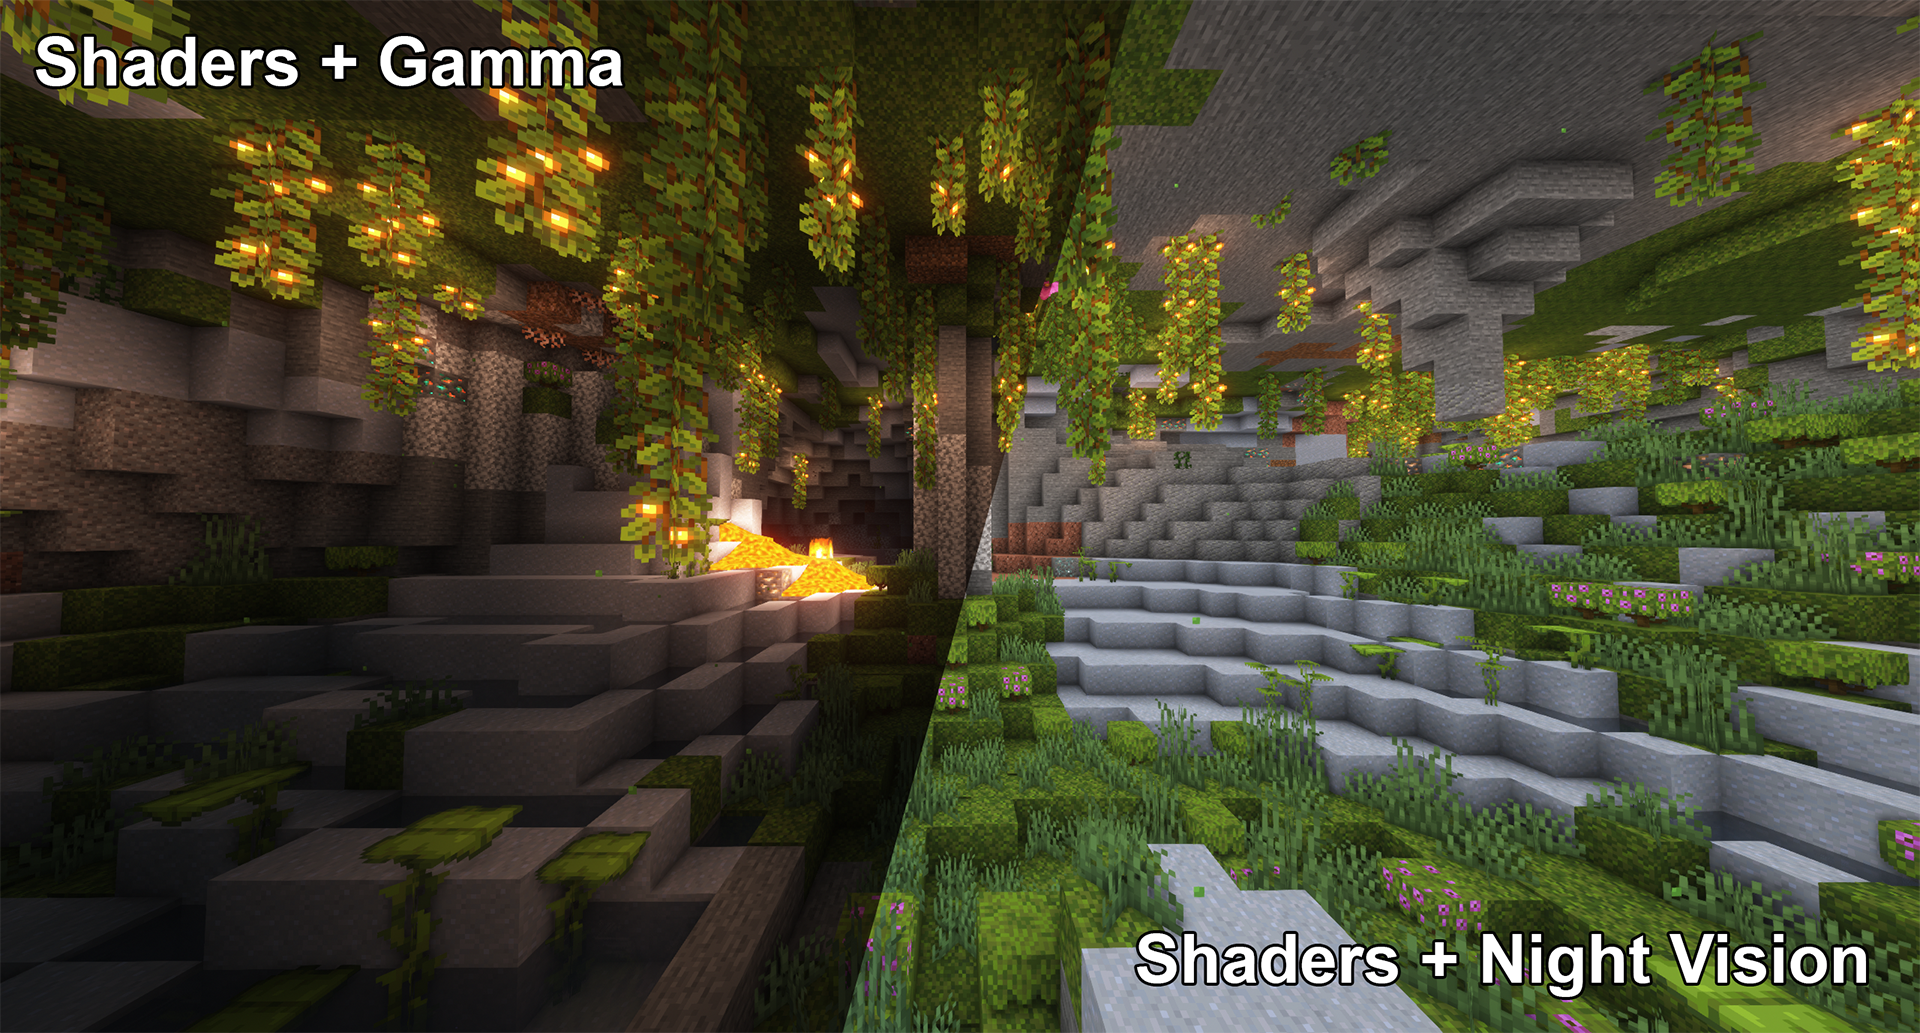
- Shaders (e.g., Complementary Shaders, BSL Shaders): For a truly transformative visual experience, shaders dramatically overhaul lighting, shadows, and water effects, though they require a robust graphics card. Many shaders also have their own full-bright options.
- Client-Side Tweaks (e.g., Litematica for building, Tweakeroo for various client-side adjustments): Offer powerful tools for builders and advanced players.
Remember to always install mods compatible with your specific Minecraft version and mod loader (Forge/Fabric).

Staying Updated and Safe with Mods
- Regular Updates: Mod developers frequently release updates for new Minecraft versions or to fix bugs and add features. CurseForge makes updating mods simple; you’ll often see prompts when new versions are available. However, always back up your worlds before updating any major mod or mod loader.
- Source Credibility: Stick to reputable sources like CurseForge for downloading mods. Avoid unofficial sites that might host outdated, broken, or even malicious files. The safety and vetting process on CurseForge are designed to protect users.
- Community Engagement: Join Minecraft modding communities on Reddit, Discord, or forums. These platforms are excellent for discovering new mods, getting troubleshooting help, and staying informed about the latest developments.
By leveraging the powerful and user-friendly CurseForge platform, you’ve taken control of your Minecraft experience, starting with the simple yet impactful addition of a Gamma Mod. This newfound ability to customize your game opens up a universe of possibilities, allowing you to craft a Minecraft adventure that truly belongs to you. Happy modding!
aViewFromTheCave is a participant in the Amazon Services LLC Associates Program, an affiliate advertising program designed to provide a means for sites to earn advertising fees by advertising and linking to Amazon.com. Amazon, the Amazon logo, AmazonSupply, and the AmazonSupply logo are trademarks of Amazon.com, Inc. or its affiliates. As an Amazon Associate we earn affiliate commissions from qualifying purchases.