For anyone working with virtual machines, VMware Workstation and vSphere are indispensable tools. They provide a robust platform for running various operating systems within a single physical machine, offering unparalleled flexibility for development, testing, and system administration. However, the true power and seamless experience of a virtual machine are unlocked only when “VMware Tools” are properly installed. These crucial utilities enhance performance, improve graphics, and enable essential functionalities like drag-and-drop file transfers, shared folders, and proper screen resolution scaling.
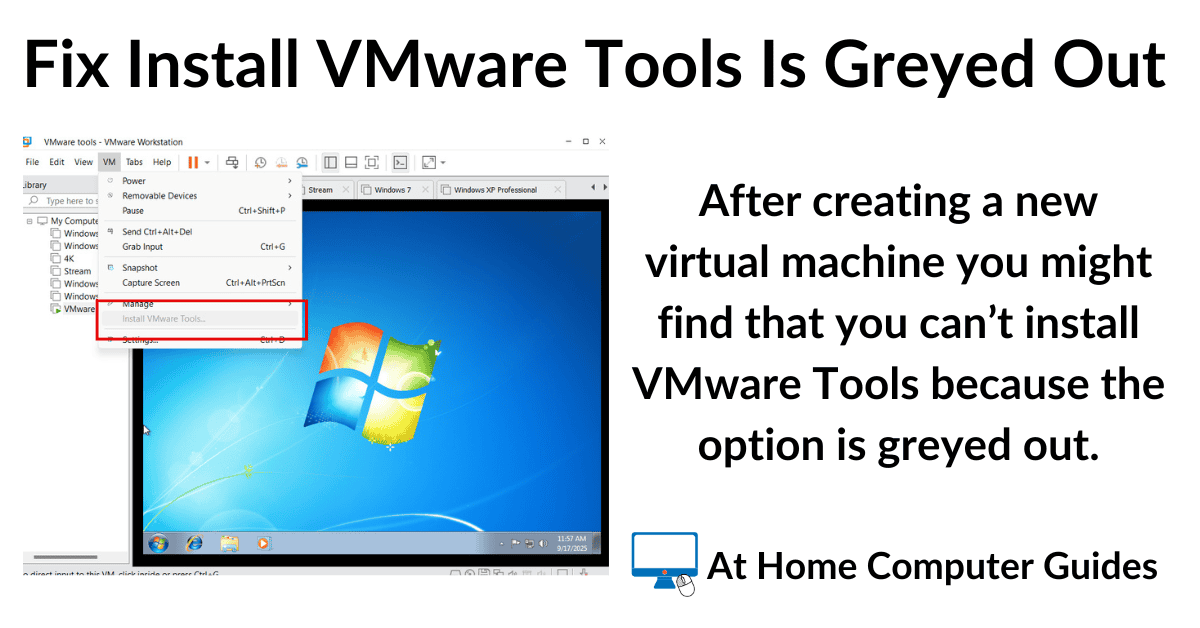
It can be incredibly frustrating, then, when you find the “Install VMware Tools” option greyed out, preventing you from installing or upgrading this vital component. This seemingly minor issue can halt productivity and leave you with a sluggish, less-than-optimal virtual environment. Fortunately, this common problem is often resolvable with a systematic approach. This comprehensive guide will delve into the various reasons why the “Install VMware Tools” option might appear greyed out and provide detailed, step-by-step solutions to get your virtual machine running at its peak performance. We’ll cover everything from simple checks to more advanced troubleshooting techniques, ensuring you have all the knowledge needed to tackle this technical hurdle.
Understanding VMware Tools and Their Importance
Before diving into solutions, it’s essential to grasp what VMware Tools are and why they are so fundamental to your virtual machine experience. Understanding their role often sheds light on why certain troubleshooting steps are necessary.
What are VMware Tools?
VMware Tools is a suite of utilities that enhances the performance of the virtual machine’s guest operating system and improves user interaction with the VM. It’s essentially a set of drivers and utilities that bridges the gap between the virtualized hardware and the guest operating system. When you install an operating system like Windows or Linux in a VMware virtual machine, it initially sees generic, non-optimized virtual hardware. VMware Tools provides the specialized drivers for this virtual hardware, allowing the guest OS to interact more efficiently with the underlying hypervisor.
Key components of VMware Tools include:
- SVGA driver: Enhances graphics performance, enables higher screen resolutions, and allows for automatic resizing of the guest display.
- VMXNet3 driver (for network): Provides optimized network performance, often significantly faster than the default emulated network adapter.
- Paravirtualized SCSI driver (pvscsi): Improves storage I/O performance.
- Shared folders feature: Enables easy file sharing between the host and guest operating system.
- Drag-and-drop and copy-paste functionality: Seamlessly transfer files and text between host and guest.
- Time synchronization: Keeps the guest OS clock in sync with the host.
- Shutdown/restart gracefully: Allows the host to initiate a clean shutdown or restart of the guest OS.
- Memory ballooning: Helps the hypervisor manage memory more efficiently across multiple VMs.
Why are they Crucial for Virtual Machine Performance?
Without VMware Tools, your virtual machine operates on basic, generic drivers. This results in several noticeable limitations and performance issues:
- Poor Graphics Performance: You might be stuck with low resolutions, no proper scaling, and sluggish graphical responsiveness. This is particularly problematic for applications requiring any graphical fidelity or for general productivity where screen real estate is key.
- Suboptimal Network and Disk I/O: Network transfers will be slower, and disk operations will be less efficient, impacting application load times, data processing, and overall system responsiveness.
- Lack of Integration Features: Essential quality-of-life features like drag-and-drop, copy-paste between host and guest, and shared folders will be unavailable, making data transfer cumbersome and inefficient.
- Manual Time Synchronization: The guest OS time might drift from the host, leading to potential issues with timestamps, logging, and applications sensitive to accurate time.
- Inefficient Resource Management: The hypervisor cannot efficiently reclaim unused memory from the guest without the memory balloon driver, potentially impacting the performance of other VMs or the host itself.
In essence, VMware Tools transform a basic virtual machine into a highly integrated, high-performance, and user-friendly computing environment. Therefore, resolving the greyed-out “Install VMware Tools” option is a priority for anyone aiming to maximize their virtual infrastructure.
Common Reasons for the Greyed-Out ‘Install VMware Tools’ Option
The ‘Install VMware Tools’ option usually becomes greyed out for a variety of reasons, often stemming from the current state of the virtual machine, its configuration, or even issues within the VMware application itself. Understanding these underlying causes is the first step towards effective troubleshooting.
Incorrect VM State or Configuration
One of the most frequent culprits is the operational state or specific configuration of the virtual machine itself.
- Virtual Machine is Not Powered On: This is perhaps the most obvious reason. VMware Tools are guest operating system utilities, and they can only be installed or interacted with when the guest OS is running. If your VM is powered off, suspended, or in a saved state, the option will be unavailable.
- VMware Tools are Already Installed and Up-to-Date: If VMware Tools are already installed and are at the latest version compatible with your VMware product, the option might appear greyed out, or you might see “Reinstall VMware Tools” or “Update VMware Tools” instead. In some cases, if the tools are fully installed, the “Install” option might simply not be applicable.
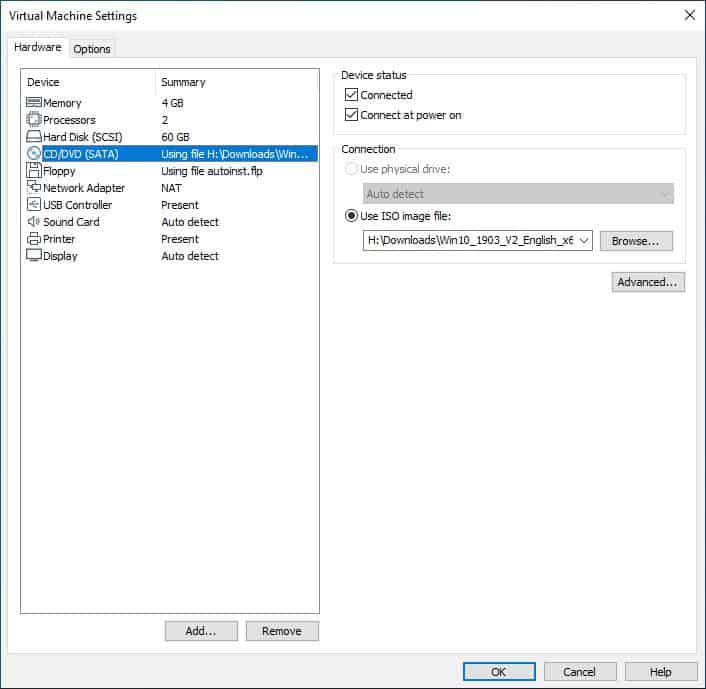
- An ISO Image is Already Mounted to the Virtual CD/DVD Drive: When you initiate the “Install VMware Tools” process, VMware typically mounts a special ISO image (containing the installation files) to the VM’s virtual CD/DVD drive. If another ISO image (e.g., an operating system installation disk, an application installer) is already mounted, VMware cannot mount its own ISO, thus grey-ing out the option.
- Virtual Machine Hardware Version is Incompatible: While less common, an older virtual machine hardware version might sometimes cause issues, especially if you’re running a very old VM on a newer VMware Workstation or ESXi version. Conversely, an extremely new VM hardware version might have compatibility issues with an older VMware host application.
Host/Guest OS Issues
Sometimes, the problem isn’t directly with VMware but with the guest operating system or even the host environment.
- Guest Operating System is Not Fully Ready: If the guest OS is still booting up, undergoing a major update, or in a state of high resource utilization, it might not be ready to receive the VMware Tools ISO or initiate the installation process.
- Antivirus or Firewall Interference: Security software on either the host or the guest OS can sometimes interfere with the mounting of the ISO, the execution of the installer, or the installation of drivers. This is particularly true for overly aggressive security settings.
- Corrupted Guest OS Files or Registry: Rarely, a severely corrupted guest operating system can prevent the installation process from starting or completing correctly.
- Missing Dependencies in Linux Guests: For Linux-based virtual machines, VMware Tools often relies on specific kernel headers, development tools (like
makeandgcc), and other packages. If these dependencies are not installed, the installation might fail, and the option could remain problematic.
VMware Software Glitches
Occasionally, the issue might stem from the VMware application itself.
- Outdated VMware Workstation/ESXi Version: Running an old version of VMware Workstation or an ESXi host can lead to compatibility issues with newer guest operating systems or newer VMware Tools packages.
- Corrupt VMware Workstation/vSphere Client Installation: A rare but possible scenario is a corrupted installation of the VMware Workstation application or issues with the vSphere Client/Web Client, leading to incorrect menu behavior.
- VMware Services Not Running (Host): For VMware Workstation, if certain background services related to virtual machine management are not running correctly on the host, it can impact VM functionality, including the VMware Tools installation.
By methodically checking these potential causes, you can narrow down the problem and apply the most appropriate solution.
Step-by-Step Solutions to Resolve the Issue
With a clear understanding of the potential causes, we can now move on to a structured approach for resolving the greyed-out “Install VMware Tools” option. These solutions progress from simple checks to more advanced troubleshooting techniques.
Basic Checks and Restart Procedures
Start with the easiest and most common fixes. Many issues are resolved by simply ensuring the VM and related services are in a correct state.
- Verify Virtual Machine Power State:
- Ensure your virtual machine is powered on and the guest operating system is fully booted and responsive. If it’s powered off, suspended, or paused, power it on.
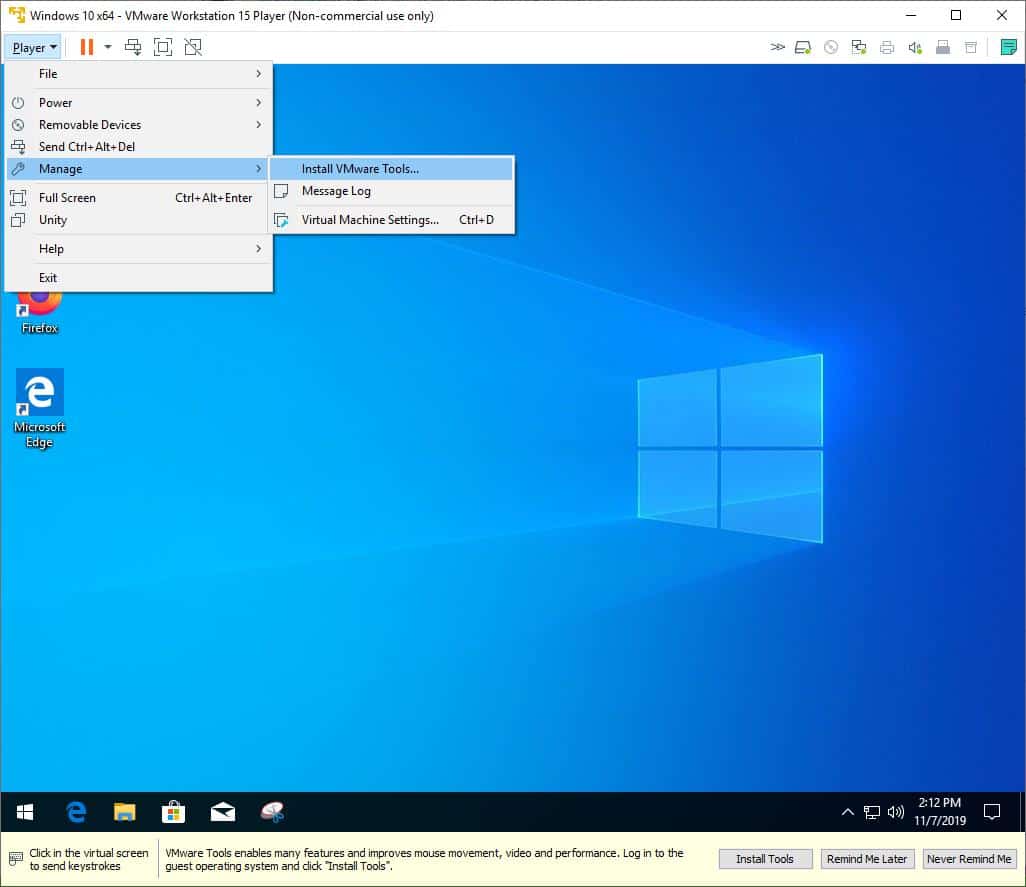
- How to: In VMware Workstation, right-click the VM and select “Power > Power On”. In vSphere Client, right-click the VM, select “Power > Power On”.
- Reboot the Guest Operating System:
- Even if the VM is powered on, sometimes a fresh boot of the guest OS can resolve temporary glitches that prevent the Tools installer from being recognized.
- How to: Perform a clean restart from within the guest operating system (e.g., Start > Restart in Windows, or
sudo rebootin Linux).
- Check if VMware Tools are Already Installed/Up-to-Date:
- If the tools are already installed, the option might be greyed out or prompt for an update/reinstallation.
- How to: In Windows guest, check “Add or Remove Programs” or “Programs and Features” for “VMware Tools”. In Linux, check for the
/usr/bin/vmware-toolbox-cmdutility or theopen-vm-toolspackage. If they are, you might only need to update them, not install from scratch.
- Restart VMware Services (Workstation/Fusion):
- On your host machine, ensure VMware related services are running correctly.
- How to (Windows Host): Press
Win + R, typeservices.msc, and press Enter. Look for services like “VMware Authorization Service”, “VMware Workstation Server”, and “VMware USB Arbitration Service”. Right-click and restart them if they’re not running or seem stuck.
- Restart VMware Workstation/Client Application:
- Close and reopen VMware Workstation or the vSphere Client/Web Client. Sometimes the application itself needs a refresh.
Managing Virtual Machine Media
The most common reason for the greyed-out option is often related to the virtual CD/DVD drive.
- Eject Any Currently Mounted ISO Images:
- If there’s an existing ISO or physical CD/DVD mounted to the VM’s virtual drive, VMware cannot mount its own Tools ISO.
- How to (Workstation): Go to
VM > Removable Devices > CD/DVD (SATA) > DisconnectorVM > Settings > CD/DVD (SATA) > (select the drive) > Disconnect at power off > OK(then power off/on the VM). - How to (vSphere Client): Right-click the VM >
Edit Settings>Virtual Hardwaretab >CD/DVD Drive(select the drive) > ensure “Datastore ISO File” or “Client Device” is not connected, or specifically select “Host Device” and ensure nothing is inserted. - After disconnecting, try the “Install VMware Tools” option again.
- Manually Mount the VMware Tools ISO:
- If the automatic mounting fails, you can often manually mount the ISO.
- How to (Workstation): Navigate to the VMware Workstation installation directory (e.g.,
C:Program FilesVMwareVMware Workstation). Inside, you’ll find ISO files likewindows.iso,linux.iso, etc. for different guest OS types. In your VM’s settings, configure the CD/DVD drive to “Use ISO image file” and browse to the appropriate ISO. Once mounted, open “This PC” (Windows) or the file manager (Linux) inside the guest OS and run the installer from the virtual CD drive. - How to (vSphere Client): Upload the appropriate VMware Tools ISO (found in
C:Program FilesVMwareVMware Workstationif you have it, or VMware’s product downloads) to a datastore accessible by your ESXi host. Then, in the VM’sEdit Settings, configure the CD/DVD drive to “Datastore ISO File” and browse to the uploaded ISO. Once mounted, proceed with the installation inside the guest OS.
- Check Virtual CD/DVD Drive Configuration:
- Ensure the virtual CD/DVD drive is configured correctly in the VM’s hardware settings. It should exist and be connected.
- How to: In VM settings, ensure a CD/DVD drive is present and enabled. For Workstation, it’s typically SATA or IDE. For ESXi, it’s usually
CD/DVD Drive 1etc. Ensure “Connect at power on” is checked if you want it connected by default.
Addressing Guest Operating System Specifics
Sometimes the guest OS itself needs some attention for VMware Tools to install correctly.
- Run Guest OS Updates:
- Ensure the guest operating system is fully updated. Missing patches or service packs can sometimes conflict with VMware Tools.
- How to: In Windows, go to
Settings > Update & Security > Windows Update. In Linux, runsudo apt update && sudo apt upgrade(Debian/Ubuntu) orsudo yum update(CentOS/RHEL).
- Temporarily Disable Antivirus/Firewall (Guest OS):
- If an overzealous security program is blocking the installation, temporarily disabling it can help. Remember to re-enable it immediately after installation.
- How to: In Windows, go to
Start > Settings > Update & Security > Windows Security > Virus & threat protection > Manage settingsand temporarily turn off “Real-time protection”. For third-party antivirus, refer to its documentation.
- Install Necessary Dependencies (Linux Guests):
- For Linux VMs, VMware Tools often requires specific build tools and kernel headers.
- How to: Before installing VMware Tools, open a terminal in your Linux guest and run:
- Debian/Ubuntu-based:
sudo apt update && sudo apt install build-essential linux-headers-$(uname -r) - RedHat/CentOS-based:
sudo yum update && sudo yum install kernel-devel perl gcc make - Then retry the VMware Tools installation.
- Debian/Ubuntu-based:
Advanced Troubleshooting for Persistent Problems
If the basic and media-related checks don’t work, you might need to try more advanced solutions.
-
Update VMware Workstation/ESXi Host:
- Ensure your VMware Workstation application or ESXi host is running the latest available updates. Newer VMware Tools versions are designed for newer hypervisor versions.
- How to (Workstation):
Help > Check for Updates. - How to (ESXi): This typically involves applying patches or upgrading your ESXi host, which should be done with caution and proper backup procedures.
-
Upgrade Virtual Machine Hardware Version:
- An outdated VM hardware version can occasionally cause issues. Upgrading it allows the VM to utilize newer virtual hardware features and drivers.
- How to: Power off the VM completely. Then, in Workstation,
VM > Manage > Change Hardware Compatibility. In vSphere Client, right-click VM >Compatibility > Upgrade VM Compatibility. Always back up your VM before performing this step, as it’s irreversible.
-
Perform a Clean Reinstallation of VMware Tools:
- If Tools were partially installed or corrupted, a clean reinstall might be necessary.
- How to (Windows Guest): Inside the guest OS, go to
Control Panel > Programs and Features(orSettings > Apps > Apps & features), find “VMware Tools”, and uninstall it. Reboot the VM. Then, attempt to install VMware Tools again from the VMware menu. - How to (Linux Guest – if previously installed via tar.gz): Open a terminal, navigate to the VMware Tools installation directory (often
/usr/local/binor/etc/vmware-tools), and runsudo ./vmware-uninstall-tools.pl. Reboot and then try to install again.
-
Install VMware Tools via Command Line (Advanced Users):
- Sometimes, the GUI installer fails, but a command-line installation can succeed. This is particularly relevant for Linux guests.
- How to (Linux Guest):
- Mount the VMware Tools ISO (as described in “Manually Mount the VMware Tools ISO”).
- Open a terminal in the guest OS.
- Mount the CD-ROM:
sudo mount /dev/cdrom /mnt(or wherever your CD-ROM is, checklsblk). - Navigate to the mounted directory:
cd /mnt. - Extract the installer:
tar -zxf VMwareTools-*.tar.gz -C /tmp. - Navigate to the extracted directory:
cd /tmp/vmware-tools-distrib. - Run the installer:
sudo ./vmware-install.pl -d(the-daccepts default options). - Unmount the CD-ROM:
sudo umount /mnt. - Reboot the VM.
- How to (Windows Guest – if you have the standalone setup.exe): After manually mounting the
windows.iso, navigate to the virtual CD drive in File Explorer and runsetup.exe(for 32-bit) orsetup64.exe(for 64-bit) as administrator.
-
Consider Open VM Tools (Linux Guests):
- For many modern Linux distributions, “Open VM Tools” (open-vm-tools) are the preferred and often pre-installed alternative to VMware’s proprietary Tools. They are open-source implementations and are often integrated directly into the distribution’s package repositories.
- How to: Check if
open-vm-toolsis installed:sudo apt list --installed | grep open-vm-toolsorsudo yum list installed | grep open-vm-tools. If not, install it:sudo apt install open-vm-tools(Debian/Ubuntu) orsudo yum install open-vm-tools(CentOS/RHEL). For desktop environments, you might also wantopen-vm-tools-desktopfor enhanced GUI integration. If you haveopen-vm-toolsinstalled, the “Install VMware Tools” option in the menu may be greyed out by design, as the essential functionality is already provided by the open-source package.
Prevention and Best Practices
While knowing how to fix the problem is crucial, adopting best practices can significantly reduce the likelihood of encountering the “Install VMware Tools” greyed-out issue in the first place.
Keeping Software Updated
Regularly updating your VMware Workstation, ESXi hosts, and guest operating systems is paramount.
- VMware Hypervisor: Newer versions of VMware products often include bug fixes, performance enhancements, and updated VMware Tools packages that are compatible with the latest guest operating systems. Running an outdated hypervisor can lead to compatibility conflicts, making Tools installation problematic.
- Guest Operating Systems: Keeping your guest OS updated ensures that it has the necessary patches, drivers, and dependencies for VMware Tools to install and function correctly. This is especially true for kernel updates in Linux, which often require corresponding kernel headers for VMware Tools to build its modules.
Proper VM Shutdown Procedures
Always shut down your virtual machines gracefully. Abruptly powering off or suspending VMs can sometimes lead to file system corruption within the guest or leave virtual hardware in an inconsistent state, which might interfere with subsequent VMware Tools operations. Use the operating system’s shutdown command or the graceful shutdown options provided by VMware.
Regular Maintenance
Just like physical machines, virtual machines benefit from regular maintenance.
- Periodically Check VMware Tools Status: In the VMware Workstation UI or vSphere Client, you can usually see the status of VMware Tools for each VM. If it shows “Out of date” or “Not installed,” address it promptly.
- Clean Up Old Snapshots: While not directly related to Tools installation, managing snapshots prevents disk bloat and ensures the VM’s configuration files remain lean and less prone to corruption.
- Verify VM Configuration: Periodically review your VM’s hardware settings (CD/DVD drive, network adapters, etc.) to ensure they are configured as expected and not causing unintended conflicts.
By following these best practices, you can maintain a stable and optimized virtual environment, minimizing the chances of encountering the frustrating “Install VMware Tools” greyed-out problem.
Conclusion
The “Install VMware Tools” option being greyed out is a common, albeit annoying, obstacle for many virtual machine users. However, as we’ve explored, it’s rarely a sign of an unfixable problem. From simply ensuring your virtual machine is powered on to delving into advanced command-line installations and dependency checks for Linux guests, a systematic approach to troubleshooting will almost always lead to a resolution.
VMware Tools are not just an optional add-on; they are the backbone of a high-performing and integrated virtual machine experience. They unlock essential features that vastly improve productivity, from seamless file transfers to optimized graphics and networking. When these tools are not properly installed, your virtual environment operates at a significant disadvantage.
By understanding the common reasons behind the greyed-out option—ranging from incorrect VM states and media conflicts to guest OS issues and VMware software glitches—you can efficiently diagnose the problem. The step-by-step solutions provided in this guide cover the vast majority of scenarios, empowering you to tackle this technical challenge with confidence. Remember to always start with the basic checks and progressively move towards more complex solutions, and always consider backing up critical VMs before making significant configuration changes. With a little patience and the right knowledge, you’ll have your VMware Tools up and running, ensuring your virtual machines deliver the performance and fluidity you expect.
aViewFromTheCave is a participant in the Amazon Services LLC Associates Program, an affiliate advertising program designed to provide a means for sites to earn advertising fees by advertising and linking to Amazon.com. Amazon, the Amazon logo, AmazonSupply, and the AmazonSupply logo are trademarks of Amazon.com, Inc. or its affiliates. As an Amazon Associate we earn affiliate commissions from qualifying purchases.