In the rapidly evolving world of technology, efficiency and control over your digital environment are paramount. For macOS users, especially those deeply entrenched in development, system administration, or simply power users seeking greater flexibility, the native software management tools can often feel restrictive. This is where Homebrew, often affectionately referred to as “Brew,” steps in. It’s a free and open-source package manager that simplifies the installation, updating, and management of command-line tools and GUI applications on Apple’s operating system, transforming your Mac into an even more powerful workstation.
This comprehensive guide will walk you through every step of installing Homebrew on your Mac, from essential prerequisites to advanced usage tips and troubleshooting. By the end, you’ll not only have Brew up and running but also understand its immense potential to streamline your workflow, boost productivity, and secure your software ecosystem. Embracing tools like Homebrew is a clear marker of a tech-savvy approach, reflecting a commitment to optimizing your digital infrastructure – a value that resonates across technology trends, digital security, and even personal branding for professionals.
Understanding Homebrew: The Missing Package Manager for macOS
Imagine a vast library of software, accessible with simple, intuitive commands right from your terminal. That’s essentially what Homebrew provides for macOS. Without it, installing many developer tools, utilities, or even specific versions of programming languages often involves navigating complex build instructions, manually downloading archives, and grappling with dependencies. Homebrew distills this complexity into elegant one-line commands.
What is Homebrew and Why Do You Need It?
Homebrew is described as “the missing package manager for macOS” for a very good reason. While operating systems like Linux have long benefited from robust package managers (like apt on Debian/Ubuntu or yum/dnf on Red Hat/Fedora), macOS historically lacked an equally powerful, centralized solution. Homebrew fills this void by providing a straightforward way to install Unix tools, programming languages, and a plethora of other open-source software that Apple doesn’t bundle by default.
At its core, Homebrew fetches source code or pre-compiled binaries from various repositories, compiles them if necessary (though often it uses pre-compiled “bottles” for speed), and installs them into a user-friendly directory structure. It intelligently manages dependencies, ensuring that all necessary components for a piece of software are also installed, updated, or removed when no longer needed. This automation saves countless hours and prevents the dreaded “dependency hell” that can plague manual installations.
Key Benefits for macOS Users
The advantages of integrating Homebrew into your macOS workflow are numerous, impacting efficiency, security, and the overall usability of your system:
- Streamlined Software Management: The most obvious benefit is simplicity. Install software with
brew install [package], update everything withbrew upgrade, and remove withbrew uninstall [package]. It’s a consistent, easy-to-learn interface for managing a vast array of software. This efficiency directly contributes to productivity, a key theme for any tech professional or business seeking to optimize operations. - Access to a Vast Software Library: Homebrew boasts an incredibly extensive collection of “formulae” (recipes for installing command-line tools) and “casks” (recipes for installing GUI applications). From popular programming languages like Python, Node.js, and Ruby to databases like PostgreSQL and MySQL, and essential utilities like Git, wget, htop, and countless others, Homebrew provides instant access.
- Dependency Resolution: Homebrew automatically handles software dependencies. When you install a package, Homebrew identifies and installs any other packages it relies on, ensuring everything works correctly without manual intervention.
- Non-Intrusive Installation: By default, Homebrew installs software in
/opt/homebrew(for Apple Silicon Macs) or/usr/local(for Intel Macs). This approach keeps system files separate from user-installed software, reducing the risk of conflicts and making it easier to manage and remove applications without affecting the core operating system. - Keeps Software Up-to-Date: Regularly running
brew updateandbrew upgradeensures all your installed software is current. This is not just about getting new features; it’s also a critical aspect of digital security, as updates often include crucial security patches that protect against vulnerabilities. - Developer-Friendly: For developers, Homebrew is an indispensable tool. It provides a consistent environment for managing development tools, making it easier to set up new machines, onboard team members, and ensure everyone is working with the correct software versions. This professionalism ties into personal branding and corporate identity, showcasing an organized and efficient approach to technology.
Prerequisites: Gearing Up for Installation
Before you can unleash the power of Homebrew, there are a couple of essential prerequisites to ensure a smooth and successful installation. These steps involve preparing your Mac’s environment to properly compile and execute the Homebrew installation script.
Installing Xcode Command Line Tools
The primary prerequisite for Homebrew is Apple’s Xcode Command Line Tools. While you don’t need to install the full Xcode IDE (the massive development environment), many of the tools Homebrew relies on for compiling software are contained within this smaller package. These tools include Git, make, a C/C++/Objective-C compiler (Clang), and various Unix utilities.
To install Xcode Command Line Tools:
- Open Terminal: You can find the Terminal application in
Applications/Utilities/or by searching for it with Spotlight (Command + Space and type “Terminal”). - Execute the Installation Command: In the Terminal window, type the following command and press Enter:
bash

xcode-select --install
- Follow the Prompts: A software update dialog will appear, asking if you want to install the command-line developer tools. Click “Install” and then “Agree” to the terms and conditions.
- Wait for Completion: The download and installation process might take a few minutes, depending on your internet connection. Once completed, the Terminal will return to the command prompt.
If you already have Xcode Command Line Tools installed (perhaps from a previous setup or if you’re a developer), the system might inform you that the tools are already installed. In such cases, you can proceed directly to the next step.
Ensuring Your System is Ready
Beyond the Xcode Command Line Tools, there are a few other considerations to ensure your Mac is optimally prepared:
- Administrator Privileges: You’ll need administrator privileges to install Homebrew, as it writes files to system-level directories. If you’re using your personal Mac, your user account likely already has these. If you’re on a managed machine, ensure you have the necessary permissions or consult with your IT department.
- Internet Connection: Homebrew requires an active internet connection to download its installer script and subsequently to fetch software packages.
- Sufficient Disk Space: While Homebrew itself is relatively small, the software you install using it can consume significant disk space. Ensure you have ample free space, especially if you plan on installing large applications or development environments.
- Update macOS: While not strictly mandatory for Homebrew’s base installation, it’s always good practice to keep your macOS up to date. Running the latest version helps ensure compatibility and benefits from Apple’s most recent security patches and performance enhancements. You can check for updates via
System Settings(orSystem Preferences) >General>Software Update.
Step-by-Step Homebrew Installation Guide
With the prerequisites handled, you’re now ready for the main event: installing Homebrew. This process is remarkably straightforward, involving a single command executed in your Terminal.
Executing the Installation Command
The Homebrew installation is managed by a script designed to safely and efficiently set up the package manager on your system.
- Open Terminal: If you closed it after installing Xcode Command Line Tools, open it again.
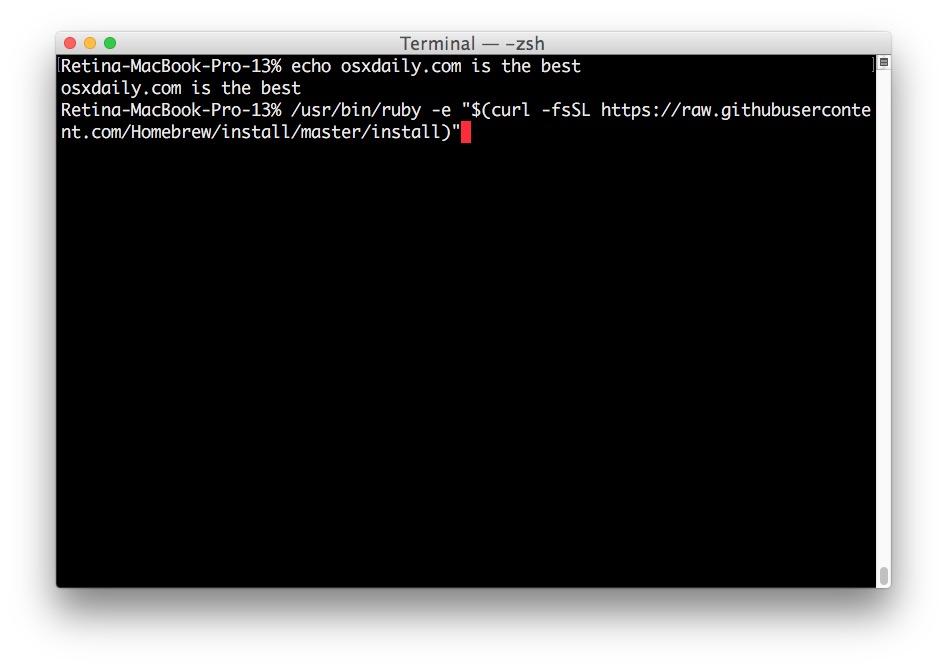
- Visit the Official Homebrew Website: It’s always best practice to get the latest installation command directly from the official source: brew.sh. This ensures you’re using the most current and secure script.
- Copy the Installation Command: On the Homebrew homepage, you’ll find a prominent installation command. It typically looks something like this:
bash

/bin/bash -c "$(curl -fsSL https://raw.githubusercontent.com/Homebrew/install/HEAD/install.sh)"
Self-correction: I should specify the path correctly for Apple Silicon vs Intel if possible, but the installer script handles it, sobrew.shis sufficient to point to. - Paste and Execute: Paste this command into your Terminal and press Enter.
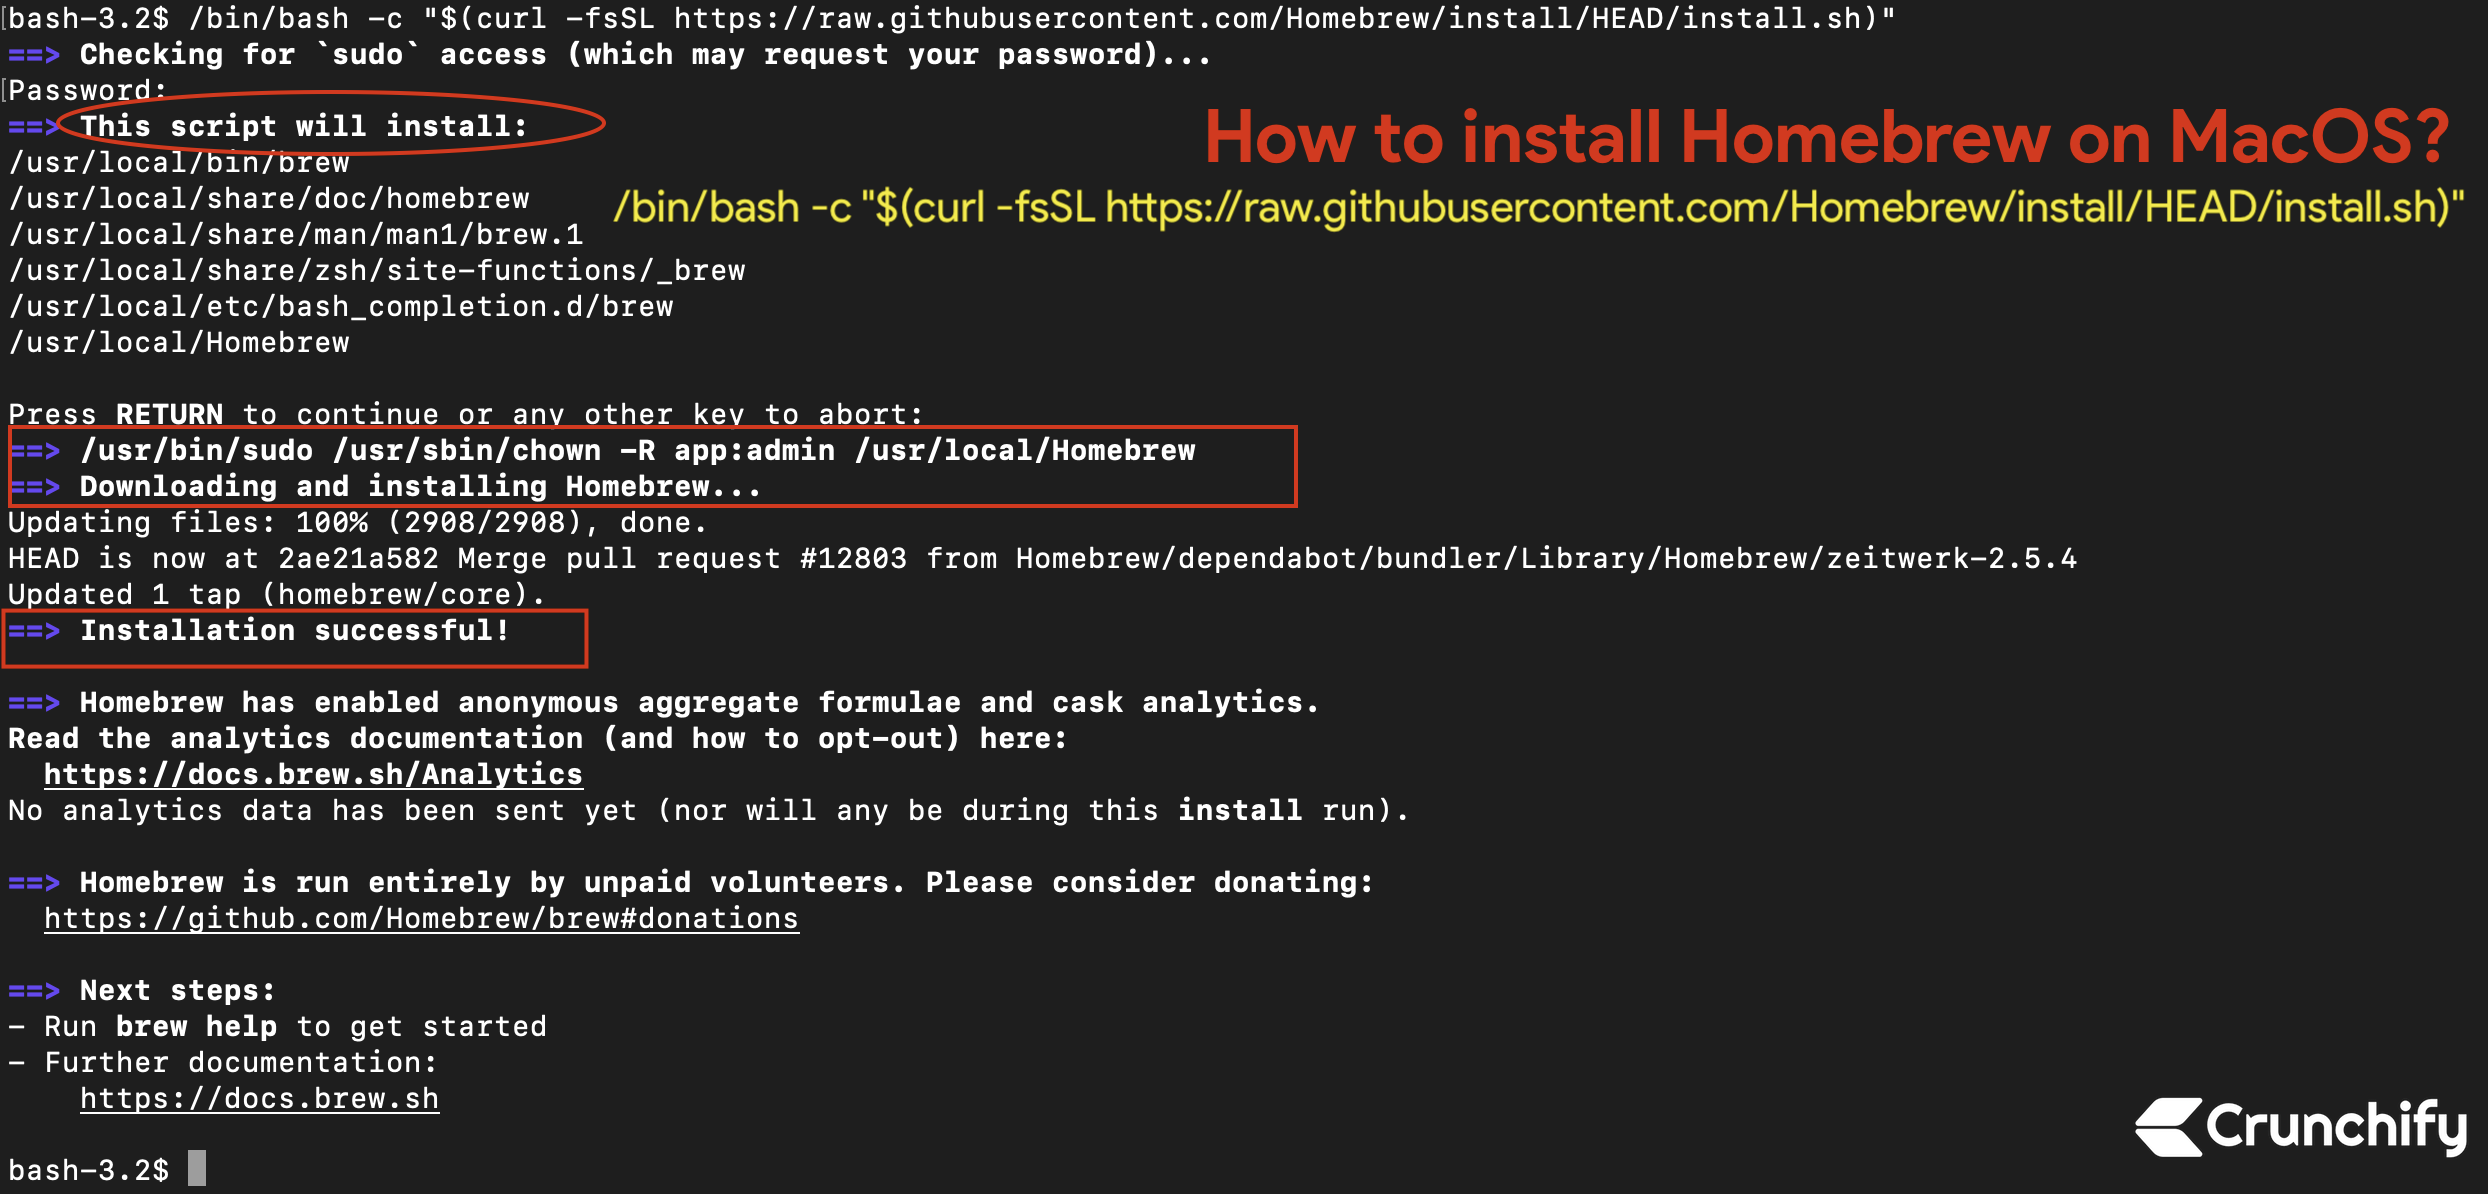
- Provide Administrator Password: The script will likely prompt you for your administrator password (the same one you use to log into your Mac). Type it in and press Enter. Note that your input won’t be displayed on the screen for security reasons.
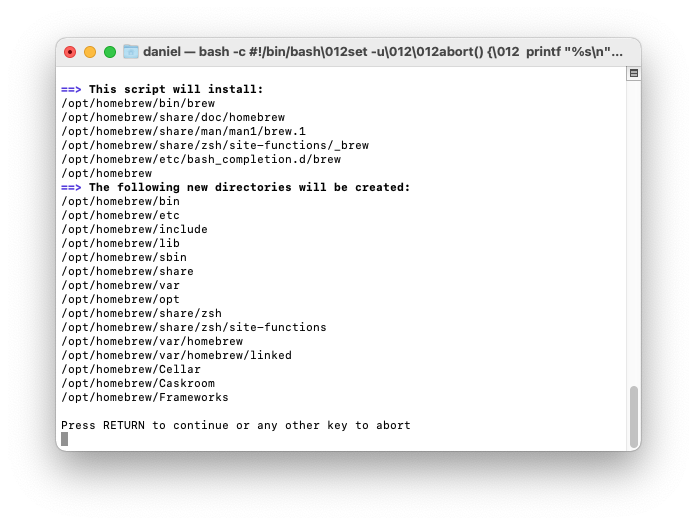
- Review Installation Details: The installer script will display a summary of what it’s about to do, including the directories it will create and modify. Review this information and press Enter when prompted to continue.
- Wait for Installation: The script will download and install Homebrew. This process involves fetching necessary files and setting up the directory structure. It might take several minutes, depending on your internet speed and system performance. You’ll see various messages scrolling through your Terminal as it progresses.
Verifying a Successful Installation
Once the installation script completes, it’s crucial to verify that Homebrew has been installed correctly and is accessible from your Terminal.
- Check for Success Messages: The installer script itself often provides a success message upon completion. Look for text indicating that Homebrew has been installed.
- Run
brew doctor: This command is Homebrew’s diagnostic tool. It checks for potential issues, misconfigurations, or warnings that might affect Homebrew’s operation.
bash

brew doctor
Ideally, it should output “Your system is ready to brew.” If it reports any warnings or errors, pay close attention to the suggested remedies. These might include fixing permissions or updating your system. - Check Homebrew Version: To confirm Homebrew is recognized and functioning, you can query its version:
bash

brew --version
This command should display the installed Homebrew version, for example, “Homebrew 4.2.16”.
Adding Homebrew to Your PATH (If Needed)
Modern Homebrew installations, especially on Apple Silicon Macs, often automatically configure your shell’s PATH variable. The PATH is an environment variable that tells your shell where to look for executable programs. If Homebrew’s binaries aren’t in your PATH, your shell won’t be able to find brew commands.
After the installation script finishes, it will usually provide specific instructions if manual intervention is required to add Homebrew to your PATH. Pay close attention to these instructions. They will typically look like this:
For Zsh (the default shell on macOS since Catalina):
echo 'eval "$(/opt/homebrew/bin/brew shellenv)"' >> ~/.zprofile
eval "$(/opt/homebrew/bin/brew shellenv)"
For Bash (if you’re still using it or prefer it):
echo 'eval "$(/opt/homebrew/bin/brew shellenv)"' >> ~/.bash_profile
eval "$(/opt/homebrew/bin/brew shellenv)"
Important:
.zprofilevs..zshrcor.bash_profilevs..bashrc: The Homebrew installer usually recommends~/.zprofileor~/.bash_profilebecause these files are sourced when you open a new login shell (like a new Terminal window). If you prefer, or if you encounter issues, you might add it to~/.zshrcor~/.bashrcinstead, which are sourced for interactive non-login shells.- The
eval "$(/opt/homebrew/bin/brew shellenv)"command makes the changes effective immediately in your current Terminal session without needing to close and reopen it. - After adding to your profile file, subsequent new Terminal windows will automatically have Homebrew in their
PATH. If you make changes to these files, you cansource ~/.zprofile(or~/.bash_profile) to apply them to your current session without restarting the Terminal.
If you don’t perform this step correctly, you might encounter a “command not found: brew” error when trying to use Homebrew commands. Double-check your PATH configuration if this happens.
Mastering Homebrew: Essential Commands and Usage
Once Homebrew is installed and configured, you’ll want to start using it. Here are the fundamental commands to manage your software efficiently. Learning these commands is key to leveraging Homebrew’s full potential for productivity and system maintenance.
Installing Software with Brew
This is the most frequent command you’ll use. To install a package:
brew install [package_name]
Examples:
- To install
git:brew install git - To install
node(Node.js):brew install node - To install
wget:brew install wget
Homebrew will download the necessary files, compile them if required (or use pre-compiled bottles), and install them. It will also automatically handle any dependencies.
Updating and Upgrading Packages
Keeping your software up-to-date is vital for security, stability, and access to the latest features.
- Update Homebrew Itself: This command fetches the latest formula definitions from Homebrew’s repositories. It doesn’t upgrade your installed software yet, only Homebrew’s internal database.
bash

brew update
It’s good practice to run this regularly, especially before installing new software or upgrading existing ones. - Upgrade Installed Packages: After updating Homebrew’s knowledge, this command upgrades all your currently installed packages to their latest available versions based on the updated formulae.
bash

brew upgrade
You can also upgrade a specific package:brew upgrade [package_name]
Uninstalling Software
To remove software installed via Homebrew:
brew uninstall [package_name]
Example:
- To uninstall
node:brew uninstall node
Homebrew will remove the specified package and any dependencies that are no longer required by other installed software.
Managing Brew Itself
Beyond installing and upgrading software, Homebrew offers commands to manage its own health and discover available packages.
- List Installed Packages: See everything Homebrew has installed on your system.
bash

brew list
- Search for Packages: If you’re looking for a specific tool but aren’t sure of its exact name, or want to explore available options:
bash

brew search [keyword]
Example:brew search python - Get Information About a Package: Learn details like its homepage, dependencies, and installation path.
bash

brew info [package_name]
- Clean Up Old Versions: Homebrew keeps old versions of packages after an upgrade. This command removes them, freeing up disk space.
bash

brew cleanup
Runningbrew cleanupregularly is a good maintenance practice. - Fix Common Issues: As mentioned before,
brew doctoris your first line of defense against problems.
bash

brew doctor
Troubleshooting Common Homebrew Issues
While Homebrew is generally robust, you might occasionally encounter issues. Knowing how to troubleshoot them effectively will save you time and frustration. Remember, brew doctor is often your best starting point.
“Command Not Found” Errors
This is perhaps the most common issue after initial installation or if your PATH configuration is incorrect.
Symptoms: When you type brew install or brew update, your Terminal responds with -bash: brew: command not found or -zsh: command not found: brew.
Solutions:
- Check your
PATH: Revisit the “Adding Homebrew to Your PATH” section. Ensure the correctevalcommand is in your~/.zprofile(or~/.bash_profile) and that you’ve sourced it in your current session (e.g.,source ~/.zprofile) or reopened your Terminal. - Verify Homebrew Installation Path: Homebrew typically installs to
/opt/homebrewon Apple Silicon Macs and/usr/localon Intel Macs. Ensure that/opt/homebrew/binor/usr/local/binis indeed in yourPATH. - Restart Terminal: Sometimes, simply closing and reopening your Terminal window is enough to pick up changes to profile files.
Permissions Problems
Homebrew needs appropriate read/write permissions for its installation directories (typically /opt/homebrew or /usr/local). If permissions are incorrect, you might see errors like “Permission denied” during installation or when trying to install/update packages.
Symptoms: Errors during installation or upgrade indicating that Homebrew cannot write to certain directories.
Solutions:
- Use
brew doctor: It often identifies permission issues and provides specific commands to fix them. - Correct Ownership (Intel Macs, less common on Apple Silicon): For older Intel Macs where Homebrew installs to
/usr/local, you might need to take ownership of that directory.
bash

sudo chown -R $(whoami) /usr/local/*

sudo chown -R $(whoami) /usr/local/.git
Caution: Usesudocommands carefully. Ensure you understand what they do.
For Apple Silicon, Homebrew usually sets up/opt/homebrewwith correct user permissions by default, so manualchownis rarely needed here unless you’ve manually messed with permissions. - Reset Homebrew Permissions: If you’ve been experimenting with
sudoand Homebrew, you might need to reset permissions specifically for Homebrew’s directories. Consultbrew doctorfor the most accurate commands.
Updating Brew Doctor
If brew doctor itself is reporting issues or not running as expected, or if you suspect your Homebrew installation is severely corrupted, you might need to re-evaluate.
Symptoms: brew doctor doesn’t run, gives strange errors, or Homebrew is completely unresponsive.
Solutions:
- Reinstall Homebrew: As a last resort, if
brew doctoror other basic troubleshooting doesn’t work, you can try to completely uninstall and reinstall Homebrew.- Uninstall Script: Find the uninstall script on the Homebrew GitHub repository (search for “Homebrew uninstall script” or check
brew.shfor guidance). It’s typically:
bash

/bin/bash -c "$(curl -fsSL https://raw.githubusercontent.com/Homebrew/install/HEAD/uninstall.sh)"
- Follow Reinstallation Steps: After running the uninstall script, follow the installation guide from the beginning.
- Uninstall Script: Find the uninstall script on the Homebrew GitHub repository (search for “Homebrew uninstall script” or check
- Consult Homebrew Documentation/Community: For complex or persistent issues, the official Homebrew documentation (docs.brew.sh) and community forums (like Stack Overflow) are excellent resources.
The Homebrew Ecosystem: Beyond Basic Installation
Homebrew is more than just a tool for command-line utilities. It has evolved into a comprehensive ecosystem that significantly expands its utility for macOS users, encompassing desktop applications and background services.
Homebrew Cask: Apps for Your Mac
One of Homebrew’s most popular extensions is Homebrew Cask. Cask allows you to install and manage macOS GUI applications (like Chrome, Visual Studio Code, Spotify, etc.) directly from the command line, just like you would with command-line tools. This brings the same level of automation and centralized management to your desktop applications.
- Install a Cask:
bash

brew install --cask [app_name]
Examples:brew install --cask google-chromebrew install --cask visual-studio-codebrew install --cask spotify
- Upgrade Casks:
bash

brew upgrade --cask
This updates all installed Cask applications. - List Casks:
bash

brew list --cask
Homebrew Cask drastically simplifies software setup on new Macs and ensures all your applications stay updated, further boosting productivity and ensuring digital security by providing a consistent update mechanism.
Homebrew Services: Running Background Processes
For developers and power users, managing background services (like databases, web servers, or caching systems) is a common task. Homebrew Services provides a convenient way to start, stop, and manage these services.
- Start a Service:
bash

brew services start [service_name]
Example:brew services start postgresql - Stop a Service:
bash

brew services stop [service_name]
- List Services: See all managed services and their status.
bash

brew services list
This functionality is invaluable for maintaining a consistent development environment and ensuring critical services are always running when needed.
Tap: Extending Homebrew’s Capabilities
Homebrew’s core “formulae” and “casks” are maintained in official repositories. However, users and organizations can create their own “taps” – external Git repositories containing additional formulae and casks. Taps allow Homebrew to install software that isn’t included in the main distribution, expanding its reach even further.
- Add a Tap:
bash

brew tap [user/repo]
Example:brew tap homebrew/cask-fonts(for font management) - Remove a Tap:
bash

brew untap [user/repo]
Tapping into community-maintained repositories can unlock a huge range of specialized tools and applications, making Homebrew incredibly versatile for a multitude of niche requirements.
Conclusion: Empowering Your macOS Workflow
Installing Homebrew on your Mac is more than just adding another utility; it’s an investment in your productivity, efficiency, and overall command over your digital toolkit. By adopting Homebrew, you transition from a reactive approach to software management to a proactive, streamlined one.
For tech enthusiasts, developers, and professionals across various industries, Homebrew embodies the spirit of optimization and control. It ensures your tools are always up-to-date, dependencies are gracefully handled, and new software is just a simple command away. This level of efficiency not only saves valuable time – which, in the realm of “Money,” translates directly to cost savings or increased earning potential – but also enhances your professional “Brand” by demonstrating a sophisticated understanding and mastery of your technical environment.
From effortlessly installing development tools and managing critical background services to keeping your favorite desktop applications updated with a single command, Homebrew transforms your macOS experience. Embrace this powerful package manager, and unlock a new level of control and convenience that will undoubtedly make your Mac an even more formidable workstation. Start brewing today, and watch your productivity soar.
aViewFromTheCave is a participant in the Amazon Services LLC Associates Program, an affiliate advertising program designed to provide a means for sites to earn advertising fees by advertising and linking to Amazon.com. Amazon, the Amazon logo, AmazonSupply, and the AmazonSupply logo are trademarks of Amazon.com, Inc. or its affiliates. As an Amazon Associate we earn affiliate commissions from qualifying purchases.