In an era defined by digital convenience and on-demand entertainment, streaming devices have become indispensable household gadgets. Among the titans of this industry, Roku stands out as a user-friendly and versatile platform, offering a vast library of content through an intuitive interface. Whether you’re cutting the cord from traditional cable, looking to upgrade your existing smart TV capabilities, or simply seeking a more streamlined entertainment experience, installing a Roku device is your gateway to a world of movies, TV shows, live sports, music, and much more.
This comprehensive guide is designed to walk you through every step of the Roku installation process, from unboxing your device to optimizing its performance for peak streaming pleasure. We’ll delve into the necessary preparations, provide a clear, step-by-step setup tutorial, and even offer valuable tips for troubleshooting common issues and enhancing your overall Roku experience. By the end of this article, you’ll not only have your Roku up and running but also understand how to leverage its full potential within your smart home ecosystem, emphasizing digital security and user productivity.

Preparing for Your Roku Setup: What You’ll Need
Before you dive into the exciting world of endless entertainment, a little preparation goes a long way. Ensuring you have all the necessary components and a clear understanding of your environment will make the installation process smooth and stress-free.
Choosing the Right Roku Device for Your Needs
Roku offers a diverse range of devices, each designed to cater to different needs and budgets. Understanding these options is the first step in a successful setup, aligning with our focus on Tech Gadgets and informed Reviews.
- Roku Express/Express 4K: These are entry-level models, perfect for basic HD or 4K streaming. They are compact, connect via HDMI, and are incredibly affordable, making them excellent choices for secondary TVs or those new to streaming.
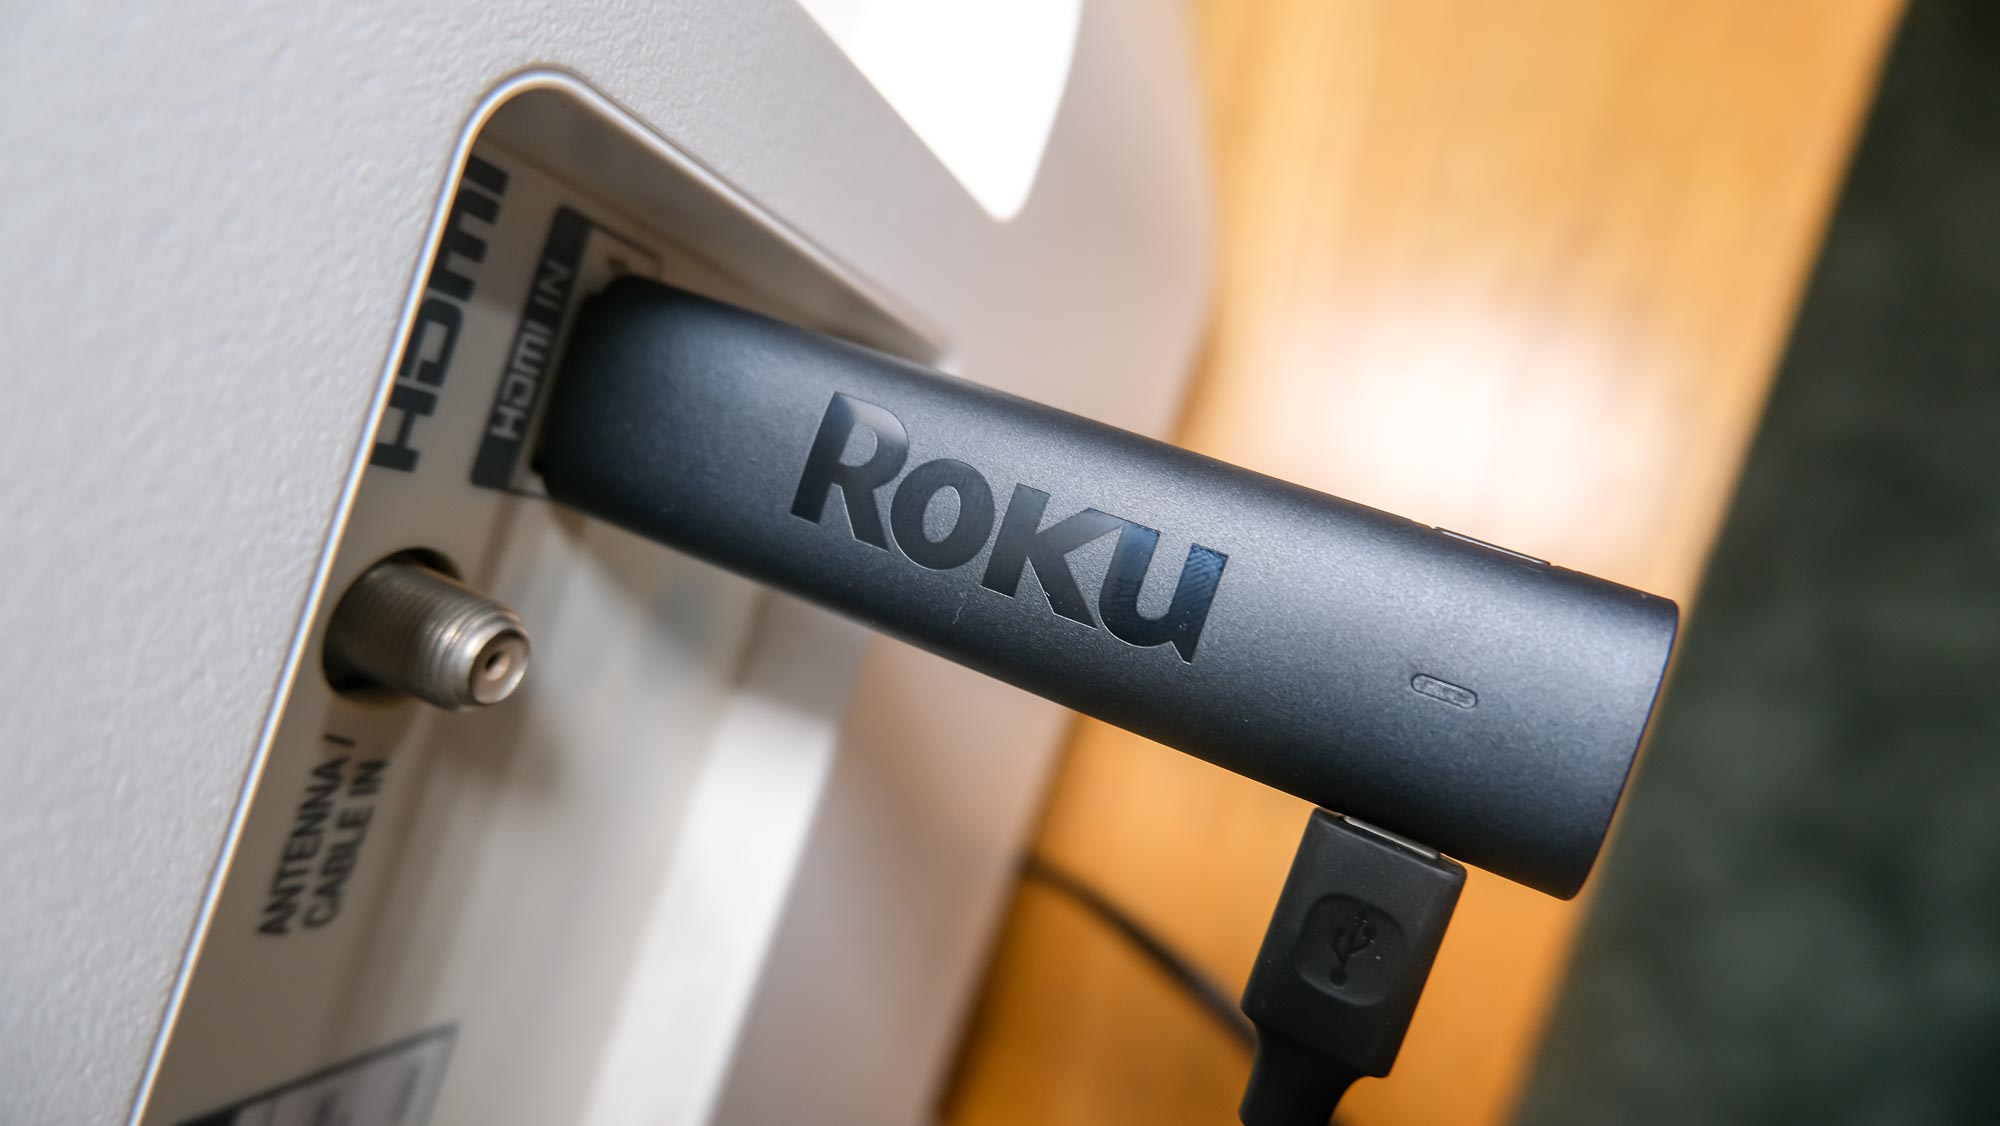
- Roku Streaming Stick 4K/4K+: Designed for portability and discretion, these sticks plug directly into an HDMI port, often hidden behind your TV. They offer robust Wi-Fi performance and support 4K HDR streaming. The “Plus” model includes the voice remote with private listening.
- Roku Ultra: The flagship model, Roku Ultra is built for power users. It features an Ethernet port for wired connectivity (ensuring maximum speed and stability), a lost remote finder, a USB port for local media playback, and enhanced Wi-Fi. It’s ideal for primary entertainment centers where performance is paramount.
- Roku TV: Not a separate device, but smart TVs with Roku OS built-in. If you have a Roku TV, much of the initial setup related to connecting a separate player will be skipped, simplifying the process even further.
Consider your TV’s resolution (HD, 4K), your internet speed, and whether you prefer wired or wireless connectivity when making your choice. This decision impacts not just your initial cost but also your long-term streaming experience.
Essential Components and Connectivity Checks
Once you’ve selected your Roku device, gather the following items and perform a quick check of your setup environment:
- Your Roku Device: The player itself, along with its power adapter and remote control (and batteries, usually included).
- A Television: A TV with an available HDMI input port. For 4K devices, ensure your TV is 4K compatible and that you’re using an HDMI port that supports HDCP 2.2 for 4K content.
- HDMI Cable: While most Roku players (except some stick models which plug directly in) come with an HDMI cable, ensure it’s in good condition. For 4K streaming, an “High-Speed HDMI” or “Premium High-Speed HDMI” cable is recommended to guarantee sufficient bandwidth.
- Internet Connection: A stable and relatively fast internet connection is crucial for streaming.
- Wireless (Wi-Fi): You’ll need your Wi-Fi network name (SSID) and password. Position your Roku device within a reasonable range of your wireless router for optimal signal strength.
- Wired (Ethernet): If you have a Roku Ultra or a Roku TV with an Ethernet port, an Ethernet cable connected to your router can provide the most reliable and fastest connection. This is often preferred for high-bandwidth 4K streaming and contributes to better Digital Security by reducing potential wireless vulnerabilities.
- Power Outlet: An accessible electrical outlet near your TV for the Roku device’s power adapter.
- Roku Account (Optional but Recommended): While you can create one during setup, having an existing Roku account (or knowing you’ll need to create one) can save a few minutes. You’ll need a valid email address.
By ensuring these prerequisites are met, you’re already halfway to enjoying your new streaming hub.
Step-by-Step Roku Installation: From Box to Binge-Watching
The core of this guide focuses on the practical steps of getting your Roku operational. We’ve broken it down into logical phases, ensuring clarity and ease of execution for all users, regardless of technical proficiency.
Physical Setup: Connecting Your Roku Device
This initial phase involves the physical connections between your Roku, your TV, and your power source.
- Unbox Your Roku: Carefully remove all components from the packaging. You should find the Roku player, a remote control, batteries for the remote, a power adapter, and possibly an HDMI cable (depending on the model).
- Connect Power:
- Plug the smaller end of the Roku power adapter into the power input port on your Roku device.
- Plug the larger end of the power adapter into a wall outlet. Avoid using USB ports on your TV for power, as they may not provide sufficient, stable power, which can lead to performance issues or device instability.
- Connect to Your TV via HDMI:
- Plug one end of the HDMI cable into the HDMI output port on your Roku device.
- Plug the other end of the HDMI cable into an available HDMI input port on your television. Make a note of which HDMI port number you used (e.g., HDMI 1, HDMI 2) as you’ll need to select this input later. For Roku Sticks, simply plug the stick directly into an available HDMI port.
- Pro Tip for 4K users: If your TV has multiple HDMI ports, some might be labeled for specific functions like “HDMI ARC” or “HDMI 4K.” If you have a 4K Roku device, use an HDMI port that explicitly supports 4K (often HDMI 2.0 or higher) for the best quality.
- Insert Batteries into the Remote: Open the battery compartment on the back of your Roku remote and insert the included batteries, matching the positive (+) and negative (-) terminals correctly. For voice remotes, ensure they are paired with the device, which usually happens automatically during initial setup or can be manually done if needed.
Initial On-Screen Configuration
Once the physical connections are made, power on your TV and select the correct HDMI input channel using your TV remote. You should see the Roku logo appear, indicating the device is receiving power and sending a signal.
- Language Selection: The first screen you’ll typically encounter will ask you to select your preferred language. Use your Roku remote to navigate and make your selection.
- Network Connection (Wi-Fi/Ethernet):
- For Wi-Fi: Roku will scan for available wireless networks. Select your home Wi-Fi network from the list. You will then be prompted to enter your Wi-Fi password. Carefully type it in using the on-screen keyboard. Passwords are case-sensitive. Once entered, select “Connect.” Roku will attempt to connect to the internet.
- For Ethernet (Roku Ultra/TV): If you connected an Ethernet cable, Roku should automatically detect the wired connection and connect to the internet. If it prompts for Wi-Fi, ensure your Ethernet cable is securely connected to both the Roku and your router.
- Digital Security Tip: Always connect to a password-protected private network. Avoid public Wi-Fi networks if possible, especially for sensitive activities like account creation. Ensure your router uses WPA2 or WPA3 encryption for stronger security.
- Software Updates: After connecting to the internet, your Roku device will likely check for and download any available software updates. This is crucial for performance, security, and accessing the latest features. Allow this process to complete; it may involve one or more reboots. Do not unplug your device during an update. This aligns with Software and Digital Security best practices, ensuring your device is protected against known vulnerabilities.
- Display Type Detection: Roku will automatically detect your TV’s resolution and optimize its display settings. It might prompt you to confirm the best setting (e.g., 1080p, 4K HDR). Follow the on-screen instructions to confirm or adjust.
Roku Account Creation and Channel Integration
A Roku account is essential for downloading channels, managing subscriptions, and personalizing your experience.
- Account Linkage: You will be prompted to link your Roku device to a Roku account.
- If you have an existing account, sign in.
- If you don’t have one, the Roku device will display a unique code and instruct you to visit
roku.com/linkon a computer or mobile device. Enter the code there to create a new account or link to an existing one. - Important for Digital Security: When creating an account, use a strong, unique password. Consider using a password manager. Roku will typically ask for credit card information during account creation. This is primarily for purchasing channels or subscribing to services directly through Roku’s platform, but it’s not strictly necessary for basic free channel access. You can skip this step or remove it later if you prefer.
- Add Streaming Channels: Once your account is linked, Roku will present you with a selection of popular streaming channels (Netflix, Hulu, Disney+, YouTube, Prime Video, etc.) to add to your home screen. Select the ones you use or wish to explore. You can always add or remove channels later from the Roku Channel Store.
- Link Subscriptions: For premium channels like Netflix or HBO Max, you’ll typically need an existing subscription with that service. Once the channel is added to your Roku, open it and follow the on-screen instructions to sign in with your subscription credentials.
Personalizing Your Roku Experience
With your core setup complete, it’s time to make your Roku truly yours, enhancing your Productivity and user satisfaction.

- Organize Your Home Screen: You can rearrange the order of your channels on the home screen. Highlight a channel, press the
*(Star) button on your remote, and select “Move channel.” This allows you to place your most frequently used apps front and center. - Explore Themes: Roku offers various themes to customize the look and feel of your interface. Go to “Settings” > “Themes” to browse and apply new backgrounds and sounds.
- Set Up Parental Controls (PIN): If you have children, setting up a PIN for purchases and content restrictions is highly recommended. Navigate to “Settings” > “Parental controls” to configure these options. This is a crucial Digital Security feature, preventing unauthorized purchases and access to inappropriate content.
- Explore Voice Search (if applicable): If your remote has a microphone button, press and hold it to activate voice search. You can search for movies, shows, actors, or even launch channels by speaking commands. This is a great example of AI Tools enhancing user experience.
Optimizing Your Roku for Peak Performance and Security
Beyond the initial setup, several steps can be taken to ensure your Roku device operates at its best, providing a seamless, secure, and productive streaming experience.
Network Optimization for Smooth Streaming
A strong and stable internet connection is the backbone of high-quality streaming.
- Bandwidth Considerations: Ensure your internet plan offers sufficient bandwidth for your household’s streaming needs. For 4K streaming, a minimum of 25 Mbps is generally recommended per stream. If multiple devices are streaming simultaneously, you’ll need more.
- Router Placement: Position your Wi-Fi router in a central location, away from obstructions and other electronics that might cause interference. For Roku Sticks or devices connecting wirelessly, a strong signal is paramount.
- Ethernet vs. Wi-Fi: Whenever possible, use an Ethernet cable for your Roku Ultra or Roku TV. A wired connection minimizes latency, eliminates wireless interference, and provides the most consistent speeds, especially for high-bitrate 4K content.
- Quality of Service (QoS): Check your router settings for QoS (Quality of Service) features. If available, you can prioritize your Roku device’s network traffic to ensure it gets preferential bandwidth, reducing buffering, especially during peak network usage.
Maintaining Digital Security on Your Roku
Protecting your Roku account and device from unauthorized access is a critical aspect of responsible tech usage.
- Strong Account Passwords: Reiterate the importance of a unique, complex password for your Roku account. Avoid using easily guessable information.
- PIN for Purchases: As mentioned, always set up a PIN for purchases. This prevents accidental or unauthorized buying of movies, shows, or subscriptions through your Roku account. You can set this up under “Settings” > “PIN for purchases.”
- Regular Software Updates: Roku regularly releases firmware updates that include security patches and performance improvements. Ensure your device is set to update automatically (usually the default) or manually check for updates via “Settings” > “System” > “System update.” Keeping your device updated is a cornerstone of Digital Security.
- Review Linked Accounts: Periodically check which streaming services are linked to your Roku account and ensure they are still active and authorized. Unlink any services you no longer use.
- Privacy Settings: Explore the privacy settings on your Roku device, particularly regarding advertising and data collection. You can often limit ad tracking and customize data sharing preferences under “Settings” > “Privacy.”
Essential Roku Tips and Tricks for Enhanced Productivity
Roku offers several features that can enhance your user experience and make your streaming habits more efficient.
- Utilize the Roku Mobile App: The free Roku mobile app for iOS and Android is a powerful companion. It acts as a remote control, supports voice search, allows private listening (routing audio to your phone’s headphones), and makes entering text much easier using your phone’s keyboard. This significantly boosts Productivity.
- Voice Search: Even if your remote doesn’t have a voice button, the mobile app often includes this feature. Use it to quickly find content across multiple channels without manually browsing.
- Private Listening: A game-changer for shared living spaces. Plug headphones into your smartphone while using the Roku app, and all audio from your Roku will be routed to your headphones, allowing you to watch without disturbing others.
- Screen Mirroring: Most Roku devices support screen mirroring (often called “Cast” or “Screen Share”) from compatible smartphones, tablets, or computers. This allows you to display photos, videos, or even web pages from your device directly on your TV. Check “Settings” > “System” > “Screen mirroring” to ensure it’s enabled.
- Follow Channels for Price Drops: The “My Feed” feature allows you to “follow” specific movies, TV shows, or actors. Roku will then notify you if the content becomes available on a new service or if its price drops on a premium channel. This is a smart way to manage your entertainment budget, touching on aspects of Money management.
- Guest Mode (Roku TV/Ultra): If you frequently have guests, Roku’s Guest Mode allows them to sign in to their own streaming accounts for a temporary period, automatically logging them out after a set duration. This maintains your personal account security while offering convenience.
Troubleshooting Common Roku Installation Issues
Even with the most careful planning, you might encounter minor hurdles during or after installation. Here are solutions to some common Roku problems.
No Power or Display Issues
- No Power Indicator Light: Ensure the power adapter is securely plugged into both the Roku device and a working wall outlet. Try a different outlet.
- No Signal on TV: Double-check that your TV is set to the correct HDMI input channel that your Roku is connected to. Try plugging the HDMI cable into a different port on your TV. Ensure the HDMI cable is firmly seated at both ends.
- Flickering or Distorted Picture: Try a different HDMI cable. If your TV has multiple HDMI ports, switch to another. For 4K content, ensure your TV and HDMI cable support HDCP 2.2. Restart both your Roku (Settings > System > System restart) and your TV.
Network Connectivity Problems
- Roku Can’t Find Wi-Fi Network: Ensure your Wi-Fi router is on and broadcasting. Move your Roku closer to your router if possible. Restart your router by unplugging it for 30 seconds and then plugging it back in.
- Incorrect Password: Double-check your Wi-Fi password for typos, especially case sensitivity.
- Limited or No Internet Access: Even if connected to Wi-Fi, you might not have internet. Restart your router and modem. Verify other devices can connect to the internet. If you have a Roku Ultra, try connecting via Ethernet to rule out Wi-Fi issues.
- Weak Wi-Fi Signal: Consider a Wi-Fi extender or mesh system if your Roku is far from your router. For optimal performance, especially for 4K streaming, aim for a strong signal.
Remote Not Working
- Batteries: Replace the batteries in your remote, ensuring they are inserted correctly.
- Line of Sight (Infrared Remotes): For basic IR remotes, ensure there’s a clear line of sight between the remote and the Roku player. Obstructions can block the signal.
- Pairing (Enhanced/Voice Remotes): If you have an enhanced “point anywhere” or voice remote, it might need to be paired. Press and hold the pairing button inside the battery compartment (or on the back) until you see an on-screen pairing message.
- Roku Mobile App: Use the Roku mobile app as a temporary remote control to troubleshoot or navigate.
App Crashing or Buffering
- Restart Roku: A simple system restart (Settings > System > System restart) can resolve many app-related glitches.
- Remove and Re-add Channel: If a specific channel is problematic, try removing it (highlight channel, press
*, select “Remove channel”) and then re-adding it from the Channel Store. - Clear Cache (Not directly possible on Roku): While Roku doesn’t have a direct “clear cache” button for individual apps, removing and re-adding a channel often achieves a similar effect.
- Internet Speed: Run an internet speed test on your network to ensure you’re getting adequate bandwidth for streaming, especially for 4K content. Slow speeds are a primary cause of buffering.
By systematically addressing these common issues, you can quickly get back to enjoying your Roku device. Most problems are minor and easily resolved with a few simple checks.
Conclusion
Installing a Roku device is a straightforward process that unlocks a vast universe of entertainment and information. From the initial physical connections to customizing your home screen and optimizing performance, this guide has equipped you with the knowledge to set up your device with confidence. Roku’s blend of user-friendliness, extensive content options, and integration with modern Tech Trends makes it an excellent choice for anyone looking to enhance their home entertainment system.
Remember to prioritize Digital Security by using strong passwords and enabling PINs, and leverage Roku’s features like the mobile app and voice search to boost your Productivity. With your Roku seamlessly integrated into your home, you’re now ready to explore endless streaming possibilities, discover new content, and enjoy a truly personalized viewing experience. Happy streaming!
aViewFromTheCave is a participant in the Amazon Services LLC Associates Program, an affiliate advertising program designed to provide a means for sites to earn advertising fees by advertising and linking to Amazon.com. Amazon, the Amazon logo, AmazonSupply, and the AmazonSupply logo are trademarks of Amazon.com, Inc. or its affiliates. As an Amazon Associate we earn affiliate commissions from qualifying purchases.