For any Mac user who delves beyond basic productivity tasks, the ability to efficiently manage software is paramount. Whether you’re a budding developer, a digital artist experimenting with new tools, or simply someone who likes to keep their system lean and up-to-date, a robust package manager can be a game-changer. In the macOS ecosystem, Homebrew stands out as the de facto standard for this purpose. Think of it as the ultimate App Store for your command line, allowing you to install, update, and uninstall a vast array of software with simple, intuitive commands.
This comprehensive guide will walk you through everything you need to know about installing Homebrew on your Mac. We’ll explore why it’s such an indispensable tool, the prerequisites you’ll need, and the straightforward installation process itself. By the end of this article, you’ll be well-equipped to harness the power of Homebrew, streamlining your software management and unlocking a world of possibilities for your Mac.
Why Homebrew? The Powerhouse of Mac Package Management
Before we dive into the “how,” let’s solidify the “why.” Homebrew is more than just a tool for installing software; it’s a philosophy for managing your digital toolkit efficiently and effectively. Its origins lie in the open-source community, driven by a desire to simplify the process of installing command-line tools and graphical applications on macOS.
Streamlining Your Workflow
The primary benefit of Homebrew is its ability to simplify software installation and management. Traditionally, installing command-line utilities on macOS often involved downloading from various websites, compiling from source code, or dealing with complex dependencies. Homebrew automates all of this. With a single command, you can install a package, and Homebrew handles finding the correct version, resolving any dependencies it needs to function, and placing it in the appropriate location on your system.
Consider a scenario where you need to install a popular development tool like Node.js, or perhaps a utility like wget for downloading files from the internet. Without Homebrew, you might spend considerable time searching for the official installer, downloading it, and then navigating through potentially complicated installation steps. With Homebrew, it’s as simple as typing:
brew install node
brew install wget
This simplicity is a massive time-saver, especially for users who frequently work with a variety of software tools.
Keeping Your Software Up-to-Date
Another significant advantage of Homebrew is its ability to keep your installed software current. Software developers constantly release updates to fix bugs, improve performance, and introduce new features. Manually tracking and updating each application can be a tedious and error-prone process. Homebrew provides a centralized way to check for and apply updates to all the packages you’ve installed through it.
A quick command like brew upgrade will scan all your Homebrew-installed packages and update any that have newer versions available. This ensures you’re always working with the latest stable releases, benefiting from security patches and the newest functionalities without manual intervention.
Expanding Your Software Arsenal
The Homebrew repository boasts an extensive collection of software, often referred to as “formulae.” These formulae are essentially scripts that tell Homebrew how to download, compile, and install a particular piece of software. The range of available packages is vast, encompassing:
- Development Tools: Languages like Python, Ruby, Node.js, Go, compilers like GCC, build tools like Make, and debugging utilities.
- Command-Line Utilities: Text editors like Vim and Emacs, system monitoring tools, file manipulation utilities, network tools, and much more.
- Graphical Applications: While primarily known for command-line tools, Homebrew can also install many popular GUI applications, often referred to as “casks,” making it a versatile installer for your entire system.
- Databases: Popular database systems like PostgreSQL, MySQL, and SQLite.
- Version Control Systems: Git, Subversion, and others.
This comprehensive library means that whatever your technical needs, there’s a high probability that the software you require is available through Homebrew.
A Foundation for Advanced Usage
For those venturing into more advanced system administration, scripting, or development, Homebrew provides a stable and predictable environment. By managing your software through a single, consistent mechanism, you reduce the chances of conflicts between different software versions or installations. This is particularly crucial when building complex projects or setting up development environments.
Prerequisites for Installing Homebrew
Before you can embark on the journey of installing Homebrew, there are a few essential prerequisites that your Mac needs to meet. These ensure a smooth and successful installation process.
Ensure Your macOS is Up-to-Date
Homebrew is actively developed and tested against the latest versions of macOS. While it may work on older versions, it’s always recommended to have the most recent stable release of macOS installed on your machine. This ensures compatibility with Homebrew’s dependencies and the underlying system frameworks.
To check for macOS updates:
- Click on the Apple menu in the top-left corner of your screen.
- Select System Settings (or System Preferences on older macOS versions).
- Navigate to General and then Software Update.
- If an update is available, follow the on-screen instructions to download and install it.
Install the Xcode Command Line Tools
Homebrew relies heavily on the Xcode Command Line Tools for compilation and other essential development tasks. These tools provide compilers (like Clang), version control systems (like Git), and other utilities that Homebrew needs to build and install software from source.
To install the Xcode Command Line Tools:
-
Open the Terminal application. You can find it in
Applications > Utilities > Terminalor by searching for “Terminal” using Spotlight (Command + Space). -
In the Terminal window, type the following command and press Enter:
xcode-select --install -
A dialog box will appear, prompting you to install the command-line developer tools. Click Install and agree to the license terms.
-
The installation process may take a few minutes, depending on your internet connection. You’ll see a progress indicator in the Terminal window.
-
Once the installation is complete, the dialog box will close, and you’ll receive a confirmation message.
Important Note: If you already have Xcode installed from the Mac App Store, you might already have the command-line tools. Running the xcode-select --install command should simply confirm their presence or prompt you to update them if necessary.
Verify Command Line Tools Installation
To confirm that the Xcode Command Line Tools have been installed correctly, you can run a simple command in the Terminal:
gcc --version
If the tools are installed properly, you should see output indicating the version of the GCC compiler available. If you receive an error, it means the installation was not successful, and you should try running xcode-select --install again.
With these prerequisites met, you are now ready to proceed with the Homebrew installation itself.
Installing Homebrew: A Step-by-Step Process
The installation of Homebrew on macOS is designed to be straightforward and user-friendly. The official Homebrew website provides a single, robust command that handles the entire process.
Obtaining the Installation Script
The most reliable way to install Homebrew is by using the command provided on its official website (https://brew.sh/). This script is regularly updated by the Homebrew community to ensure it installs the latest stable version of Homebrew and its dependencies.
-
Open your Terminal application. As mentioned before, you can find it in
Applications > Utilities > Terminalor by using Spotlight. -
Visit the Homebrew website: Open your web browser and go to https://brew.sh/.
-
Copy the installation command: On the homepage of the Homebrew website, you will find a prominent section with a command ready to be copied. It will look something like this (the exact version number may change):
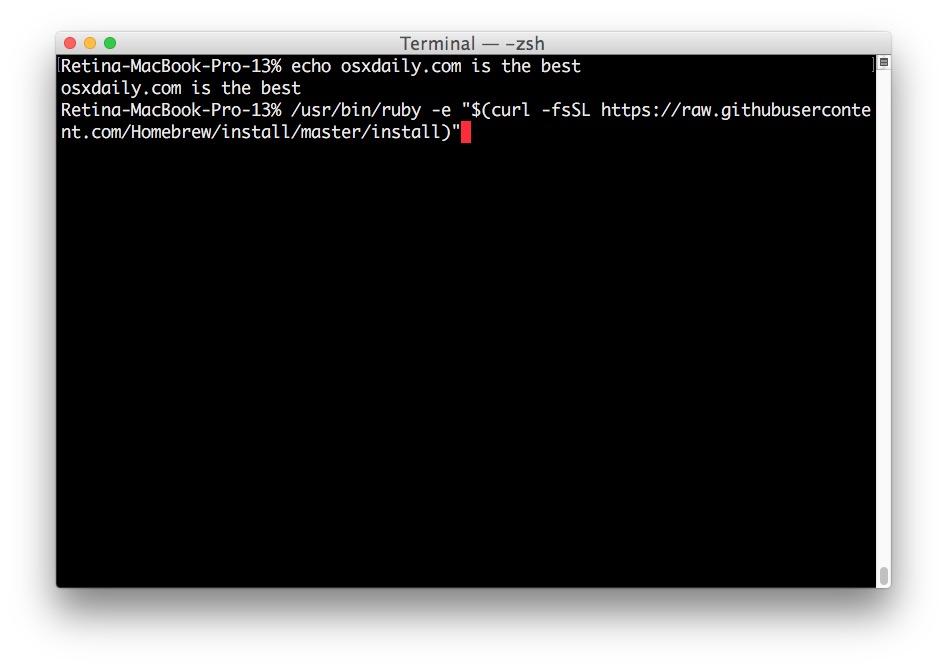
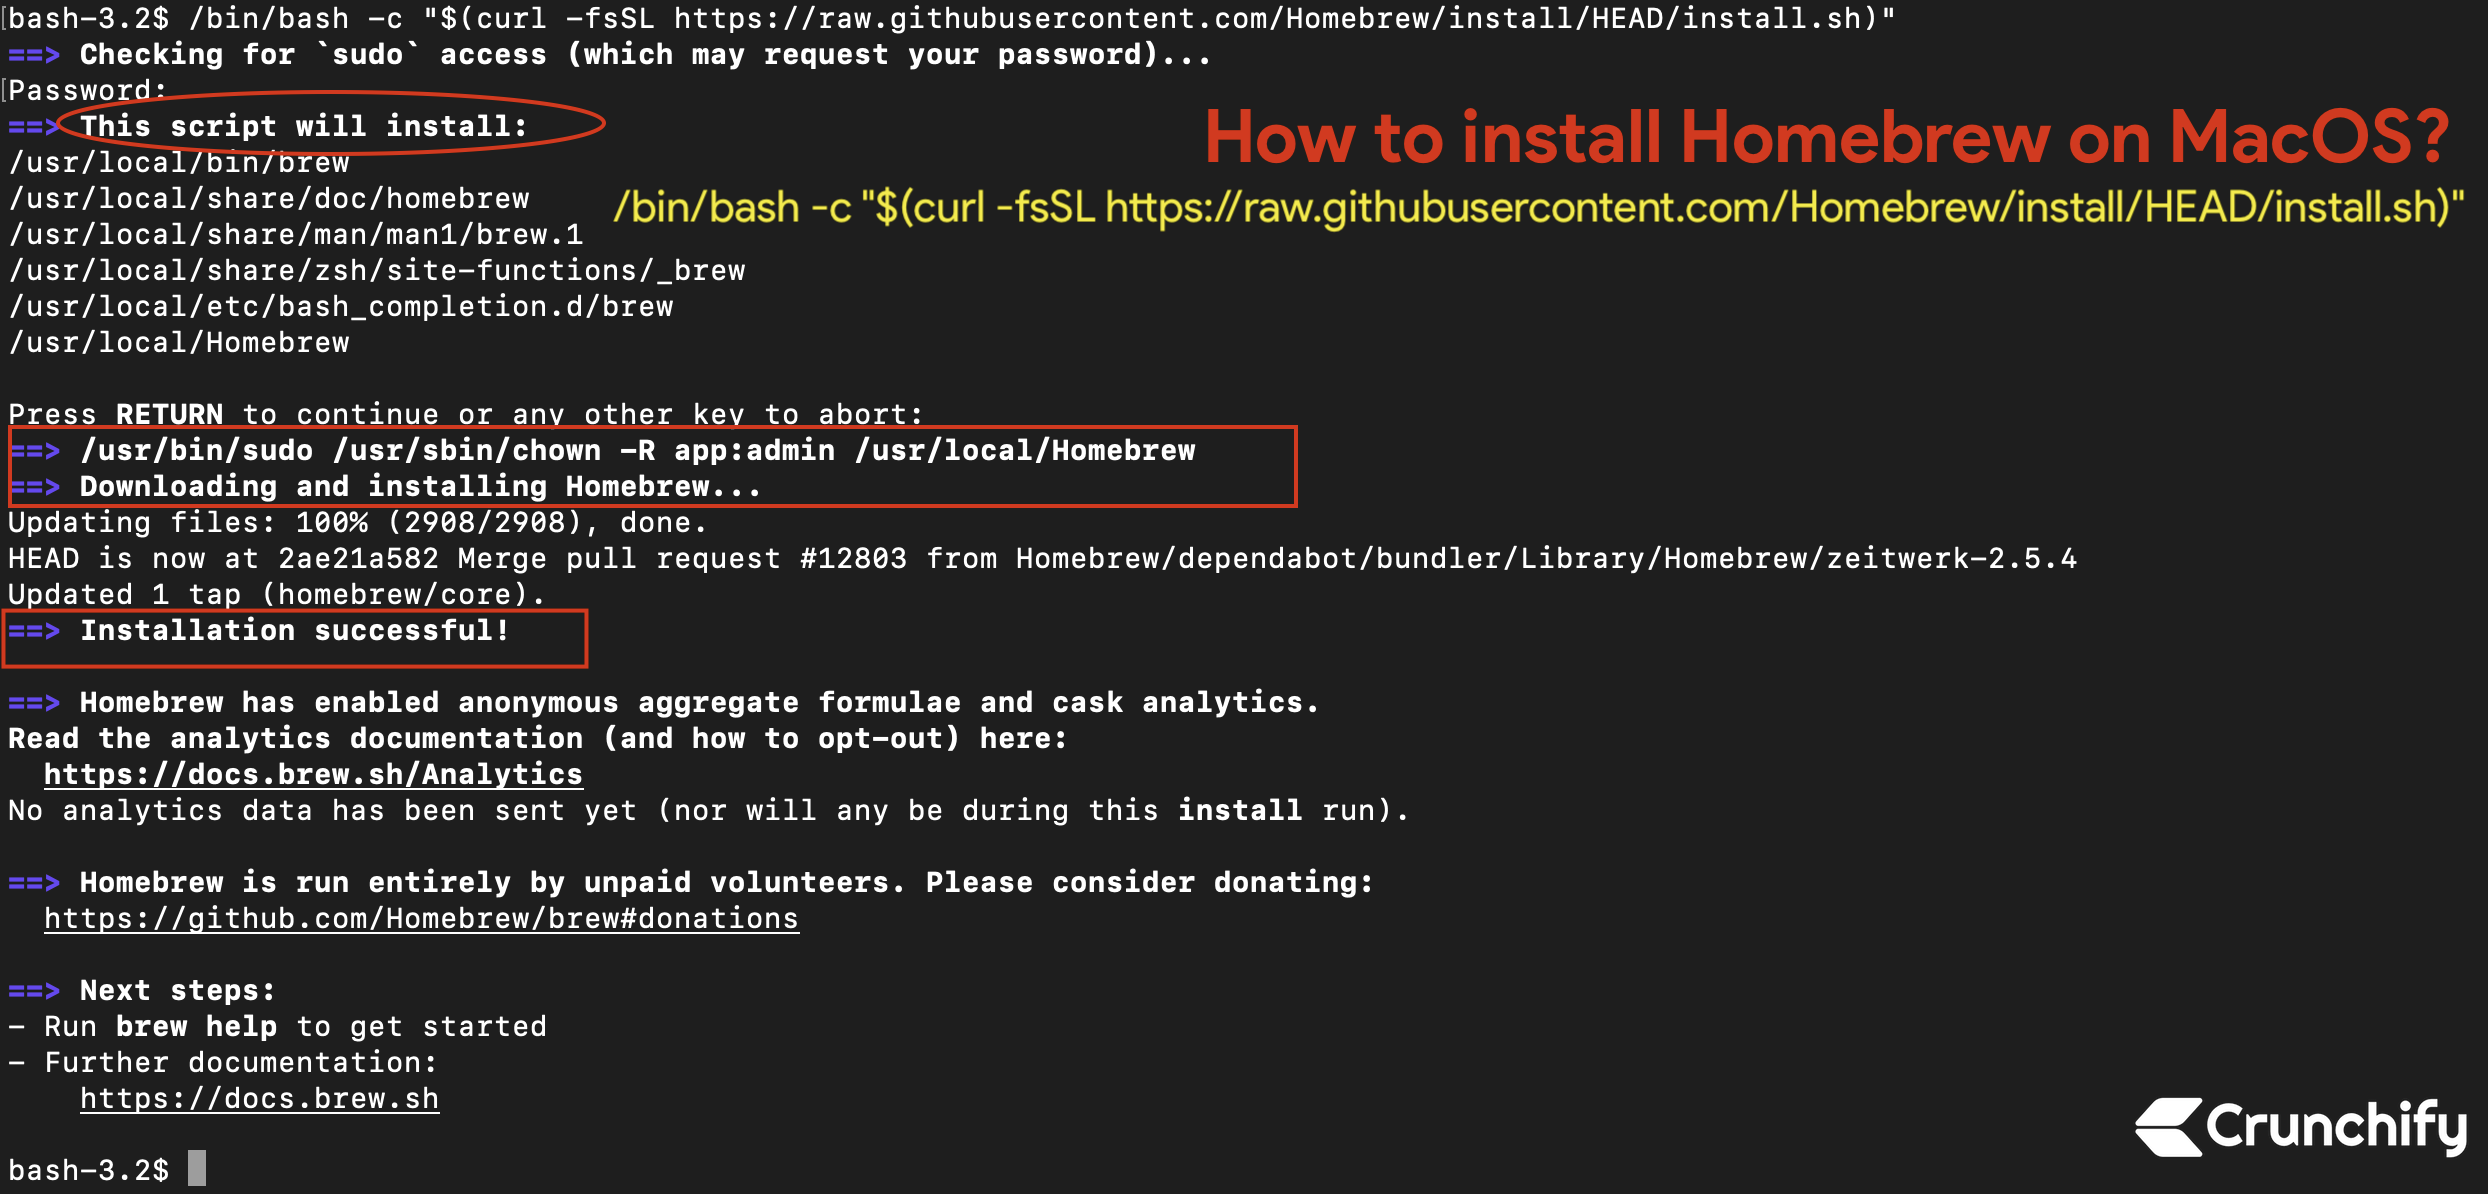
/bin/bash -c "$(curl -fsSL https://raw.githubusercontent.com/Homebrew/install/HEAD/install.sh)"This command does the following:
/bin/bash -c: Executes the following command in a Bash shell.$(...): This is command substitution. The output of the command within the parentheses will be used as the argument for the outer command.curl -fsSL https://raw.githubusercontent.com/Homebrew/install/HEAD/install.sh: Downloads the installation script from the Homebrew GitHub repository.-f: Fail silently (no output on error).-s: Silent mode (don’t show progress meter or error messages).-S: Show error messages even in silent mode.-L: Follow redirects.
-
Paste and execute the command in Terminal: Go back to your Terminal window, paste the copied command, and press Enter.
Following the On-Screen Prompts
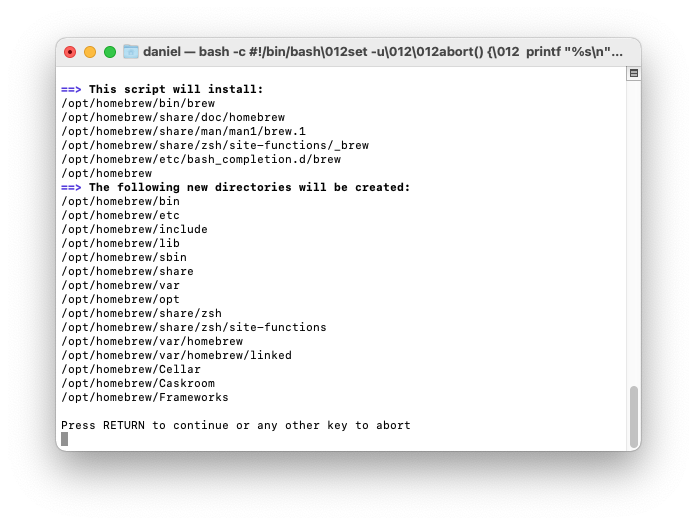
Once you execute the command, the installation script will begin. It will first perform some checks and then present you with information about what it’s about to do. You will likely be prompted to:
-
Confirm the installation: The script will usually tell you where Homebrew will be installed (typically
/usr/localon Intel Macs or/opt/homebrewon Apple Silicon Macs) and ask you to pressRETURNto continue orCtrl+Cto abort. PressRETURNto proceed. -
Enter your password: For security reasons, the script will require your administrator password to make changes to your system. Type your password (you won’t see any characters appear as you type, this is normal) and press Enter.
The installation script will then proceed to download and install Homebrew and all its necessary components. This process can take several minutes, depending on your internet speed and the performance of your Mac. You will see a lot of output in the Terminal window as Homebrew downloads and installs packages.
Post-Installation Verification and Path Configuration
After the installation completes successfully, the script will provide you with important information and instructions. It’s crucial to pay attention to these messages.
Verifying the Installation
To confirm that Homebrew has been installed correctly, you can run the following command in your Terminal:
brew --version
This command should display the installed version of Homebrew. If you see a version number, congratulations, Homebrew is successfully installed!
Configuring Your System’s PATH
For Homebrew to work seamlessly, its bin directory needs to be included in your system’s PATH environment variable. The PATH tells your shell where to look for executable commands. The Homebrew installer usually tries to configure this for you automatically.
However, especially on Apple Silicon Macs (M1, M2, etc.), the default installation location is /opt/homebrew, which requires explicit PATH configuration. The installer script will typically guide you through this by printing instructions at the end of the installation.
If you are on an Apple Silicon Mac, you will likely see output similar to this:
==> Next steps:
- Run these two commands in your terminal to add Homebrew to your PATH:
    echo 'eval "$(/opt/homebrew/bin/brew shellenv)"' >> ~/.zprofile
    eval "$(/opt/homebrew/bin/brew shellenv)"
You will need to execute these commands to ensure Homebrew is accessible from any Terminal session.
echo 'eval "$(/opt/homebrew/bin/brew shellenv)"' >> ~/.zprofile: This command appends a line to your~/.zprofilefile (or~/.zshrcif you are using Zsh as your default shell, which is common on modern macOS). This line tells your shell to evaluate the Homebrew environment variables whenever a new shell session starts.eval "$(/opt/homebrew/bin/brew shellenv)": This command immediately applies the changes for your current Terminal session.
If you are on an Intel Mac and installed to /usr/local, the PATH configuration is often handled automatically by the installer. However, if you encounter issues, you might need to manually add /usr/local/bin to your PATH in your shell’s configuration file (e.g., ~/.zshrc or ~/.bash_profile).
To manually check or add to your PATH (if needed):
-
Open your shell configuration file: For Zsh (the default on recent macOS), it’s usually
~/.zshrc. For Bash, it’s~/.bash_profileor~/.bashrc. You can open it with a text editor likenano:nano ~/.zshrcor
nano ~/.bash_profile -
Add the following line (adjusting the path if necessary):
export PATH="/opt/homebrew/bin:$PATH"or for Intel Macs:
export PATH="/usr/local/bin:$PATH" -
Save and exit
nano: PressCtrl+X, thenYto confirm saving, andEnterto confirm the filename. -
Reload your shell configuration: You can either close and reopen your Terminal, or run:
bash

source ~/.zshrc
or
bash

source ~/.bash_profile
With these steps completed, Homebrew is fully installed and configured on your Mac, ready for you to start installing new software.
Managing Software with Homebrew: Essential Commands
Now that Homebrew is installed, let’s explore some of the fundamental commands you’ll use regularly to manage your software.
Installing New Packages
The primary function of Homebrew is to install software. The command is simple and intuitive:
brew install <package_name>
For example, to install the htop utility (an interactive process viewer):
brew install htop
Homebrew will download the necessary files, compile the software if required, and make it available in your system’s PATH.
Updating Homebrew and Packages
It’s good practice to keep Homebrew itself and all your installed packages up-to-date.
-
Update Homebrew’s package list: This fetches the latest information about available packages.
brew update -
Upgrade installed packages: This command checks all your installed packages and upgrades any that have newer versions available.
brew upgradeYou can also upgrade a specific package:
brew upgrade <package_name>
Searching for Packages
If you’re not sure if a package is available through Homebrew, you can search for it:
brew search <keyword>
For example, to find packages related to Python:
brew search python
This will list all formulae that match your keyword.
Uninstalling Packages
When you no longer need a piece of software installed via Homebrew, you can easily remove it:
brew uninstall <package_name>
For example, to uninstall htop:
brew uninstall htop
Listing Installed Packages
To see a list of all the software you’ve installed using Homebrew:
brew list
Cleaning Up Old Versions
Over time, Homebrew keeps older versions of packages for potential rollbacks. You can clean these up to free up disk space:
brew cleanup
This command removes outdated downloads and outdated versions of installed formulae.
By familiarizing yourself with these basic commands, you’ll be able to efficiently manage your software environment using Homebrew, making your Mac a more powerful and customizable tool.
Conclusion: Empower Your Mac with Homebrew
In the ever-evolving landscape of technology, efficient software management is not just a convenience; it’s a necessity for productivity, creativity, and staying ahead. Homebrew has emerged as an indispensable tool for macOS users, simplifying the installation, updating, and uninstallation of a vast array of software, particularly those found in the command-line environment.
From developers needing to install multiple programming languages and tools, to power users who want to customize their system with specialized utilities, Homebrew provides a centralized, reliable, and easy-to-use solution. Its active community ensures that the software repository is constantly growing and maintained, offering access to thousands of open-source packages.
By following the straightforward installation steps outlined in this guide – ensuring you have updated macOS, the Xcode Command Line Tools, and then executing the official install script – you can equip your Mac with this powerful package manager. The ability to search, install, and upgrade software with simple commands like brew install, brew update, and brew upgrade will undoubtedly streamline your workflow and open up new possibilities for how you use your Mac.
Embrace the power of Homebrew, and unlock a more efficient, flexible, and capable computing experience. Your Mac will thank you for it.
aViewFromTheCave is a participant in the Amazon Services LLC Associates Program, an affiliate advertising program designed to provide a means for sites to earn advertising fees by advertising and linking to Amazon.com. Amazon, the Amazon logo, AmazonSupply, and the AmazonSupply logo are trademarks of Amazon.com, Inc. or its affiliates. As an Amazon Associate we earn affiliate commissions from qualifying purchases.