
Setting up a brand-new PC is an exciting endeavor, promising enhanced speed, capabilities, and a fresh start for your digital life. However, simply installing the operating system isn’t enough to unlock your machine’s full potential. The crucial next step, often overlooked by novices, is the proper installation of device drivers. Without them, your cutting-edge hardware is essentially speaking a foreign language to your operating system, leading to sluggish performance, limited functionality, and potential instability. This comprehensive guide will walk you through everything you need to know about installing drivers on your new PC, ensuring a seamless and powerful computing experience right from the start.

Understanding the Crucial Role of Device Drivers
Before diving into the “how-to,” it’s vital to grasp “why.” Understanding the function of drivers demystifies the process and underscores its importance for anyone managing their technology assets, whether for personal productivity or professional endeavors.
What Exactly Are Drivers and Why Do They Matter?
Think of device drivers as the essential translators between your computer’s operating system (like Windows, macOS, or Linux) and its various hardware components. Every piece of hardware inside or connected to your PC—from your graphics card and sound chip to your keyboard, mouse, and Wi-Fi adapter—requires specific instructions on how to interact with the OS. That’s precisely what a driver provides. It’s a small piece of software that enables your operating system to recognize, communicate with, and control a specific piece of hardware.
Without the correct drivers, your hardware might not function at all, or it might operate with severely limited capabilities. For instance, a graphics card without its proper driver might only display a basic resolution, preventing you from enjoying high-definition videos or demanding games. A network adapter without its driver won’t be able to connect to the internet, leaving your new PC disconnected from the digital world. Beyond basic functionality, well-installed and updated drivers are paramount for:
- Optimal Performance: They unlock the full speed and features of your hardware.
- System Stability: Incorrect or missing drivers are a common cause of crashes, blue screens of death (BSODs), and general system instability.
- Feature Access: Many advanced features of components (like multi-monitor support, audio enhancements, or peripheral customization) are only available with the correct drivers.
- Digital Security: Outdated drivers can sometimes contain vulnerabilities that malicious actors might exploit, making driver updates a component of your overall digital security strategy.
When to Prioritize Driver Installation on Your New Machine
The ideal time to install drivers is immediately after you’ve successfully installed your operating system on your new PC. While modern operating systems, especially Windows, come with a vast library of generic drivers that can get your system up and running with basic functionality, these “in-box” drivers are often not optimized for your specific hardware.
The typical order of operations after installing the OS is as follows:
- Install OS: Get Windows (or your chosen OS) up and running.
- Establish Internet Connection: Ensure your network drivers are working. This is often the first critical step, as many subsequent driver installations and updates will rely on an internet connection.
- Install Core System Drivers: Focus on chipset, graphics card (GPU), and audio drivers. These are usually the most impactful on overall system performance and user experience.
- Install Peripheral Drivers: Follow up with drivers for any specific external devices like printers, specialized keyboards, or webcams.
- Update All Drivers: Once the initial installations are complete, perform a comprehensive check for updates.
Adhering to this sequence ensures that your new PC is not only functional but also performing at its peak, providing you with the best possible user experience from day one.
Essential Drivers Every New PC Needs
While every component theoretically needs a driver, some are far more critical than others for the basic and advanced functionality of your system. Understanding these priorities helps streamline the installation process.
Core System Drivers: Chipset, GPU, and Audio
These three categories are the bedrock of your PC’s functionality and performance. Neglecting any of them will severely impact your user experience.
- Chipset Drivers: The chipset is the “traffic controller” on your motherboard, managing communication between the CPU, RAM, storage, and other peripherals. Chipset drivers are arguably the most fundamental drivers, as they optimize how your operating system interacts with the motherboard’s core components. Installing these first can often resolve many underlying issues and lay a stable foundation for other drivers. Without them, your system might experience slow data transfer speeds, unrecognized USB ports, or general instability.
- Graphics Card (GPU) Drivers: For anyone interested in gaming, graphic design, video editing, or even just smooth web browsing and high-resolution displays, GPU drivers are paramount. Integrated graphics (found on the CPU) and dedicated graphics cards (like NVIDIA GeForce or AMD Radeon) both require specific drivers. These drivers unlock the full processing power of your GPU, enable support for various display technologies (like high refresh rates, G-Sync/FreeSync), and provide access to control panels for fine-tuning visual settings. Generic drivers will only offer basic display functionality, drastically limiting visual fidelity and performance.
- Audio Drivers: While your PC might produce basic sound with default drivers, installing the specific audio drivers for your motherboard’s integrated sound chip (e.g., Realtek) or a dedicated sound card will significantly improve sound quality, enable advanced features like surround sound, audio enhancements, and proper microphone input. Without them, you might experience crackling, low volume, or no sound at all.
Connectivity and Peripheral Drivers: Network and Beyond
Once the core components are addressed, focusing on connectivity ensures your PC can interact with the outside world and other devices.
- Network Drivers (Ethernet & Wi-Fi): These are often the most crucial drivers to install early on because without them, your PC can’t connect to the internet. An internet connection is typically required for Windows Updates, downloading other drivers, and installing software. If your new PC doesn’t automatically detect your Ethernet or Wi-Fi adapter, you’ll need to install these drivers first, often by downloading them onto another device and transferring them via USB.
- Bluetooth Drivers: If your PC has a Bluetooth adapter, installing its drivers will enable wireless connectivity with peripherals like Bluetooth headphones, keyboards, mice, and other devices.
- USB 3.0/3.1/3.2 Drivers: While many USB ports work out of the box, specific drivers for newer USB standards can ensure optimal data transfer speeds, especially when connecting high-speed external storage devices. These are often included with chipset drivers but sometimes require separate installation for best performance.
- Peripheral Drivers: Beyond the core system, any specialized external hardware like printers, scanners, webcams, gaming controllers, or dedicated capture cards will likely require their own drivers. Always check the manufacturer’s website for the latest drivers for these devices.
Step-by-Step Guide to Driver Installation Methods
With an understanding of what drivers are and which ones are essential, let’s explore the practical methods for installing them on your new PC.
Leveraging Windows Update: The Automated Approach
For many users, Windows Update is the simplest starting point, often resolving a significant portion of driver needs automatically.
- Connect to the Internet: This is paramount. If your network drivers aren’t working, you’ll need to manually install them first (see next section).
- Run Windows Update:
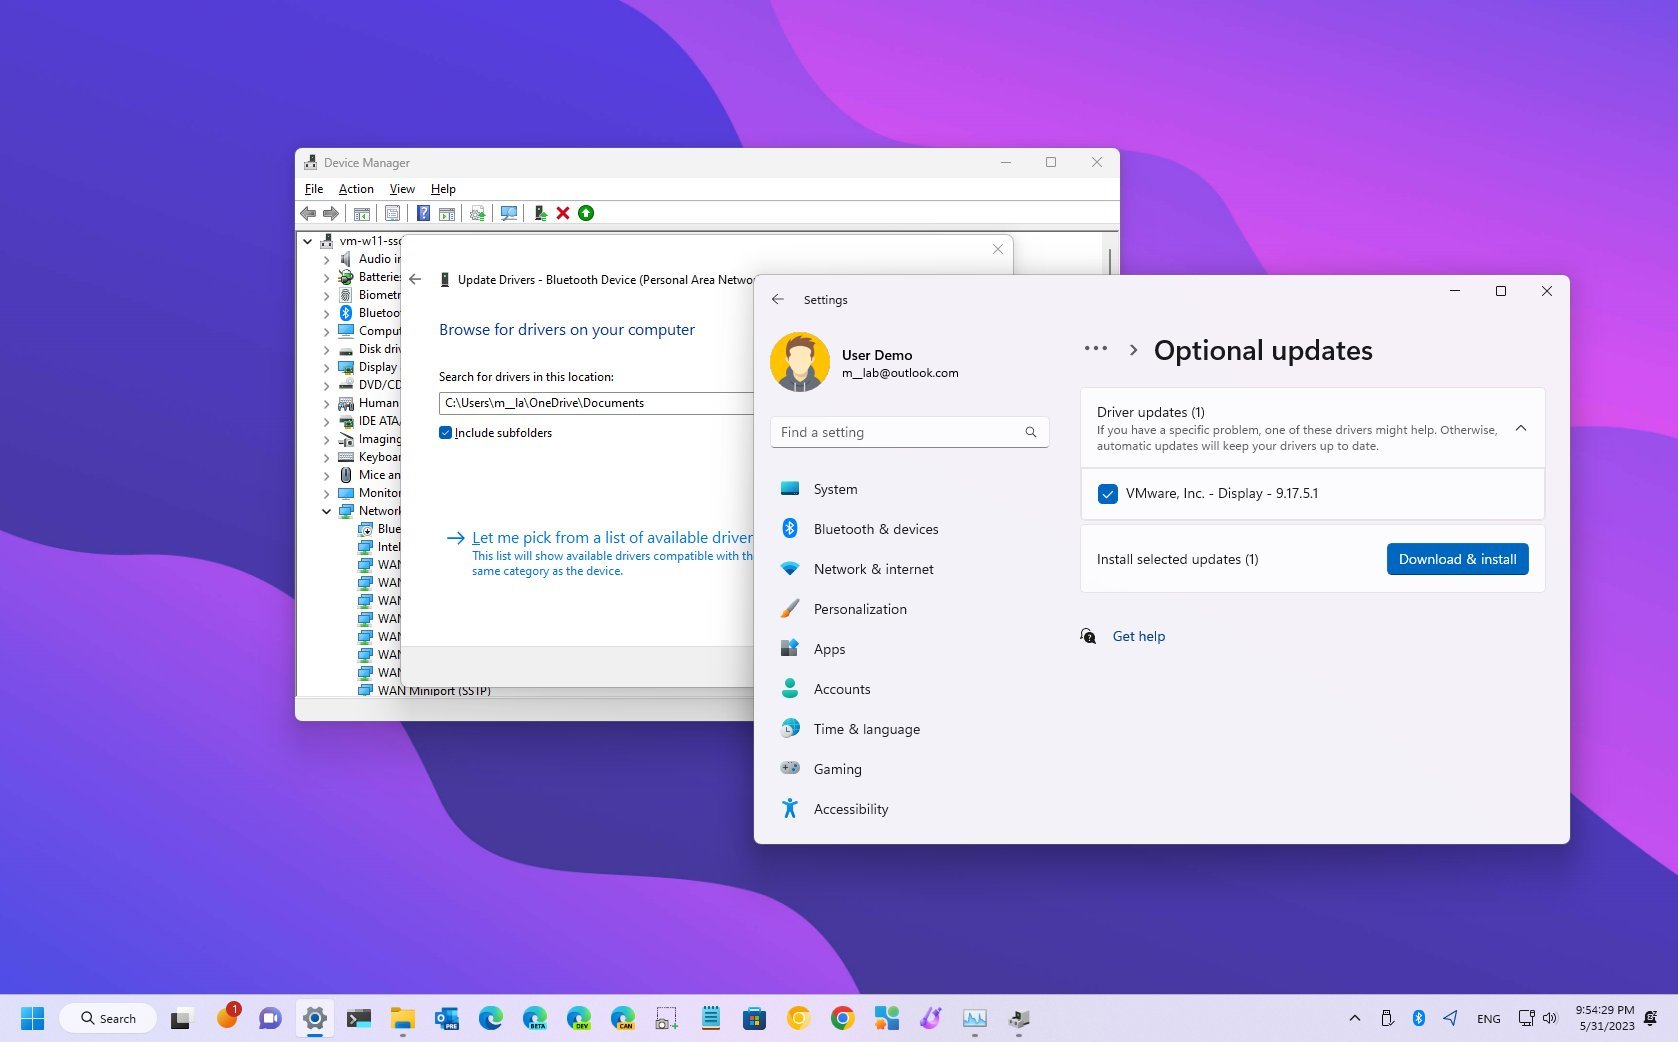
- Go to Start Menu > Settings > Update & Security > Windows Update.
- Click “Check for updates.”
- Windows will download and install available updates, which often include drivers for common hardware components.
- Pay attention to “Optional updates” or “View optional updates,” as these sometimes contain additional driver updates not automatically installed.
- Restart Your PC: After updates are installed, Windows will prompt you to restart. This is crucial for the new drivers to take effect.
- Repeat: Check for updates again after restarting, as sometimes new updates become available only after previous ones are installed.
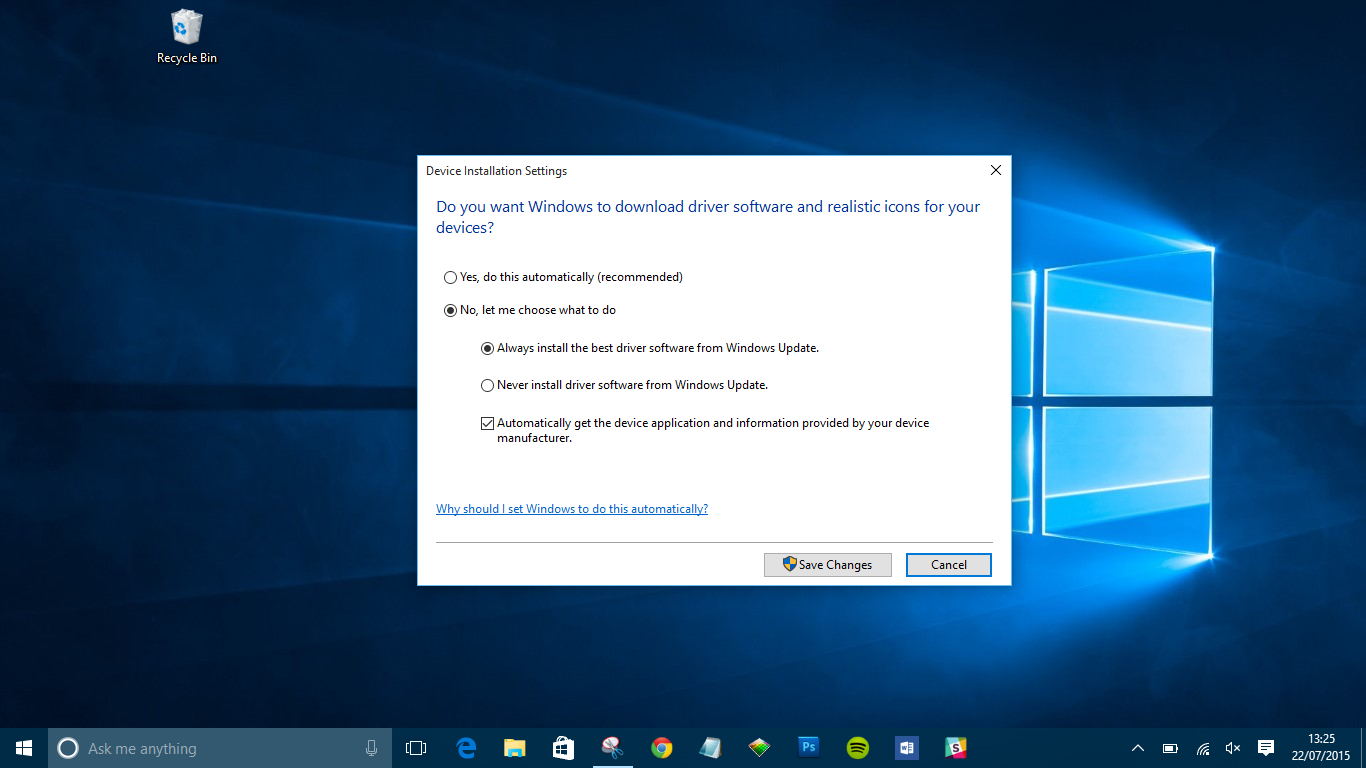
While convenient, Windows Update might not always provide the absolute latest or most optimized drivers, especially for high-performance components like dedicated GPUs.
Manual Installation from Manufacturer Websites: Precision and Control
This is the recommended method for critical components like your motherboard’s chipset and your graphics card, as it ensures you get the most recent and best-performing drivers directly from the source.
- Identify Your Hardware: You need to know the exact model numbers of your motherboard, graphics card, network adapter, and any other specific components.
- For a pre-built PC: Check the PC manufacturer’s website (e.g., Dell, HP, Lenovo) or documentation.
- For a custom-built PC: Check the original packaging or look for model numbers directly on the components themselves. You can also use a system information tool like CPU-Z or Speccy once the OS is installed.
- Visit Manufacturer Websites: Navigate to the support/download section of each component’s manufacturer.
- Motherboard: (e.g., ASUS, MSI, Gigabyte, ASRock) – Download chipset, LAN (Ethernet/Wi-Fi), audio, and potentially USB drivers.
- Graphics Card: (e.g., NVIDIA, AMD, Intel) – Download the latest graphics drivers.
- Peripherals: (e.g., Logitech, Razer, Canon) – Download drivers for specialized keyboards, mice, printers, etc.
- Select Your OS: Crucially, select your specific operating system (e.g., Windows 10 64-bit) to ensure compatibility.
- Download Drivers: Download the executable (
.exe) driver files. It’s often best to create a dedicated “Drivers” folder to keep them organized. - Install Drivers:
- Run the downloaded
.exefiles, typically in the order of chipset, then graphics, then audio, then network, and finally other peripherals. - Follow the on-screen prompts. Most installations are straightforward.
- Restart your PC after each major driver installation, especially for chipset and GPU drivers, even if not explicitly prompted. This helps prevent conflicts.
- Run the downloaded
This method gives you the most control and access to the latest, most optimized drivers.
Using Manufacturer-Provided Discs or USB Drives (If Applicable)
In older systems or some pre-built PCs, manufacturers might include a CD/DVD or USB flash drive with essential drivers.
- Insert the Media: Place the CD/DVD into your optical drive or insert the USB drive into a port.
- Run the Installer: An autorun menu usually appears, allowing you to select and install drivers. Follow the on-screen instructions.
- Prioritize Online: While convenient, these drivers are often outdated by the time you install them. Use them as a last resort (e.g., if you can’t get internet connectivity) and always follow up with checking for newer drivers online.
A Word on Third-Party Driver Utility Tools
There are numerous third-party “driver updater” tools available. While they promise convenience, exercise extreme caution.
- Risks: Many free tools can bundle bloatware or even malware. Even reputable ones can sometimes install incorrect drivers, leading to system instability or security vulnerabilities.
- Recommendation: For a new PC, it’s always best to stick to Windows Update and official manufacturer websites. These sources guarantee authentic, tested, and secure drivers. Avoid third-party tools unless you are an experienced user who thoroughly researches and trusts a specific utility. The potential for issues far outweighs the convenience.
Verifying Installation and Troubleshooting Common Issues
After the installation phase, it’s essential to confirm that everything is working as it should. Even with careful installation, issues can sometimes arise.
Confirming Driver Status with Device Manager
The Windows Device Manager is your primary tool for verifying driver installation and identifying hardware issues.
- Open Device Manager:
- Right-click the Start Menu button and select “Device Manager.”
- Alternatively, type “Device Manager” into the Windows search bar and open it.
- Inspect for Warnings: Look for any devices with:
- Yellow exclamation marks (!): Indicates a missing driver, an incorrectly installed driver, or a conflict.
- Red “X” symbols: Indicates a disabled device.
- “Unknown device”: Often points to a missing driver.
- Check Driver Details:
- Right-click on a device (especially those with warnings) and select “Properties.”
- Go to the “Driver” tab. Here you can see the driver provider, date, and version.
- If a driver is missing or problematic, you can often right-click the device and select “Update driver,” then choose to search automatically or browse your computer for driver software (if you downloaded it manually).
If all devices appear without warnings, it’s a good indication that your drivers are correctly installed.
Addressing Driver Conflicts and Malfunctions
Despite best efforts, driver-related problems can emerge. Here are common troubleshooting steps:
- Roll Back Driver: If a newly installed driver causes issues, you can often revert to a previous version. In Device Manager, go to the device’s Properties > Driver tab and click “Roll Back Driver.” This option is only available if a previous driver exists.
- Uninstall and Reinstall: Sometimes a clean reinstallation is necessary. In Device Manager, right-click the problematic device, select “Uninstall device,” check the box “Delete the driver software for this device” (if available), and then restart your PC. Windows will often try to reinstall a generic driver, or you can manually install the correct one.
- Check for Conflicts: If multiple devices show errors, it might indicate a conflict. Removing one driver at a time and testing can help isolate the culprit.
- Safe Mode: If your PC is too unstable to troubleshoot in normal mode, boot into Windows Safe Mode. This loads only essential drivers, allowing you to access Device Manager and rectify issues without further system crashes.
- System Restore: As a last resort, if you created a system restore point before installing problematic drivers, you can revert your system to that earlier state.
Best Practices for Driver Management and PC Longevity
Installing drivers on a new PC is just the beginning. Ongoing driver management is crucial for maintaining performance, stability, and security over the long term, aligning with smart technology and digital security practices.
Keeping Your Drivers Up-to-Date: The Key to Sustained Performance
Drivers are constantly being refined by manufacturers. New versions often bring:
- Performance Improvements: Especially for graphics cards, new drivers can significantly boost frame rates in games or speed up productivity applications.
- Bug Fixes: Address stability issues, crashes, or strange behaviors.
- Feature Enhancements: Unlock new capabilities or support for newer technologies.
- Security Patches: Close vulnerabilities that could be exploited.
Strategy for Updates:
- Windows Update: Continue to run Windows Update regularly.
- GPU Drivers: Check NVIDIA GeForce Experience or AMD Radeon Software for automatic updates, or visit their websites monthly.
- Motherboard/Chipset: Update these less frequently, perhaps every 6-12 months, unless you’re experiencing specific issues or a critical update is released.
- Peripherals: Update as needed, checking manufacturer websites periodically.
While it’s important to update, avoid updating drivers just for the sake of it if your system is perfectly stable. “If it ain’t broke, don’t fix it” sometimes applies, especially for less critical drivers.
Creating a Driver Backup Strategy
For complex systems or in preparation for future OS reinstallations, having a backup of your current, working drivers can be a lifesaver.
- Manual Download Folder: The simplest method is to keep a dedicated folder on an external drive or cloud storage containing all the driver installers you manually downloaded for your specific hardware.
- Third-Party Backup Tools: Some advanced users might use tools that can extract and back up currently installed drivers. However, proceed with caution and thorough research as with any third-party software.
A driver backup ensures that even if you’re offline or a manufacturer’s website is down, you have immediate access to the necessary software to get your PC fully functional.
The Impact on Digital Security and Productivity
Effective driver management isn’t just about speed; it’s a critical component of your overall digital security and productivity ecosystem. Outdated drivers can sometimes create security vulnerabilities that malicious software can exploit to gain unauthorized access to your system or data. By keeping drivers updated, you patch these potential security holes, making your PC more resilient to attacks.
Furthermore, a PC operating with optimized, stable drivers is a more productive PC. You’ll experience fewer crashes, faster application loading times, smoother multitasking, and reliable hardware performance. This translates directly into less downtime, fewer frustrations, and a more efficient workflow, whether you’re working, studying, or enjoying digital entertainment.
In conclusion, installing drivers on a new PC is a foundational step that should not be rushed or ignored. By understanding their role, knowing which ones are critical, and following the correct installation procedures, you can ensure your new machine delivers the exceptional performance, stability, and security you expect. This diligent approach to system setup and maintenance is a cornerstone of intelligent technology management, safeguarding your digital assets and maximizing your investment.
aViewFromTheCave is a participant in the Amazon Services LLC Associates Program, an affiliate advertising program designed to provide a means for sites to earn advertising fees by advertising and linking to Amazon.com. Amazon, the Amazon logo, AmazonSupply, and the AmazonSupply logo are trademarks of Amazon.com, Inc. or its affiliates. As an Amazon Associate we earn affiliate commissions from qualifying purchases.