
Cyberpunk 2077, despite its initial tumultuous launch, has evolved into a sprawling, immersive RPG experience, captivating millions with its dystopian vision of Night City. Yet, even with numerous official patches and expansions like Phantom Liberty, dedicated players and enthusiasts continually seek ways to further personalize, optimize, and expand their journey. This pursuit often leads to the vibrant modding community, and at the heart of much of Cyberpunk 2077’s modding ecosystem lies Cyber Engine Tweaks (CET).
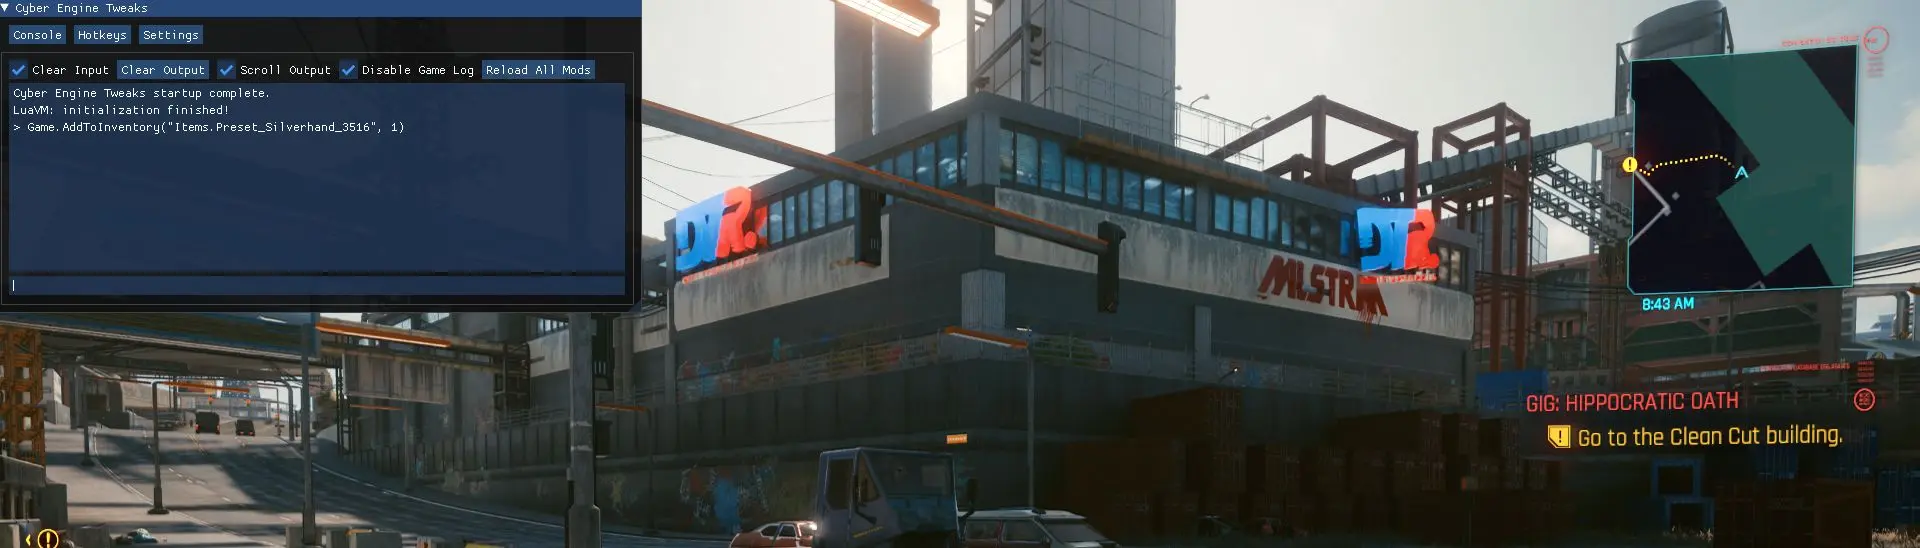
CET is far more than just another mod; it’s a foundational framework, an essential toolkit that unlocks the game’s hidden potential for customization, performance optimization, and the integration of countless other user-made modifications. It provides a robust in-game console, a crucial debugging interface, and a platform for executing LUA scripts, essentially acting as the central nervous system for a vast array of community-driven enhancements. For anyone serious about diving deep into Cyberpunk 2077’s modding scene, understanding and correctly installing Cyber Engine Tweaks is not just recommended – it’s practically mandatory.
This comprehensive guide will walk you through every step of installing Cyber Engine Tweaks, from initial prerequisites to troubleshooting common issues, ensuring you can seamlessly integrate this powerful tool into your Cyberpunk 2077 experience. Prepare to unlock a new dimension of Night City, tailored precisely to your preferences.
Understanding Cyber Engine Tweaks (CET) and Its Benefits
Before we delve into the technicalities of installation, it’s crucial to grasp what Cyber Engine Tweaks is, why it’s so pivotal, and what essential preparations you should undertake. This understanding will not only demystify the process but also highlight the immense value CET brings to your Cyberpunk 2077 gameplay.
What is Cyber Engine Tweaks?
At its core, Cyber Engine Tweaks is an open-source utility designed specifically for Cyberpunk 2077. Unlike many mods that add new items or change textures, CET operates on a deeper level, acting as an intermediary layer between the game engine and external scripts or modifications. It injects itself into the game process, providing a powerful in-game debug console and an API (Application Programming Interface) that allows other mods to interact directly with the game’s internal functions, variables, and memory.
This fundamental access means CET can enable a wide range of functionalities that would otherwise be impossible. From simple quality-of-life adjustments to complex gameplay overhauls, the vast majority of advanced Cyberpunk 2077 mods leverage CET for their operation. It essentially creates a sandbox environment where developers can experiment and build upon the game’s existing structure without directly altering the core game files in irreversible ways. The project is maintained by a dedicated community, constantly updated to ensure compatibility with new game patches and to fix potential issues, underscoring its role as a dynamic and evolving piece of the modding puzzle.
Why You Need CET: Unlocking Cyberpunk 2077’s Full Potential
The necessity of Cyber Engine Tweaks becomes apparent when you consider the myriad benefits it brings to the Cyberpunk 2077 experience:
- Enabling Advanced Modding: This is CET’s primary function. Hundreds of popular mods, including those that introduce new mechanics, change UI elements, enhance graphics, or fix bugs, explicitly list CET as a required dependency. Without it, these mods simply won’t work, severely limiting your ability to customize your game.
- In-Game Debug Console: CET provides a powerful, accessible console directly within the game. This console allows players to execute commands, spawn items, change game variables, teleport, modify character stats, and even fix minor glitches on the fly. It’s an invaluable tool for both troubleshooting and experimentation, granting unprecedented control over your game session.
- Performance Enhancements: CET often includes features designed to improve game performance. This can range from optimizing memory usage to fine-tuning graphical settings that aren’t exposed in the standard game menus. While not a magic bullet, these tweaks can provide noticeable framerate improvements or smoother gameplay, especially on systems that struggle with the game’s demanding requirements.
- Quality-of-Life Improvements: Many smaller, but impactful, quality-of-life mods rely on CET. These might include features like a more intuitive UI, improved key bindings, auto-loot functionalities, or dynamic changes to the game world that enhance immersion without fundamentally altering the core experience.
- Troubleshooting and Development: For mod developers, CET is an indispensable debugging tool. For players, understanding how to use its console can help diagnose issues with other mods or even with the base game itself, providing error messages and detailed information that can lead to quick solutions.
In essence, CET transforms Cyberpunk 2077 from a fixed experience into a highly malleable platform, allowing you to tailor Night City and your journey through it in ways the developers never intended, providing a truly personalized and enriched gameplay experience.
Essential Prerequisites Before You Begin
Before you embark on the installation process, a few critical steps and considerations are necessary to ensure a smooth, error-free setup. Adhering to these prerequisites will save you potential headaches down the line.
- Own and Install Cyberpunk 2077: This might seem obvious, but ensure you have a legitimate copy of Cyberpunk 2077 installed on your PC. CET is designed specifically for this game and won’t function otherwise. Whether you own it on Steam, GOG, or Epic Games Store, the installation process remains largely the same.
- Update Your Game to the Latest Version: Cyber Engine Tweaks is constantly updated to maintain compatibility with the latest official game patches. Always ensure your Cyberpunk 2077 installation is fully updated. Running an outdated game version with a new CET version (or vice-versa) is a common cause of crashes or non-functional tweaks.
- Identify Your Game’s Root Directory: Knowing the location of your Cyberpunk 2077 installation is fundamental. This is where you’ll be placing CET’s files.
- Steam: Right-click Cyberpunk 2077 in your library > Manage > Browse local files.
- GOG Galaxy: Select Cyberpunk 2077 > Settings icon (next to Play) > Manage Installation > Show folders.
- Epic Games Store: Go to Library > Find Cyberpunk 2077 > Click the three dots next to the game title > Manage > Click the folder icon next to “Installation Folder.”
The root directory typically contains folders likebin,r6,archive, etc. Inside the root directory, you’ll specifically need to navigate tobinx64.
- Backup Your Save Files (Recommended): While CET is generally safe, any modding carries inherent risks. It’s always a good practice to back up your save files before making significant changes to your game. Your save files are usually located in
%USERPROFILE%Saved GamesCD Projekt RedCyberpunk 2077. Copy the entire “Cyberpunk 2077” folder to a safe location. - Disable Your Antivirus (Temporarily, if necessary): Some overly zealous antivirus software can sometimes flag CET’s
dinput8.dllfile as a potential threat because it injects itself into another process (the game). If you encounter issues during installation or launch, temporarily disabling your antivirus, installing CET, and then re-enabling it (and potentially whitelisting the CET files) might be necessary. - Admin Privileges: Ensure you have administrator rights on your computer, as you’ll be modifying files within program directories.
With these preparations complete, you are now ready to proceed with the actual installation of Cyber Engine Tweaks.
Step-by-Step Installation Guide
Installing Cyber Engine Tweaks is a straightforward process, but precision is key. Follow these steps meticulously to ensure a successful integration into your Cyberpunk 2077 game files.
Acquiring the Latest Version of CET
The first and most crucial step is to obtain the official and most up-to-date version of Cyber Engine Tweaks. Relying on outdated or unofficial sources can lead to compatibility issues, crashes, or even security risks.
- Navigate to the Official Source: The primary and most reliable place to download Cyber Engine Tweaks is its official GitHub repository or its page on Nexus Mods. While GitHub usually hosts the absolute latest builds, Nexus Mods often provides more user-friendly download packages and comprehensive instructions. For most users, Nexus Mods is the recommended route. Search for “Cyber Engine Tweaks” on Nexus Mods (nexusmods.com/cyberpunk2077/mods/107).
- Download the Main File: On the Nexus Mods page, go to the “Files” tab. Look for the “Main Files” section. You’ll typically find an archive named something like “Cyber Engine Tweaks – [version number]”. Choose the “Manual Download” option.
- Verify the Download: After downloading, it’s a good practice to quickly check the file. It should be a
.zipor.7zarchive. While extremely rare, corrupted downloads can happen. Do not extract it yet; we’ll do that in the next step. Ensure you are downloading the file for your game version (e.g., if there’s a specific version for 2.0 or 2.1, pick that). The mod description will usually clarify this.
Manual Installation: Placing Files Correctly
This is where precise file placement is paramount. Incorrectly placing even a single file can prevent CET from functioning.
- Locate Your Game’s
binx64Directory:- As established in the prerequisites, navigate to your Cyberpunk 2077 installation directory.
- Inside the main game folder, you will see a folder named
bin. - Open
bin, then openx64. - The full path should look something like:
C:Program Files (x86)SteamsteamappscommonCyberpunk 2077binx64(for Steam users) or your respective platform equivalent. This is your target directory.
- Extract the Downloaded CET Archive:
- Open the
.zipor.7zfile you downloaded using a file archiver tool like 7-Zip or WinRAR. - Inside the archive, you will typically find the following:
dinput8.dll(This is the core injection library.)- A
pluginsfolder (This contains CET’s essential components and where other CET-dependent mods will often place their files.) - Potentially a
LICENSEfile orREADMEfile.
- Crucially, select
dinput8.dlland thepluginsfolder from the archive and drag-and-drop or copy-paste them directly into your game’sbinx64directory. - Ensure that
dinput8.dllis directly insidex64, and thepluginsfolder is also directly insidex64(i.e., you should seedinput8.dlland thepluginsfolder alongsideCyberpunk2077.exewithin thex64folder). Do not place them inside any subfolder withinpluginsunless instructed by a specific mod.
- Open the
Initial Configuration and First Launch
With the files correctly placed, it’s time to launch Cyberpunk 2077 and perform the initial setup for Cyber Engine Tweaks.
- Launch Cyberpunk 2077: Start the game as you normally would, either through your game launcher (Steam, GOG Galaxy, Epic Games) or directly via
Cyberpunk2077.exein thebinx64folder. - The First-Time Setup Prompt:
- If CET is installed correctly, upon launching the game, you will be greeted by a prompt or a small window appearing in the top-left corner of your screen before the main menu loads.
- This prompt will ask you to bind a hotkey to open the CET overlay console. The default suggestion is usually
~(tilde) orF4. Choose a key that you are comfortable with and unlikely to press accidentally during normal gameplay. It’s highly recommended to use the default~orF4unless you have a specific reason not to. - Once you’ve entered your desired key, click “Bind” or “Save.”
- Verify Installation:
- Once in the game (either at the main menu or loaded into a save), press the hotkey you just bound.
- If a console-like overlay appears on your screen, with options for “Console,” “Bindings,” “Settings,” and “Mods,” then congratulations – Cyber Engine Tweaks has been successfully installed and is working!
- If nothing happens, or the game crashes before reaching this point, refer to the troubleshooting section below.
- Initial Settings (Optional but Recommended):
- Within the CET overlay, navigate to the “Settings” tab.
- You might find options here to adjust the console font size, enable or disable certain features, or view debug information. Review these at your leisure.
- Crucially, if you experience performance issues, check for options related to “Disable Async Compute” or similar performance tweaks, as these can sometimes offer minor boosts depending on your hardware.
Leveraging Cyber Engine Tweaks: Beyond Basic Installation

Installing CET is just the beginning. Its true power lies in its ability to facilitate complex modding and provide direct control over the game through its debug console. Understanding these aspects will significantly enhance your modded Cyberpunk 2077 experience.
Harnessing the Debug Console: Essential Commands and Syntax
The in-game console is arguably CET’s most powerful feature, offering a direct line to the game’s internal workings. Learning a few basic commands can dramatically change your gameplay.
- Accessing the Console: Press your bound hotkey (
~orF4by default) to open the CET overlay, then select the “Console” tab. - Basic Command Structure: Most commands in CET are executed using Lua scripting. They often involve interacting with
Gameobjects orPlayerobjects.- Getting Player Information: Type
Game.GetPlayer()and press Enter. This will return information about your current player character. - Spawning Items: A popular use is to spawn specific items. For example, to add money:
Game.GetPlayer():GiveEP(100000)will give you 100,000 Eurodollars. To spawn a specific weapon or item, you’d use a more complex command involving item hashes. Note: Item hashes need to be looked up from community resources like the Cyberpunk 2077 Wiki or specific mod pages. For instance,Game.GetPlayer():AddItem('Items.PowerfulWeapon', 1)(replace ‘Items.PowerfulWeapon’ with an actual item hash). - Modifying Stats: You can directly modify character stats. For example, to give yourself perk points:
Game.GetPlayer():GivePerkPoints(5). - Teleportation: Some advanced scripts allow teleportation to specific coordinates.
- NoClip: Many mods that enable “no-clip” mode (walking through walls) utilize CET. You might activate it with a command like
TweakDB.SetFlat("player", "player_noclip", true)if a specific mod provides it.
- Getting Player Information: Type
- Exploring Commands: The CET console doesn’t have an auto-complete feature for all commands, so you’ll often rely on community-created lists of commands and scripts. Nexus Mods, YouTube tutorials, and dedicated Cyberpunk 2077 modding Discord servers are excellent resources for discovering useful commands and understanding their syntax.
- Scripting: For more complex actions, CET supports executing
.luascripts. Many mods are essentially.luascripts placed in thebinx64pluginscyber_engine_tweaksscriptsfolder, which CET automatically loads.
Integrating Other Mods and Scripts
CET’s primary function is as a dependency for other mods. Integrating these mods is often as simple as placing their files in the correct location, typically within the plugins folder created by CET.
- Read Mod Requirements Carefully: Every mod on Nexus Mods (or other platforms) will list its requirements. If a mod requires “Cyber Engine Tweaks,” ensure CET is installed and working before attempting to install that mod.
- Follow Mod-Specific Installation Instructions: While many mods simply go into your
binx64pluginsfolder, some might have specific subfolders or slightly different placement requirements. Always refer to the individual mod’s installation instructions. For example, a mod might require you to place its folder withinbinx64pluginscyber_engine_tweaksmodsorbinx64pluginscyber_engine_tweaksscripts. - Mod Managers: For users managing numerous mods, a dedicated mod manager like Vortex (from Nexus Mods) can streamline the installation and uninstallation process, often automatically handling CET and its dependencies. However, even with a mod manager, understanding the manual process is beneficial for troubleshooting.
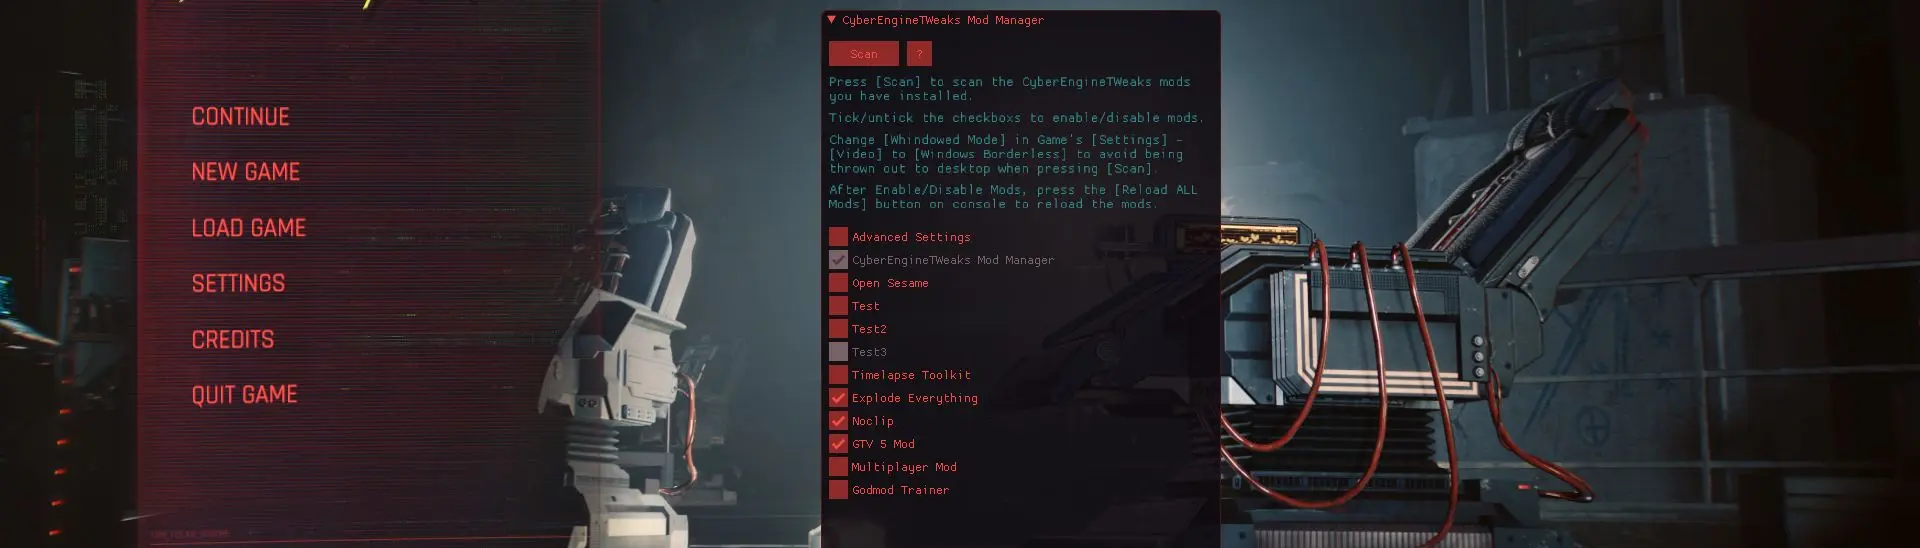
- Enabling/Disabling Mods: Within the CET overlay, under the “Mods” tab, you’ll see a list of detected CET-dependent mods. Here, you can usually toggle them on or off, allowing for easier testing and conflict resolution.
Performance Enhancements and Quality-of-Life Features
Beyond modding, CET itself offers a few performance-related tweaks and quality-of-life improvements.
- Async Compute Toggle: In the “Settings” tab of the CET overlay, you might find an option to disable “Async Compute.” For some older GPUs (especially NVIDIA Pascal generation), disabling this can lead to minor performance improvements. Experiment with this setting to see if it benefits your system.
- UI and HUD Customization: While not directly part of CET, many mods that customize the game’s user interface (HUD, menus, fonts) rely on CET. This allows for a more personalized visual experience, removing intrusive elements or enhancing readability.
- Input Customization: Some CET-dependent mods allow for advanced keybinding and input remapping, giving you granular control over your game’s controls beyond the in-game options.
Troubleshooting Common Issues and Maintaining Your Installation
Even with careful installation, issues can arise. Knowing how to troubleshoot and maintain your Cyber Engine Tweaks installation is essential for a stable and enjoyable modded experience.
Resolving Installation Glitches and Game Crashes
When something goes wrong, it’s usually due to a few common culprits. Here’s a checklist for resolving typical issues:
- CET Overlay Not Appearing / Game Crashing on Launch:
- Incorrect File Placement: This is the most common issue. Double-check that
dinput8.dlland thepluginsfolder are directly insidebinx64, alongsideCyberpunk2077.exe. They should not be in a subfolder. - Version Mismatch: Ensure your Cyberpunk 2077 game version and your Cyber Engine Tweaks version are compatible. An outdated CET on a new game patch (or vice-versa) is a prime cause of crashes. Always download the CET version specified for your current game patch.
- Antivirus Interference: As mentioned, your antivirus might be quarantining
dinput8.dll. Temporarily disable your antivirus, reinstall CET, then add an exclusion for thebinx64folder in your antivirus settings before re-enabling it. - Conflicting Mods: If you have other mods installed (especially those that also use a
dinput8.dllor similar injection method, which is rare but possible), they might conflict with CET. Try launching the game with only CET installed to rule out other mod conflicts. - Corrupted Game Files: Verify the integrity of your game files through your game launcher (Steam, GOG Galaxy, Epic Games Store). This can fix corrupted base game files that might be preventing CET from hooking properly.
- Steam: Right-click Cyberpunk 2077 > Properties > Installed Files > Verify integrity of game files.
- GOG Galaxy: Select Cyberpunk 2077 > Settings icon > Manage Installation > Verify / Repair.
- Epic Games Store: Go to Library > Find Cyberpunk 2077 > Click the three dots > Manage > Verify.
- Missing Dependencies (Rare): Ensure your Windows installation has up-to-date Visual C++ Redistributables. These are usually installed automatically by games, but problems can occur.
- Incorrect File Placement: This is the most common issue. Double-check that
- CET Console Opens, But Commands Don’t Work / Mods Don’t Show Up:
- Typo in Command: Double-check your console commands for any spelling errors or incorrect syntax.
- Incorrect Mod Installation: Ensure the specific mod you’re trying to use is installed correctly, typically within the
pluginsfolder hierarchy. Read its specific instructions. - Mod Version Mismatch: The mod itself might be outdated for your game or CET version.
- Mod Conflicts: Two CET-dependent mods might be conflicting with each other. Try disabling other mods to isolate the issue.
Updating CET for Game Patches and New Features
CD Projekt Red frequently updates Cyberpunk 2077, and these updates often break mod compatibility, including CET. Staying updated is crucial.
- Check for New CET Versions: After every major Cyberpunk 2077 patch, check the official CET Nexus Mods page (or GitHub) for an updated version. The mod authors are usually quick to release compatible versions.
- Clean Update Process (Recommended):
- Delete Old CET Files: Before installing a new version, it’s best practice to completely remove the old CET files. Go to your
binx64folder and deletedinput8.dlland thepluginsfolder (unless you have other mods inside thepluginsfolder you wish to keep, in which case just deletedinput8.dlland thecyber_engine_tweakssubfolder insideplugins). - Download New Version: Download the latest compatible CET version from Nexus Mods.
- Install Fresh: Follow the manual installation steps detailed above to place the new
dinput8.dllandpluginsfolder into yourbinx64directory. - Rebind Hotkey: You’ll likely need to rebind your hotkey on the first launch after updating.
- Delete Old CET Files: Before installing a new version, it’s best practice to completely remove the old CET files. Go to your
- Update Other Mods: Remember that other mods that depend on CET will also likely need updates after a major game patch. Check their respective mod pages for new versions.
Safely Uninstalling Cyber Engine Tweaks
Should you wish to revert your game to its unmodded state, uninstalling CET is straightforward.
- Locate Your
binx64Directory: Navigate to your Cyberpunk 2077 game directory and then intobinx64. - Delete CET Files:
- Delete the
dinput8.dllfile. - Delete the entire
pluginsfolder. If you have other mods within thepluginsfolder that you want to keep, you’ll need to openpluginsand only delete thecyber_engine_tweakssubfolder within it. However, for a complete uninstall, deleting the entirepluginsfolder is the safest bet to ensure no remnants of CET or CET-dependent mods remain.
- Delete the
- Verify Game Files (Optional but Recommended): After uninstalling, verifying the integrity of your game files through your game launcher is a good final step to ensure everything is restored to its original state.
The Future of Modding and Responsible Practices
The world of Cyberpunk 2077 modding is ever-evolving, driven by a passionate community and facilitated by powerful tools like Cyber Engine Tweaks. As you venture further into customizing your Night City experience, adopting responsible modding practices will ensure longevity and stability for your game.
The Evolving Modding Landscape of Cyberpunk 2077
Since its release, Cyberpunk 2077 has seen an incredible surge in mod development. With official tools and support from CD Projekt Red (such as REDmod), the modding scene continues to flourish. CET remains a cornerstone, providing low-level access that complements higher-level modding frameworks. As new game updates, expansions, and even sequels emerge, CET will likely continue to adapt, offering a consistent platform for community innovation. Staying engaged with modding communities on platforms like Nexus Mods, Reddit, and Discord will keep you informed about the latest tools, trends, and groundbreaking creations that reshape Night City.
Best Practices for a Stable Modded Experience
To ensure your modded Cyberpunk 2077 experience remains stable and enjoyable, consider these best practices:
- Read Everything: Before downloading and installing any mod, thoroughly read its description, requirements, installation instructions, and the “Bugs” and “Posts” sections on its Nexus Mods page. This is your first line of defense against conflicts and issues.
- Install One Mod at a Time (Initially): When starting with modding, install one mod, test it, and ensure it works before installing the next. This makes it infinitely easier to identify which mod is causing a problem if something breaks.
- Create Backups: Beyond just save files, consider backing up your entire
binx64folder (or even your whole game installation) before embarking on extensive modding. This provides a clean rollback point. - Use a Mod Manager: For anything more than a handful of mods, a mod manager like Vortex or the community-driven CP2077 Mod Manager can drastically simplify installation, updating, and conflict resolution. They help keep your game folder clean and allow for easier disabling/enabling of mods.
- Stay Updated (Selectively): While it’s important to update CET and other foundational mods, don’t rush to update every mod immediately after a new game patch. Give mod authors time to release compatible versions. Playing on a slightly older game patch with stable mods can sometimes be better than jumping to the latest patch with broken mods.
- Engage with the Community: If you encounter an issue, chances are someone else has too. Search forums, join Discord servers, and politely ask for help. Providing clear details about your game version, CET version, and the mods you have installed will greatly assist others in helping you.
- Support Mod Authors: If you enjoy a mod, consider endorsing it on Nexus Mods or even donating to the author. Modding is a labor of love, and appreciation fuels further development.
By integrating Cyber Engine Tweaks responsibly and following these guidelines, you’re not just playing Cyberpunk 2077; you’re actively participating in its ongoing evolution, transforming Night City into your truly unique, personalized playground. Dive in, experiment, and enjoy the limitless possibilities that CET opens up.
aViewFromTheCave is a participant in the Amazon Services LLC Associates Program, an affiliate advertising program designed to provide a means for sites to earn advertising fees by advertising and linking to Amazon.com. Amazon, the Amazon logo, AmazonSupply, and the AmazonSupply logo are trademarks of Amazon.com, Inc. or its affiliates. As an Amazon Associate we earn affiliate commissions from qualifying purchases.