
Welcome to the ultimate guide on installing Blender, the powerful open-source 3D creation suite that has revolutionized digital art, animation, and visual effects. Whether you’re an aspiring artist, a game developer, an architect visualizing designs, or a content creator looking to elevate your visual storytelling, Blender offers an unparalleled array of tools – all completely free.
In the fast-evolving landscape of technology, mastering versatile software like Blender can be a significant boost to your productivity and creative output. From sculpting intricate models and crafting breathtaking animations to rendering photorealistic scenes and even developing interactive experiences, Blender empowers you to bring your wildest ideas to life. Its continuous development, supported by a vibrant global community, ensures it remains at the cutting edge of 3D technology, often incorporating features found in expensive proprietary software.
This comprehensive tutorial will walk you through every step of getting Blender set up on your system, ensuring a smooth and hassle-free installation process. We’ll cover various operating systems and installation methods, along with essential tips for ensuring your system is ready to handle the demands of 3D creation. Get ready to unlock a world of limitless possibilities and transform your digital aspirations into tangible realities.
Preparing Your System: Understanding Blender’s Requirements and Installation Methods
Before diving into the installation process, it’s crucial to ensure your computer meets Blender’s system requirements. While Blender is remarkably optimized, 3D rendering and complex simulations can be demanding on hardware. Understanding these requirements will prevent frustration and ensure a smoother, more productive experience once you start creating.
System Requirements for Optimal Performance
Blender’s system requirements are generally quite accessible, but investing in better hardware, particularly a dedicated graphics card, will significantly enhance your experience, especially when dealing with complex scenes or rendering.
Minimum Requirements (For basic use and learning):
- Operating System: Windows 10, 8.1, or 7 (64-bit); macOS 10.13 High Sierra; Linux.
- Processor (CPU): 64-bit dual-core processor with SSE2 support.
- RAM: 8 GB.
- Graphics Card (GPU): OpenGL 4.3 compatible card with 2 GB VRAM. Intel HD Graphics 4000 (Ivy Bridge) or better is generally sufficient for basic viewport navigation, but rendering will be slow.
- Display: 1920×1080 resolution.
- Input: Mouse, trackpad, or pen tablet.
Recommended Requirements (For typical use and production):
- Operating System: Windows 10 (64-bit); macOS 11 Big Sur or newer; Linux.
- Processor (CPU): 64-bit quad-core processor.
- RAM: 16 GB or more.
- Graphics Card (GPU): OpenGL 4.3 compatible card with 8 GB VRAM. NVIDIA GeForce RTX series or AMD Radeon RX series are highly recommended for optimal viewport performance and faster Cycles rendering (Blender’s physically-based renderer). CUDA (NVIDIA) or OpenCL/HIP (AMD) support is crucial for GPU rendering.
- Display: 2560×1440 resolution or higher, with a 3-button mouse.
- Storage: SSD for faster loading of Blender and project files.
Important Note on Graphics Drivers: Regardless of your operating system, ensuring your graphics drivers are up-to-date is paramount. Outdated drivers are a common cause of performance issues, crashes, and visual glitches in Blender. Always download the latest drivers directly from NVIDIA, AMD, or Intel’s official websites.
Exploring Installation Methods
Blender offers several installation methods, each with its own advantages. The best method for you often depends on your operating system, technical comfort level, and personal preferences regarding software management.
- Official Installer/Package: This is the most common and recommended method for Windows and macOS users. It provides a standard installation process, integrating Blender seamlessly into your system.
- Portable Version (ZIP): Available for Windows and Linux, the portable version doesn’t require installation. You simply extract the files and run Blender directly from the folder. This is great for running Blender from a USB drive, testing new versions without affecting your main installation, or if you don’t have administrative privileges.
- Application Stores (Microsoft Store, Steam): These platforms offer a convenient, one-click installation experience and often handle updates automatically. Steam, in particular, is cross-platform (Windows, macOS, Linux) and popular among gamers and developers.
- Package Managers (Linux): Linux users have access to various package managers (Snap, Flatpak, apt, dnf, pacman) that simplify software installation and updates.
Choosing the right method streamlines your workflow and integrates Blender effectively into your digital ecosystem. Now, let’s proceed with the detailed installation guides for each major operating system.
Step-by-Step Installation Guides for Diverse Operating Systems
This section provides clear, actionable instructions tailored to your specific operating system, ensuring a smooth transition into the world of 3D creation.
Installing Blender on Windows
Windows is a popular platform for Blender users, and the installation process is straightforward. You have a few options to consider.
Method 1: Using the Official Windows Installer (Recommended)
This is the most common and robust way to install Blender on Windows, providing full integration with your system.
-
Download the Installer:
- Open your web browser and navigate to the official Blender website:
blender.org/download. - The website should automatically detect your operating system. Click the prominent “Download Blender [Version Number]” button. This will download an executable file (e.g.,
blender-[version]-windows-x64.msi).
- Open your web browser and navigate to the official Blender website:
-
Run the Installer:
- Once the download is complete, locate the
.msifile (usually in yourDownloadsfolder) and double-click it to launch the Blender Setup Wizard. - If a User Account Control (UAC) prompt appears, click “Yes” to allow the installer to make changes to your device.
- Once the download is complete, locate the
-
Follow the Setup Wizard:
- Welcome Screen: Click “Next.”
- End-User License Agreement: Read through the EULA. If you agree to the terms, select “I accept the terms in the License Agreement” and click “Next.”
- Custom Setup: By default, Blender will install to
C:Program FilesBlender FoundationBlender [Version]. You can click “Browse” to choose a different installation directory if you prefer, but the default is generally fine. Click “Next.” - Ready to install Blender: Click “Install” to begin the installation process.
-
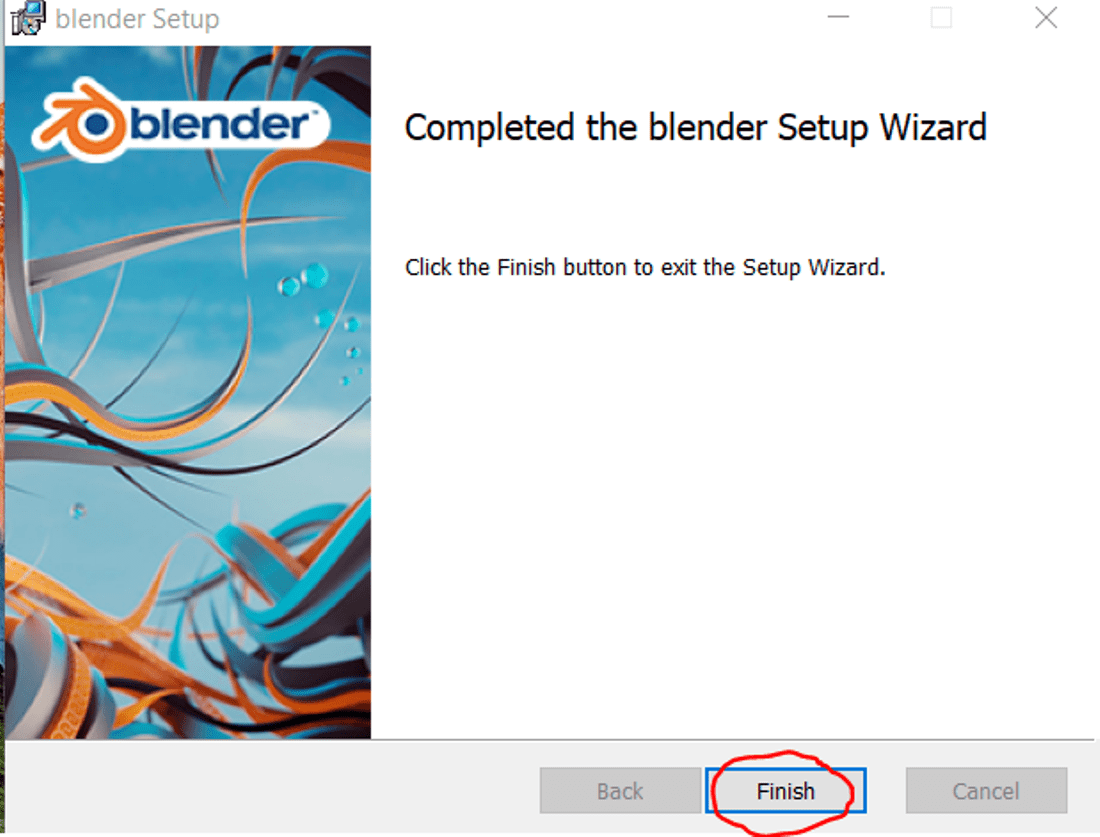
Complete Installation:
- The installer will copy files and configure Blender. This may take a few minutes.
- Once finished, a “Completed the Blender Setup Wizard” screen will appear. Click “Finish.”
Blender is now installed! You can find it in your Start Menu or by searching for “Blender.”
Method 2: Using the Portable (ZIP) Version
The portable version is excellent for running Blender without affecting system files, or if you lack administrative privileges.
-
Download the ZIP Archive:
- Go to
blender.org/download. - Below the main download button, look for “Other Downloads” or “Previous Versions.” Find the Windows section and select the “blender-[version]-windows-x64.zip” download link.
- Go to
-
Extract the Files:
- Locate the downloaded
.zipfile. - Right-click on the
.zipfile and select “Extract All…” (or use your preferred archiving software like 7-Zip or WinRAR). - Choose a destination folder where you want to store Blender (e.g.,
C:BlenderPortableor a USB drive). Click “Extract.”
- Locate the downloaded
-
Run Blender:
- Navigate into the newly extracted folder (e.g.,
Blender-[version]-windows-x64). - Inside, you’ll find the
blender.exeexecutable. Double-click it to launch Blender.
- Navigate into the newly extracted folder (e.g.,
Installing Blender on macOS
Installing Blender on a Mac is straightforward, leveraging the standard .dmg disk image format.
-
Download the macOS Installer:
- Go to
blender.org/download. - Click the “Download Blender [Version Number]” button. This will download a
.dmgfile (e.g.,blender-[version]-macos-x64.dmgfor Intel Macs, orblender-[version]-macos-arm64.dmgfor Apple Silicon Macs). Ensure you download the correct architecture for your Mac.
- Go to
-
Mount the Disk Image:
- Once downloaded, double-click the
.dmgfile. This will “mount” the disk image and open a Finder window showing its contents.
- Once downloaded, double-click the
-
Install Blender:
- In the Finder window, you will typically see the Blender application icon and an “Applications” folder alias.
- Drag the “Blender.app” icon into the “Applications” folder alias. This will copy Blender to your Applications directory.
-
Eject the Disk Image:
- After copying, you can close the Finder window.
- To unmount the disk image, drag the “Blender [Version]” drive icon from your Desktop or Finder sidebar to the Trash (the Trash icon will change to an Eject icon).
-
Launch Blender:
- Open your “Applications” folder (from Finder or Launchpad).
- Find “Blender.app” and double-click it.
- The first time you launch Blender, macOS might ask you to confirm that you want to open an application downloaded from the internet. Click “Open.”
Installing Blender on Linux
Linux offers the most flexibility for installing Blender, with several robust methods available. We’ll focus on the most user-friendly options.
Method 1: Using Snap (Recommended for Ease of Use)
Snap is a universal packaging system that makes installing software on various Linux distributions incredibly simple, often providing the latest stable versions.
-
Open Terminal:
- Press
Ctrl+Alt+Tor search for “Terminal” in your applications menu.
- Press
-
Install Blender via Snap:
- Type the following command and press Enter:
bash

sudo snap install blender --classic
- You will be prompted to enter your user password. Type it and press Enter (no characters will appear as you type for security).
- Snap will download and install Blender. This may take a few minutes depending on your internet speed.
- Type the following command and press Enter:
-
Launch Blender:
- Once installed, you can launch Blender from your applications menu or by typing
blenderin the terminal and pressing Enter.
- Once installed, you can launch Blender from your applications menu or by typing
Method 2: Using Flatpak

Flatpak is another universal packaging system, similar to Snap, offering sandboxed applications that run consistently across distributions.
-
Ensure Flatpak is Installed:
- Most modern Linux distributions come with Flatpak pre-installed. If not, refer to
flatpak.org/setup/for installation instructions specific to your distribution.
- Most modern Linux distributions come with Flatpak pre-installed. If not, refer to
-
Add Flathub Repository (if not already added):
- Flathub is the primary source for Flatpak applications. Add it with:
bash

flatpak remote-add --if-not-exists flathub https://flathub.org/repo/flathub.flatpakrepo
- Flathub is the primary source for Flatpak applications. Add it with:
-
Install Blender via Flatpak:
- Open your terminal and type:
bash

flatpak install flathub org.blender.Blender
- Confirm the installation when prompted.
- Open your terminal and type:
-
Launch Blender:
- After installation, launch Blender from your applications menu or using the command:
bash

flatpak run org.blender.Blender
- After installation, launch Blender from your applications menu or using the command:
Method 3: Manual Installation from tar.xz Archive
This method gives you complete control over where Blender is installed and is useful for running multiple versions or for server environments.
-
Download the Linux Archive:
- Go to
blender.org/download. - Under “Other Downloads,” find the “Linux” section and download the
blender-[version]-linux-x64.tar.xzfile.
- Go to
-
Extract the Archive:
- Open your terminal and navigate to your
Downloadsdirectory:
bash

cd ~/Downloads
- Extract the archive to your preferred location (e.g.,
/opt/blenderfor system-wide, or~/blenderfor personal use). Let’s use~/blenderas an example:
bash

mkdir ~/blender

tar -xf blender-[version]-linux-x64.tar.xz -C ~/blender --strip-components=1
Replaceblender-[version]-linux-x64.tar.xzwith the actual filename.
- Open your terminal and navigate to your
-
Run Blender:
- Navigate into the extracted Blender directory:
bash

cd ~/blender
- Execute Blender:
bash

./blender
- For easier access, you might want to create a desktop shortcut or add Blender to your system’s PATH.
- Navigate into the extracted Blender directory:
Installing Blender via Steam (Cross-Platform Convenience)
Steam, primarily known for gaming, offers a convenient way to install and manage Blender across Windows, macOS, and Linux. It automatically handles updates and can keep your Blender version synchronized across multiple machines.
-
Install Steam (if you haven’t already):
- If Steam isn’t installed on your system, download and install it from
store.steampowered.com. Create an account if you don’t have one.
- If Steam isn’t installed on your system, download and install it from
-
Search for Blender on Steam:
- Open the Steam client and navigate to the “Store” tab.
- In the search bar at the top right, type “Blender” and press Enter.
-
Install Blender:
- Click on “Blender” from the search results.
- On the Blender store page, click the “Free” or “Install” button.
- Steam will prompt you to choose an installation location and will then begin downloading Blender.
-
Launch Blender:
- Once the download is complete, Blender will appear in your Steam Library under “Software.”
- Click “Play” to launch Blender. Steam will also handle background updates for you.
Post-Installation Essentials: Verifying, Configuring, and Staying Updated
You’ve successfully installed Blender – congratulations! But the journey doesn’t end there. A few crucial steps after installation can significantly improve your initial experience, ensure long-term stability, and maximize your productivity.
Verifying Your Installation
Before you dive into 3D modeling, it’s wise to quickly verify that Blender has installed correctly and is running as expected.
- Launch Blender: Open Blender using the method appropriate for your installation (Start Menu, Applications folder, Terminal command, or Steam).
- Check the Splash Screen: When Blender first launches, you’ll see a splash screen displaying the version number. Ensure this matches the version you intended to install.
- Basic Functionality Test:
- You should see the default cube in the 3D viewport.
- Try navigating the viewport: middle-click-drag to rotate, Shift + middle-click-drag to pan, scroll wheel to zoom.
- Press
Xand click “Delete” to remove the cube. - Press
Shift+A, then select “Mesh” > “UV Sphere” to add a new object. - If these basic actions work without crashing or significant lag, your installation is likely successful.
Initial Setup and Configuration
The first time you launch Blender, you’ll be presented with an initial setup screen that allows you to configure some fundamental preferences. Taking a moment here can save you time later.
- Language: Choose your preferred language.
- Shortcuts: Select your preferred shortcut preset. “Blender” is the default and recommended for new users. “Industry Compatible” attempts to match shortcuts from other 3D software (like Maya) if you’re transitioning.
- Select with: Choose whether to select objects with the Left or Right mouse button. Left-click is the modern standard and generally recommended.
- Spacebar Action: Configure what happens when you press the spacebar (e.g., Play, Search, Tools). “Search” is often very useful for quickly finding commands.
- Save & Load: Check “Load Previous Settings” if you’re upgrading from an older version and want to keep your previous preferences (though for a fresh install, this isn’t relevant).
- Click “Save New Settings”: This will apply your choices and close the splash screen, bringing you to the default Blender interface.
Further Customization (Highly Recommended):
- Edit > Preferences: This is your control center for all Blender settings.
- Interface: Adjust UI scale, theme, and more.
- System: Crucially, configure your “Cycles Render Devices.” If you have a dedicated GPU, ensure it’s selected here (CUDA for NVIDIA, HIP for AMD). This will dramatically speed up rendering.
- Add-ons: Blender has a vast ecosystem of built-in and community-developed add-ons. Explore and enable those that fit your workflow (e.g., “Node Wrangler” for shader nodes, “LoopTools” for modeling).
Keeping Blender Updated
Blender is under active development, with frequent updates that bring new features, performance improvements, and crucial bug fixes. Staying updated is vital for security, accessing the latest tools, and maintaining peak productivity.
- Regular Releases: Blender typically releases stable updates every few months.
- LTS (Long Term Support) Versions: For production environments that require maximum stability, Blender offers LTS versions that receive critical bug fixes for an extended period, without introducing new features that might disrupt workflows.
- Update Process:
- Official Installer (Windows/macOS): For major version upgrades, you generally need to download the new installer from
blender.org/downloadand run it. It usually installs a new version alongside the old one, allowing you to keep both or uninstall the older one. Minor point releases might be handled through the existing installation. - Snap/Flatpak (Linux): These package managers simplify updates significantly. You can usually update Blender along with other system packages using commands like
sudo snap refresh blenderorflatpak update. - Steam: Steam automatically handles updates for Blender, keeping your installation current without manual intervention.
- Portable (ZIP/tar.xz): For portable versions, you’ll need to manually download the new ZIP/tar.xz file and extract it to a new location, then potentially copy your configuration files over.
- Official Installer (Windows/macOS): For major version upgrades, you generally need to download the new installer from
Always back up your important project files before updating, especially if you’re moving between major versions. While Blender aims for backward compatibility, it’s a good practice to be cautious.
Troubleshooting Common Installation and Launch Issues
Even with careful planning, occasional issues can arise. Here are some common problems and their solutions to help you get Blender up and running smoothly.
Graphics Card Driver Problems
This is by far the most frequent culprit for Blender not launching, crashing, or displaying visual glitches.
- Symptoms: Blender fails to launch with a “Failed to create OpenGL context” error, crashes immediately upon opening, displays a black screen, or shows corrupted viewport graphics.
- Solution: Update your graphics card drivers.
- NVIDIA: Visit
nvidia.com/drivers. - AMD: Visit
amd.com/en/support. - Intel: Visit
intel.com/content/www/us/en/support/detect.html. - Download and install the latest stable drivers for your specific GPU model. Restart your computer after installation.
- For Linux users: Ensure your
mesautilities and proprietary drivers (if applicable) are up to date through your distribution’s package manager.
- NVIDIA: Visit
Permissions Errors
On Windows and Linux, incorrect file permissions can prevent Blender from installing or launching correctly.
- Symptoms: Installer fails with an access denied error, Blender executable won’t run, or cannot save files.
- Solution:
- Windows: Right-click the installer
.msiorblender.exeand select “Run as administrator.” Ensure your user account has read/write permissions for the Blender installation directory and your project file locations. - Linux: If you’re using the manual
tar.xzmethod, ensure the extracted Blender files have execute permissions (chmod +x blender). If installing system-wide, usesudofor commands that require elevated privileges.
- Windows: Right-click the installer
Download Corruption
Sometimes, a downloaded file might be incomplete or corrupted, leading to installation failures.
- Symptoms: Installer reports an error like “corrupted archive,” or the
.zip/.dmgfile cannot be opened. - Solution: Delete the downloaded Blender file and try downloading it again from
blender.org/download. A stable internet connection is crucial for large downloads. If the issue persists, try downloading from a different browser or network.
Blender Not Responding or Freezing
If Blender launches but then becomes unresponsive, especially when performing a specific action.
- Symptoms: Blender freezes when opening a specific file, switching modes, or starting a render.
- Solution:
- Check System Resources: Open Task Manager (Windows) or Activity Monitor (macOS) or a system monitor (Linux) to check CPU, RAM, and GPU usage. If any are maxed out, your system might be struggling.
- Reset User Preferences: Sometimes corrupted user preferences can cause issues. You can reset Blender to factory defaults by going to
File > Defaults > Load Factory Settings. If Blender won’t launch, you might need to manually delete the configuration folder. For Windows, this is typically in%APPDATA%Blender FoundationBlender[Version]. For macOS,~/Library/Application Support/Blender/[Version]. For Linux,~/.config/blender/[Version]. - Open from Terminal (Linux/macOS): Launching Blender from the terminal (e.g.,
./blenderorblender) can sometimes provide useful error messages that indicate the root cause of the crash.
By understanding these common issues and their solutions, you’ll be better equipped to troubleshoot and resolve any installation hiccups, getting you back to creating in no time.

Conclusion: Your Journey into 3D Awaits
Installing Blender is the first, crucial step on an exciting journey into the vast and rewarding world of 3D creation. From this point forward, the only limit is your imagination and willingness to learn. You now have access to a professional-grade 3D suite that empowers artists, designers, and innovators across countless industries.
Blender’s open-source nature, coupled with its robust feature set, makes it an indispensable tool for anyone looking to make their mark in digital content creation. Whether you’re aiming to craft stunning visual assets for your brand, develop compelling animations that tell unique stories, or even explore the burgeoning field of game design and virtual reality, Blender provides the foundation.
Embrace the learning curve, experiment with its powerful tools, and don’t hesitate to tap into the vibrant global Blender community for inspiration and support. This investment in acquiring a new skill, starting with this straightforward installation, is a profound step towards enhancing your creative productivity and opening doors to new opportunities in the dynamic digital landscape. So, go ahead – launch Blender, explore its intuitive interface, and begin transforming your ideas into incredible 3D realities. The future of your creative expression starts now!
aViewFromTheCave is a participant in the Amazon Services LLC Associates Program, an affiliate advertising program designed to provide a means for sites to earn advertising fees by advertising and linking to Amazon.com. Amazon, the Amazon logo, AmazonSupply, and the AmazonSupply logo are trademarks of Amazon.com, Inc. or its affiliates. As an Amazon Associate we earn affiliate commissions from qualifying purchases.