In the ever-evolving landscape of technology, staying ahead often means delving into the nitty-gritty of your devices. For Android users and developers, understanding and utilizing the Android Debug Bridge (ADB) is a fundamental skill. ADB acts as a versatile command-line tool that enables communication between your computer and your Android device, unlocking a world of advanced functionalities, from custom ROM installations and app debugging to data recovery and system tweaks. This guide will walk you through the process of installing ADB on your Windows machine, empowering you to harness its full potential.
The relevance of ADB extends across various domains within our website’s core focus areas. For Tech enthusiasts, ADB is an indispensable tool for exploring the deeper functionalities of their Android devices, understanding software behavior, and even dabbling in digital security by analyzing app permissions or rooting devices. For those in the Brand space, particularly in app development or mobile marketing, ADB can be crucial for testing applications on different devices, identifying performance bottlenecks, or even simulating user scenarios to refine the user experience. While not directly related to Money, the ability to troubleshoot and optimize your Android devices can indirectly lead to cost savings by extending device lifespan, avoiding costly repairs, or even enabling sideloading of beneficial apps that might otherwise require a subscription. Ultimately, mastering ADB can enhance your overall digital productivity and understanding.
Understanding ADB and Its Importance
Before we dive into the installation process, let’s briefly touch upon what ADB is and why it’s such a valuable tool.
ADB is a client-server program that includes three components:
- A client: This runs on your development machine. You can invoke it from a shell using a command like
adb. - A daemon (adbd): This runs as a background process on each device (emulator or physical device) in your development environment.
- A server: This manages the communication between the client and the daemon. The server is a background process that is started automatically when you run an
adbcommand.
The primary functions of ADB include:
- Installing and Debugging Applications: This is perhaps its most common use. Developers use ADB to push their applications onto an Android device and debug them in real-time.
- Accessing the Device Shell: ADB allows you to open a command-line interface directly on your Android device, granting you access to its file system, running processes, and system logs.
- Transferring Files: You can easily copy files between your computer and your Android device using ADB.
- Backing Up and Restoring Data: ADB can be used to create full backups of your device’s data and restore it later.
- Flashing Custom ROMs and Kernels: For advanced users, ADB is a gateway to modifying your device’s operating system by flashing custom firmware.
- Taking Screenshots and Recording Screen: ADB provides commands to capture screenshots and record your device’s screen directly from your computer.
- Troubleshooting and Diagnostics: ADB offers powerful tools for diagnosing issues with your device, viewing system logs, and understanding error messages.
Given this broad range of capabilities, it’s clear why ADB is a cornerstone for anyone serious about interacting with their Android devices beyond the basic user interface.
Prerequisites for Installing ADB on Windows
Before you embark on the installation journey, ensure you have the following prerequisites in place:
Hardware and Software Requirements
- A Windows Computer: This guide is specifically tailored for Windows operating systems (Windows 7, 8, 10, and 11).
- An Android Device: This can be a smartphone or a tablet.
- A USB Cable: A reliable USB cable to connect your Android device to your computer. The original cable that came with your device is usually the best option.
- Internet Connection: Required to download the necessary SDK Platform-Tools.
Enabling Developer Options and USB Debugging on Your Android Device
This is a crucial step that allows your computer to communicate with your Android device via ADB. The exact steps might vary slightly depending on your Android version and device manufacturer, but the general process is as follows:
- Locate “About Phone” or “About Tablet”: On your Android device, go to Settings. Scroll down to find “About phone” or “About tablet”.
- Find the Build Number: Within the “About phone” section, look for “Build number”. You might need to tap on “Software information” or a similar sub-menu to find it.
- Enable Developer Options: Tap on the “Build number” repeatedly (usually about 7 times) until you see a message stating “You are now a developer!” or “Developer options are now enabled.”
- Access Developer Options: Go back to the main Settings menu. You should now see a new option called “Developer options”. Tap on it.
- Enable USB Debugging: Inside “Developer options”, find the “USB debugging” toggle. Turn it on.
- Confirm USB Debugging Prompt: When you connect your Android device to your computer for the first time with USB debugging enabled, a prompt will appear on your device asking “Allow USB debugging?”. You should check the box that says “Always allow from this computer” and then tap “Allow” or “OK”. This ensures that you won’t be prompted every time you connect your device.
Important Note: Keep in mind that enabling developer options and USB debugging can grant advanced access to your device. Ensure you are only connecting to trusted computers and be mindful of the commands you execute.
Installing ADB on Windows: Step-by-Step Guide
There are a couple of primary methods to install ADB on your Windows machine. We will cover the most recommended and straightforward approach using the official SDK Platform-Tools.
Method 1: Installing ADB via SDK Platform-Tools (Recommended)
This method involves downloading the official Android SDK Platform-Tools from Google. This package contains ADB, Fastboot, and other essential debugging tools.
-
Download the SDK Platform-Tools:
- Open your web browser and go to the official Android developer website. Search for “SDK Platform-Tools download” or navigate directly to the download page. You can typically find this by searching for “Android SDK Platform-Tools” on Google and looking for the official Android Developers link.
- Locate the download link for Windows.
- Download the ZIP file. It will be named something like
platform-tools-latest-windows.zip.
-
Extract the Platform-Tools:
- Once the download is complete, navigate to your Downloads folder (or wherever you saved the file).
- Right-click on the downloaded ZIP file and select “Extract All…”.
- Choose a location to extract the files. It’s highly recommended to extract it to a prominent and easily accessible location, such as
C:platform-toolsorD:platform-tools. Avoid extracting it directly into your Downloads folder, as it can become cluttered. Create a new folder if necessary. - Click “Extract”.
-
Add Platform-Tools to Your System’s PATH Environment Variable:
This is the most crucial step that allows you to run ADB commands from any directory in your Command Prompt or PowerShell, without having to navigate to theplatform-toolsfolder every time.-
Open System Properties:
- Press the Windows key + R to open the Run dialog box.
- Type
sysdm.cpland press Enter. This will open the System Properties window.
-
Navigate to Environment Variables:
- In the System Properties window, go to the “Advanced” tab.
- Click on the “Environment Variables…” button.
-
Edit the PATH Variable:
- In the “System variables” section (the lower half of the Environment Variables window), find the variable named “Path”.
- Select “Path” and click the “Edit…” button.
-
Add the Platform-Tools Directory:
- In the “Edit environment variable” window, click “New”.
- Paste the full path to the folder where you extracted the SDK Platform-Tools. For example, if you extracted it to
C:platform-tools, you would enterC:platform-tools. - Click “OK” on all open Environment Variables windows to save your changes.
-
-
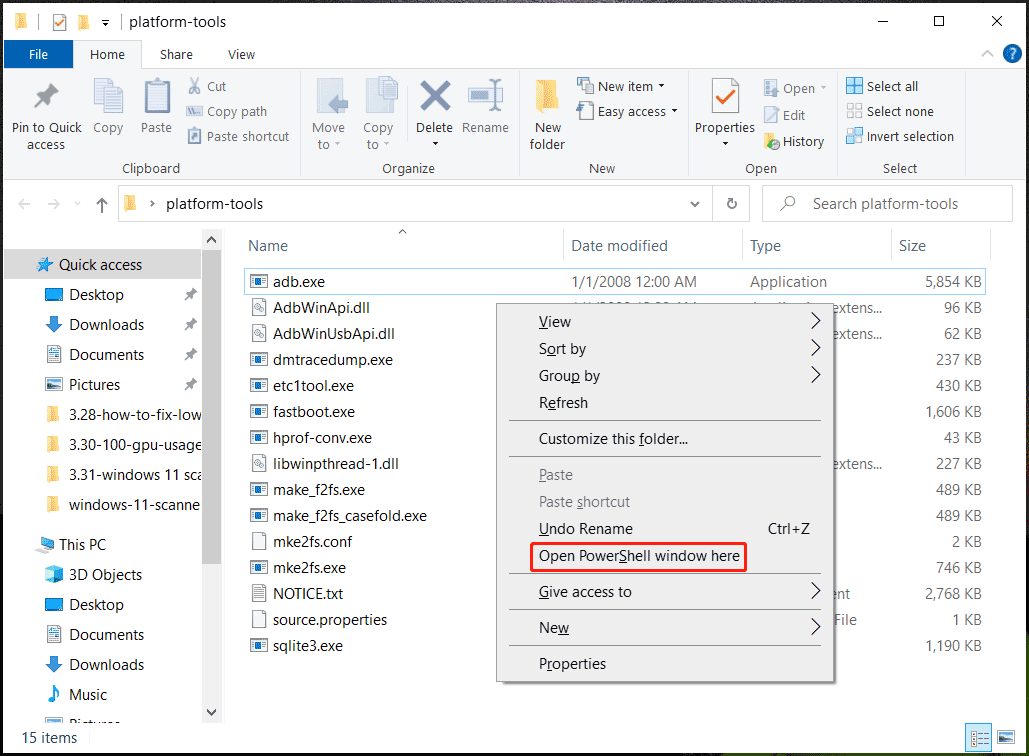
Verify ADB Installation:
- Open a new Command Prompt or PowerShell window. It’s important to open a new one after modifying the PATH variable for the changes to take effect.
- Type the following command and press Enter:
bash

adb devices
- If the installation was successful and your device is connected and authorized for USB debugging, you should see your device listed with its serial number and the word “device” next to it. For example:
List of devices attached

XXXXXXXXXXXX    device
- If you see “unauthorized,” it means you haven’t granted permission on your Android device. Disconnect and reconnect your device, and ensure you allow USB debugging.
- If you see “no devices/emulators found,” double-check that your device is connected via USB, USB debugging is enabled, and you have granted the necessary permissions.
Method 2: Installing ADB via Android Studio (For Developers)
If you are a developer and plan to use Android Studio, ADB is already included as part of the SDK.
- Install Android Studio: Download and install Android Studio from the official Android developer website.
- Install SDK Components: During the Android Studio setup or later through the SDK Manager, ensure that “Android SDK Platform-Tools” is selected for installation.
- Locate ADB: Once installed, the
platform-toolsfolder will typically be located within your Android SDK directory. The default location is usually:C:Users<YourUsername>AppDataLocalAndroidSdkplatform-tools
- Add to PATH (Optional but Recommended): Follow the steps outlined in Method 1 (Step 3) to add this
platform-toolsdirectory to your system’s PATH environment variable for easier access. - Verify Installation: Open a new Command Prompt or PowerShell and run
adb devicesas described in Method 1.
Using ADB: Basic Commands and Troubleshooting
Now that ADB is installed, let’s explore some fundamental commands and common troubleshooting tips.
Common ADB Commands
adb devices: Lists all connected Android devices and emulators.adb push <local_path> <remote_path>: Copies a file from your computer to the Android device.- Example:
adb push C:UsersYourNameDownloadsmy_app.apk /sdcard/Download/
- Example:
adb pull <remote_path> <local_path>: Copies a file from the Android device to your computer.- Example:
adb pull /sdcard/DCIM/Camera/IMG_20231027.jpg C:UsersYourNameDesktop
- Example:
adb install <path_to_apk>: Installs an APK file onto the connected Android device.- Example:
adb install C:UsersYourNameDownloadsapp.apk
- Example:
adb uninstall <package_name>: Uninstalls an application from the device. You need to know the app’s package name.- Example:
adb uninstall com.example.myapp
- Example:
adb shell: Opens an interactive command-line shell on the Android device.- Once inside the shell, you can use Linux-like commands (e.g.,
ls,cd,pwd). - Type
exitto leave the shell.
- Once inside the shell, you can use Linux-like commands (e.g.,
adb reboot: Reboots the connected device.adb reboot bootloader: Reboots the device into the bootloader (for flashing).adb logcat: Displays the device’s system logs. This is invaluable for debugging. PressCtrl + Cto stop.
Troubleshooting Common ADB Issues
- “adb: command not found” or “adb is not recognized as an internal or external command”: This means ADB is not in your system’s PATH. Double-check that you’ve correctly added the
platform-toolsdirectory to your environment variables and that you’ve opened a new Command Prompt/PowerShell window after making the changes. - Device not listed in
adb devices:- Ensure the USB cable is functioning correctly and securely connected. Try a different USB port or cable.
- Verify that USB Debugging is enabled in Developer Options on your device.
- Check your device for the “Allow USB debugging” prompt and ensure you’ve granted permission.
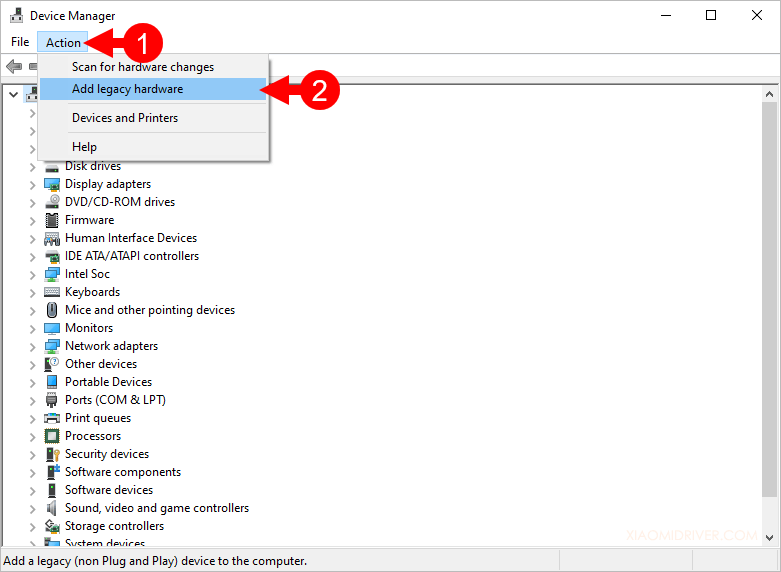
- Install the appropriate USB drivers for your Android device on your Windows computer. You can usually find these on your phone manufacturer’s website.
- Device shows as “unauthorized”: This means you haven’t authorized your computer to debug. Disconnect the USB cable, revoke USB debugging authorizations on your device (in Developer Options), reconnect, and accept the prompt on your device.
- Slow file transfers: This can be due to a slow USB connection (try USB 3.0 if available) or a slow storage medium on either your computer or device.
Conclusion: Unleash the Power of Your Android Device
Installing ADB on your Windows machine is a gateway to a deeper, more powerful interaction with your Android devices. Whether you’re a budding app developer looking to streamline your workflow, a tech enthusiast eager to customize your device, or simply someone who wants to gain more control over their digital tools, ADB is an essential skill to acquire. By following this guide, you should now have ADB up and running, ready to execute commands and unlock the full potential of your Android ecosystem. Remember to explore the vast array of ADB commands and experiment responsibly. The world of Android customization and advanced functionality awaits!
aViewFromTheCave is a participant in the Amazon Services LLC Associates Program, an affiliate advertising program designed to provide a means for sites to earn advertising fees by advertising and linking to Amazon.com. Amazon, the Amazon logo, AmazonSupply, and the AmazonSupply logo are trademarks of Amazon.com, Inc. or its affiliates. As an Amazon Associate we earn affiliate commissions from qualifying purchases.