In today’s fast-paced digital world, where information flows at an unprecedented rate, the ability to translate digital documents into tangible prints remains a critical component of both personal and professional productivity. While much of our work now lives in the cloud, there are countless scenarios where a physical copy is indispensable – from signing contracts and presenting reports to preserving cherished memories or simply keeping a hard copy of important receipts. A new printer, therefore, isn’t just another gadget; it’s a vital tool designed to streamline workflows, enhance learning, and offer a reliable bridge between your digital workspace and the physical realm.
For many, the thought of installing a new piece of technology can conjure images of tangled wires, perplexing software, and frustrating error messages. However, modern printers, driven by advancements in tech, are designed with user-friendliness in mind, offering intuitive setup processes that are far simpler than they once were. This comprehensive guide will walk you through every step of installing your new printer, whether it’s a sleek laserjet for your home office, a versatile inkjet for creative projects, or a robust all-in-one device for handling diverse tasks. We’ll delve into the essentials of unboxing, explore various connection methods from traditional USB to cutting-edge wireless options, and guide you through the crucial driver and software installations. Furthermore, we’ll equip you with troubleshooting tips and highlight advanced features, ensuring your new device integrates seamlessly into your digital ecosystem, enhancing your productivity and helping you harness the full power of your investment.
The Foundation: Pre-Installation & Initial Setup for Optimal Performance
The journey to a fully functional printer begins long before you click “print.” A proper pre-installation setup can save you significant time and frustration down the line, ensuring a smooth and efficient integration into your existing tech infrastructure. This initial phase involves more than just plugging in cables; it’s about understanding your printer’s environment, preparing its essential components, and choosing the right connection strategy.
Unboxing and Physical Placement: Setting the Stage for Success
The moment your new printer arrives, careful unboxing is paramount. Most printers are packed securely with protective tape and Styrofoam to prevent damage during transit. Gently remove all packaging materials, including any tape inside the printer’s various compartments (e.g., paper tray, cartridge access door). These often brightly colored tapes are crucial to remove as they prevent internal components from moving during shipping but will hinder operation.
Once unboxed, consider the ideal physical placement. Printers require a stable, flat surface to operate correctly, minimizing vibrations that could affect print quality. Ensure there’s adequate space around the printer for proper ventilation – especially important for laser printers, which generate heat – and easy access to paper trays and cartridge compartments for future maintenance. Proximity to a power outlet is obvious, but also think about its location relative to your computer if you plan on a wired connection, or within a good range of your Wi-Fi router for wireless setups. A well-ventilated area away from direct sunlight and excessive dust will prolong its lifespan and maintain optimal performance, aligning with principles of thoughtful tech integration and asset management.
Powering On and Loading Consumables: Breathing Life into Your Device
With your printer in its designated spot, the next step is to connect it to a power source. Use the power cable provided by the manufacturer, plugging one end securely into the printer and the other into a wall outlet or surge protector. Avoid using power strips that are already heavily loaded, as printers can draw significant power, particularly during startup and printing. Once connected, press the power button, usually located on the front or side of the device. The printer will typically perform an initial self-check, which may involve some whirring noises and indicator lights flashing.
While the printer is powering up, it’s the perfect time to install the ink cartridges or toner, and load paper. For inkjet printers, carefully unwrap the ink cartridges, remove any protective seals (be careful not to touch the metal contacts or nozzles), and insert them into their designated slots according to the printer’s on-screen instructions or user manual. Most modern printers have color-coded slots or clear labels to guide you. For laser printers, unwrap the toner cartridge, gently shake it to distribute the toner evenly, and slide it into the drum unit or directly into the printer as instructed. Finally, load the appropriate paper type and size into the paper tray, adjusting the paper guides to prevent jams and ensure accurate feeding. This meticulous preparation ensures that your printer is ready for its first command.
Choosing Your Connection Method: Tailoring to Your Tech Ecosystem
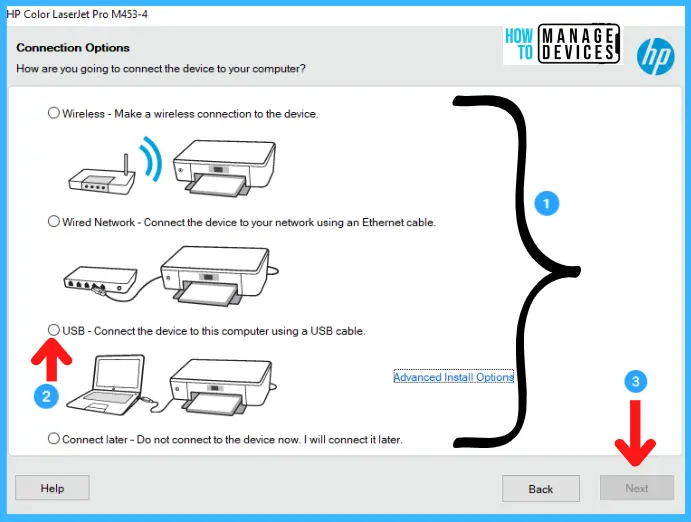
Modern printers offer a variety of connection options, each with its own advantages, allowing you to tailor the setup to your specific needs and existing tech ecosystem. Understanding these options is key to a seamless integration and maximizing productivity.
-
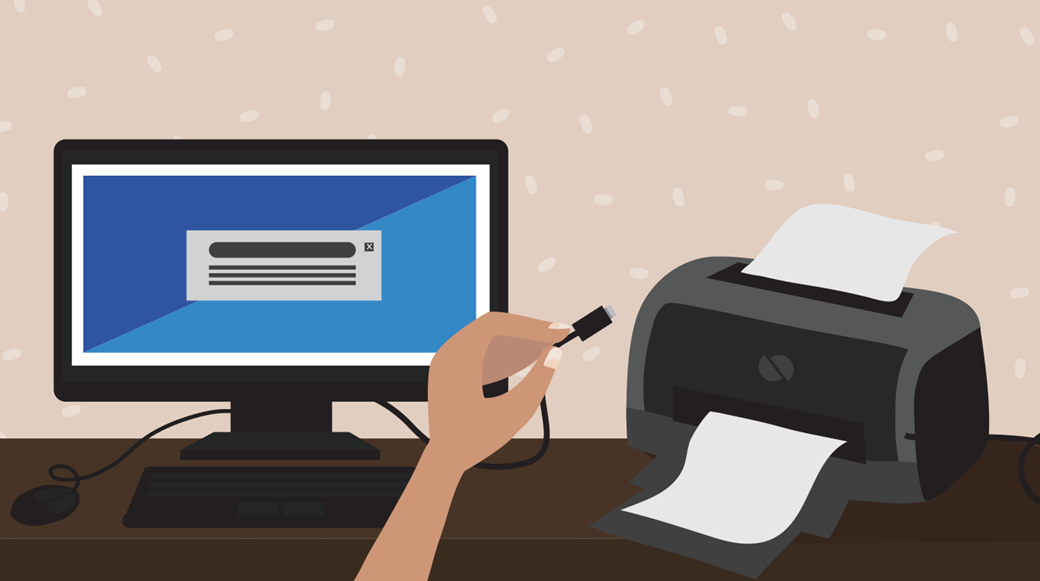
USB Connection: This is the most traditional and straightforward method, offering a direct, reliable link between your computer and the printer. Ideal for single-computer setups or when wireless connectivity is not available or desired. You’ll need a USB-B to USB-A cable (often included, but sometimes sold separately), which connects the rectangular USB-B port on the printer to a standard USB-A port on your computer. While simple, it restricts the printer’s location and doesn’t allow for multi-device access without sharing through the host computer.
-
Wireless (Wi-Fi) Connection: The most popular and convenient option for homes and small offices, wireless connectivity allows multiple devices (computers, smartphones, tablets) to print to a single printer without physical cables. This offers unparalleled flexibility in printer placement. There are generally a few ways to connect wirelessly:
- WPS (Wi-Fi Protected Setup): If your router has a WPS button, this is often the easiest method. You typically press the WPS button on your router, then a corresponding button or selection on your printer’s control panel. The devices will automatically connect.
- Manual Setup: If WPS isn’t available or preferred, you can connect manually via the printer’s control panel. The printer will scan for available networks, you select yours, and then enter your Wi-Fi password.
- Manufacturer Apps: Many printer brands offer mobile apps that guide you through the wireless setup process from your smartphone, making it even more intuitive.
-
Ethernet Connection: For larger networks or situations requiring maximum stability and speed, an Ethernet connection is an excellent choice. This involves connecting the printer directly to your router or network switch via an Ethernet cable. It’s often found on office-grade printers and provides a robust, consistent connection, bypassing potential Wi-Fi interference. This method is particularly beneficial in busy network environments where reliability is paramount.
Carefully consider your printing habits, the number of users, and your network infrastructure when selecting the most appropriate connection method. This decision impacts not only the initial setup but also the long-term usability and efficiency of your new printer.
Bringing Your Printer to Life: Software & Driver Installation Essentials
With your printer physically connected and powered on, the next critical step is to enable your computer or mobile devices to communicate with it. This involves installing the necessary drivers and, often, supplementary software that unlocks the full range of your printer’s capabilities. Drivers are essentially translators, allowing your operating system to understand and control the printer, while the software often provides enhanced features, maintenance tools, and scanning functionalities for multifunction devices.
Automatic Driver Detection: The Plug-and-Play Advantage
Modern operating systems like Windows and macOS have become remarkably adept at automatically detecting and installing basic printer drivers. This “plug-and-play” functionality is a huge convenience, especially for newer printer models.
- For USB Connections: Once you connect the printer via USB and power it on, your operating system will typically recognize the new hardware. Windows might display a notification that it’s “installing device driver software,” while macOS might prompt you to add the printer in System Settings/Preferences. In many cases, a basic print driver will be installed automatically, allowing you to perform fundamental printing tasks almost immediately.
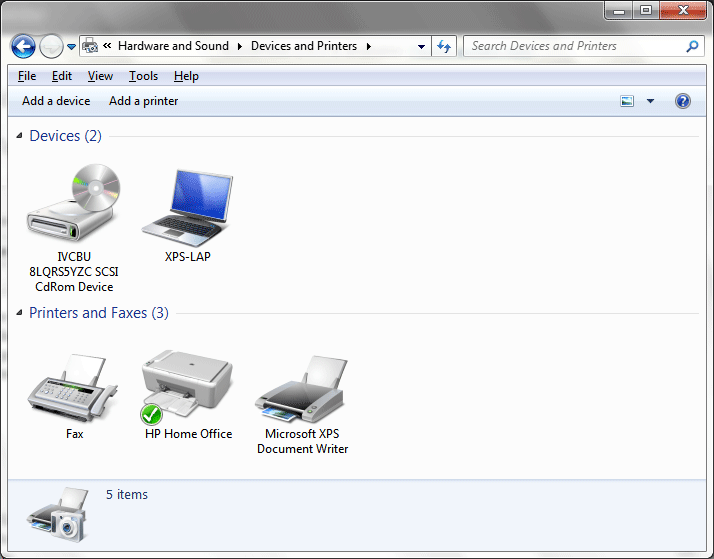
- For Wireless/Ethernet Connections: If your computer is connected to the same network as your printer, the operating system can often discover the printer automatically. Windows users can navigate to “Settings > Bluetooth & devices > Printers & scanners” and click “Add a device.” macOS users can go to “System Settings > Printers & Scanners” and click the “Add Printer, Scanner, or Fax” button (the ‘+’ icon). The system will usually list available network printers, and you can select yours to add it.
While automatic detection is convenient, these default drivers might not always provide access to all of your printer’s advanced features, such as duplex printing, specific paper handling options, or color management tools. For the full experience, a manual installation is often recommended.
Manual Driver Installation: Unlocking Full Functionality
To fully leverage your printer’s capabilities, installing the drivers and software provided by the manufacturer is usually the best approach. This ensures compatibility and provides access to proprietary features and utilities.
-
From the Manufacturer’s Website: This is the most recommended method, as it ensures you get the latest drivers and software versions, often including important bug fixes and performance improvements.
- Identify Your Printer Model: Locate the exact model number of your printer (usually on a label on the printer itself).
- Visit the Manufacturer’s Support Site: Go to the official website of your printer’s brand (e.g., HP, Epson, Canon, Brother, Lexmark).
- Navigate to Support/Drivers Section: Look for a “Support,” “Downloads,” or “Drivers” section.
- Enter Your Model Number: Use the search bar or navigation filters to find drivers specific to your printer model and your computer’s operating system (Windows version, macOS version).
- Download the Full Software Package: Look for a “full software package,” “full feature driver,” or “complete software solution.” This typically includes the necessary drivers and utility software.
- Run the Installer: Once downloaded, double-click the installer file and follow the on-screen prompts. This will guide you through the installation process, including driver installation, software components, and sometimes an initial setup of the printer on your network.
-
From an Installation Disc (Less Common Now): Some older or more basic printers might still include an installation CD/DVD. If your computer has an optical drive, you can insert the disc and follow the prompts. However, always check the manufacturer’s website first, as the disc often contains older software versions. Only resort to the disc if you lack internet access or cannot find drivers online.
Installing Essential Printer Software and Utilities: Beyond Basic Printing
Beyond the core drivers, many manufacturers provide a suite of software tools that enhance the printing experience and streamline maintenance. These often include:
- Printer Utility Software: This application typically allows you to monitor ink/toner levels, check print queue status, clean print heads (for inkjets), align cartridges, and perform diagnostic checks. This is invaluable for proactive maintenance and troubleshooting.
- Scanning Software: For multifunction printers (all-in-one devices), dedicated scanning software provides advanced options for capturing documents and photos, saving them in various formats, and often directly integrating with cloud services or email.
- Photo Printing Software: Some brands offer specialized software for editing and printing photos, with features like borderless printing, collage creation, and color correction.
- Mobile Printing Apps: Dedicated mobile apps from manufacturers (e.g., HP Smart, Epson iPrint, Canon PRINT Inkjet/SELPHY) facilitate printing directly from smartphones and tablets, offering print status, mobile scanning, and even ordering supplies.
Ensure you install these supplementary tools as part of the full software package to unlock the true potential of your new printer and maximize your productivity.
Beyond Basic Printing: Advanced Features & Troubleshooting for a Seamless Experience
Once your printer is installed and ready for basic printing tasks, exploring its advanced features can significantly enhance your workflow and efficiency. Furthermore, understanding common troubleshooting steps will empower you to quickly resolve minor issues, ensuring a consistently smooth printing experience.
Embracing Wireless and Mobile Printing: Freedom from Wires
One of the greatest advancements in modern printing technology is the widespread adoption of wireless and mobile printing capabilities, which perfectly align with a tech-centric, on-the-go lifestyle.
- AirPrint (for Apple Devices): If you use an iPhone, iPad, or Mac, and your printer is AirPrint-enabled (most modern wireless printers are), printing is incredibly simple. As long as your Apple device and printer are on the same Wi-Fi network, you can print directly from most applications by selecting the share icon, then “Print,” and choosing your printer. No separate drivers or apps are needed for basic functions, making it a truly seamless experience.
- Mopria Print Service (for Android Devices): Similar to AirPrint, Mopria provides a universal print standard for Android devices. Many Android phones come with Mopria Print Service pre-installed, allowing you to print to Mopria-certified printers on the same network without needing specific manufacturer apps.
- Manufacturer-Specific Mobile Apps: As mentioned earlier, virtually all major printer brands offer their own dedicated mobile apps. These apps often provide more advanced features than universal standards, such as mobile scanning, cloud printing integration, checking ink levels, ordering supplies, and even setting up the printer initially. They are excellent for fine-tuning print settings and managing your device from anywhere within your network.
- Cloud Printing Services (e.g., Email Print): Some printers offer cloud-based printing solutions, where you can send documents via email to a unique email address assigned to your printer, allowing you to print from virtually anywhere in the world, even when you’re not on the same local network. This is particularly useful for remote workers or for printing documents to a home printer while you’re away.
Leveraging these wireless and mobile printing options dramatically increases convenience and flexibility, allowing you to print quickly from any device at hand, fostering a more dynamic and efficient digital workflow.
Sharing Your Printer Across a Network: Collaborative Printing Solutions
In a multi-computer household or a small office environment, sharing a single printer across multiple devices is a cost-effective and efficient solution.
- Network Sharing (Windows): If your printer is connected via USB to one computer, you can share it over your local network. On the host computer, go to “Settings > Bluetooth & devices > Printers & scanners,” select your printer, click “Printer properties,” then navigate to the “Sharing” tab. Check “Share this printer” and give it a recognizable share name. On other computers on the same network, you can then add the shared printer by going to “Add a printer or scanner” and selecting it from the list or entering its network path.
- Direct Network Connection (Wireless/Ethernet): If your printer is connected directly to your network via Wi-Fi or Ethernet, it’s inherently discoverable by all devices on that network. Simply follow the “Add a printer” steps on each computer or device, and the printer should appear as an available network device. This is often the simplest and most robust method for multi-user access, as it doesn’t rely on a host computer being turned on.
Implementing network sharing transforms your printer from a personal peripheral into a collaborative asset, enhancing productivity for all users without the need for multiple devices.
Common Troubleshooting Tips for a Smooth Experience: When Things Go Wrong
Even with the most careful installation, technical glitches can occur. Being prepared with basic troubleshooting knowledge can quickly resolve common issues and minimize downtime.
-
Printer is “Offline”: This is a very frequent problem.
- Check Power and Connection: Ensure the printer is powered on and all cables (power, USB, Ethernet) are securely connected. For wireless printers, verify it’s connected to your Wi-Fi network (check its control panel for Wi-Fi status indicators).
- Restart Everything: Turn off the printer, computer, and router. Wait 30 seconds, then restart the router, followed by the printer, and finally the computer. This often refreshes network connections.
- Check Print Queue: Open your computer’s print queue (by clicking the printer icon in the taskbar or navigating through “Printers & scanners”). Clear any pending print jobs that might be stalled.
- Verify Driver Status: Go to “Printers & scanners” in your settings. Ensure the printer is not paused and is set as the default printer if intended. Reinstalling the latest drivers from the manufacturer’s website can also fix driver-related offline issues.
-
Poor Print Quality:
- Check Ink/Toner Levels: Low ink or toner is a primary cause. Replace cartridges if necessary.
- Run Cleaning Cycles: Inkjet printers often have “print head cleaning” or “nozzle check” utilities within their software or control panel. Run these to clear clogged nozzles.
- Check Paper Type/Settings: Ensure you’re using the correct paper type for your print job and that the print settings (e.g., plain paper, photo paper) match.
- Inspect Cartridges: Ensure cartridges are correctly seated and any protective tapes have been fully removed.
-
Paper Jams:
- Follow Printer’s Instructions: Most printers have on-screen or manual instructions for clearing jams. Gently pull jammed paper in the direction of the paper path, avoiding tearing.
- Remove All Scraps: Even small pieces of torn paper can cause future jams.
- Use Correct Paper: Ensure you’re not overloading the paper tray and that the paper type and weight are within the printer’s specifications. Fanning the paper before loading can help prevent sheets from sticking together.
By understanding these common issues and their solutions, you can maintain your printer’s optimal performance and ensure it remains a reliable tool for your digital and physical needs.
Conclusion: Empowering Your Digital-to-Physical Workflow
Installing a new printer, while initially seeming like a daunting technical task, is a straightforward process when approached systematically. From the careful unboxing and strategic placement to the thoughtful selection of connection methods and the precise installation of drivers and software, each step contributes to a seamless integration into your tech ecosystem. We’ve explored how modern advancements, from automatic driver detection to ubiquitous wireless and mobile printing capabilities, have simplified the journey from purchase to the first printed page.
Beyond the initial setup, leveraging advanced features like network sharing and understanding common troubleshooting steps empowers you to maximize your printer’s utility and maintain its efficiency. In a world increasingly reliant on digital tools, the ability to effortlessly produce high-quality physical documents remains invaluable for productivity, organization, and creative expression. Your new printer is more than just a peripheral; it’s an investment in your personal or professional workflow. By following this comprehensive guide, you’ve not only set up a new device but also laid the groundwork for a more efficient, flexible, and robust digital-to-physical workflow, ensuring you harness the full potential of your technological assets. Enjoy the crisp text and vibrant images your new printer will bring to life!
aViewFromTheCave is a participant in the Amazon Services LLC Associates Program, an affiliate advertising program designed to provide a means for sites to earn advertising fees by advertising and linking to Amazon.com. Amazon, the Amazon logo, AmazonSupply, and the AmazonSupply logo are trademarks of Amazon.com, Inc. or its affiliates. As an Amazon Associate we earn affiliate commissions from qualifying purchases.