
Upgrading or installing a new graphics card (GPU) is one of the most impactful enhancements you can make to your personal computer. Whether you’re a hardcore gamer chasing the highest frame rates, a creative professional rendering intricate 3D models, or an everyday user seeking a smoother, more responsive experience, a powerful GPU is the heart of visual performance. This guide will walk you through every step of the process, from crucial pre-installation checks to post-installation optimization, ensuring a seamless and successful upgrade.
In an era defined by visual content, demanding applications, and the burgeoning field of artificial intelligence, your GPU isn’t just a component; it’s a gateway to new possibilities. Let’s unlock your PC’s full potential.
The Indispensable Role of Your GPU: Why Upgrade?
Before we delve into the technicalities, it’s essential to understand why a graphics card upgrade is often the most significant investment for many PC users. Its capabilities extend far beyond simply displaying images on a screen.
The Gaming Edge
For gamers, the GPU is king. A powerful graphics card translates directly into higher frame rates, allowing for buttery-smooth gameplay even in the most graphically intensive titles. It enables you to play at higher resolutions (1080p, 1440p, 4K, or even 8K) and push in-game settings to their maximum, revealing stunning visual details, realistic lighting (ray tracing), and immersive environments. An upgraded GPU future-proofs your gaming rig, ensuring you can enjoy upcoming titles without immediate concerns about performance bottlenecks. This isn’t just about aesthetics; competitive gamers benefit from the responsiveness and clarity that higher frame rates provide, potentially offering a crucial advantage.
Powering Creative and Professional Workflows
Beyond gaming, a robust GPU is a critical asset for professionals in various fields. Video editors rely on it for accelerating rendering times, encoding footage, and real-time playback of complex timelines. Graphic designers, architects, and engineers utilize GPU acceleration in applications like AutoCAD, SolidWorks, and Adobe Creative Suite for 3D modeling, CAD rendering, and complex simulations. Even photographers working with high-resolution images can see significant speedups in editing and processing tasks. For these users, a GPU isn’t a luxury; it’s a productivity multiplier, directly impacting deadlines and output quality. The financial return on investment for such professionals can be substantial, making a quality GPU a wise ‘money’ allocation.
Future-Proofing for AI and Beyond
The modern technological landscape is increasingly dominated by artificial intelligence and machine learning. GPUs, with their parallel processing architecture, are uniquely suited for the intense computational demands of AI training and inference. As AI tools become more integrated into everyday software – from advanced photo editing features to intelligent productivity apps – a capable GPU will become even more crucial for local processing and efficiency. Installing a new graphics card isn’t just about current performance; it’s an investment in your PC’s ability to adapt to future ‘Tech’ trends and participate in the next generation of computing.
Pre-Installation Checklist: Ensuring a Smooth Upgrade
A successful GPU installation begins long before you open your PC case. Thorough preparation is key to avoiding compatibility issues, potential damage, and frustrating troubleshooting later on. This stage is about meticulous planning and understanding your existing system.
Compatibility Cornerstones: Motherboard, Case, and PSU
This is arguably the most critical step. Ignoring compatibility can lead to a non-functional system, or worse, damaged components.
- Motherboard: Most modern graphics cards use a PCI Express (PCIe) x16 slot. Ensure your motherboard has an available PCIe x16 slot. While older motherboards might use PCIe Gen 2.0 or 3.0, and newer ones Gen 4.0 or 5.0, they are generally backward compatible. A newer GPU will still work in an older slot, though it might be slightly bandwidth-limited. The main concern is physical slot availability.
- PC Case: Graphics cards vary significantly in size. High-end cards can be very long, thick (taking up 2-4 expansion slots), and sometimes tall. Measure the available space inside your PC case, especially the length from the back expansion slot to the front drive cages or fans. Also, check the height and width clearance. Compare these measurements with the dimensions of your chosen graphics card. Many PC cases specify maximum GPU length.
- Power Supply Unit (PSU): The graphics card is often the most power-hungry component in your PC. You need a PSU with sufficient wattage and the correct power connectors. Check the recommended PSU wattage for your new graphics card (usually found on the manufacturer’s website or product page). Most modern PSUs have PCIe power cables (6-pin, 8-pin, 12-pin, or the newer 12VHPWR connector). Ensure your PSU has the required number and type of connectors. It’s always wise to have a little headroom (e.g., if a card recommends 650W, a 750W PSU is safer). A quality ‘Brand’ PSU from reputable manufacturers like Seasonic, Corsair, or EVGA is also a smart ‘Money’ investment to protect your entire system.
Gathering Your Tools and Workspace Prep
Having the right tools at hand will make the installation process much smoother.
- Phillips Head Screwdriver: This is the most common tool you’ll need for opening the case and securing the GPU.
- Anti-Static Wrist Strap (Recommended): Static electricity can damage sensitive computer components. An anti-static wrist strap, connected to an unpainted metal part of your PC case, is the best way to prevent this. Alternatively, frequently touch an unpainted metal surface to discharge any static buildup.
- Flashlight or Headlamp: Inside a PC case, corners can be dark. A light source will help you see screw holes and connectors clearly.
- Zip Ties or Velcro Straps: Useful for cable management after installation to improve airflow and aesthetics.
- Can of Compressed Air: Great for cleaning out dust from your case and components, especially if you’re replacing an old card.
Prepare a clean, well-lit workspace. Clear any clutter from your desk or table. Avoid working on carpeted floors, as they can generate more static electricity.
Essential Software Housekeeping
Before physically swapping out components, some digital prep work can prevent software conflicts.
- Back Up Important Data: While a GPU installation rarely impacts your data, it’s always a best practice to back up critical files before performing any significant hardware changes.
- Uninstall Old Graphics Drivers: If you’re replacing an existing graphics card, especially if it’s from a different manufacturer (e.g., switching from AMD to NVIDIA or vice-versa), it’s crucial to thoroughly uninstall the old drivers. Tools like Display Driver Uninstaller (DDU) are highly recommended for a clean removal. Run DDU in Windows Safe Mode for the most effective cleanup. This prevents driver conflicts that can lead to system instability, crashes, or poor performance.
- Download New Drivers: Visit the manufacturer’s website (NVIDIA or AMD) for your new graphics card and download the latest stable drivers. Having them ready on your desktop will streamline the post-installation process. Avoid downloading drivers from third-party sites to ensure you get authentic, uncompromised software.
Step-by-Step Installation: Bringing Your New GPU to Life
With preparations complete, it’s time for the hands-on part. Remember to work carefully and deliberately.
Opening Your PC Case and Initial Disassembly
- Power Down and Unplug: Completely shut down your PC. Crucially, unplug the power cable from the wall outlet and from the back of your power supply. Press the power button a few times after unplugging to drain any residual power from the system’s capacitors.
- Move to Your Workspace: Carefully move your PC to your prepared workspace.
- Remove the Side Panel: Most PC cases have thumb screws or standard screws on the rear of the case that secure the side panel (usually the left side when viewed from the front). Remove these screws and slide or hinge the side panel off. Set it aside safely.
- Connect Anti-Static Strap: If you have an anti-static wrist strap, put it on and clip it to an unpainted metal part of your PC case to ground yourself.
Removing the Old Graphics Card (If Applicable)
If you’re upgrading, you’ll need to remove the old GPU first. If this is a new build, skip to the next section.
- Disconnect Power Cables: Gently unplug any PCIe power cables connected to your old graphics card. These usually have clips that need to be squeezed or pressed.
- Unscrew Retention Bracket: Graphics cards are typically secured to the PC case with one or two screws at the back, holding the I/O bracket in place. Unscrew these.
- Release PCIe Latch: At the end of the PCIe x16 slot on the motherboard, there’s a small plastic or metal latch that holds the graphics card in place. Carefully press or pull this latch to release the card. It might be stiff.
- Gently Pull Out the Card: Once the latch is released and screws are removed, firmly but gently pull the graphics card straight up and out of the PCIe slot. Avoid wiggling it excessively. Place the old card in its anti-static bag or a safe place.
Seating Your New Graphics Card
This is the moment of truth for your new hardware.
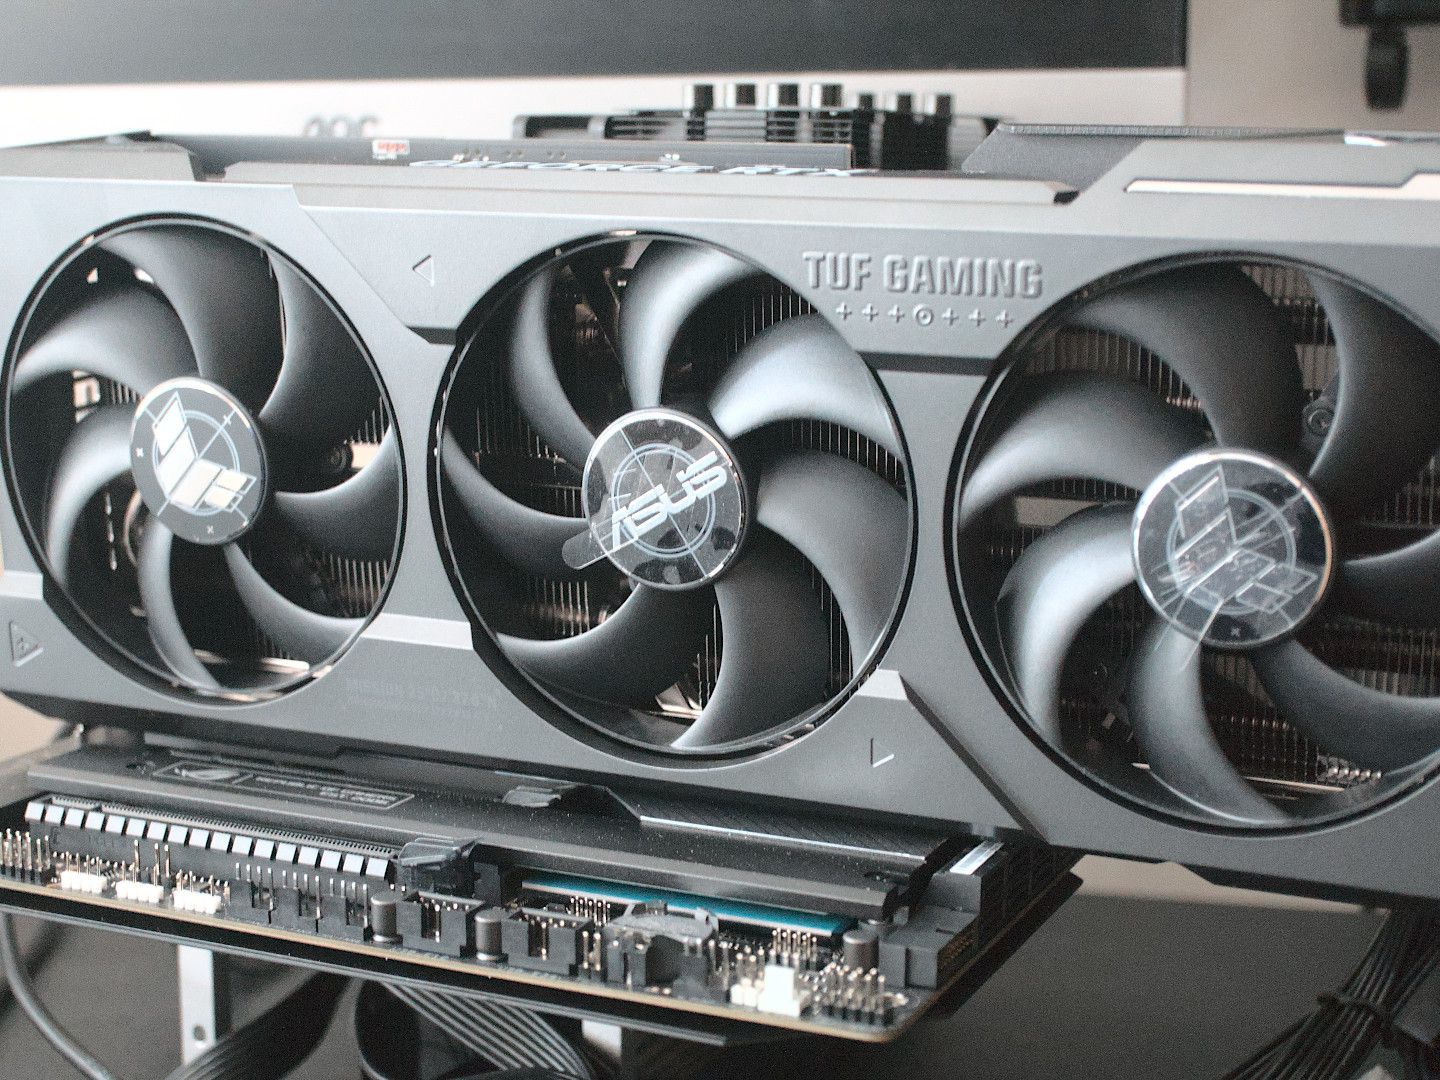
- Unpack Your New GPU: Carefully remove your new graphics card from its packaging and anti-static bag. Handle it by the edges or the heatsink, avoiding touching the golden PCIe contacts or delicate components on the PCB.
- Remove PCIe Slot Covers: Depending on the size of your new card, you may need to remove one, two, or even three metal slot covers from the back of your PC case, aligning with where the GPU’s display outputs will protrude. Use your screwdriver if they are screw-in covers, or gently twist them until they break off if they are punch-out covers.
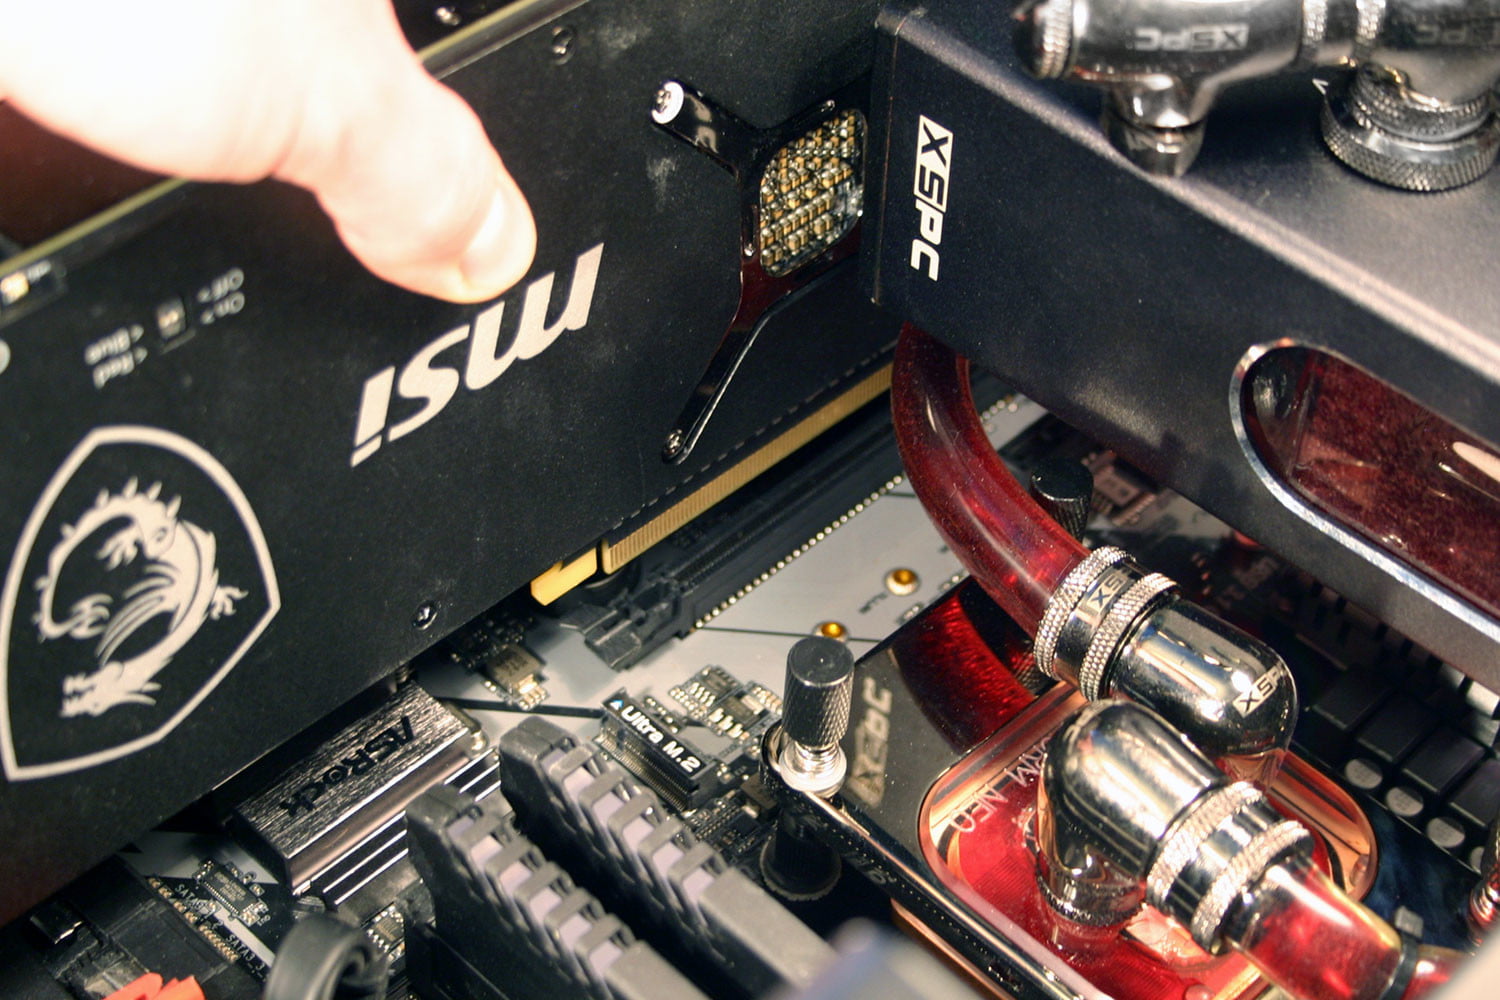
- Align and Insert: Carefully align the golden PCIe contacts of your new graphics card with the PCIe x16 slot on your motherboard. Ensure the back I/O bracket of the card lines up with the open slot(s) on your case.
- Firmly Seat the Card: Apply gentle, even pressure to both ends of the graphics card until it clicks securely into the PCIe slot. You should hear an audible click as the retention latch engages. Visually confirm that the card is fully seated and level. Do not force it; if it doesn’t go in, re-check alignment.
Connecting Power and Securing the Card
Almost there! Now ensure it has power and is stable.
- Connect PCIe Power Cables: Locate the necessary PCIe power connectors from your power supply (6-pin, 8-pin, 12-pin, or 12VHPWR). Plug them firmly into the corresponding ports on your new graphics card. Ensure all required power connectors are plugged in; some high-end cards might need two or even three. Never mix and match different types of cables unless they are specifically designed for your PSU and GPU model.
- Secure the Card to the Case: Use the screws you removed earlier (or new ones provided with your case) to secure the graphics card’s I/O bracket to the PC case. This prevents the card from sagging and ensures it’s stable.
- Cable Management (Optional but Recommended): Route any power cables neatly to improve airflow and aesthetics using zip ties or Velcro straps.
- Replace Side Panel: Once you’re confident everything is connected and secure, carefully reattach the side panel of your PC case.
- Reconnect Peripherals: Move your PC back to its original location. Reconnect your monitor (ensuring it’s plugged into the new graphics card’s display outputs, not the motherboard’s integrated graphics ports), keyboard, mouse, and other peripherals. Finally, plug in the main power cable.
Post-Installation Procedures: Software and System Integration
The physical installation is done, but your work isn’t quite finished. Software setup and testing are crucial for optimal performance.
Installing the Latest Drivers
- Boot Up Your PC: Power on your computer. If all goes well, you should see a display on your monitor. Windows might boot with generic drivers, or the screen resolution might be low initially. This is normal.
- Install Downloaded Drivers: Navigate to the graphics drivers you downloaded earlier. Run the installer. Follow the on-screen prompts.
- NVIDIA: Typically, you’ll install GeForce Experience, which then manages driver updates. Choose “Custom Installation” and select “Perform a clean installation” for best results.
- AMD: Install the AMD Adrenalin Software suite. Similarly, look for an option to perform a clean install.
- Restart Your PC: After the driver installation is complete, the installer will prompt you to restart your computer. Do so.
Verifying Functionality and Initial Testing
Once restarted, your new GPU should be fully recognized and operational.
- Check Device Manager: In Windows, right-click the Start button, select “Device Manager,” and expand “Display adapters.” You should see your new graphics card listed without any error symbols.
- Check GPU-Z or Similar Utility: Download a free tool like GPU-Z. This utility provides detailed information about your graphics card, including its model, clock speeds, memory, and temperature sensors. It’s a great way to confirm everything is as expected.
- Run a Benchmark or Game: The best way to test your new GPU is by putting it under load. Run a demanding game you own, or download a free benchmark tool like 3DMark Demo (from Steam) or FurMark. Monitor temperatures and performance during these tests. Look for smooth performance and stable temperatures.
Optimizing Settings for Peak Performance
To truly maximize your new investment, fine-tune its settings.
- In-Game Settings: Experiment with in-game graphics settings. Start with high or ultra settings, then adjust individual parameters (e.g., anti-aliasing, shadow quality, texture resolution) to find the perfect balance between visual fidelity and desired frame rates.
- Driver Control Panel: Both NVIDIA Control Panel and AMD Adrenalin Software offer extensive global and per-application settings. You can tweak things like V-Sync, refresh rates (ensure your monitor is set to its highest refresh rate in Windows Display Settings), image scaling, and more.
- Monitor Settings: Ensure your monitor’s settings (OSD) are configured correctly, especially if it supports adaptive sync technologies like G-Sync or FreeSync.
Troubleshooting Common Installation Hurdles
Even with the best preparation, issues can sometimes arise. Don’t panic; most problems have straightforward solutions.
“No Display” or Black Screen Issues
This is the most common and alarming issue.
- Check Monitor Cables: Ensure your monitor cable (HDMI, DisplayPort) is securely plugged into the new graphics card’s output ports and into your monitor.
- Reseat the Card: Power down, unplug, open the case, and gently press down on the graphics card to ensure it’s fully seated in the PCIe slot. Release and re-engage the PCIe latch.
- Check PCIe Power Cables: Confirm all PCIe power connectors are securely plugged into the graphics card and your PSU. Try different modular cables if possible.
- Test with Integrated Graphics: If your CPU has integrated graphics (Intel CPUs with “F” designation and AMD “X” series typically do not), unplug the monitor from the GPU and plug it into the motherboard’s display output. If you get a display, it confirms the rest of your system is working, pointing to a GPU or driver issue.
- Clear CMOS: If your PC doesn’t even POST, try clearing your motherboard’s CMOS (refer to your motherboard manual). This resets BIOS settings.
Driver-Related Problems
Drivers can be tricky, especially if old ones weren’t fully removed.
- Run DDU Again in Safe Mode: If you’re experiencing crashes, freezes, or poor performance, boot into Windows Safe Mode and run Display Driver Uninstaller (DDU) again for a thorough cleanup. Then reinstall the latest drivers.
- Try an Older Driver Version: Occasionally, the very latest drivers might have bugs. Check the manufacturer’s website for slightly older, stable driver versions.
- Windows Updates: Ensure your Windows operating system is fully up to date.
Performance Under Expectations
Your new GPU is working, but not as fast as you expected.
- Check Temperatures: Use GPU-Z or your driver’s software to monitor GPU temperatures under load. High temperatures can cause “thermal throttling,” where the card reduces its clock speed to prevent overheating. Ensure good airflow in your case.
- CPU Bottleneck: Is your CPU powerful enough to keep up with your new GPU? An older or less powerful CPU might be holding back your GPU’s performance in some games or applications.
- Power Limit: Ensure your GPU is receiving adequate power. Some GPUs have software settings to adjust power limits; ensure they aren’t set too low.
- Monitor Refresh Rate: Confirm your monitor is actually running at its advertised refresh rate in Windows Display Settings.

Conclusion: Elevating Your PC Experience
Installing a new graphics card is a rewarding upgrade that can breathe new life into your PC, unlocking superior performance for gaming, professional work, and future ‘Tech’ applications. While it may seem daunting at first, by following this comprehensive guide step-by-step, you can confidently undertake the process.
Remember, patience and careful attention to detail are your best allies. From meticulous pre-installation checks to securing the physical card and integrating the software, each stage contributes to a successful outcome. By choosing the right components from reputable ‘Brand’ manufacturers and executing the installation correctly, you’re not just upgrading a piece of hardware; you’re making a strategic ‘Money’ investment in your digital experience. Enjoy the enhanced visuals, accelerated workflows, and the thrilling new possibilities that your powerful new graphics card brings to your PC!
aViewFromTheCave is a participant in the Amazon Services LLC Associates Program, an affiliate advertising program designed to provide a means for sites to earn advertising fees by advertising and linking to Amazon.com. Amazon, the Amazon logo, AmazonSupply, and the AmazonSupply logo are trademarks of Amazon.com, Inc. or its affiliates. As an Amazon Associate we earn affiliate commissions from qualifying purchases.