
In the fast-paced digital world, a slow computer can feel like a significant bottleneck, impacting everything from daily productivity to leisure activities. While many factors contribute to a sluggish system, insufficient Random Access Memory (RAM) is frequently a primary culprit. RAM is your computer’s short-term memory, enabling it to juggle multiple tasks, load applications quickly, and process data efficiently. If your system frequently stutters, freezes, or struggles with everyday operations, upgrading your RAM might be the most impactful and cost-effective solution.
This comprehensive guide will walk you through the entire process of installing more RAM, from understanding why you need it to troubleshooting common issues. It’s a surprisingly accessible upgrade that can breathe new life into an aging machine or significantly boost the performance of a modern one, aligning perfectly with the core principles of maximizing technology and productivity.
Why Upgrade Your RAM? Understanding the Performance Boost
Before diving into the mechanics, it’s crucial to understand the “why.” Why is RAM so important, and how does upgrading it translate into a better user experience? Recognizing the symptoms of low RAM can help you determine if this upgrade is truly what your system needs.
Identifying the Signs of Insufficient RAM
Your computer sends clear signals when it’s running low on memory. Paying attention to these cues can save you a lot of frustration:
- Slow Application Loading Times: Programs take an unusually long time to open, or switching between them feels sluggish.
- Frequent Freezing or Crashing: Especially when you have multiple browser tabs open, are running demanding software like video editors or CAD programs, or engaging in intense gaming sessions.
- Stuttering or Lag: While gaming, streaming high-definition content, or editing media, you might experience noticeable pauses or frame drops.
- System Warnings: Your operating system might explicitly notify you of “low memory” or suggest closing applications to free up RAM.
- Excessive Disk Activity: If your hard drive light is constantly flashing and you hear it working overtime, even when you’re not actively saving files, it often indicates the system is relying heavily on its “swap file” or “page file” – essentially using slower storage as a temporary extension of RAM. This is a tell-tale sign of memory starvation.
- Task Manager/Activity Monitor: Checking your system’s performance monitor (Task Manager on Windows, Activity Monitor on macOS) will show RAM usage consistently at 90% or higher, even under moderate load.
If these symptoms sound familiar, an RAM upgrade is likely to offer substantial relief.
The Tangible Benefits of a RAM Upgrade
The advantages of adding more RAM extend beyond merely fixing slowdowns; they enhance nearly every aspect of your computer’s performance:
- Multitasking Prowess: More RAM means your computer can hold more active programs and data simultaneously without having to constantly swap information to the slower storage drive. This allows you to run dozens of browser tabs, a word processor, a video editor, and a communication app all at once without a noticeable dip in performance.
- Faster Application Launches & Responsiveness: Applications that load quickly and respond instantly contribute directly to your daily productivity. An upgrade can significantly reduce the waiting time when opening software.
- Smoother Gaming & Creative Work: For demanding tasks like modern gaming, video editing, graphic design, or 3D rendering, increased RAM is critical. It provides the necessary buffer for large files and complex computations, leading to higher frame rates, faster render times, and a more fluid creative workflow.
- Enhanced Web Browsing: Modern web browsers, especially with numerous extensions and tabs, can be notorious RAM hogs. An upgrade ensures your browsing experience remains snappy and responsive.
- Future-Proofing (to an Extent): While not a permanent solution, adding RAM can extend the usable life of your current system. Operating systems and applications tend to become more resource-intensive over time, and a healthy amount of RAM can help your computer keep up with future software demands.
- Cost-Effectiveness: Compared to upgrading a CPU or GPU, RAM is often a more affordable component, offering a significant performance boost for a relatively modest investment. This makes it an attractive upgrade for those looking to maximize their system’s capabilities without breaking the bank.
Before You Begin: Essential Pre-Installation Steps
A successful RAM upgrade hinges on careful planning and preparation. Rushing this stage can lead to compatibility issues or, worse, damage to your components.
Compatibility is Key: Choosing the Right RAM
The most critical step is selecting the correct RAM for your system. Not all RAM is universal; several factors must align with your motherboard and CPU.
- RAM Type (DDR4 vs. DDR5): RAM generations are not interchangeable. Most systems built between roughly 2014 and 2021 use DDR4 (Double Data Rate 4). Newer systems, especially those with Intel’s 12th generation Core CPUs or AMD’s Ryzen 7000 series and later, utilize DDR5. You cannot mix DDR4 and DDR5, nor can you use DDR5 in a DDR4 motherboard (or vice versa). Check your motherboard’s specifications or use system information tools (like CPU-Z) to determine your current RAM type.
- Form Factor (DIMM vs. SODIMM):
- DIMM (Dual In-line Memory Module): These are the longer sticks found in desktop computers.
- SODIMM (Small Outline Dual In-line Memory Module): These are significantly smaller modules designed for laptops, mini-PCs, and some all-in-one desktops. Ensure you purchase the correct form factor for your device.
- Capacity & Speed:
- Capacity: How much RAM do you need?
- 8GB: Bare minimum for basic computing (web browsing, email, light office work).
- 16GB: The sweet spot for most users, offering excellent performance for multitasking, gaming, and general productivity.
- 32GB: Ideal for enthusiasts, serious gamers, video editors, graphic designers, or anyone running virtual machines or complex engineering software.
- 64GB+: Reserved for high-end professional workstations.
If you’re adding to existing RAM, try to match the capacity of the new stick to the old one (e.g., adding an 8GB stick to another 8GB stick). Ideally, you want to install RAM in pairs for dual-channel performance.
- Speed (MHz) & Latency (CL): RAM speed is measured in megahertz (MHz), and lower latency (CAS Latency, or CL) is generally better. Your motherboard and CPU have limits on the maximum supported RAM speed. While faster RAM can offer performance benefits, ensure your system can fully utilize it. If you’re adding RAM, it’s generally best to match the speed and latency of your existing modules. If you buy a new kit, ensure the new modules are rated at the highest speed your motherboard and CPU can support for optimal performance. You may need to enable an XMP (Intel) or DOCP (AMD) profile in your BIOS to reach advertised speeds.
- Capacity: How much RAM do you need?
- Motherboard & CPU Support: This is paramount.
- Motherboard: Consult your motherboard’s manual or the manufacturer’s website for its “Qualified Vendor List” (QVL) for RAM, maximum supported capacity, and supported speeds. The QVL lists RAM kits that have been specifically tested for compatibility.
- CPU: Your CPU also has an integrated memory controller with limits on RAM type, speed, and total capacity. Verify these specifications on Intel or AMD’s website.
- Number of Slots: Desktops typically have 2 or 4 DIMM slots, while laptops usually have 1 or 2 SODIMM slots. If you’re installing multiple sticks, your motherboard manual will specify which slots to use for “dual-channel” operation, which provides a significant performance boost by allowing the CPU to access two RAM modules simultaneously.
Gathering Your Tools and Taking Precautions
Once you’ve identified and purchased the correct RAM, it’s time to prepare for the physical installation. This involves gathering a few basic tools and, crucially, taking steps to protect your components.
- Tools Required:
- Phillips Head Screwdriver: The most common type for opening PC cases and laptop covers.
- Anti-static Wrist Strap (Recommended): This inexpensive tool grounds you to your computer’s chassis, preventing electrostatic discharge (ESD), which can permanently damage sensitive electronics.
- Can of Compressed Air: Useful for cleaning any dust out of your system, especially around the RAM slots.
- Flashlight: Can help illuminate dark corners inside your PC case.
- Small Container: For holding screws so they don’t get lost.
- Static Electricity Mitigation: ESD is the silent killer of computer components. Take these precautions seriously:
- Ground Yourself: Wear an anti-static wrist strap connected to a bare metal part of your computer chassis. If you don’t have one, frequently touch an unpainted metal surface on the computer case to discharge any static buildup.
- Work on a Non-Static Surface: Avoid working on carpet. A wooden desk or workbench is ideal.
- Handle Components by Edges: Avoid touching the gold contacts or the circuit board itself on the RAM modules.
- Data Backup (Crucial for Peace of Mind): While a RAM installation is generally safe and doesn’t involve data storage components, it’s always good practice to back up critical files before performing any internal hardware work. This aligns with good “Digital Security” practices and offers peace of mind. Use cloud services or an external hard drive for important documents and photos.
- Power Down & Unplug: This is non-negotiable.
- Shut down your computer completely.
- Unplug the power cable from the wall outlet and the back of your PC.
- For desktops, press and hold the power button for 5-10 seconds after unplugging to drain any residual power from the system’s capacitors.
- For laptops, if possible, disconnect the battery internally once the back cover is removed (refer to your laptop’s service manual).
A Step-by-Step Guide to RAM Installation
With preparations complete, you’re ready to physically install the new RAM. The process differs slightly between desktops and laptops.
Installing RAM in a Desktop PC
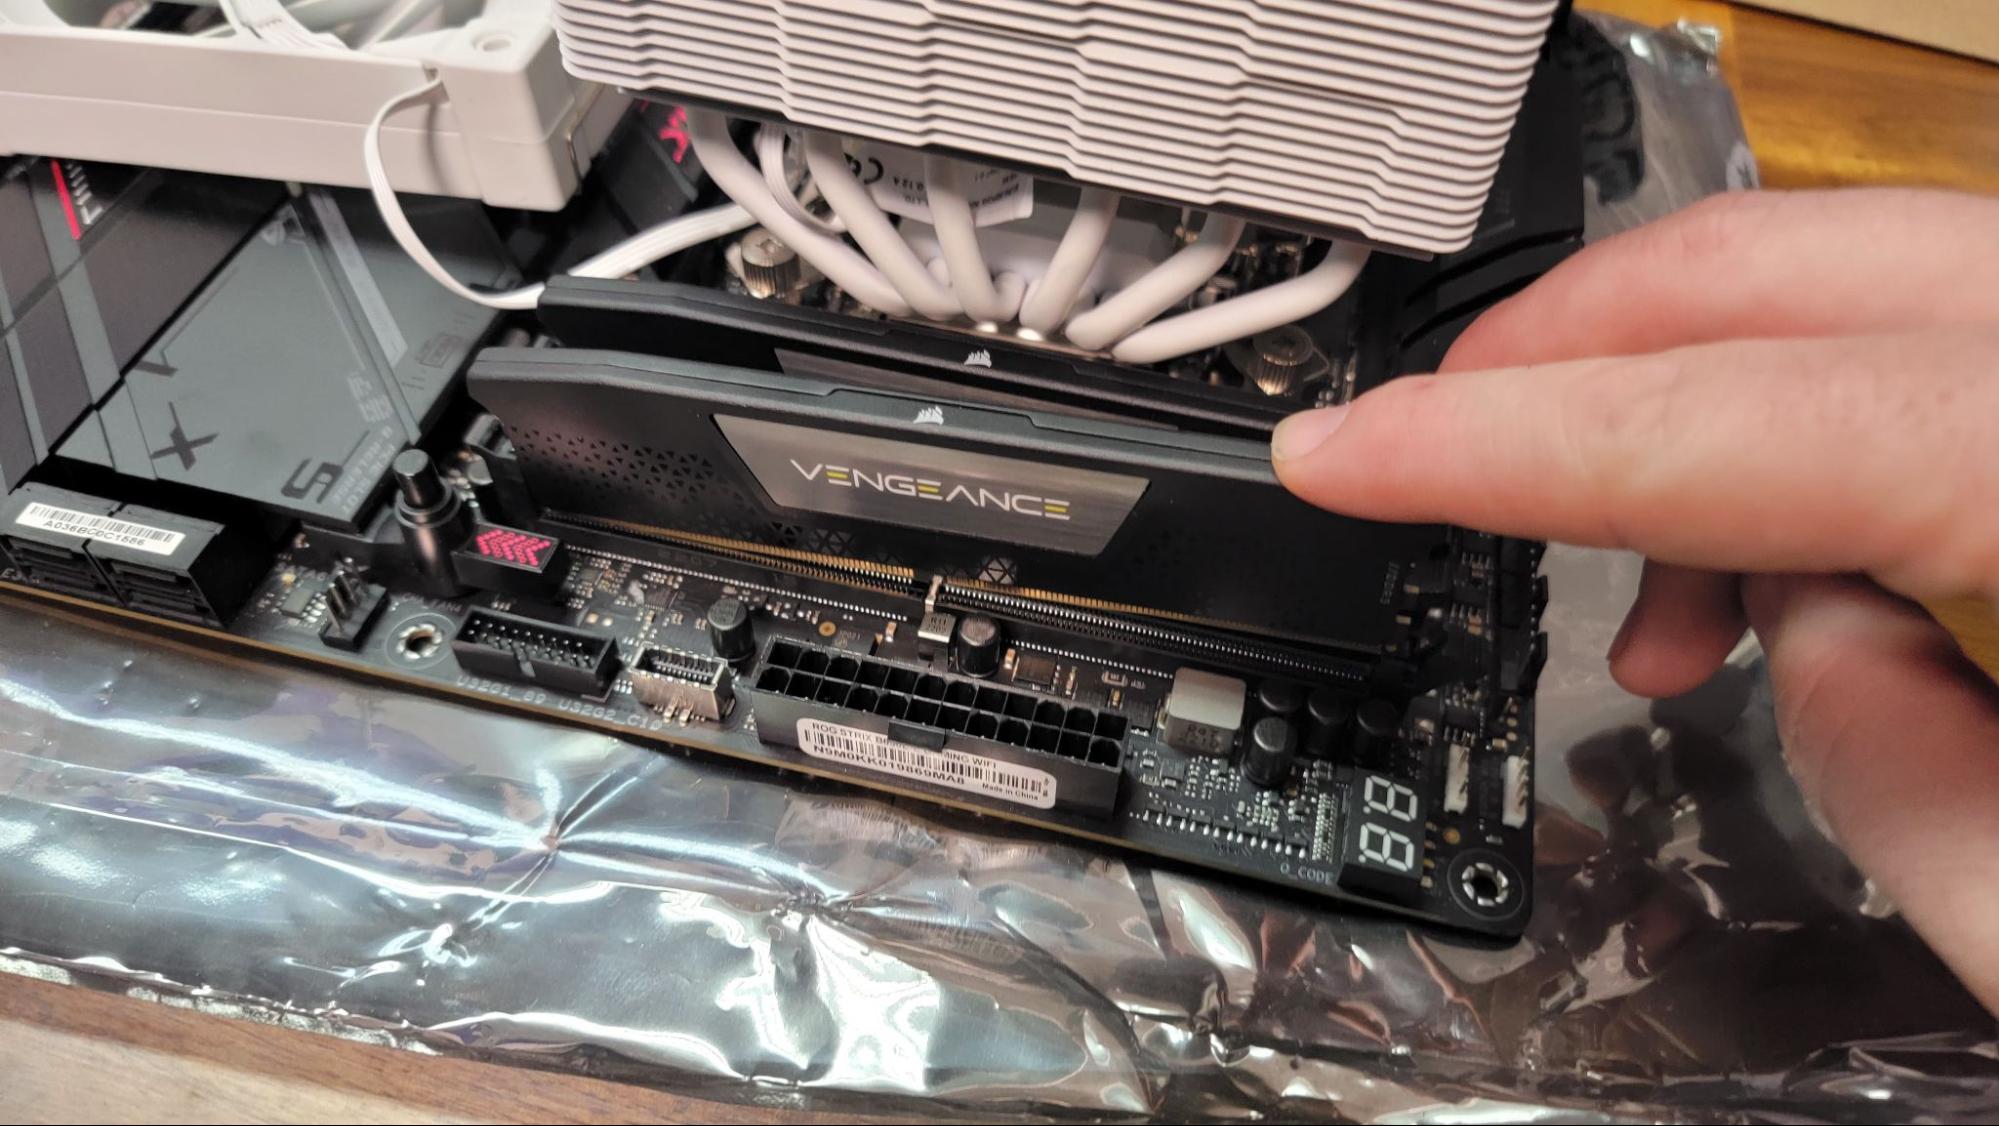
Desktop PCs are generally easier to work with due to their larger components and more accessible internal layout.
- Open the PC Case and Locate RAM Slots:
- Place your desktop PC on its side on a clean, stable surface.
- Unscrew and remove the side panel, usually the left side when viewed from the front (the side opposite the motherboard’s ports).
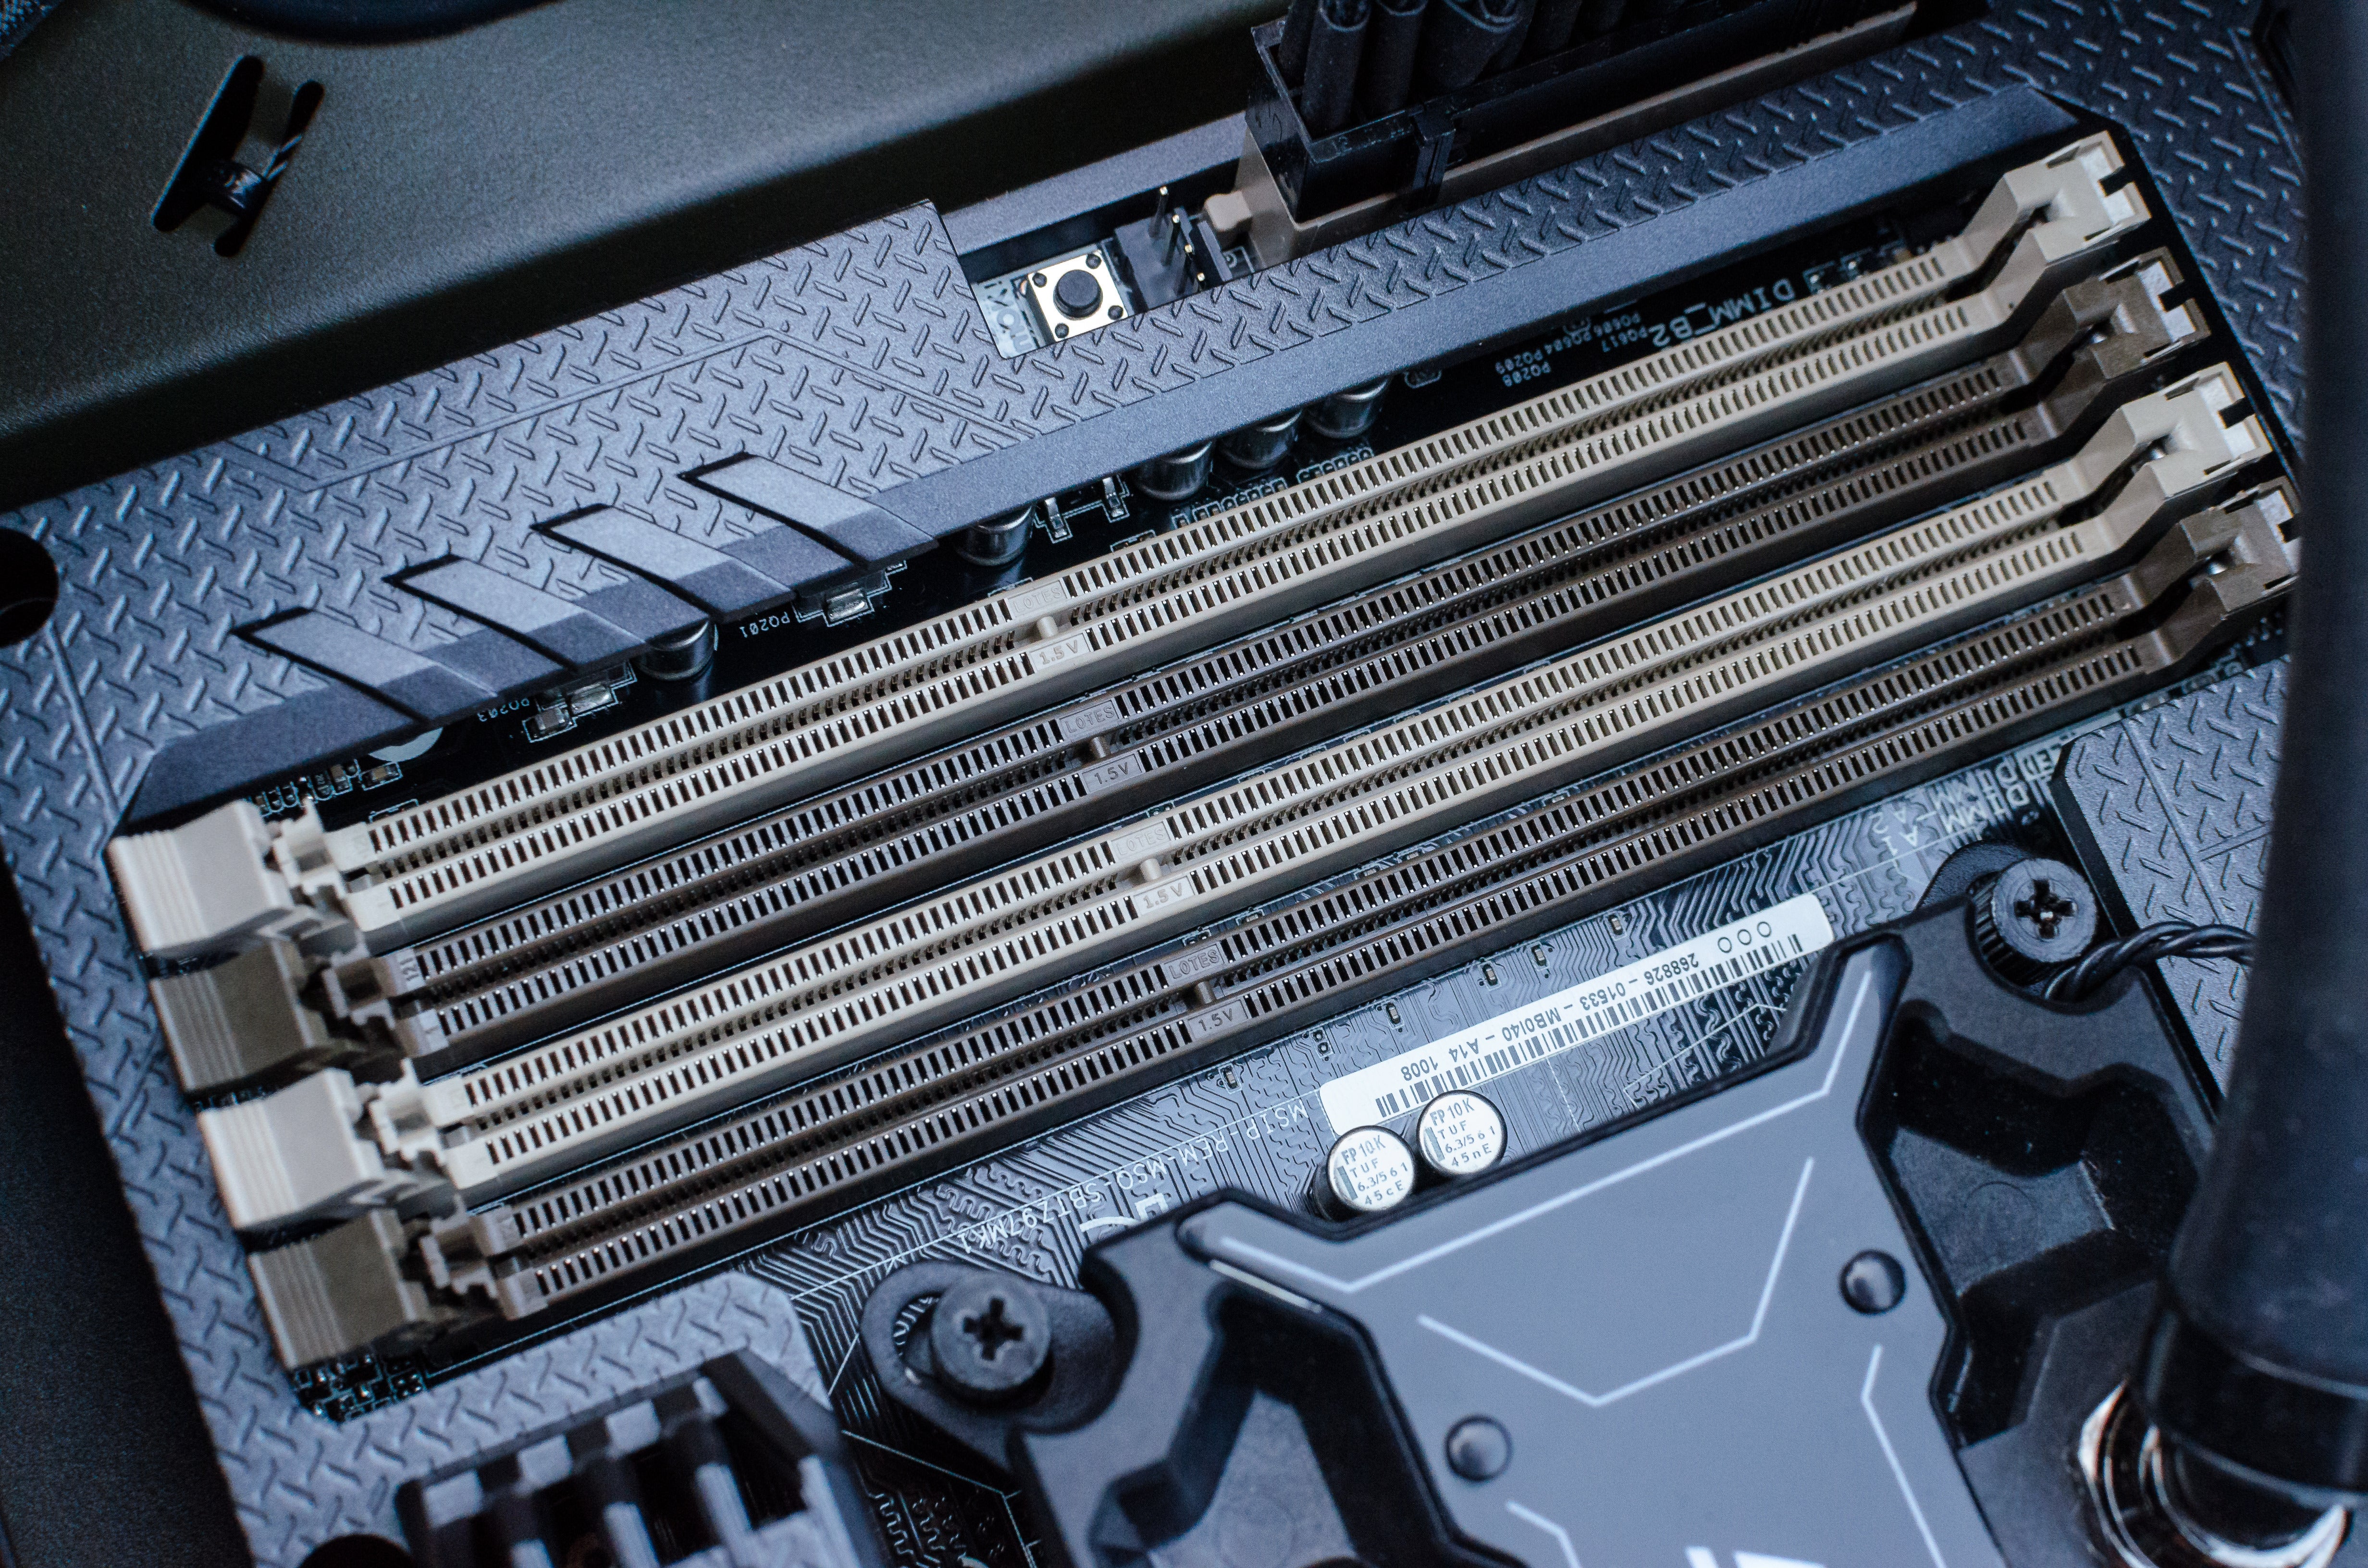
- Identify the motherboard, which is the large circuit board. The RAM slots are long, narrow slots typically located next to the CPU cooler, often distinguished by plastic clips on either end. They might be color-coded.
- Remove Old RAM (If Applicable):
- If you’re replacing existing RAM or moving modules, you’ll need to remove them first.
- Gently push down the plastic clips on both ends of the RAM stick. The module should slightly pop up from its slot.
- Carefully grasp the RAM module by its edges and pull it straight out.
- Place the removed RAM in an anti-static bag or a safe, dry place.
- Insert New RAM Modules:
- Ensure the clips on both ends of the RAM slot are in the open position.
- Hold the new RAM module by its edges. Notice the small notch (key) in the row of gold contacts on the bottom of the RAM stick. This notch must align perfectly with the corresponding ridge in the RAM slot. This “keying” ensures you cannot insert the RAM incorrectly.
- Carefully place the RAM module into the slot, aligning the notch.
- Apply firm, even pressure to both ends of the RAM stick simultaneously, pushing straight down. You should hear distinct clicks as the clips on either side snap into place, securing the module.
- Visually inspect the module to ensure it’s fully seated and level in the slot, with the clips firmly holding it. Do not force the RAM if it doesn’t align; re-check the notch and try again.
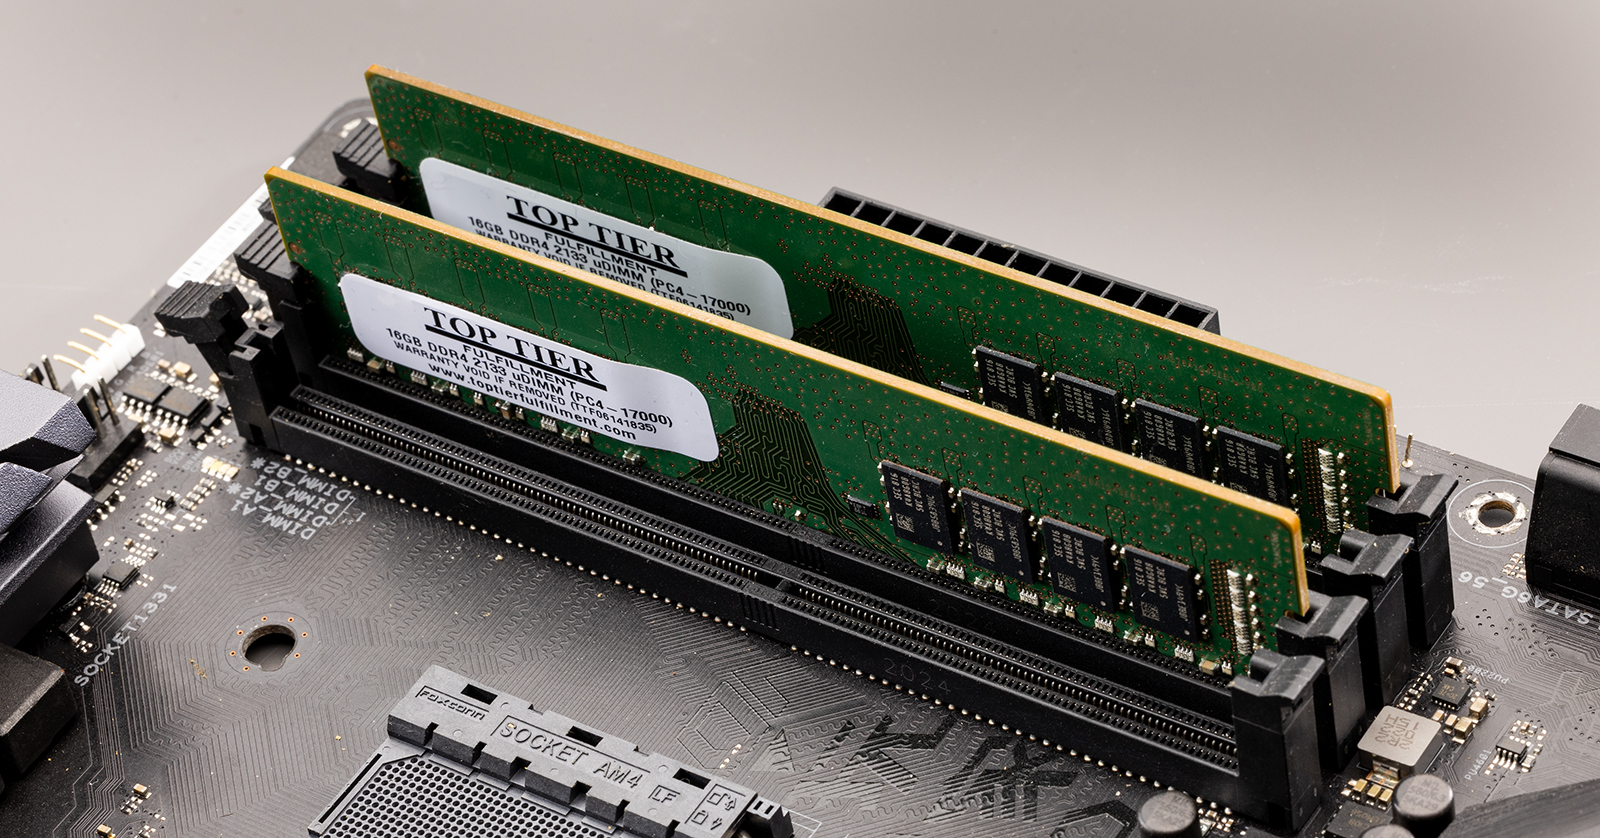
- If installing multiple RAM sticks (e.g., two 8GB sticks), refer to your motherboard manual for the correct “dual-channel” slots. These are usually indicated as A2/B2 or similar, and are often every other slot, e.g., slot 2 and slot 4.
- Secure the Case:
- Once all new RAM is installed and secured, double-check all connections and ensure no tools or loose screws are left inside the case.
- Reattach the side panel and tighten its screws.
Upgrading RAM in a Laptop (General Guidelines)
Laptops vary significantly in their design, making a universal guide challenging. Always refer to your specific laptop model’s service manual or a reputable online tutorial for precise instructions.
- Accessing the RAM Bay:
- Completely shut down and unplug your laptop.
- Flip it over. Many laptops have a dedicated small access panel for RAM (and sometimes storage). Others require removing the entire bottom cover, which might involve dozens of screws and careful prying. Some ultra-thin or sealed models may have soldered RAM that is not user-upgradeable.
- If battery disconnection is possible and accessible internally, perform that step before handling RAM.
- Handle SODIMM Modules:
- Once the RAM modules are visible, they will be smaller SODIMM sticks.
- Removing: There are usually two small metal or plastic clips on either side of the module. Gently push them outwards. The SODIMM stick will pop up at an angle. Grasp it by its edges and slide it out of the slot.
- Inserting: Align the notch on the new SODIMM module with the notch in the slot. Insert the module at a slight angle (usually around 30-45 degrees), ensuring it’s fully seated. Then, gently push down on the module until it clicks horizontally into place, with the clips securing it.
- Reassemble: Carefully reattach any internal cables (like the battery), then secure the back panel or access door.
Post-Installation: Verifying and Troubleshooting
You’ve installed the RAM, reassembled your system – now it’s time for the moment of truth: powering it on and verifying the upgrade.
Confirming Your New RAM is Recognized
- First Boot: The system might take slightly longer than usual to boot up after a RAM upgrade. This is normal, as the BIOS (Basic Input/Output System) or UEFI (Unified Extensible Firmware Interface) needs to detect and configure the new hardware. Don’t panic if it takes an extra 10-20 seconds or restarts once.
- BIOS/UEFI Check:
- As your computer starts, press the designated key to enter the BIOS/UEFI settings (commonly DEL, F2, F10, or F12; check your motherboard manual).
- Navigate through the BIOS menus (often under a “Main,” “System Information,” or “Memory” tab) to verify the total installed RAM capacity and its speed.
- If your new RAM is rated for higher speeds than your system defaulted to, you might need to enable an XMP (Intel) or DOCP (AMD) profile in the BIOS to reach those speeds. Look for “Memory Profile,” “Extreme Memory Profile,” or “D.O.C.P.” settings.
- Operating System Check:
- Windows: Right-click on the Taskbar and select “Task Manager” (or press Ctrl+Shift+Esc). Go to the “Performance” tab and select “Memory.” It will display the total RAM installed. Alternatively, search for “About your PC” in the Start menu.
- macOS: Click the Apple menu in the top-left corner, then “About This Mac.” The “Memory” tab will show the installed RAM.
- Linux: Open a terminal and type
free -hor use a graphical system monitor.
- Memory Diagnostic Tools: To ensure the RAM is stable and error-free, consider running a memory diagnostic.
- Windows Memory Diagnostic: Search for it in the Start menu. It will require a restart and run a series of tests.
- MemTest86: For more thorough testing, you can create a bootable USB drive with MemTest86 and run it for several hours (or even overnight). This is especially useful if you experience intermittent crashes after the upgrade.
Common Issues and Solutions
Even with careful planning, sometimes things don’t go perfectly. Here are some common problems and their solutions:
- System Not Booting/Black Screen: This is the most alarming issue.
- Solution: Power down, unplug, and open the case again. Ensure all RAM modules are fully seated in their slots, with both clips firmly engaged. Sometimes, a stick looks installed but isn’t making full contact. Try re-seating them.
- Solution: If you installed multiple sticks, try booting with just one new RAM stick in the primary slot (usually indicated in the motherboard manual). If it boots, try adding the other sticks one by one to isolate a potentially faulty module or slot.
- Solution: Clear the CMOS (Complementary Metal-Oxide-Semiconductor). This resets your motherboard’s BIOS settings to default. Consult your motherboard manual for the location of the CMOS battery (a coin-cell battery, usually CR2032) or the “Clear CMOS” jumper/button. Remove the battery for a minute or use the jumper, then replace/reset.
- Incorrect RAM Capacity Recognized:
- Solution: Double-check your motherboard’s maximum supported RAM capacity and ensure it matches what you’ve installed.
- Solution: Re-seat the RAM modules.
- Solution: Update your motherboard’s BIOS to the latest version. Sometimes, older BIOS versions don’t fully support newer RAM modules or higher capacities.
- Stability Issues/Crashes After Boot:
- Solution: Run a comprehensive memory diagnostic tool like MemTest86.
- Solution: If you enabled XMP/DOCP profiles in the BIOS, try disabling them and letting the RAM run at its default JEDEC speed to see if stability improves. Your RAM might be unstable at its advertised speed, especially if your CPU’s memory controller is struggling, or if it’s not on your motherboard’s QVL. You might need to manually adjust timings or slightly increase memory voltage (advanced users only).
- Solution: If you mixed RAM kits, even if they have similar specs, they might not play well together. It’s often best to buy RAM as a matched kit.
Beyond the Upgrade: Maximizing Your System’s Potential
While a RAM upgrade is powerful, it’s essential to remember that it’s one piece of a larger technological puzzle. To truly maximize your system’s performance and align with the “Technology Trends” and “Productivity” aspects of a tech-focused approach, consider the interplay of all components.
RAM and Overall System Harmony
A generous amount of RAM dramatically improves multitasking and application responsiveness, but it won’t magically solve all performance issues.
- CPU and Storage Synergy: Your CPU (Central Processing Unit) is the brain, and your storage drive (SSD or HDD) is the long-term memory. A powerful CPU can process data quickly, but if it has to constantly wait for data from slow storage or insufficient RAM, its potential is wasted. Similarly, ample RAM won’t compensate for an ancient, struggling CPU or a traditional hard drive that’s constantly thrashing.
- SSD is Crucial: If you’re still using a mechanical hard drive as your main system drive, an upgrade to a Solid State Drive (SSD) is arguably more impactful for overall system snappiness than a RAM upgrade, especially for boot times and application loading. With an SSD, your system accesses the “swap file” much faster, mitigating some of the pain of low RAM, though more RAM is still ideal.
- Graphics Card (GPU): For gaming, video editing, and 3D rendering, your Graphics Processing Unit (GPU) is often the dominant factor. More RAM helps the CPU feed data to the GPU efficiently, but a weak GPU will still be your primary bottleneck in these specific tasks.
When to Consider a Full System Overhaul
If, after upgrading your RAM (and perhaps your storage to an SSD), your system still struggles, it might be time to consider a more significant overhaul or a brand-new build.
- CPU Bottleneck: If your CPU constantly hits 100% usage, even with plenty of RAM and an SSD, it means the processor itself is the limiting factor.
- Outdated Platform: If your motherboard only supports older RAM types (e.g., DDR3) or is limited to very old CPU generations, you’ve likely hit the ceiling for meaningful upgrades.
- Lack of Modern Features: New motherboards and CPUs bring support for faster ports (USB 3.2, Thunderbolt), better network connectivity (Wi-Fi 6/6E), and more efficient power delivery.
- Specific Performance Demands: If your professional or recreational needs have outgrown your system’s fundamental architecture (e.g., moving from casual photo editing to professional 4K video production), a complete upgrade might be the most sensible “Investment” for your “Productivity.”
Conclusion
Upgrading your computer’s RAM is one of the most straightforward yet impactful hardware upgrades you can perform. It directly addresses common frustrations like sluggish multitasking, slow application launches, and system freezes, significantly improving your digital experience. By carefully selecting the right modules, following essential pre-installation precautions, and meticulously going through the installation steps, you can confidently transform your system’s performance.
Remember to take your time, prioritize safety by guarding against static electricity, and thoroughly verify your work post-installation. Empowering yourself with such technical skills not only boosts your computer’s capabilities but also deepens your understanding of technology – a valuable asset in today’s tech-driven world. So, embrace the power of more RAM and unlock the full potential of your machine!
aViewFromTheCave is a participant in the Amazon Services LLC Associates Program, an affiliate advertising program designed to provide a means for sites to earn advertising fees by advertising and linking to Amazon.com. Amazon, the Amazon logo, AmazonSupply, and the AmazonSupply logo are trademarks of Amazon.com, Inc. or its affiliates. As an Amazon Associate we earn affiliate commissions from qualifying purchases.