
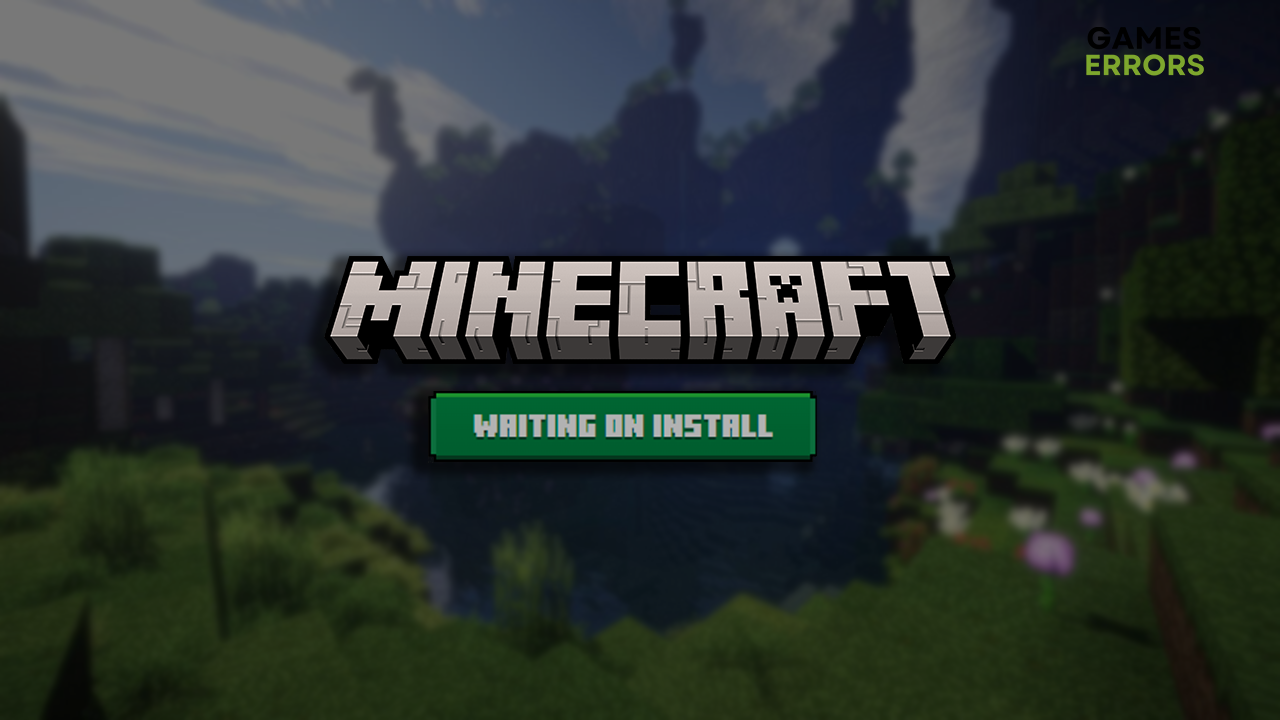
There are few things more frustrating for a gamer than the anticipation of diving into a new world, only to be met by an endlessly spinning wheel and a cryptic message: “Waiting on install” for the Minecraft Launcher. This common predicament can halt your adventure before it even begins, leaving you wondering what went wrong and how to fix it. Far from being a simple hiccup, this issue often stems from a confluence of factors, ranging from network glitches and system conflicts to server-side snags. Understanding the underlying causes is the first step toward reclaiming your gateway to the blocky universe of Minecraft.
In this comprehensive guide, we’ll dissect the various reasons behind the persistent “Waiting on Install” message, providing actionable troubleshooting steps to get your game up and running. Whether you’re a seasoned miner or a budding builder, we’ll equip you with the knowledge to diagnose and resolve these installation roadblocks, ensuring your path to crafting and exploration remains unobstructed. We’ll delve into the technicalities, offer practical solutions, and even touch upon some best practices to avoid such delays in the future, all while keeping the digital security and user experience at the forefront.
Understanding the “Waiting on Install” Phenomenon
The message “Waiting on install” isn’t unique to the Minecraft Launcher; it’s a generic status update that indicates the installation process has initiated but is currently paused, pending an external resource or internal system response. It’s the digital equivalent of a queue, where your installer is waiting for its turn or for a necessary component to become available.
What Does “Waiting on Install” Truly Mean?
At its core, “Waiting on install” signifies that the installation application has sent a request to download, unpack, or verify files, but it hasn’t received the expected acknowledgment or resources within a normal timeframe. This could be due to a lack of data coming from the internet, an inability to write data to your hard drive, a conflict with another program, or even a temporary issue with the game’s servers themselves. For a brand like Minecraft, which prides itself on accessibility and a vast user base, ensuring a smooth installation process is paramount to maintaining player satisfaction and brand loyalty. When this process falters, it directly impacts the user experience and can lead to frustration.
Common Root Causes of Installation Delays
The culprits behind a stalled Minecraft Launcher installation are diverse and can often overlap. We can categorize them broadly into several groups:
- Network-Related Issues: The installer relies heavily on a stable internet connection to download game files. Any instability, throttling, or blockage can lead to indefinite waiting.
- System-Specific Problems: Your computer’s environment plays a critical role. Insufficient disk space, outdated drivers, operating system conflicts, or administrative permission issues can all bring an installation to a halt.
- Software Conflicts: Other applications, particularly security software like antivirus programs or firewalls, can misinterpret the installer’s actions as malicious and block them.
- Server-Side Issues: Less common but equally disruptive, problems on Minecraft’s end (e.g., server maintenance, high traffic, outages) can prevent files from being downloaded.
- Corrupted Files: A partially downloaded or damaged installer file can cause the process to stall as it attempts to process unreadable data.
Addressing these issues systematically is key to a successful resolution. We’ll start by tackling the most common and easily fixable problems before moving on to more complex diagnostics.
Diagnosing and Resolving Network-Related Hold-ups
Many installation issues, especially those involving downloading large game files, trace back to the network connection. A robust internet connection is not just about speed; it’s also about stability and unimpeded access to necessary servers.
Verifying Your Internet Connection’s Health
Before anything else, ensure your internet connection is stable and performing as expected.
- Test Connectivity: Open a web browser and try accessing several different websites. If they load slowly or not at all, your internet connection might be the problem.
- Speed Test: Use an online speed test (e.g., Speedtest.net) to check your download and upload speeds. While Minecraft’s core requirements aren’t extreme, a very slow connection will naturally prolong the “waiting” period.
- Other Devices: Check if other devices on your network are experiencing similar issues. This can help determine if the problem is specific to your computer or your entire home network.
- Wired vs. Wireless: If you’re on Wi-Fi, try connecting your computer directly to your router with an Ethernet cable. Wired connections are generally more stable and faster, eliminating potential wireless interference as a factor.
Firewall and Antivirus Interference: A Double-Edged Sword
Security software is essential for digital security, protecting your system from malware and threats. However, they can sometimes be overly aggressive, flagging legitimate software installations as suspicious.
- Whitelist the Minecraft Launcher: Most antivirus programs allow you to “whitelist” or add exceptions for specific applications. Navigate to your antivirus settings and add the Minecraft Launcher and its installer to the list of allowed programs.
- Temporarily Disable: As a diagnostic step, you can temporarily disable your antivirus and firewall (Windows Defender Firewall) and then try the installation again. Important: Remember to re-enable them immediately after the installation to maintain your system’s security. Never browse the internet or download other files with your security software disabled.
- Check Windows Defender Firewall: Even if you use a third-party antivirus, Windows Defender Firewall might still be active. Search for “Windows Defender Firewall” in your Start menu, go to “Allow an app or feature through Windows Defender Firewall,” and ensure Minecraft or its related processes are allowed. If not, add them manually.
Router and Modem Reboot: The Classic IT Solution
It might sound cliché, but a simple restart of your networking equipment can resolve a surprising number of connectivity issues.
- Power Cycle: Unplug your modem and router from their power outlets. Wait for about 30-60 seconds, then plug the modem back in. Once the modem is fully online (indicated by stable lights, check your device’s manual), plug in your router. Wait for the router to fully boot up before trying the Minecraft Launcher installation again. This clears out temporary glitches and re-establishes fresh connections.
Proxy Settings and VPNs: Hidden Obstacles
Proxy servers and VPNs (Virtual Private Networks) can redirect your internet traffic, potentially interfering with installation downloads by blocking necessary ports or routes.
- Disable Proxy: Go to your Windows Settings > Network & Internet > Proxy. Ensure “Automatically detect settings” is on and “Use a proxy server” is off, unless you specifically need it for work or other purposes.
- Disable VPN: If you’re using a VPN, temporarily disable it and attempt the installation. VPNs, while offering privacy and security benefits, can sometimes cause latency or connection issues with certain servers or services.
Checking Minecraft Server Status: It Might Not Be You
Sometimes, the issue isn’t on your end at all. Minecraft’s servers, like any online service, can experience maintenance, outages, or periods of high traffic.
- Official Sources: Check the official Mojang/Minecraft status pages or their social media channels (e.g., Twitter) for any announcements regarding server issues. A quick search for “Minecraft server status” will usually lead you to reliable information. If the servers are indeed down or experiencing issues, your best bet is to wait until they are resolved. Trying to force an installation during an outage will only prolong your “waiting” state.
System-Level Solutions to Unblock the Installation
Once you’ve ruled out network issues, the spotlight shifts to your local system. Your computer’s configuration, available resources, and overall health significantly impact software installations.
Running as Administrator: The Power to Install
Many modern operating systems, including Windows, restrict certain actions for security reasons. Installing software often requires elevated privileges.
- Right-Click and Run: Locate the Minecraft Launcher installer file (or the launcher shortcut if you’re reinstalling/updating). Right-click on it and select “Run as administrator.” This grants the installer the necessary permissions to make changes to your system files and directories, which is crucial for a successful installation. Skipping this step is a very common cause of “waiting on install” messages.
Insufficient Disk Space: An Overlooked Culprit
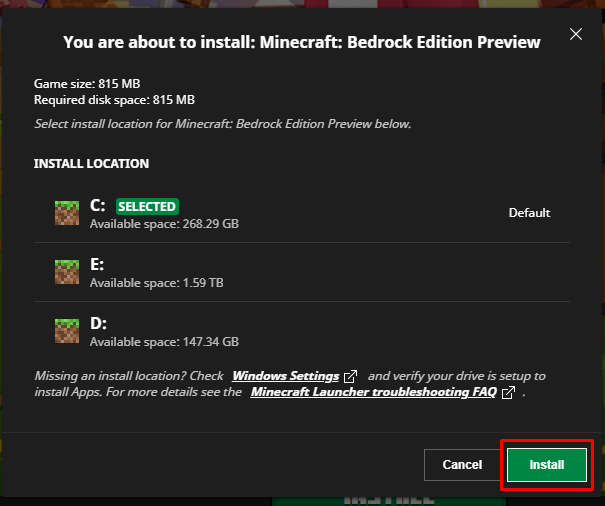
Minecraft, especially with additional content or multiple versions, can take up a significant amount of space. If your drive is full or nearly full, the installer won’t have anywhere to write the necessary files.
- Check Disk Space: Go to “This PC” (or “My Computer”) and check the free space on the drive where you’re trying to install Minecraft (usually your C: drive). Minecraft generally requires at least a few GBs, but it’s always good to have more.
- Free Up Space: If space is low, uninstall unused programs, delete unnecessary files, or move large files to an external drive. Windows’ built-in Disk Cleanup tool can also help remove temporary files and system clutter.
Clearing Temporary Files and Cache: System Hygiene
Accumulated temporary files and cache data can sometimes interfere with new installations or system processes.
- Disk Cleanup: Search for “Disk Cleanup” in the Windows search bar, select your main drive (usually C:), and let it scan. Then, select “Clean up system files” and mark various categories like “Temporary files,” “Temporary Internet Files,” and “Windows Update Cleanup.” Be cautious about what you delete, but temporary files are usually safe.
- Temporary Folder: You can also manually clear the
Tempfolder. PressWin + R, type%temp%, and press Enter. Select all files and folders (Ctrl+A) and delete them. Skip any files that are currently in use.
Updating Your Operating System and Drivers: Ensuring Compatibility
Outdated operating system components or graphics drivers can lead to compatibility issues with new software installers.
- Windows Updates: Go to Settings > Update & Security > Windows Update and check for any pending updates. Install all critical and recommended updates, then restart your computer. Modern installers often rely on up-to-date system components.
- Graphics Drivers: Outdated graphics drivers can cause performance issues and sometimes even installation problems. Visit the website of your graphics card manufacturer (NVIDIA, AMD, Intel) and download the latest drivers for your specific model. Perform a clean installation if possible.
Performing a Clean Boot: Isolating Software Conflicts
A clean boot starts Windows with a minimal set of drivers and startup programs, helping you determine if a background program is interfering with the Minecraft Launcher installation.
- How to Perform: Search for
msconfigin your Start menu to open System Configuration.- On the “General” tab, select “Selective startup” and uncheck “Load startup items.”
- Go to the “Services” tab, check “Hide all Microsoft services,” and then click “Disable all.”
- Click “Apply” and “OK,” then restart your computer.
- Test Installation: Try installing Minecraft. If it works, a background program was the culprit. You’ll then need to re-enable services and startup items in small groups to pinpoint the specific application.
- Return to Normal: Once you’ve identified the issue or finished troubleshooting, remember to revert your System Configuration to “Normal startup.”
Reinstalling the Launcher (A Fresh Start) and Corrupted Files
If you’re updating the launcher and it gets stuck, or if previous troubleshooting steps haven’t worked, a fresh installation is often the best approach.
- Uninstall First: Before reinstalling, it’s crucial to completely uninstall any existing Minecraft Launcher. Go to Settings > Apps > Apps & features, find “Minecraft Launcher,” and click “Uninstall.”
- Delete Leftover Files: After uninstalling, manually check and delete any leftover files or folders in
%appdata%.minecraft(copy and paste this into your Windows search bar or Run dialog) andC:Program FilesMinecraft Launcher. Be careful not to delete any world saves unless you have them backed up. - Download Anew: Go to the official Minecraft website (minecraft.net) and download the latest version of the launcher installer. Ensure you’re downloading from the official source to avoid issues with unofficial or modified installers, which can pose security risks and lead to financial implications if they contain malware.
- Run Installer: Once downloaded, run the new installer as administrator.
Advanced Troubleshooting and Prevention Tips
Sometimes, the simpler solutions aren’t enough, or you want to ensure these issues don’t crop up again. These advanced tips focus on more specific scenarios and long-term digital health.
Hardware Considerations: Meeting the Minimum Requirements
While Minecraft is known for its accessibility, ensuring your system meets the minimum hardware requirements is fundamental. If your RAM, CPU, or GPU are severely underpowered, the installation process itself, or the subsequent game launch, might struggle.
- Check Specs: Familiarize yourself with Minecraft’s official system requirements and compare them to your computer’s specifications (you can find these by right-clicking “This PC” and selecting “Properties”). While minor deficiencies might allow the game to run, they can exacerbate installation issues. Investing in suitable hardware, if necessary, is an investment in your gaming experience and can prevent countless technical headaches.
Digital Security Best Practices: Beyond the Installer
The advice to download only from official sources isn’t just about functionality; it’s a critical digital security practice. Unofficial launchers or installers can be bundled with malware, ransomware, or other unwanted software, which can compromise your system, steal personal data, or even lead to financial losses.
- Always Official: Stick to minecraft.net for downloads.
- Scrutinize Downloads: If you’re ever prompted to download a “helper” tool or a “fix” from a third-party site, exercise extreme caution.
- Regular Scans: Periodically run full system scans with your trusted antivirus software to catch any lurking threats that might interfere with legitimate software.
When to Contact Support: Knowing When to Escalate
If you’ve meticulously followed all the troubleshooting steps and your Minecraft Launcher still refuses to install, it’s time to reach out to the experts.
- Gather Information: Before contacting support, collect all relevant information: your operating system version, specific error messages (if any beyond “waiting on install”), the steps you’ve already tried, and screenshots if possible.
- Mojang/Microsoft Support: The official Minecraft support channels (usually found on the Mojang/Minecraft website) are your best resource for persistent issues. They have specialized tools and knowledge to diagnose problems specific to their software. Be patient, provide detailed information, and follow their instructions carefully.
Future-Proofing Your Gaming Setup: Maintenance is Key
Preventing future installation woes involves maintaining a healthy computing environment.
- Regular Updates: Keep your OS, drivers, and security software updated.
- Disk Management: Periodically check your disk space and perform cleanup routines.
- Clean Installs: For major software, consider clean installs rather than just updates to avoid accumulating old, potentially conflicting files.
- Backup Data: Always back up your critical data, especially Minecraft worlds, before performing major troubleshooting or reinstallation steps. This safeguards your time and effort invested in the game.
The frustration of seeing “Waiting on install” can feel like an insurmountable barrier to your Minecraft adventures. However, by methodically addressing potential issues related to your network, system, and software, you can almost always find a solution. Remember the importance of official sources for downloads and the role of your security software in maintaining a safe digital environment. With these strategies in hand, you’ll not only conquer the current installation hurdle but also empower yourself to navigate future tech challenges with confidence, ensuring your journey into the endless possibilities of Minecraft is as smooth as possible.
aViewFromTheCave is a participant in the Amazon Services LLC Associates Program, an affiliate advertising program designed to provide a means for sites to earn advertising fees by advertising and linking to Amazon.com. Amazon, the Amazon logo, AmazonSupply, and the AmazonSupply logo are trademarks of Amazon.com, Inc. or its affiliates. As an Amazon Associate we earn affiliate commissions from qualifying purchases.