WordPress has evolved from a simple blogging tool into the world’s most dominant Content Management System (CMS), powering over 40% of the internet. For developers, sysadmins, and tech enthusiasts, understanding the nuances of installing WordPress software is a foundational skill. While the platform is famous for its “5-minute install,” the technical environment, server configurations, and security protocols surrounding that installation are what determine the long-term stability and performance of a digital asset. This guide provides a comprehensive deep dive into the technical pathways of deploying WordPress, covering everything from server prerequisites to advanced manual configurations.

1. Establishing the Technical Foundation: Server Requirements and Environment
Before a single line of WordPress code is uploaded, the hosting environment must be meticulously prepared. WordPress is a database-driven application built on PHP, which means it requires a specific stack—typically LAMP (Linux, Apache, MySQL, PHP) or LEMP (Linux, Nginx, MySQL, PHP)—to function optimally.
Technical Prerequisites and System Requirements
To run the latest version of WordPress software, your server should ideally meet the following specifications:
- PHP version 7.4 or greater: While older versions may work, they lack critical security patches and performance improvements found in PHP 8.x.
- MySQL version 5.7 or greater (or MariaDB version 10.3 or greater): The database is where all your content, comments, and settings reside.
- HTTPS support: In the modern tech landscape, SSL/TLS certificates are non-negotiable for security and SEO.
- Memory Limit: A minimum of 64MB is required, but 256MB is recommended for sites running complex plugins or themes.
Choosing Between Managed and Unmanaged Hosting
From a technical standpoint, the installation experience varies wildly depending on your infrastructure. Managed WordPress hosting providers (like WP Engine or Kinsta) offer a “pre-baked” environment where the software is often pre-installed and optimized for the server’s specific hardware. On the other hand, unmanaged Virtual Private Servers (VPS) or dedicated servers give the technician full control over the stack but require manual configuration of the web server (Apache/Nginx) and the database engine.
Domain Name System (DNS) Configuration
Before the software installation can be finalized, the domain must point to the server’s IP address. This involves configuring A Records and CNAMEs within your DNS provider’s dashboard. Propagation can take anywhere from a few minutes to 48 hours, a critical window that technical teams must account for when planning a deployment.
2. The Automated Path: Utilizing One-Click Installers and Control Panels
For many, the most efficient way to install WordPress is through automation tools provided by web hosting control panels. This method reduces human error and speeds up the deployment process significantly.
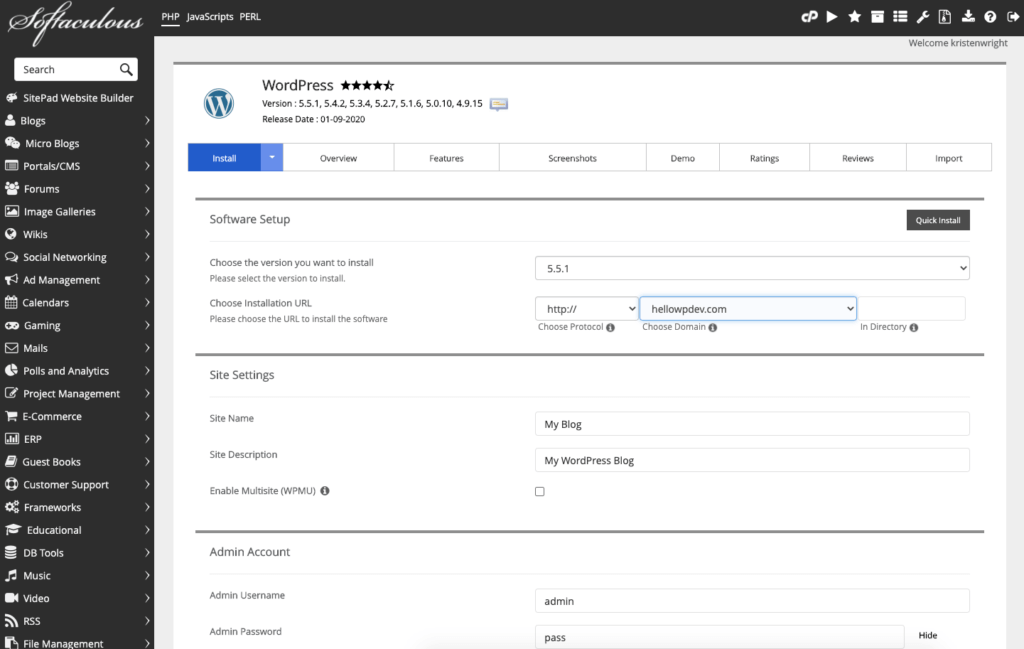
Leveraging Softaculous and cPanel
Most shared hosting environments utilize cPanel, which features the Softaculous Apps Installer. This tool automates the creation of the MySQL database, the generation of the wp-config.php file, and the extraction of the WordPress core files.
- Selection: Locate the WordPress icon in the script library.
- Configuration: Define the installation directory (root vs. subdirectory).
- Database Naming: While Softaculous automates this, it is a technical best practice to change the default “wp_” table prefix to something unique to prevent SQL injection attacks targeting default structures.
Command Line Installation via WP-CLI
For advanced tech users and system administrators, the graphical user interface (GUI) of a control panel might feel sluggish. WP-CLI is a powerful command-line interface for WordPress that allows you to install the software without a browser. By using commands like wp core download, wp config create, and wp core install, developers can script entire installations, making it possible to deploy dozens of WordPress instances in seconds. This is the preferred method for DevOps pipelines and automated scaling environments.
3. The Manual Method: A Step-by-Step Deep Dive into the “5-Minute Install”
To truly understand how WordPress interacts with server hardware, one must perform a manual installation. This process reveals the connection between the file system and the database.
Phase 1: Preparing the Core Files
The first step is visiting the official WordPress.org website to download the latest stable release in .zip or .tar.gz format. Once downloaded, the files must be extracted. If you are working on a local environment (like MAMP or XAMPP) or a remote server, you will need to move these files to the public directory (usually public_html or var/www/html).
Phase 2: Database Creation and User Permissions
WordPress cannot function without a database. Using a tool like phpMyAdmin or the MySQL command line, you must:
- Create a new database: (e.g.,
db_wordpress_prod). - Create a new database user: Never use the ‘root’ user for a WordPress installation. Create a specific user with a complex password.
- Grant Privileges: Ensure the user has all privileges to the specific database you just created. This allows the WordPress software to create tables and store data.
Phase 3: Configuring wp-config.php and Uploading
The wp-config.php file is the heart of the installation. It tells the PHP scripts how to talk to the MySQL database.
- Renaming: You will find a file named
wp-config-sample.php. Rename this towp-config.php. - Editing: Input your Database Name, Username, Password, and Host (usually ‘localhost’).
- Salt Keys: Generate unique Authentication Unique Keys and Salts from the official WordPress API. these keys provide an extra layer of encryption for cookies and passwords.
- FTP/SFTP Upload: Use a client like FileZilla or Cyberduck to move the files to your server. SFTP (Secure File Transfer Protocol) is highly recommended over standard FTP to ensure your credentials aren’t intercepted in plain text.
Phase 4: Running the Installation Script
Once the files are on the server and the configuration file is set, navigate to your domain in a web browser. WordPress will detect the files and launch the “Famous 5-Minute Install” screen. Here, you will set your Site Title, Admin Username, and a strong password. Upon clicking “Install WordPress,” the software will populate the database tables, and your site will be live.
4. Post-Installation Security and Technical Optimization
The installation isn’t finished once the login screen appears. A professional tech deployment requires hardening the software against common vulnerabilities and optimizing it for speed.
Strengthening Digital Security
WordPress is a frequent target for automated bots. To secure your new installation:
- File Permissions: Ensure folders are set to
755and files are set to644. Thewp-config.phpfile should be even more restricted (often400or440) to prevent unauthorized reading. - Disable File Editing: Add
define( 'DISALLOW_FILE_EDIT', true );to your config file to prevent users from editing theme or plugin code directly from the dashboard. - Two-Factor Authentication (2FA): Implementing 2FA at the software level is one of the most effective ways to stop brute-force attacks on the
wp-login.phppage.
Technical Performance Optimization
A fresh WordPress install is fast, but it can quickly become bloated.
- Object Caching: Implement Redis or Memcached to reduce the load on the MySQL database.
- PHP OPcache: Ensure OPcache is enabled on the server level to store precompiled script bytecode in memory, significantly speeding up PHP execution times.
- Gzip Compression: Configure your server (via
.htaccessfor Apache ornginx.conffor Nginx) to compress files before sending them to the user’s browser, reducing bandwidth usage.
5. Troubleshooting Common Installation Hurdles
Even with a perfect plan, technical glitches can occur during the installation of WordPress software. Knowing how to interpret error messages is key to a successful deployment.
Addressing “Error Establishing a Database Connection”
This is the most common error encountered during installation. It usually stems from one of three issues:
- Incorrect Credentials: Double-check the
wp-config.phpfile for typos in the database name or password. - Corrupt Database: If the error persists, use the
repairfunction by addingdefine('WP_ALLOW_REPAIR', true);to your configuration file. - Database Server Down: Contact your hosting provider or check the status of your MySQL service via terminal (
service mysql status).
The White Screen of Death (WSOD)
If your installation results in a blank white page, it is typically a PHP error. To diagnose this, enable “Debug Mode” in your wp-config.php file by changing define( 'WP_DEBUG', false ); to true. This will output the specific error (such as a memory limit exhaustion or a syntax error in a plugin) directly to the screen, allowing for immediate remediation.

Correcting File Permission and Ownership Issues
On many Linux servers, particularly those using Nginx, the web server user (often www-data or apache) must own the WordPress files to allow for automatic updates and media uploads. If you cannot upload images after installation, you may need to run a chown command (e.g., chown -R www-data:www-data /var/www/html) to align ownership permissions with the server environment.
By following these technical protocols, you ensure that your WordPress software installation is not just functional, but secure, scalable, and optimized for the modern web. Whether using one-click automation or a manual terminal-based approach, the integrity of the underlying tech stack is what defines a successful digital presence.
aViewFromTheCave is a participant in the Amazon Services LLC Associates Program, an affiliate advertising program designed to provide a means for sites to earn advertising fees by advertising and linking to Amazon.com. Amazon, the Amazon logo, AmazonSupply, and the AmazonSupply logo are trademarks of Amazon.com, Inc. or its affiliates. As an Amazon Associate we earn affiliate commissions from qualifying purchases.