Upgrading your computer can seem like a daunting task, especially when it involves delving into the delicate internal components. Among the most impactful upgrades you can make is installing a new graphics card, or GPU (Graphics Processing Unit). Whether you’re a hardcore gamer seeking higher frame rates, a content creator demanding faster rendering times, or simply looking to breathe new life into an aging system, a new GPU can dramatically enhance your PC’s capabilities. This guide will walk you through every step of the process, from preparation and compatibility checks to the physical installation and post-setup, ensuring a smooth and successful upgrade.
Understanding Your Graphics Card and Why Installation Matters
Before diving into the nuts and bolts, it’s essential to understand what a graphics card does and why its proper installation is paramount.
What is a Graphics Card?
At its core, a graphics card is a specialized electronic circuit designed to rapidly manipulate and alter memory to accelerate the creation of images in a frame buffer intended for output to a display device. In simpler terms, it’s what renders everything you see on your screen, from your operating system’s desktop to intricate 3D worlds in video games.
There are two main types of graphics processing:
- Integrated Graphics: These GPUs are built directly into your CPU (Central Processing Unit) or motherboard. They share system RAM and are suitable for basic computing tasks, web browsing, video playback, and light gaming. Most laptops and budget-friendly desktop PCs utilize integrated graphics.
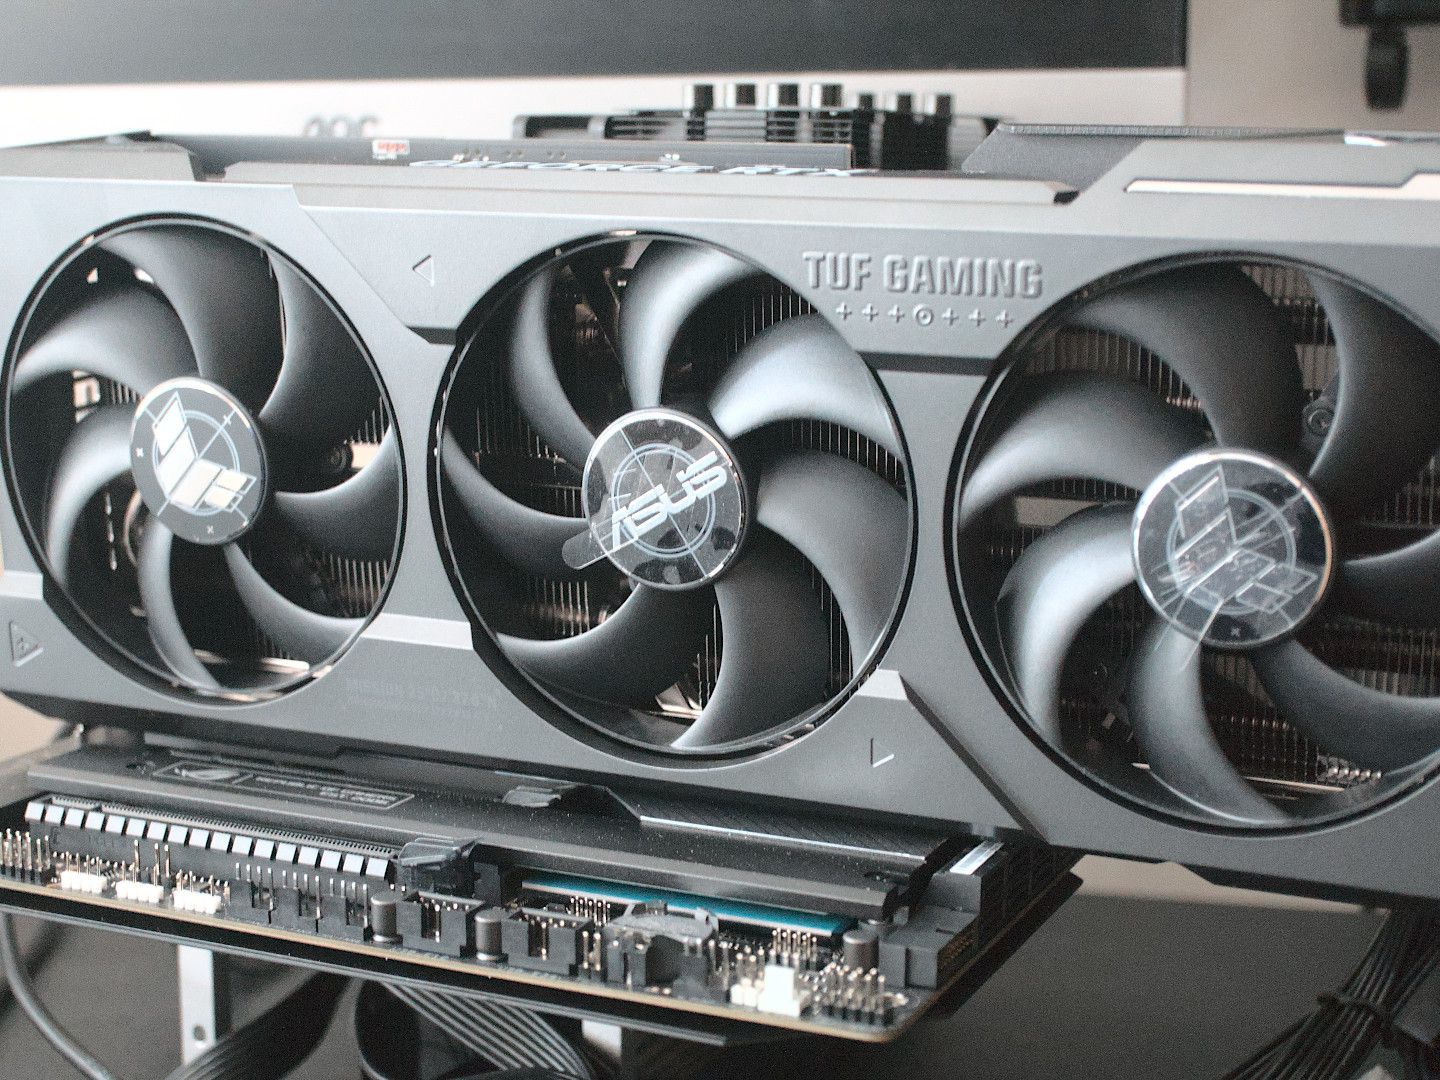
- Dedicated (Discrete) Graphics: These are separate, powerful cards that have their own dedicated video memory (VRAM) and a dedicated processor. They are designed for demanding tasks like high-end gaming, video editing, 3D rendering, and graphic design. Installing a dedicated graphics card is what this guide focuses on.
The performance of your graphics card directly impacts your experience with visual applications. A more powerful GPU allows for higher resolutions, smoother animations, faster processing of visual effects, and the ability to handle more complex graphical workloads.
Why Proper Installation is Crucial
The installation of a graphics card isn’t just about slotting it into a port; it’s a critical process that, if done incorrectly, can lead to a myriad of issues. Poor installation can result in:
- System Instability: Crashes, freezes, or the infamous Blue Screen of Death (BSOD).
- Suboptimal Performance: Even if the card works, it might not deliver its full potential due to insufficient power, overheating, or driver conflicts.
- Hardware Damage: Incorrect handling, static discharge, or improper power connections can permanently damage your new GPU, your motherboard, or other components.
- No Display Output: The most common immediate symptom of a failed installation, leaving you with a blank screen.
By following a meticulous step-by-step approach, you not only ensure your new graphics card functions perfectly but also protect your entire PC system.
Before You Begin: Preparation and Tools
A successful installation starts long before you open your PC case. Thorough preparation and gathering the right tools will save you time, frustration, and potential headaches.
Compatibility Check
This is arguably the most critical step. Not every graphics card is compatible with every system. You need to verify several key aspects:
- Motherboard (PCIe Slot Version): All modern dedicated graphics cards use a PCI Express (PCIe) slot. Most current GPUs use PCIe x16 slots, typically version 3.0 or 4.0 (some even 5.0). While newer cards are generally backward compatible with older PCIe slots (e.g., a PCIe 4.0 card will work in a PCIe 3.0 slot), you might experience a slight performance bottleneck. Ensure your motherboard has an available PCIe x16 slot. Check your motherboard’s manual or its manufacturer’s website for this information.
- Power Supply Unit (PSU) Wattage and Connectors: Graphics cards, especially high-end models, are power-hungry. Your PSU must have sufficient wattage to power your entire system, including the new GPU. Check the recommended PSU wattage on the graphics card manufacturer’s website or packaging. Additionally, modern GPUs require specific PCIe power connectors (6-pin, 8-pin, or even 12-pin, sometimes multiple of these). Ensure your PSU has the necessary cables and connectors available. An insufficient PSU can lead to system crashes or prevent the GPU from functioning correctly.
- Case Size/Clearance: Graphics cards vary significantly in length, height, and thickness. Measure the available space inside your PC case to ensure the new card will physically fit. Pay attention to drive cages, front fans, and other components that might obstruct the card’s path.
- Monitor Connections: Check the output ports on your new graphics card (e.g., HDMI, DisplayPort, DVI) and ensure they match the input ports on your monitor. You may need new cables or adapters.
Gathering Your Tools
Having the right tools at hand makes the installation process much smoother and safer:
- Phillips Head Screwdriver: The most essential tool for opening your PC case and securing the graphics card.
- Anti-static Wrist Strap: Highly recommended! Static electricity can severely damage sensitive electronic components. An anti-static wrist strap grounds you, preventing accidental electrostatic discharge (ESD). Alternatively, frequently touch an unpainted metal surface on your PC case to discharge any static buildup.
- Flashlight (Optional but Useful): Helps illuminate the cramped interior of your PC case, making it easier to see connections and screws.
- Zip Ties or Velcro Straps (Optional): For neat cable management, which improves airflow and aesthetics.
- Compressed Air (Optional): If your PC is dusty, a quick blast can clean out the PCIe slot and surrounding areas.
Essential Pre-Installation Steps
A few steps before you even touch your PC can make a world of difference:
- Backup Important Data: While a GPU installation is relatively low risk, it’s always good practice to back up any critical files before performing significant hardware changes.
- Download Latest Drivers (Optional but Recommended): You can pre-download the latest drivers for your new graphics card from the manufacturer’s website (NVIDIA or AMD). Store them on a USB drive or easily accessible location.
- Power Down and Unplug: Shut down your computer completely from the operating system, then switch off the power supply at the back and unplug the main power cable from the wall outlet. This is crucial for safety.
- Move to a Well-Lit, Clean Workspace: Ensure you have enough space to work comfortably and that your work surface is clean and non-conductive (avoid carpets if possible, especially if not using an anti-static strap).
- Ground Yourself: Put on your anti-static wrist strap and connect it to an unpainted metal part of your PC case. If you don’t have a strap, frequently touch an unpainted metal part of your PC case to discharge static electricity before touching any internal components.
The Step-by-Step Graphics Card Installation Process
With all preparations complete, it’s time to open your PC and perform the physical installation. Take your time, be gentle, and follow each step carefully.
Opening Your PC Case
- Locate and Remove Side Panel Screws: Most PC cases have two or more thumbscrews or standard screws at the rear, securing the side panel. Unscrew them.
- Carefully Remove the Side Panel: Gently slide or pivot the side panel off. It often slides towards the back of the case before detaching. Set it aside in a safe place.
- Lay the PC on its Side: Laying the PC tower on its side (with the motherboard facing up) makes it easier to access the internal components and prevents the graphics card from falling out during installation.
Removing an Old Graphics Card (If Applicable)
If you’re replacing an existing graphics card, you’ll need to remove it first. If this is a new build or you’re adding a second GPU, skip to the next section.
- Disconnect Power Cables: Locate any 6-pin, 8-pin, or 12-pin PCIe power connectors attached to the old graphics card. Press the release clip on each connector and gently pull them straight out. Do not yank the cables.
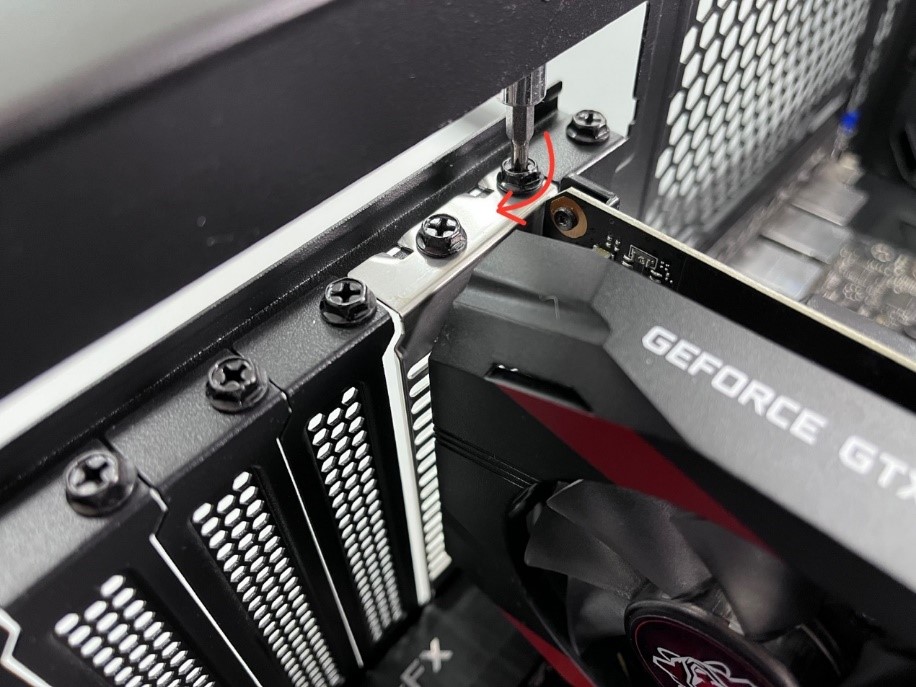
- Unscrew the GPU Bracket: Graphics cards are usually secured to the PC case at the back, where the display output ports are. There will be one or two screws holding a small metal bracket that attaches the GPU to the case. Unscrew these.
- Press the PCIe Retention Clip: At the end of the PCIe x16 slot, there’s a small plastic lever or clip that holds the graphics card in place. Gently push or press this clip downwards or outwards to release the card. It might be stiff, but don’t force it.
- Gently Pull the Old Card Out: With the power cables disconnected, screws removed, and the retention clip released, grasp the graphics card firmly but gently at both ends and pull it straight up and out of the PCIe slot. Place it in an anti-static bag or its original packaging if you plan to keep it.
Preparing the PCIe Slot
- Remove PCIe Slot Covers: If you’re installing a new graphics card into an empty slot, you’ll need to remove the metal slot covers from the back of your PC case. These typically correspond to the slots directly next to the PCIe x16 slot. You may need to unscrew them or twist them until they break off (be careful with the latter to avoid sharp edges). Usually, two slot covers are removed for a standard dual-slot graphics card.
- Ensure the Slot is Clear: Visually inspect the PCIe x16 slot for any dust or obstructions. Use compressed air if needed.
Installing the New Graphics Card
This is the moment of truth!
- Align the Card with the PCIe Slot: Hold the new graphics card by its edges (avoid touching the golden contact pins or the fans). Align the card’s PCIe connector with the PCIe x16 slot on your motherboard. The retention clip at the end of the slot should be open or depressed.
- Press Firmly and Evenly Until It Clicks: Carefully push the graphics card straight down into the slot. Apply even pressure on both ends of the card until it’s fully seated. You should hear a satisfying “click” as the PCIe retention clip locks into place, indicating the card is secure. If you don’t hear a click, ensure the card is fully seated and manually close the clip if necessary.
- Secure the Card with Screws: Re-attach the screws you removed earlier to secure the graphics card’s mounting bracket to the PC case. This prevents the card from sagging or wiggling.
Connecting Power Cables
This step is critical for your GPU to receive adequate power.
- Identify Required PCIe Power Connectors: Refer to your new graphics card’s manual or specifications to determine the type and number of PCIe power connectors it requires (e.g., one 8-pin, two 6+2-pin, or a single 12-pin).
- Connect Them Securely to the GPU: Locate the corresponding PCIe power cables from your power supply. Plug them firmly into the graphics card. Ensure they click into place and are fully seated. Never force a connector that doesn’t fit, as this can damage pins. If your PSU has “pig-tail” connectors (e.g., an 8-pin with an additional 6+2-pin branching off), it’s generally best to use separate cables from the PSU for higher-end cards if available, to ensure stable power delivery.
- Ensure Proper Cable Management: Route the power cables neatly to avoid obstructing airflow or getting caught in fans. Use zip ties or Velcro straps if desired.
Closing Your PC Case
- Replace the Side Panel: Carefully slide or pivot the side panel back into place.
- Secure the Panel Screws: Re-attach the screws to hold the side panel firmly.
Post-Installation Setup and Troubleshooting
Your graphics card is physically installed! Now it’s time for the software setup and to address any potential issues.
Initial Boot-Up and Driver Installation
- Connect Monitor to the New GPU: Crucially, disconnect your monitor from your motherboard’s video outputs (if you were using integrated graphics) and connect it to one of the output ports on your new graphics card. Use the correct cable type (HDMI, DisplayPort, etc.).
- Power On the PC: Plug your PC back into the wall outlet, switch on the PSU, and press the power button on your computer.
- Display Driver Uninstaller (DDU) – Recommended: If you’re replacing an old graphics card (especially from a different manufacturer, e.g., AMD to NVIDIA), it’s highly recommended to use Display Driver Uninstaller (DDU). Boot your PC into Safe Mode (you might be able to do this with generic Windows drivers providing a basic display) and run DDU to completely remove all traces of previous graphics drivers. This prevents conflicts that can cause instability.
- Download and Install the Latest Drivers: Once Windows loads (it might use a generic driver initially), install the drivers you pre-downloaded or navigate to the graphics card manufacturer’s website (NVIDIA GeForce Experience or AMD Adrenalin Software) to download the latest recommended drivers. Follow the on-screen prompts for installation. A reboot will likely be required.
Verifying Installation and Performance
After driver installation, perform a few checks to ensure everything is working correctly:
- Device Manager Check: In Windows, right-click the Start button and select “Device Manager.” Expand “Display adapters.” You should see your new graphics card listed without any error symbols.
- Run Benchmarks or Demanding Games: The best way to test your new GPU’s performance is to put it under load. Run your favorite demanding game or a benchmarking tool like 3DMark or FurMark. Monitor frame rates and overall system responsiveness.
- Monitor Temperatures: Use software like HWMonitor, MSI Afterburner, or the GPU manufacturer’s utility (e.g., GeForce Experience overlay) to keep an eye on your GPU’s temperature while under load. Ensure it stays within safe operating limits (typically below 85°C for sustained loads, though specifics vary by card). High temperatures could indicate poor airflow, incorrect fan settings, or an issue with the GPU cooler.

Common Troubleshooting Scenarios
Even with careful installation, sometimes issues arise. Here are solutions for common problems:
- No Display Signal (Black Screen):
- Check monitor connection: Ensure the monitor is plugged into the new GPU, not the motherboard.
- Reseat the GPU: Power down, unplug, open the case, and firmly push the GPU into its slot again until it clicks. Ensure the PCIe power cables are fully seated.
- Check PSU cables: Are all required PCIe power cables connected to the GPU? Is the PSU switch on?
- Try another port/cable: Test a different display port on the GPU or a different cable.
- Integrated graphics fallback: If your CPU has integrated graphics, connect your monitor to the motherboard’s video output. If you get a display, it might be a driver issue or a faulty dedicated GPU.
- PC Won’t Boot / Blue Screen of Death (BSOD):
- Insufficient PSU: Your power supply might not be powerful enough. Check PSU wattage requirements.
- Driver conflict: If you didn’t use DDU, old drivers might be conflicting. Try booting into Safe Mode and running DDU.
- Loose connections: Power down and re-check all power and data connections, especially to the motherboard.
- Reseat components: Carefully reseat the RAM sticks and the GPU.
- Poor Performance / Stuttering:
- Outdated drivers: Ensure you have the absolute latest drivers installed.
- Power delivery: Confirm all PCIe power connectors are properly attached.
- Compatibility bottleneck: Your CPU or RAM might be a bottleneck, preventing the GPU from performing at its best.
- Overheating: Monitor GPU temperatures during load. Ensure fans are spinning and case airflow is adequate.
- PCIe slot speed: Is the card running at the correct PCIe lane speed (e.g., x16)? You can check this with GPU-Z software.
- Fan Noise:
- Normal operation: GPUs can get loud under load. This might be normal.
- Fan curve: Use software like MSI Afterburner or the manufacturer’s utility to adjust the fan curve for a quieter operation if temperatures allow.
- Obstruction: Check for any cables or debris interfering with the fans.
Installing a new graphics card is a rewarding experience that can significantly boost your computer’s performance. While it may seem complex, by taking your time, performing thorough compatibility checks, and following these detailed steps, you can confidently upgrade your system and enjoy a superior computing experience. Embrace the power of DIY and unleash the full potential of your PC!
aViewFromTheCave is a participant in the Amazon Services LLC Associates Program, an affiliate advertising program designed to provide a means for sites to earn advertising fees by advertising and linking to Amazon.com. Amazon, the Amazon logo, AmazonSupply, and the AmazonSupply logo are trademarks of Amazon.com, Inc. or its affiliates. As an Amazon Associate we earn affiliate commissions from qualifying purchases.