
In the modern landscape of PC gaming, optimization is often the bridge between a frustrating experience and an immersive one. For players of Minecraft—a game known for its deceptively simple aesthetics but notoriously heavy CPU and GPU demands—performance mods have become essential. Among the myriad of tools available, Sodium has emerged as the gold standard for rendering optimization. Developed as a modern replacement for the aging rendering engine of the game, Sodium offers frame rate improvements that often double or triple a system’s output.
This guide provides a deep dive into how to install Sodium, the technical architecture that makes it superior to traditional alternatives, and how to configure your system for the ultimate gaming experience.
Understanding the Sodium Advantage: Why It Matters
Before diving into the installation process, it is critical to understand what Sodium is and why it has become the preferred choice for the technical Minecraft community. Historically, players relied on OptiFine for performance boosts. However, as Minecraft transitioned to newer versions of Java and more complex rendering pipelines, OptiFine’s closed-source nature and monolithic architecture began to struggle.
What is Sodium?
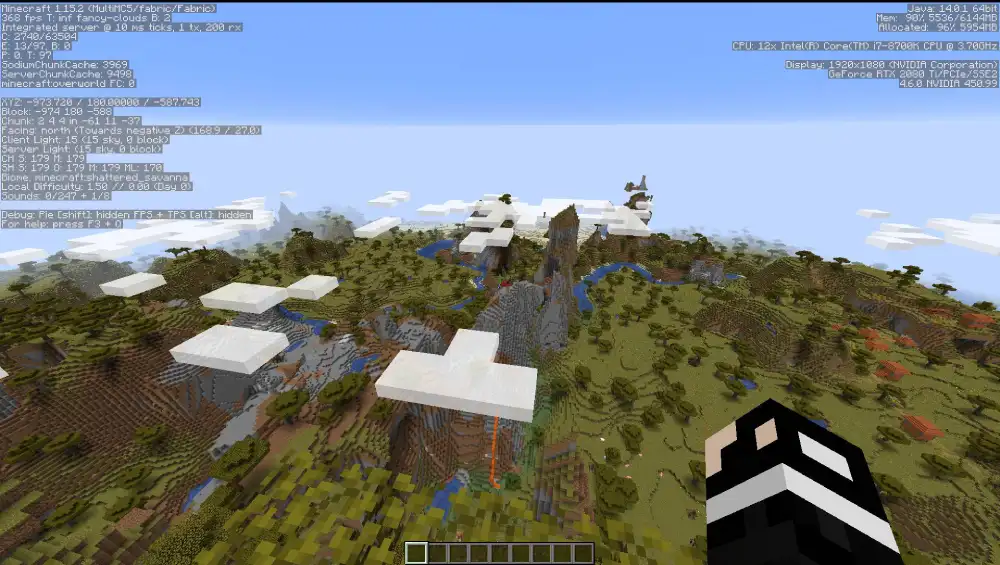
Sodium is a free and open-source rendering engine replacement for the Minecraft client. It focuses on significantly improving frame rates, reducing micro-stutter, and fixing graphical issues. Unlike other mods that simply tweak settings, Sodium rewrites how the game communicates with your graphics card. By utilizing modern OpenGL features and efficient memory management, it reduces the CPU overhead associated with rendering thousands of blocks simultaneously.
Sodium vs. OptiFine: The Technical Shift
The tech community has largely shifted toward Sodium because of its compatibility with the Fabric Loader—a lightweight, modular modding API. While OptiFine tries to do everything (shaders, textures, performance), Sodium focuses exclusively on performance. When paired with its sibling mods, such as Iris for shaders or Lithium for game logic optimization, Sodium creates a modular “powerhouse” that outperforms the all-in-one approach of previous generations.
Prerequisites and Preparing Your Environment
To ensure a seamless installation, you must first prepare your Minecraft environment. Sodium is not a standalone executable; it functions within a specific modding ecosystem.
Checking Hardware and Software Compatibility
Sodium is designed for modern hardware but works exceptionally well on older systems that support at least OpenGL 4.6. Before proceeding, ensure your graphics drivers (NVIDIA, AMD, or Intel) are updated to the latest version. Outdated drivers are the primary cause of crashes when running modern rendering engines.
Furthermore, Sodium is built specifically for the Fabric Loader. It is not natively compatible with Minecraft Forge. If you currently use Forge-based mods, you will need to decide between switching to the Fabric ecosystem or using a compatibility layer like “Rubidium,” though the official Sodium experience on Fabric is generally more stable.
Installing the Fabric Loader
The first technical step is installing the Fabric Loader, which serves as the foundation for Sodium.
- Download the Fabric Installer: Visit the official Fabric website and download the universal
.jaror.exeinstaller. - Run the Installer: Select the “Client” tab. Choose the version of Minecraft you intend to play (e.g., 1.20.1). Ensure the “Create Profile” box is checked.
- Locate the Directory: By default, the installer targets your standard Minecraft installation folder (
%appdata%.minecrafton Windows). - Execution: Click “Install.” Once finished, a new “fabric-loader” profile will appear in your Minecraft Launcher.
Step-by-Step Installation of the Sodium Mod
With the Fabric Loader in place, the next phase involves the manual placement of mod files. This process requires precision to ensure the game identifies the software correctly.
Downloading the Correct Version
Navigate to a trusted repository such as Modrinth or CurseForge. It is vital to download the version of Sodium that matches your Fabric Loader version exactly.
- Pro Tip: Always look for the “Release” version rather than “Alpha” or “Beta” unless you are looking to test the latest (and potentially unstable) features.
- Essential Companion: You should also download the Fabric API. While not part of Sodium itself, most Fabric mods require this API to communicate with the game’s code.

Moving Files to the Mods Folder
Once you have the .jar files for Sodium and the Fabric API, follow these steps:
- Press
Windows Key + Ron your keyboard, type%appdata%, and hit Enter. - Navigate to
.minecraft>mods. If themodsfolder does not exist, create a new folder and name it exactly “mods” (all lowercase). - Copy and paste the Sodium and Fabric API
.jarfiles into this folder.
Launching and Initial Verification
Open the Minecraft Launcher and select the Fabric profile from the dropdown menu. Hit “Play.” Once the game reaches the main menu:
- Navigate to Options > Video Settings.
- If the installation was successful, you will notice a completely redesigned video settings interface. This menu is a hallmark of Sodium, offering more granular control over rendering than the vanilla game.
Maximizing Performance: The Optimization Ecosystem
Installing Sodium is only the first step. To achieve “God-tier” performance, tech-savvy users integrate Sodium into a broader suite of optimization tools.
The Optimization Trinity: Lithium and Phosphor
To complement Sodium’s rendering improvements, you should consider adding:
- Lithium: A general-purpose optimization mod for the game’s physics engine, AI, and block ticking. It reduces “server-side” lag even in single-player worlds.
- Phosphor (or Starlight): These mods optimize the lighting engine. Minecraft’s default lighting calculations are notoriously inefficient; these tools rewrite them to speed up chunk loading and reduce “lighting updates” stutter.
Enabling Shaders with Iris
One common critique of Sodium was its lack of native shader support. This was solved by the Iris Shaders mod. Iris is built specifically to work with Sodium, allowing players to run beautiful shader packs (like Complementary or BSL) with significantly higher frame rates than OptiFine could ever achieve. The installation is identical: simply drop the Iris .jar into your mods folder.
Tuning the Sodium Settings
Within the new Video Settings menu, there are several levers you can pull to gain even more speed:
- Chunk Memory Management: Set this to “Asynchronous” to prevent the game from freezing while loading new areas.
- Use Compact Vertex Format: Enable this to reduce video memory usage.
- Entity Culling: Ensure this is on; it prevents the game from rendering entities (like cows or zombies) that are behind walls or out of your field of view.
Troubleshooting Common Installation Issues
Even with a straightforward process, technical conflicts can arise. Understanding how to debug these issues is part of maintaining a high-performance gaming setup.
Incompatibility with Other Mods
The most frequent issue is “Mod Conflict.” If your game crashes on startup, check the crash-reports folder in your .minecraft directory. Sodium changes the rendering pipeline significantly, so mods that also try to alter rendering (like certain old HUD mods) may cause a crash. Always ensure you are using the “Indium” mod if you use other mods that require the Fabric Rendering API alongside Sodium.
Graphics Driver Errors
If you experience “screen flickering” or “invisible blocks,” it is almost always a driver-level conflict. Sodium uses modern OpenGL functions that some older or integrated graphics drivers struggle with. Disabling “Advanced OpenGL” features in the Sodium settings or updating to the latest WHQL-certified drivers usually resolves this.
Java Version Requirements
Modern Minecraft (1.17 and above) requires specific versions of Java (Java 17 or 18). Ensure your Minecraft Launcher is using the correct bundled Java runtime. If you have manually changed your Java path in the launcher settings to an older version of Java 8, Sodium will fail to initialize.
Conclusion: The Future of Minecraft Tech
Installing Sodium is more than just a simple mod installation; it is an upgrade to the very engine that powers your virtual world. By moving away from legacy rendering systems and embracing the modular Fabric ecosystem, players can enjoy Minecraft at higher resolutions and smoother frame rates than previously thought possible.
As the game continues to evolve with more complex biomes and technical features, the role of community-driven optimization tools like Sodium will only become more vital. By following this guide, you have not only improved your frame rate but also joined the cutting edge of Minecraft’s technical community. Whether you are building massive Redstone machines or exploring vast shader-enhanced landscapes, Sodium ensures your hardware performs at its absolute peak.
aViewFromTheCave is a participant in the Amazon Services LLC Associates Program, an affiliate advertising program designed to provide a means for sites to earn advertising fees by advertising and linking to Amazon.com. Amazon, the Amazon logo, AmazonSupply, and the AmazonSupply logo are trademarks of Amazon.com, Inc. or its affiliates. As an Amazon Associate we earn affiliate commissions from qualifying purchases.