In the rapidly evolving landscape of web development, Node.js has emerged as a powerhouse, allowing developers to build scalable network applications using JavaScript on the server side. Its non-blocking, event-driven architecture makes it ideal for real-time applications, APIs, microservices, and a host of other modern web solutions. For Windows users, getting started with Node.js is a straightforward process, opening up a world of possibilities for full-stack development, command-line tools, and automation scripts.
This comprehensive guide will walk you through the various methods of installing Node.js on your Windows machine, from the simplest official installer to more advanced version management tools. Whether you’re a beginner taking your first steps into server-side JavaScript or an experienced developer seeking robust version control, we’ve got you covered. By the end of this article, you’ll have Node.js and its package manager, npm, up and running, ready to empower your next project.
Understanding Node.js: The JavaScript Runtime Environment
Before diving into the installation process, it’s beneficial to understand what Node.js is and why it has become such a cornerstone in the technology stack of many companies and individual developers worldwide.
What is Node.js?
At its core, Node.js is an open-source, cross-platform JavaScript runtime environment built on Chrome’s V8 JavaScript engine. Traditionally, JavaScript was confined to web browsers, executing client-side scripts to make websites interactive. Node.js broke this barrier by allowing JavaScript to run on the server, effectively bridging the gap between front-end and back-end development with a single language. This means developers can write server-side applications, command-line tools, and even desktop applications using JavaScript, fostering consistency across an entire development stack.
Node.js excels in handling a large number of concurrent connections efficiently. Its single-threaded, event-driven model means it processes tasks asynchronously, rather than waiting for each task to complete sequentially. This makes it incredibly fast and scalable, especially for I/O-bound operations like data streaming, real-time chats, and processing API requests.
Key Features and Benefits
The widespread adoption of Node.js isn’t just a trend; it’s backed by a multitude of compelling features and benefits:
- Performance: Built on Google Chrome’s V8 engine, Node.js offers exceptional speed in code execution. Its non-blocking I/O model is particularly efficient for data-intensive real-time applications.
- Scalability: Node.js is highly scalable, capable of handling thousands of concurrent connections with minimal overhead, making it ideal for microservices and distributed systems.
- Unified Language: By using JavaScript for both front-end and back-end development, Node.js simplifies the development process, reduces context switching for developers, and enables code sharing between client and server.
- Rich Ecosystem (npm): Node.js comes bundled with npm (Node Package Manager), the largest software registry in the world. npm provides access to millions of open-source packages and libraries, significantly accelerating development and preventing reinvention of the wheel.
- Active Community: Node.js boasts a vibrant and active community that contributes to its continuous improvement, offers extensive documentation, and provides ample support through forums and resources.
- Cross-Platform Compatibility: While this article focuses on Windows, Node.js is cross-platform, meaning applications developed on Windows can often run seamlessly on macOS or Linux environments.
Why Node.js on Windows?
Historically, Windows has sometimes been perceived as less developer-friendly for open-source technologies compared to Unix-based systems. However, this perception is increasingly outdated. Microsoft has made significant strides in supporting developer tools and environments on Windows, and Node.js runs exceptionally well on the platform.
For Windows users, installing Node.js unlocks access to a vast array of tools and frameworks that power modern web applications. Whether you’re developing React applications, Angular SPAs, Vue.js projects, or building robust back-end APIs with Express.js, Node.js is an essential prerequisite. Its seamless integration with Windows development tools, like Visual Studio Code, makes it a comfortable and productive environment for developers of all levels.
Choosing Your Installation Method
When it comes to installing Node.js on Windows, you have several reliable methods, each with its own advantages. Your choice might depend on your comfort level with command-line tools, your need for managing multiple Node.js versions, or simply your preference for simplicity.
The Official Installer (MSI): Simplicity and Stability
The official Node.js installer (.msi file) is the most straightforward and recommended method for most users, especially beginners. It provides a guided graphical interface that handles all the necessary configurations, including setting up environment variables. This method ensures a stable installation and is perfect if you typically work with a single version of Node.js.
Node Version Manager (NVM for Windows): Flexibility for Developers
For developers who need to work on multiple projects that might require different Node.js versions, NVM (Node Version Manager) for Windows is an indispensable tool. It allows you to install and switch between multiple Node.js versions effortlessly. This prevents conflicts between project dependencies and ensures compatibility across your development environment.
Package Managers (Chocolatey/Winget): Streamlined for Tech Enthusiasts
Windows has also embraced package managers, similar to apt on Linux or Homebrew on macOS. Chocolatey and Winget are two popular options that allow you to install and manage software packages from your command line. These methods are excellent for users who prefer a more streamlined, command-line driven approach to software management and often have these tools already integrated into their workflow.
Step-by-Step Installation Guides
Now, let’s walk through each installation method in detail.
Method 1: Installing Node.js with the Official MSI Installer (Recommended for Beginners)
This is the easiest and most common way to install Node.js on Windows.
Downloading the Installer
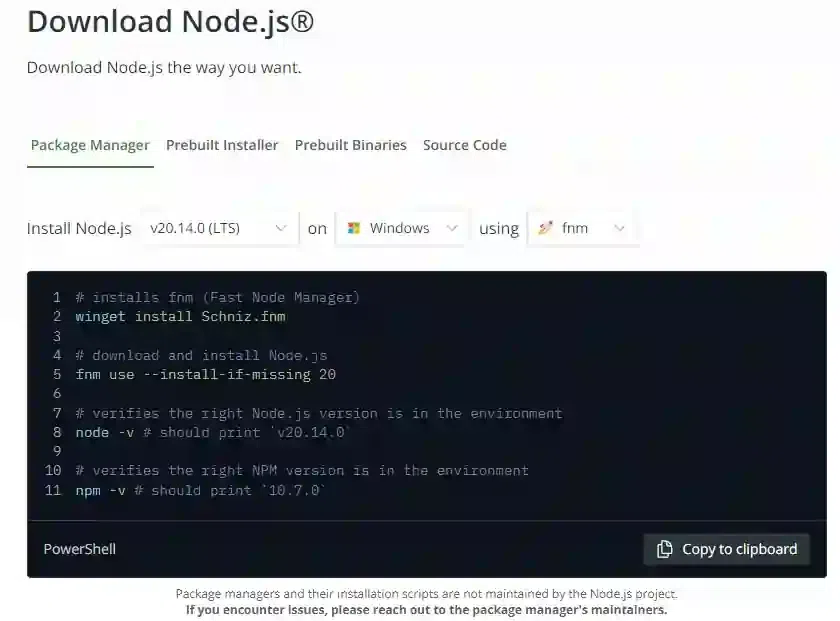
- Visit the Official Node.js Website: Open your web browser and navigate to the official Node.js download page: https://nodejs.org/en/download/
- Choose Your Version: You’ll typically see two recommended versions:
- LTS (Long Term Support): This is the most stable and recommended version for most users and production environments. It receives long-term maintenance and critical bug fixes.
- Current: This version includes the latest features but might be less stable. It’s suitable for experimenting with new features or for specific development needs.
- For most users, especially beginners, the LTS version is the best choice.
- Select the Windows Installer: Under the “Windows Installer” section, click on the 64-bit (
.msi) installer. Most modern Windows systems are 64-bit. If you’re on an older or specific system, you might need the 32-bit version, but this is rare now. The download will begin automatically.
Running the Installation Wizard
Once the .msi file is downloaded, follow these steps:
- Launch the Installer: Locate the downloaded
.msifile (usually in yourDownloadsfolder) and double-click it to start the Node.js Setup Wizard. - Welcome Screen: Click “Next” on the welcome screen.
- License Agreement: Read and accept the End-User License Agreement by checking “I accept the terms in the License Agreement” and click “Next”.
- Destination Folder: You can choose the installation location. The default path (e.g.,
C:Program Filesnodejs) is usually fine. Click “Next”. - Custom Setup: This is an important step. By default, “Node.js runtime,” “npm package manager,” “Online documentation,” and “Add to PATH” are selected.
- Node.js runtime: The core Node.js application.
- npm package manager: Essential for managing packages and dependencies.
- Online documentation: Useful for offline reference.
- Add to PATH: Crucial! This adds Node.js and npm to your system’s PATH environment variable, allowing you to run
nodeandnpmcommands from any directory in your command prompt. Ensure this option is selected. - You might also see an option for “Chocolatey” or “Tools for Native Modules”. For most users, enabling the “Automatically install the necessary tools. Note that Chocolatey will be installed” option is recommended, especially if you plan to compile native add-ons. It ensures you have Python and Visual Studio Build Tools, which are often required by certain npm packages. Click “Next”.
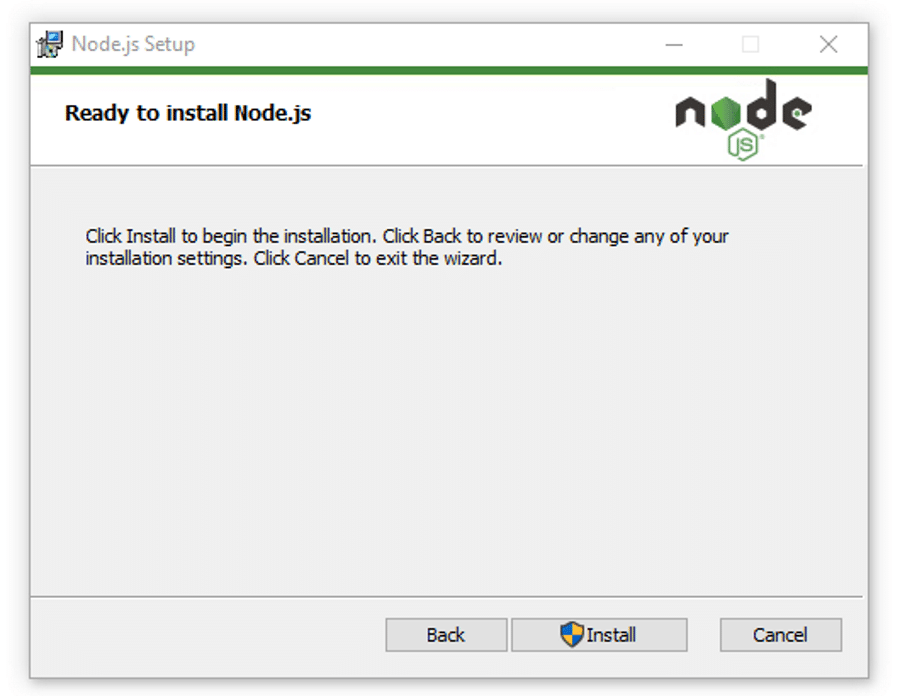
- Ready to Install: Click “Install” to begin the installation process. You may be prompted by User Account Control (UAC) to allow the installer to make changes to your system; click “Yes”.
- Completing the Installation: The installer will proceed. Once finished, click “Finish” to exit the wizard. If you opted to install additional tools, a new command prompt window might open to complete that process; follow any on-screen instructions.
Verifying the Installation
After the installation is complete, it’s crucial to verify that Node.js and npm have been installed correctly and are accessible from your command line.
- Open Command Prompt or PowerShell: Press
Win + R, typecmd(for Command Prompt) orpowershell(for PowerShell), and pressEnter.- Important: If you had a Command Prompt or PowerShell window open during the installation, close it and open a new one. This ensures that the updated PATH environment variable is loaded.
- Check Node.js Version: In the new command prompt window, type:
bash

node -v
You should see the installed Node.js version (e.g.,v20.11.1). - Check npm Version: Next, type:
bash

npm -v
You should see the installed npm version (e.g.,10.2.4).
If both commands return version numbers, congratulations! Node.js and npm are successfully installed on your Windows machine.
Method 2: Installing Node.js with NVM for Windows (For Advanced Users and Multiple Projects)
NVM for Windows (Node Version Manager for Windows) allows you to install and manage multiple versions of Node.js on a single machine. This is incredibly useful if you work on different projects that require specific Node.js versions.
Understanding NVM for Windows
NVM for Windows is a separate project from the Unix/macOS NVM. It enables you to:
- Install specific Node.js versions.
- Switch between installed versions with a simple command.
- Set a default Node.js version for convenience.
- Upgrade or downgrade Node.js versions without affecting other projects.
Pre-requisites
Before installing NVM for Windows, it’s highly recommended to uninstall any existing Node.js installations (either through the MSI installer or any other method) from your system. Go to Control Panel > Programs > Programs and Features, find “Node.js”, and uninstall it. This prevents potential conflicts with NVM.
Downloading and Installing NVM for Windows
- Go to the NVM for Windows GitHub Page: Open your browser and navigate to the official NVM for Windows repository on GitHub: https://github.com/coreybutler/nvm-windows/releases
- Download the Installer: Look for the latest stable release. Under the “Assets” section, download the
nvm-setup.exefile. - Run the Installer: Double-click the
nvm-setup.exefile.- Accept the license agreement.
- Choose the installation path for NVM itself. The default
C:Users<YourUsername>AppDataRoamingnvmis usually fine. - Choose the path where Node.js versions will be installed by NVM. The default
C:Program Filesnodejsis also acceptable, but ensure this directory is empty or will not conflict with previous installations. - Complete the installation wizard.
Using NVM to Install Node.js Versions
Once NVM is installed, open a new Command Prompt or PowerShell window (as administrator is often recommended, especially for installation commands).
- Verify NVM Installation:
bash

nvm -v
You should see the NVM for Windows version number. If you get an error, ensure your PATH environment variables are correctly set (NVM’s installer usually handles this). - List Available Node.js Versions:
bash

nvm list available
This command will show a list of Node.js versions you can install, including LTS and current releases. - Install a Specific Node.js Version: To install the latest LTS version, for example, Node.js 20.11.1, use:
bash

nvm install 20.11.1
You can replace20.11.1with any version number listed bynvm list available. You can install multiple versions if needed (e.g.,nvm install 18.19.1). - List Installed Node.js Versions:
bash

nvm list
This will show all Node.js versions you have installed via NVM. - Switch Between Versions: To use a specific installed version, for example, 20.11.1:
bash

nvm use 20.11.1
You should see a message confirming the switch. - Set a Default Version: To make a specific version the default whenever you open a new command prompt:
bash

nvm alias default 20.11.1
Replace20.11.1with your preferred default version.
Verifying NVM and Node.js Installations
After switching to a Node.js version using NVM:
- Check Node.js Version:
bash

node -v
This should reflect the version you justnvm used. - Check npm Version:
bash

npm -v
This will show the npm version associated with the currently active Node.js version.
NVM for Windows is a powerful tool for developers who juggle multiple projects with differing Node.js requirements, providing flexibility and control over their development environment.
Method 3: Installing Node.js via Package Managers (Chocolatey or Winget)
For users who prefer managing their software through command-line package managers, Chocolatey and Winget offer convenient ways to install Node.js.
Using Chocolatey
Chocolatey is a popular package manager for Windows. If you don’t have it installed:
- Install Chocolatey: Open PowerShell as an administrator and run the command from the official Chocolatey website: https://chocolatey.org/install
(As of writing, it’s typically:Set-ExecutionPolicy Bypass -Scope Process -Force; [System.Net.ServicePointManager]::SecurityProtocol = [System.Net.ServicePointManager]::SecurityProtocol -bor 3072; iex ((New-Object System.Net.WebClient).DownloadString('https://community.chocolatey.org/install.ps1'))*) - Install Node.js: Once Chocolatey is installed, open a new Command Prompt or PowerShell (as administrator) and run one of the following:
- To install the latest LTS version of Node.js:
bash

choco install nodejs-lts
- To install the latest current version of Node.js:
bash

choco install nodejs
Chocolatey will handle the download and installation, including setting up the PATH environment variable.
- To install the latest LTS version of Node.js:
Using Winget
Winget is Microsoft’s own package manager, included by default with modern Windows 10/11 versions.
- Ensure Winget is Available: Open Command Prompt or PowerShell and type
winget. If it runs, you’re good. If not, you might need to update your App Installer from the Microsoft Store. - Install Node.js: In Command Prompt or PowerShell, run one of the following:
- To install the latest LTS version of Node.js:
bash

winget install OpenJS.Nodejs.LTS
- To install the latest current version of Node.js:
bash

winget install OpenJS.Nodejs
Winget will download and install Node.js.
- To install the latest LTS version of Node.js:
Verification
After using Chocolatey or Winget, close and reopen your terminal, then verify the installation:
node -v
npm -v
You should see the version numbers.
Post-Installation Essentials and Best Practices
Once Node.js is successfully installed, there are a few essential steps and best practices to ensure your development environment is robust and up-to-date.
Keeping Node.js and npm Updated
Regularly updating Node.js and npm is crucial for security, performance, and access to the latest features.
- Updating npm: npm itself can be updated independently of Node.js. To update npm to its latest version, open your terminal and run:
bash

npm install -g npm@latest
- Updating Node.js:
- If you used the MSI installer: The most reliable way to update Node.js is to download the new MSI installer from the official website and run it. The installer will typically detect the existing installation and prompt you to upgrade.
- If you used NVM for Windows: Simply install the new Node.js version using
nvm install <new_version>and then switch to it usingnvm use <new_version>. You can then remove older versions withnvm uninstall <old_version>. - If you used Chocolatey/Winget: Use the respective update commands:
- Chocolatey:
choco upgrade nodejs-ltsorchoco upgrade nodejs - Winget:
winget upgrade OpenJS.Nodejs.LTSorwinget upgrade OpenJS.Nodejs
- Chocolatey:
Running Your First Node.js Application
Let’s create a simple Node.js script to confirm everything works.
- Create a File: Open a text editor (like Notepad, VS Code, or Sublime Text) and paste the following code:
javascript

// hello.js

console.log("Hello, Node.js World!");
- Save the File: Save the file as
hello.jsin a convenient directory (e.g.,C:Users<YourUsername>Documentsnodejs_projects). - Execute the Script: Open your Command Prompt or PowerShell, navigate to the directory where you saved
hello.js:
bash

cd C:Users<YourUsername>Documentsnodejs_projects
Then, run the script using Node.js:
bash

node hello.js
You should seeHello, Node.js World!printed in your terminal. This confirms that Node.js is correctly executing your JavaScript files.
Managing Global npm Packages
Some npm packages are useful to install globally because they provide command-line tools that you might use across various projects (e.g., create-react-app, nodemon, webpack).
- Installing a Global Package:
bash

npm install -g <package-name>
For example, to installnodemon(a utility that automatically restarts your Node.js application when file changes are detected):
bash

npm install -g nodemon
- Listing Global Packages: To see all globally installed packages:
bash

npm list -g --depth=0
Troubleshooting Common Installation Issues
While Node.js installation is generally smooth, you might occasionally encounter issues.
- ‘node’ or ‘npm’ is not recognized: This almost always indicates an issue with your system’s PATH environment variable.
- Solution: Ensure that the directory where Node.js is installed (e.g.,
C:Program Filesnodejs) is included in your system’s PATH. If you used the MSI installer, it should do this automatically. If not, you might need to add it manually viaSystem Properties > Environment Variables. Remember to open a new terminal window after making changes.
- Solution: Ensure that the directory where Node.js is installed (e.g.,
- Permission Errors (EACCES): When installing global npm packages, you might encounter permission errors.
- Solution: Rerun your command prompt or PowerShell as an administrator. Alternatively, you can configure npm to use a different directory for global packages, or fix npm permissions (though this is more common on Unix-like systems).
- Proxy Configuration: If you’re behind a corporate proxy,
npm installcommands might fail.- Solution: Configure npm to use your proxy settings:
bash

npm config set proxy http://proxy.company.com:8080

npm config set https-proxy http://proxy.company.com:8080
Replace with your actual proxy address and port. To unset them, usenpm config rm proxyandnpm config rm https-proxy.
- Solution: Configure npm to use your proxy settings:

Conclusion: Empowering Your Development Workflow
Installing Node.js on Windows is the gateway to unlocking a powerful and versatile development environment. Whether you chose the straightforward official installer, the flexible NVM for Windows, or the streamlined approach of package managers like Chocolatey or Winget, you now have the tools necessary to build a wide array of applications.
From creating dynamic web servers and RESTful APIs with frameworks like Express.js, to building command-line utilities, real-time communication apps with WebSockets, or leveraging Node.js for desktop applications via Electron, your Windows machine is now equipped for modern JavaScript development. Remember to keep your Node.js and npm versions updated to benefit from the latest features, security patches, and performance improvements.
With Node.js successfully installed, your journey into full-stack JavaScript development on Windows has just begun. Embrace the vast ecosystem of npm packages, explore popular frameworks, and start building innovative solutions that leverage the speed and scalability Node.js offers. Happy coding!
aViewFromTheCave is a participant in the Amazon Services LLC Associates Program, an affiliate advertising program designed to provide a means for sites to earn advertising fees by advertising and linking to Amazon.com. Amazon, the Amazon logo, AmazonSupply, and the AmazonSupply logo are trademarks of Amazon.com, Inc. or its affiliates. As an Amazon Associate we earn affiliate commissions from qualifying purchases.